1984 CHEVROLET CAVALIER battery
[x] Cancel search: batteryPage 59 of 105
Downloaded from www.Manualslib.com manuals search engine •
~-
SECTION 3
IN CASE OF EMERGENCY
. FOUR·WAY HAZARD WARNING FLASHER
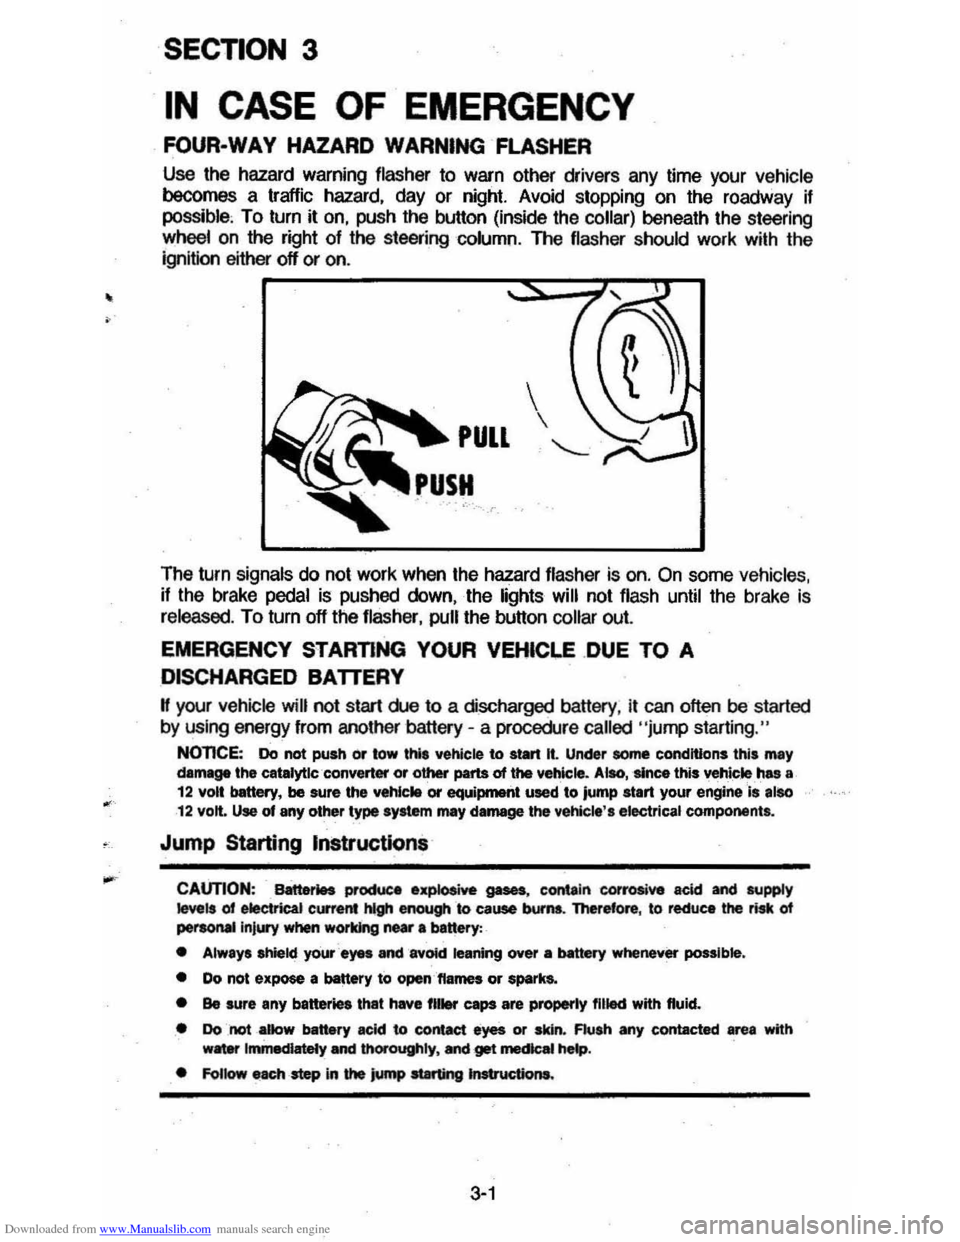
Use the hazard warning flasher to warn other drivers any time your vehicle becomes a traffic hazard. day or night. Avoid stopping on the roadway if possible, To turn it on. push the button (inside the collar) beneath the steering
wheelan the right of the steering column. The flasher should work with the
ignition either off or on .
The turn
signals do not work when the hazard flasher is on. On some vehicles. if the brake pedal is pushed down. the lights will not flash until the brake is
released. To turn off the flasher. pull the button collar out.
EMERGENCY STARTING YOUR VEHICI.E .DUE TO A
DISCHARGED BATTERY
H your vehicle will not start rue to a discharged battery. it can often be started
by using energy from another battery -a procedure called "jump starting."
NOnCE: Do not push or tow thl' vehicle to start It. Under some conditions this may damage the catalytlc ·converter or other parts of the vehicle. Alao, 'since this vehicle ,has a 12 volt bettery, be sure the vehlc .. or equiprnetlt used to jump start your engine Is also 12 volt. Use of any other type syltem mey damage the vehicle', electrical components.
Jump Starting Instructions
CAUTION: Battet1H productl .~ gases, contain corrosive acid and supply ~ls of electrical current hlgh enough &0 cause bums. Therefore, to reduce the risk of peraoMIlnjury when working near 8 banery:
• Always shield your ayes and avOid leaning over a MtttIry whenever possible.
• Do not expose a battery to open,'ftames or spark&.
• Be sure any batter. that have fll .... caps are properly filled with fluid.
• Do not _aDow battery acid to contact eyes or skin. Flush any contacted area with w8ter Immediately and thOrOughly. Mel get mecIcaI hMp.
• FoUow each -step in the jump at8rting Jnstructiona.
3-1
Page 60 of 105
Downloaded from www.Manualslib.com manuals search engine 1. Position the vehicle with the good (charged) battery so that the booster Qumper) cables will reach but never let the vehicles touch. Also, be sure
booster cables to be used do not have loose or missing insulation.
2. tn both vehicles :
• Turn off ignition and all lights and accessories except the hazard
flasher or any lights needed for lhe work area.
• Apply the parking brake firmly, and shift the automatic transaxle or transmission to Park (or manual transaxle or transmission to neutral).
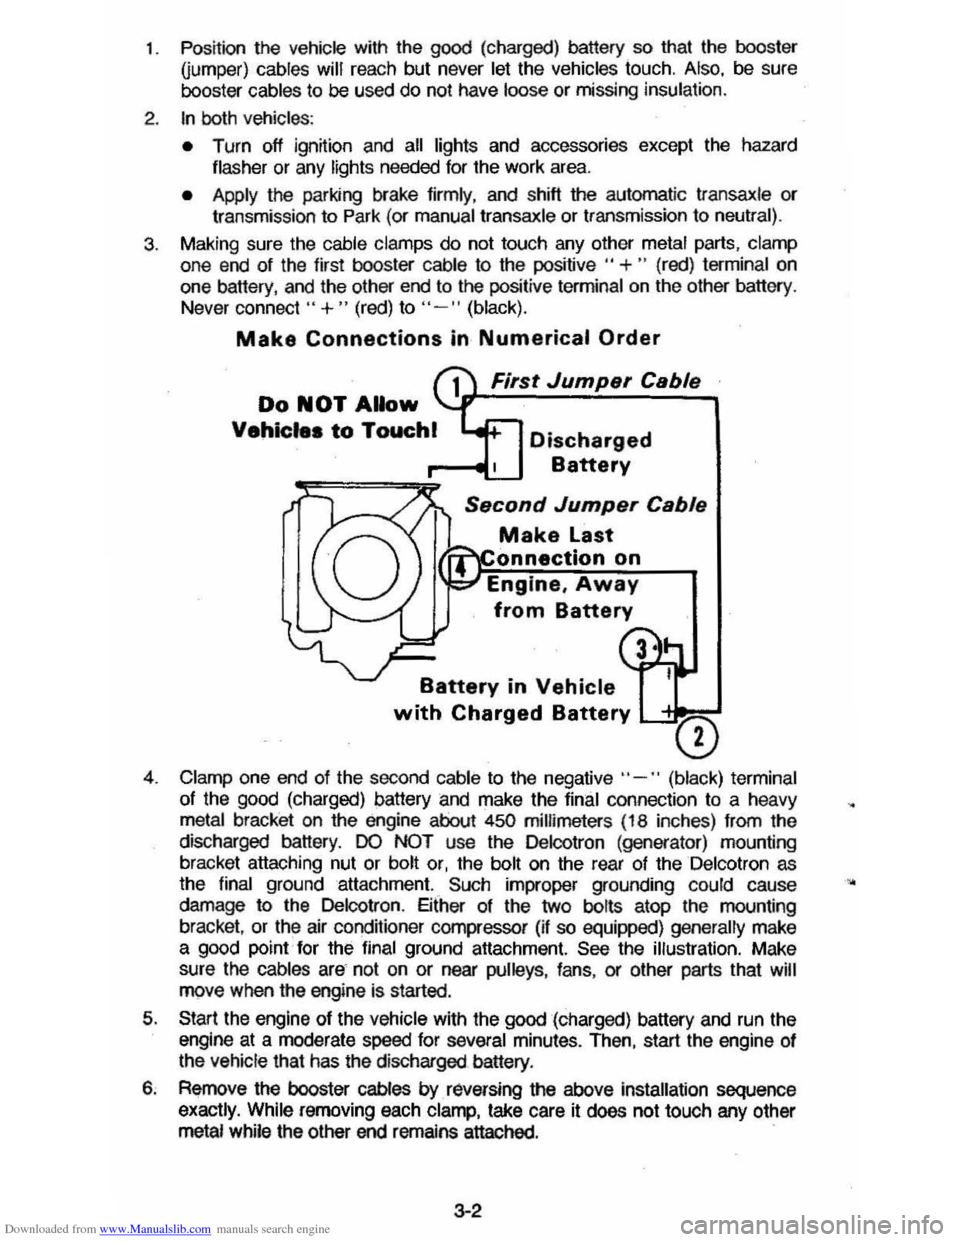
3. Making sure the cable clamps do not touch any other metal parts, clamp
one end of the first booster cable to the positive " +" (red) terminal on
one battery, and the other end to the positive terminal on the other battery .
Never connect"
+ " (red) to "- " (black).
Make Connections in Numerical Order
First Jump.r C.bl.
Do NOT Allow
Vehicle. to Touchl Discharged
Battery
S.cond Jump.r C.bl.
Make Last
onnectlon on
Engine,
Away
from Battery
Battery in Vehicle
with Charged Battery L-'= ___
o
4. Clamp one end of the second cable to the negative" -" (black) terminal
of the
good (charged) battery and make the final connection to a heavy metal bracket on the engine about 450 millimeters (18 inches) from the
discharged battery.
DO NOT use the Delcotron (generator) mounting
bracket attaching nut or bolt or, the bolt on the rear of the Delcotron as
the final ground attachment. Such improper grounding could cause
damage to the Delcotron . Either of the two bolts atop the mounting
bracket ,
or the air conditioner compressor (if so equipped) generally make a good point for the final ground attachment. See the illustration. Make
sure
the cables are not on or near pulleys , fans , or other parts that will move when the engine is started.
5. Start the engine of the vehicle with the good (charged) battery and run the
engine at a moderate speed for several minutes. Then, start the engine of
the vehicle that has the discharged battery.
6. Remove the booster cables by. raversing the above installation sequence
exactly. While removing each clamp, take care it does not touch any other metal while the other end remains attached. .
3-2
•
Page 84 of 105
Downloaded from www.Manualslib.com manuals search engine • If the fluid is warmed up (about 66"C or 150"F -- hot to the touch), the
fluid level should be between the "HOT" and "Cold" marks on the power steering reservoir.
• If cool (about 21"C or 70"F), the fluid level should be between the "Add" and "Cold" marks.
This fluid does not need periodic changing.
FRONT SUSPENSION AND STEERING LINKAGE
Lubricate fillings at the interval shown in the Maintenance Schedule with water
resistant
EP Chassis Lubricant which meets GM Specification 6031M.
NOTICE: Ball joints should not be lubricated unless their temperature is -12"C (10"F), or-higher. During cold weather, they should be allowed to warm up as necessary before
being lubricated or damage to the ball jOint could occur.
FREEDOM BATTERY
Your new vehicle has a Delco FREEDOM battery. It needs no periodic
maintenance.
Its top is permanently sealed (except for two small vent holes) and has no filler caps. ,You will never have to add water.
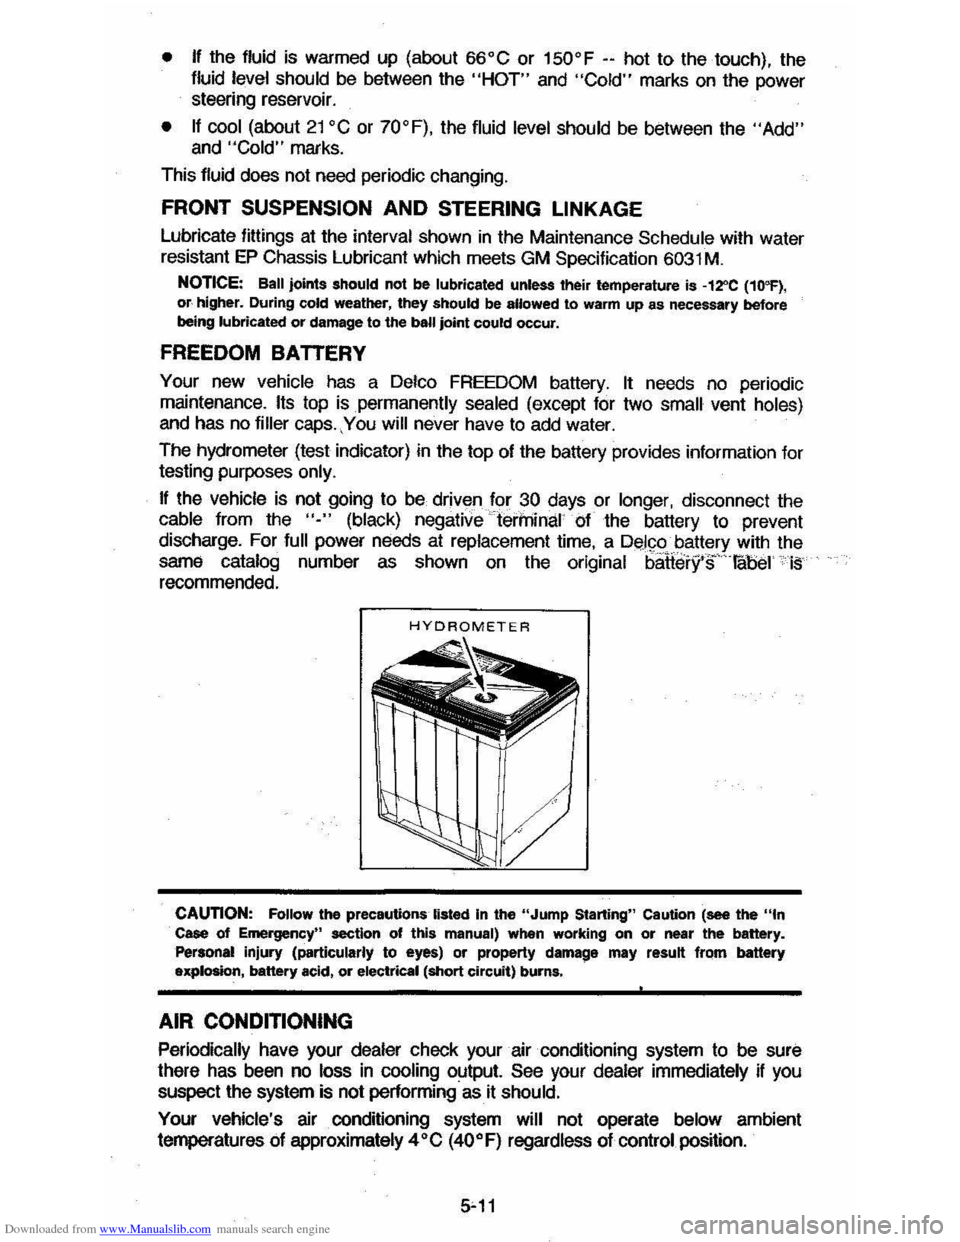
The hydrometer (test indicator) in the top of the battery provides information for
testing purposes only.
If the vehicle is not going to be driven .f?r 30 days or longer, disconnect the cable from the "-" (black) negative terminal of the battery to prevent
discharge. For
full power needs at replacement time, a Del~o battery with the sarne catalog number as shown on the original battery'if . !abel " is recommended.
CAUTION: Follow the precautions listed in the "Jump Starting" Caution (see the "In Case of Emergency" section of this manual) when working on or near the battery. Personal injury (particularly to eyes) or property damage may result from battery explosion, battery acid, or electrical (Short circuit) burns.
AIR CONDITIONING
Periodically have your dealer check your air conditioning system to be sure
there has been no loss in cooling output. See your dealer immediately if you
suspect the system is not performing"as it should.
Your vehicle's air conditioning system will not operate below ambient
temperatures of approximately
4·C (40·F) regardless of control position.
Page 93 of 105
Downloaded from www.Manualslib.com manuals search engine REPLACEMENT PARTS AND FILTERS
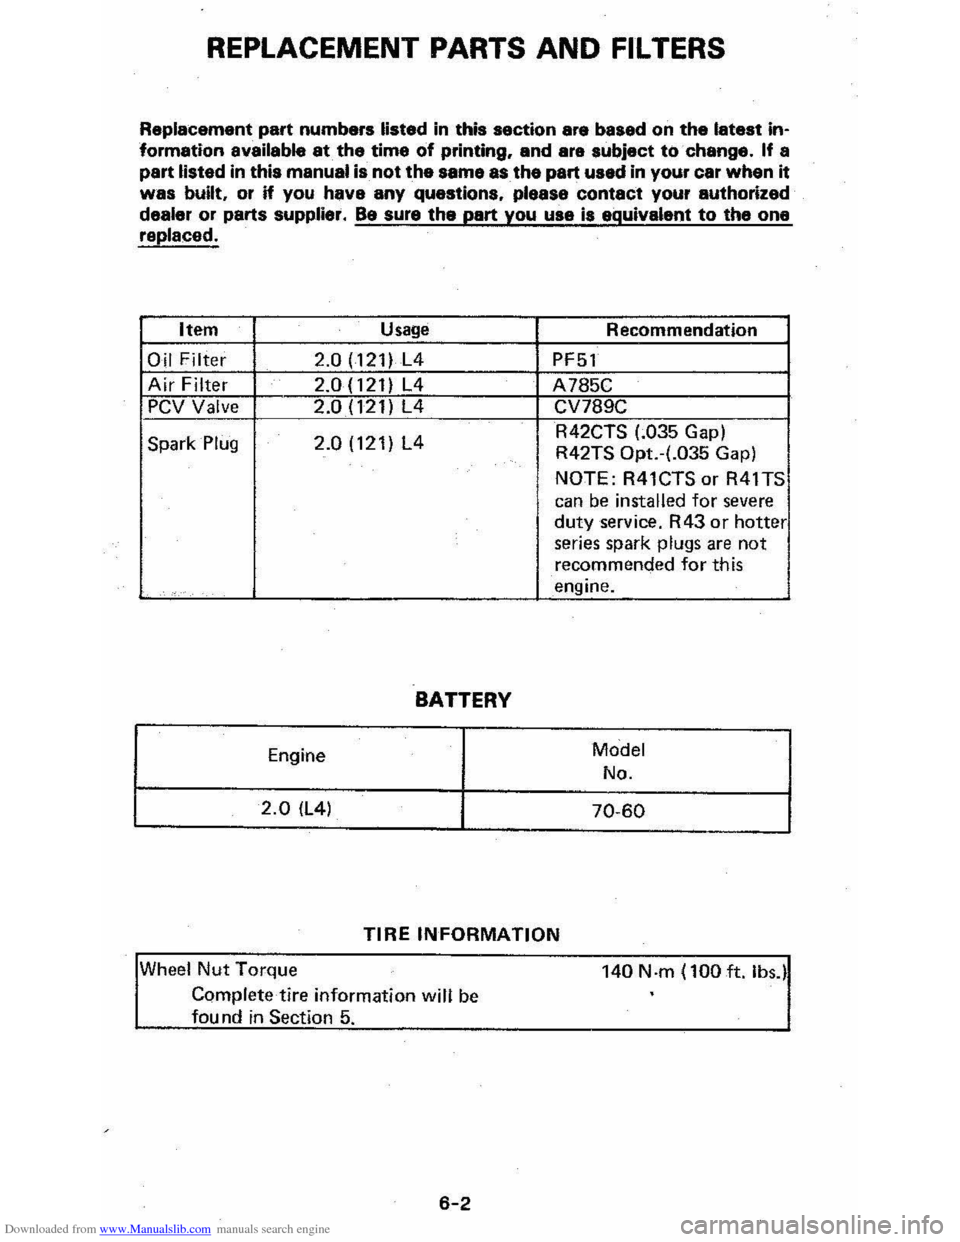
Replacement part numbers listed in this section are based on the latest information available at the time of printing. and ara subject to change. If a
part listed in this manual is not the same as the part used in your car when it
was built, or if you have any questions. please contact your authorized
dealer or parts supplier. Be sure the part you use is equivalent to the one replaced.
Item Usage
Oil Filter 2.0 (121) L4
Air Filter 2.0 (121) L4
PCV Valve 2.0 (121) L4
Spark Plug 2.0 (121) L4
BATTERY
Engine
2.0 (L4)
Recommendation
PF51
A785C
CV789C
R42CTS (.035 Gap) R42TS Opt.-(.035 Gap)
NOTE: R41CTS or R41TS
can be installed for severe
duty service. R43 or hotter series spark plugs are not
recommended for this
engine.
Model
No.
70-60
TIRE INFORMATION
Wheel Nut Torque
Complete tire information will be
fau nd in Section 5.
6-2
140 N·m (100 ft. Ib,.)
Page 99 of 105
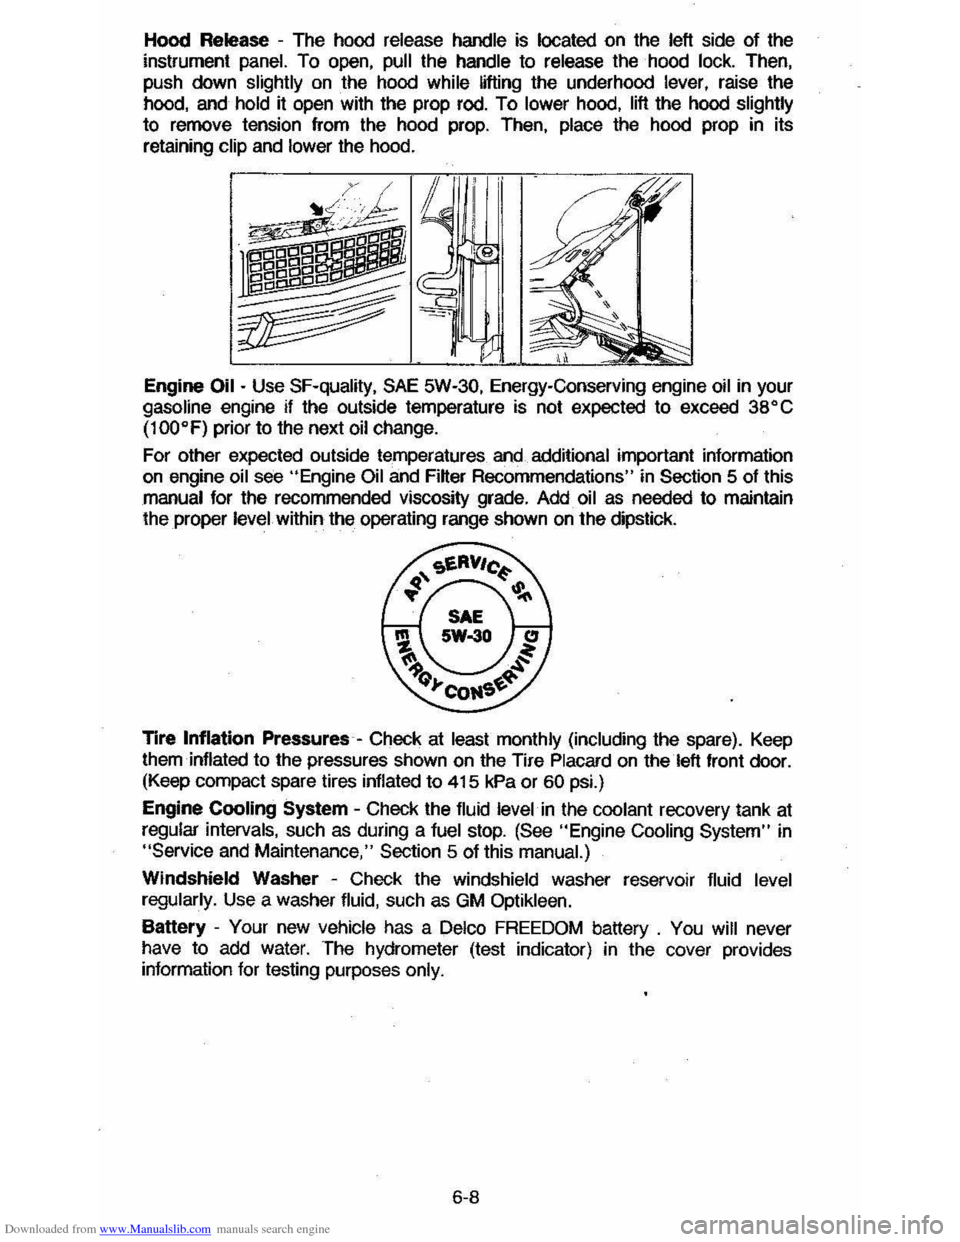
Downloaded from www.Manualslib.com manuals search engine Hood Release -The hood release handle is located on the left side of the
instrument panel. To open, pull the handle to release the hood lock. Then,
push down
slightly on the hood while lifting the underhood lever, raise the
hood, and hold it open with the prop rod. To lower hood, lift the hood slightly
to remove tension from the hood prop. Then, place the hood prop in its
retaining
clip and lower the hood.
Engine
Oil - Use SF-quality, SAE 5W-30, Energy-Conserving engine oil in your gasoline engine if the outside temperature is not expected to exceed 38" C
(100"F)
prior to the next oil change.
For other expected outside temperatures
and additional important information on engine oil see "Engine Oil and Filter Recommendations" in Section 5 of this
manual for the recommended viscosity grade. Add oil as needed to maintain
the proper level within the operating range shown on the dipstick.
Tire
Inflation Pressures -Check at least monthly (including the spare). Keep
them inflated to the pressures shown on the Tire Placard on the left front door. (Keep compact spare tires inflated to 415 kPa or 60 psi.)
Engine
Cooling System -Check the fluid level in the coolant recovery tank at
regular intervals, such as during a fuel stop. (See "Engine Cooling System" in "Service and Maintenance," Section 5 of this manual.)
Windshield Washer -Check the windshield washer reservoir fluid level
regularly. Use a washer fluid, such as GM Optikleen.
Battery -Your new vehicle has a Delco FREEDOM battery . You will never
have to add water. The hydrometer (test indicator) in the cover provides information for testing purposes only.
6-8