1976 CHEVROLET VEGA door lock
[x] Cancel search: door lockPage 6 of 87
Downloaded from www.Manualslib.com manuals search engine BEFORE DRIVING YOUR VEGA
DRIVER CHECKLIST
Before Entering Car
1. See that windows , mirrors and
lights are clean.
2. Visually note inflation condition
of tires.
3. Check that area to rear
is clear
if about
to back up.
Before Driving Off
1. Lock all doors.
2. Position seat.
3. Adjust inside and outside
mirrors.
4. Fasten belt restraints.
5. Check that warning bulbs light
when key
is turned to start posi
tion.
6. Release parking brake (and see
that brake warning light turns
off).
7. Be sure you understand your
car and how to operate it safely.
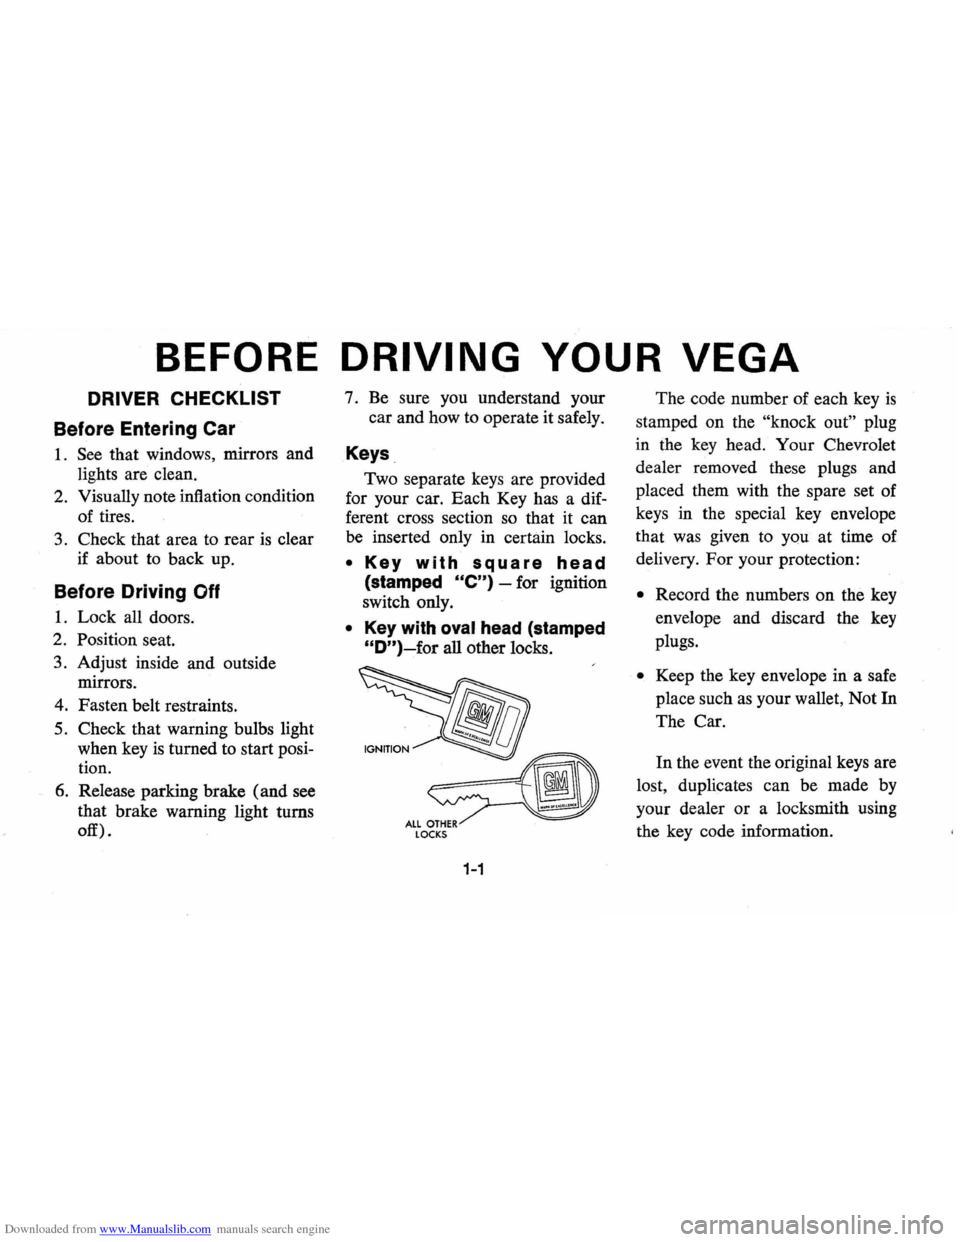
Keys
Two separate keys are provided
for your car. Each Key has a dif
ferent cross section so that it can
be inserted only in certain locks.
• Key with square head
(stamped Ole") -for ignition
switch only.
• Key with oval head (stamped
"D")~for all other locks.
LOCKS
1-1
The code number of each key is
stamped on the "knock out" plug
in the key head. Your Chevrolet
dealer removed these plugs and
placed them with the spare set of
keys in the special key envelope
that was given to you at time of
delivery.
For your protection:
• Record the numbers on the key
envelope and discard the key
plugs.
• Keep the key envelope in a safe
place such
as your wallet, Not In
The Car.
In the event the original keys are
lost, duplicates can be made by
your dealer or a locksmith using
the key code information.
Page 7 of 87
Downloaded from www.Manualslib.com manuals search engine Door Locks
Front side doors can be locked
from the inside by depressing the
passenger guard door lock buttons
located
on the upper door panel.
All doors can be locked from the
outside by first depressing the door
lock button and closing the door.
The doors can also be locked by
using the key.
All models have as a standard
safety feature overriding door locks.
When the doors are locked, the door
latch mechanism
is inoperative, pre
venting inadvertent opening of the
door by movement of the inside
handle.
Adjustable Front Seat Back
-Driver's Side
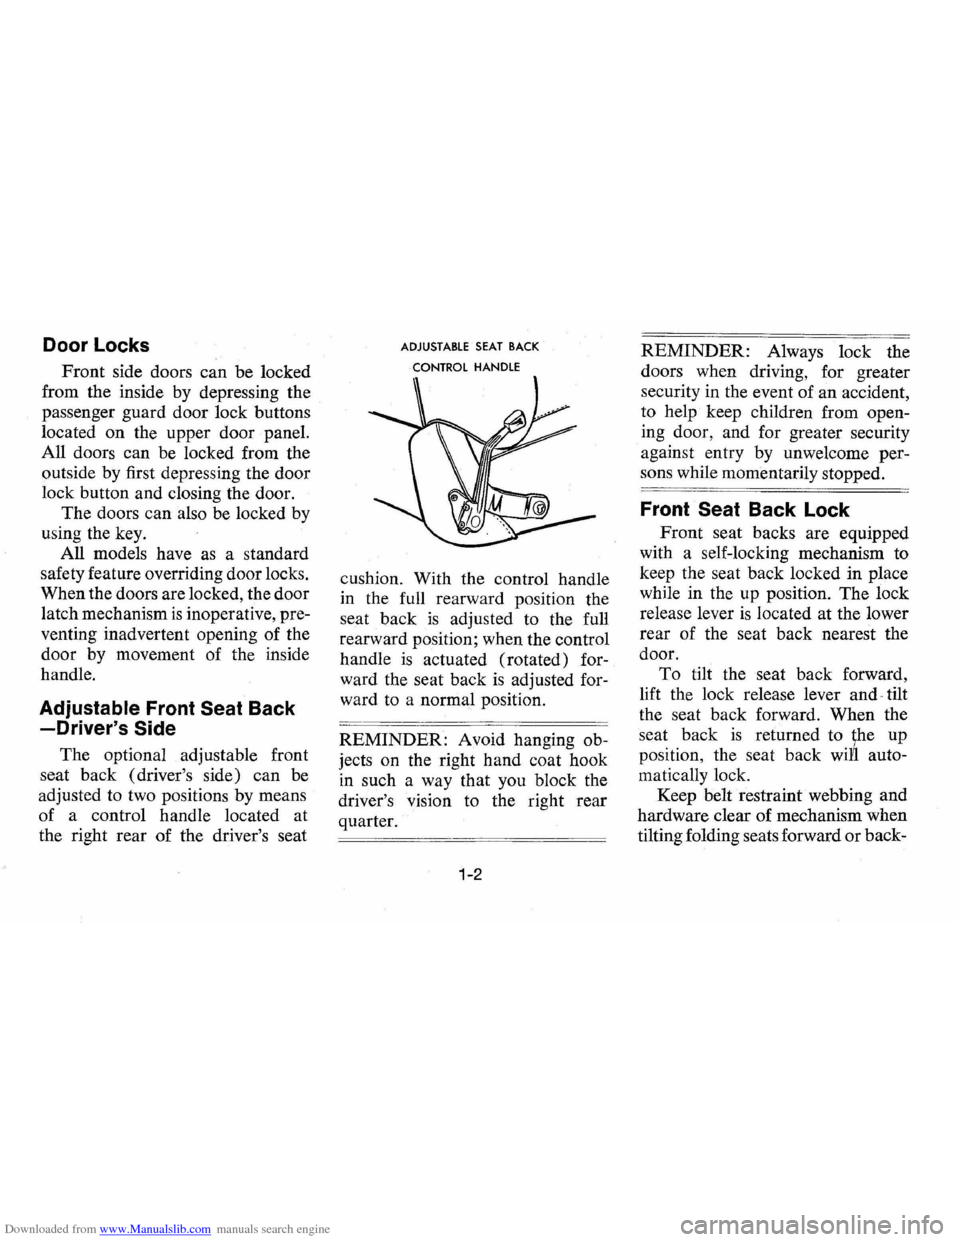
The optional adjustable front
seat back (driver's side) can be
adjusted to two positions by means
of a control handle located at
the right rear of the driver's seat
ADJUSTABLE SEAT BACK
CONTROL HANDLE
cushion. With the control handle
in the full rearward position the
seat back
is adjusted to the full
rearward position; when the control
handle
is actuated (rotated) for
ward the seat back
is adjusted for
ward to a normal position.
REMINDER: Avoid hanging ob
jects on the right hand coat hook
in such a way that you block the
driver's
VISIOn to the right rear
quarter.
1-2
REMINDER: Always lock the
doors when driving, for greater
security in the event of an accident,
to help keep children from open
ing door, and for greater security
against entry by unwelcome per
sons while momentarily stopped.
Front Seat Back Lock
Front seat backs are equipped
with a self-locking mechanism to
keep the seat back locked in place
while in the up position.
The lock
release lever
is located at the lower
rear of the seat back nearest the
door.
To tilt the seat back forward,
lift the lock release lever
and" tilt
the seat back forward. When the
seat back
is returned to ~he up
position, the seat back
wn1 auto
matically lock.
Keep belt restraint webbing and
hardware clear
of mechanism when
tilting folding seats forward
or back-
Page 18 of 87
Downloaded from www.Manualslib.com manuals search engine STEERING COLUMN CONTROLS
Anti-Theft Steering
Column Lock
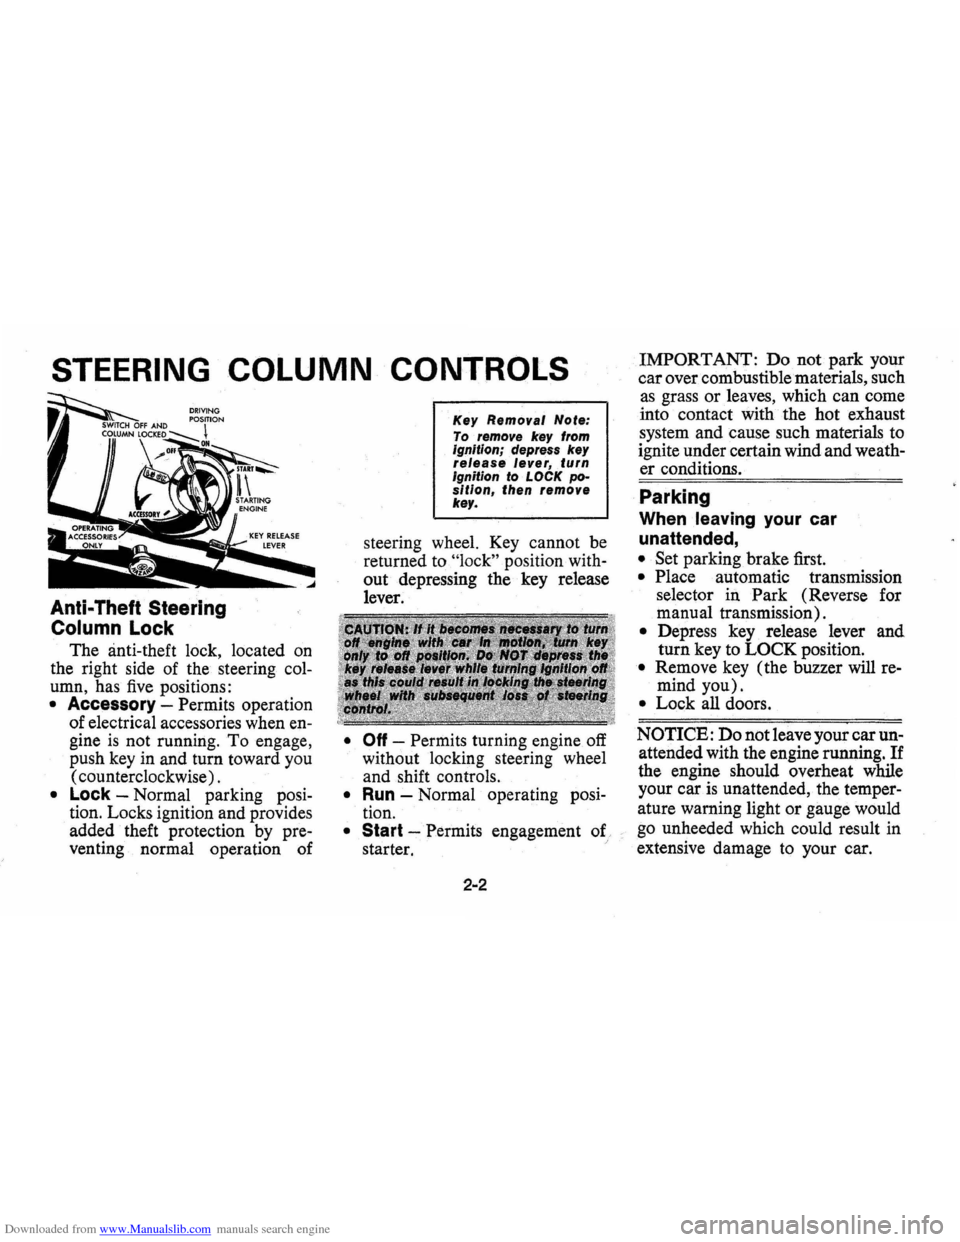
The anti-theft lock, located on
the right side of the steering col
umn, has five positions:
• Accessory -Permits operation
of electrical accessories when
en
gine is not running. To engage,
push
key in and turn toward you
( counterclockwise) .
• Lock -Normal parking posi
tion. Locks ignition and provides
added theft protection
by pre
venting normal operation of
Key Removal Note:
To remove key from ignitionjdepress key release lever, . turn Ignition to LOCK position, then remove key.
steering wheel. Key cannot be
returned to
"lock" position with
out depressing the key release
lever.
• Off -Permits turning engine off
without locking steering wheel
and shift controls.
• Run -Normal operating posi
tion.
• Start -Permits engagement of. :
starter.
2-2
IMPORTANT: Donot park your
car over combustible materials, such
as grass or leaves, which can come
into contact with the hot exhaust
system and cause such materials to
ignite under certain wind and
weath
er conditions.
. Parking
When leaving your car
unattended,
• Set parking brake first.
• Place automatic transmission
selector in
Park (Reverse for
manual transmission).
• Depress key release lever and
turn key to
LOCK position.
• Remove key (the buzzer will re
mind you).
• Lock all doors.
NOTICE: Do not leave your car un
attended with the engine running. If
the engine should overheat while
your
caris unattended, the temper
ature warning light or gauge would
go unheeded which could result in
extensive damage to your car.
Page 50 of 87
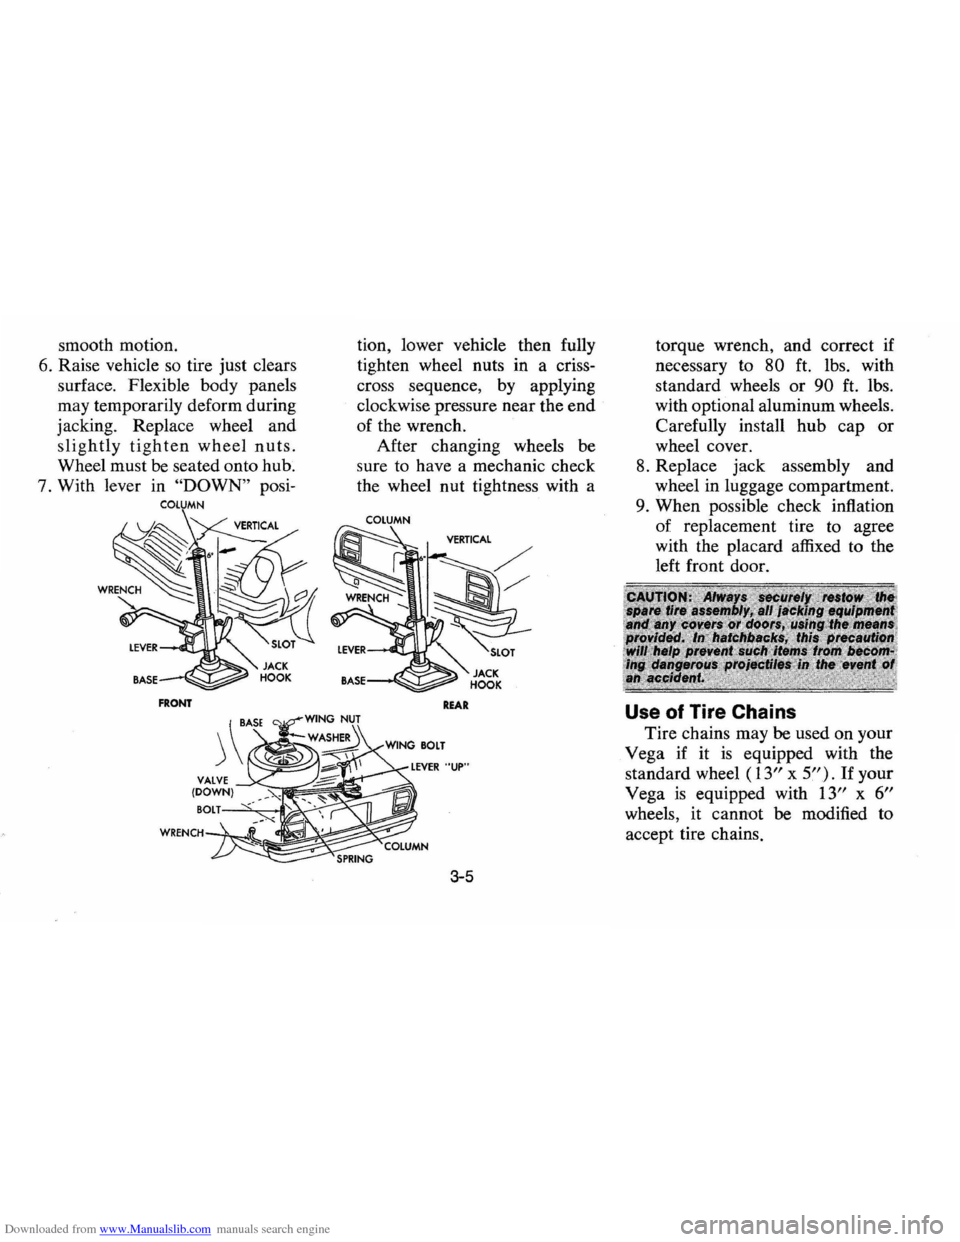
Downloaded from www.Manualslib.com manuals search engine smooth motion.
6. Raise vehicle so tire just clears
surface. Flexible body panels
may temporarily deform during
jacking. Replace wheel and
slightly tighten wheel nuts.
Wheel must be seated onto hub.
7. With lever in
"DOWN" posi
COLUMN
FRONT
tion, lower vehicle then fully
tighten wheel nuts in a criss
cross sequence, by applying
clockwise pressure near the
end
of the wrench.
After changing wheels
be
sure to have a mechanic check
the wheel nut tightness with a
COLUMN
REAR
3-5
torque wrench, and correct if
necessary to
80 ft. lbs. with
standard wheels
or 90 ft. lbs.
with optional aluminum wheels.
Carefully install
hub cap or
wheel cover.
8. Replace jack assembly and
wheel in luggage compartment.
9. When possible check inflation
of replacement tire to agree
with the placard affixed to the
left front door.
Use of Tire Chains
Tire chains may be used on your
Vega if it
is equipped with the
standard wheel
(13" x 5"). If your
Vega
is equipped with 13" x 6"
wheels, it cannot be modified to
accept tire chains.
Page 70 of 87
Downloaded from www.Manualslib.com manuals search engine Hood Latche$
Every 6 months or 7,500 miles,
whichever occurs first, lubricate
hood latch assembly and hood
hinge assembly
as follows:
1. Wipe off any accumulation of
dirt or contamination on latch
parts.
2 . Apply Lubriplate or equivalent
to latch pilot bolts and latch
locking plate.
.
3. Apply light engine oil to all pivot
points in release mechanism,
as
well as primary and secondary
latch mechanisms.
4. Lubricate hood hinges.
5. Make hood hinge and latch
mechanism functional check
to
assure the assembly is working
correctly .
Accelerator Linkage
Lubricate with engine oil every
15,000 miles.
Hinges
The following points should be
checked and lubricated every 6
months or
7,500 miles, whichever
occurs first:
hingeS on all doors,
fuel filler door, trunk lid, door lock
striker and door
jamb switches. '
5-12
Air Conditioning
Have your Authorized Dealer
check your Air Conditioning
sys
tem at some time during the winter
months to be sure there has been
no loss in cooling output. During
the summer , see your Authorized
Dealer immediately if you suspect
the system
is not performing as it
should.
NOTE: Your car's air condition
ing system will not operate below
ambient temperature of
300 F
( -1 0 C) , regardless of control
position.