1976 CHEVROLET MONTE CARLO low oil pressure
[x] Cancel search: low oil pressurePage 25 of 102
Downloaded from www.Manualslib.com manuals search engine The instruments, gauges and. in
dicator lights conveniently grouped
in the instrument cluster are de-
Fuel Gauge
The fuel g!fllge registers the
APPROXIMATE fuellevel in the
tank , when the ignition
is in the ON
po sition .
When the gauge registers
EMPTY, some fuel is.s till available
as a reserve. When the gauge
regis
ters FULL, sOme .. additional fuel
can still be added to the tank. The
following conditions may
be con
sidered normal: signed
to tell you at a glan ce many
important things about ihe
per
formanceof your car. The follow- .
•
G as station pump may shut off be
fore fuel gauge indicates FULL.
o Amount of gasoline required for
fill-up may not exactly
corres
pond to gauge.
o Needle may not move away from
FULL until sometime after fill
up.
o Needle may move during turns,
stops and accelerations. When the
ignition switch is turned to the
OFF position , the needle will not
2-11
ing information will enable you to
mor e quickly understand and
prop
erly interpret these instrume!lts.
necessarily return all the way
to
the EMPTY mark.
Oil Pressure Indicator Light
This light will be on when the
ignition switch
is turned on and
s hould go out after the engine
is
started . Occasionally the light may
be seen to flicker momentarily , but
this will do no harm. However,
if
the light remains on during normal
drivin g speeds the engine should
be
stopped until the cause of the trou-
Page 26 of 102
Downloaded from www.Manualslib.com manuals search engine ble'can be located and corrected .
. Driying the car with low oil pillS'
sure can:cause · serious ' engine
damage.
Genera~orlndicator Light
The red light will go on when
the
ignition key is in the "on " posi,
tion, b~f before the engine is
started.'J\fter the engine starts, the
light .
sho'uld go out and remain out.
If the Hght remains on when engine
is runlling, have your Authorized
Chevrolet Dealer locate and cor,
reCI the trouble as soon as possible,
Engine Temperature
Indicator Light
, This indicator light is provided
in the instrument cluster to quickly
warn
of an overheated engine. With
the ignition switch in the
5T AR T
position, the red TEMP indicator
will light to let you know that it is
operating properly. When
the engine
is started , the
red light will go out immediately,
It will light up at no other time
unless for some reason the engine
.
reaches a dangerously high oper,
atingtemperature. If the light
comes on during
extreme driving
conditions, such
as an extended
idle, turn
off the air conditioner (if
used }.and run the engine slightly
faster than
idle. speed with the
transmission in neutral gear .
If the
light does not go
off within a short
period of time
(F2 minutes), then
tum the engine off until the cause
of the.
overheating is corrected;
Glance at the
Ins.trument cluster
frequently as you drive to see if
this light
is on. '
Brake System Warning
Light
.
The service .. brake system is a
dual system designed
so that. one
part will provide some braking
2-12
action in the event of loss of hy'
draulic pressure in the other part of
the system.
If the ,warning light
labeled
"BRAKE," located in the
speedometer face, comes on .and
stays on when the ignition
is on and
'after · the brakes have been firmly
applied, it may indicate that
there
is a malfunction in one part of the
brake system.
'
•
As ~ reminde;, the light is de,
signed:to
come on with the park,
ing brake applied and the ignition
on.
• The light is also designed to
come on, during ;engine starting
to verify that the bulb is operating
. properly.
• Have system repaired '. if light
does not come
on' during check.
• This warning light, is not a sub
stitute for the visual check of
brake fluid level required
as part
of normal maintenance.
Page 56 of 102
Downloaded from www.Manualslib.com manuals search engine Spot Cleaning Fabric Type
Trim
Materials with Solvent
Type Cleaner
Before attempting to remove
spots or stain s from fabric, deter
mine as accurately
as possible the
nature and age of the spo t
or stain.
Some spo ts or st.ains can be re
moved sa
tisfactorily with water or
mild soap
solution (refer to ac
companying
'' It'emoval of Specific
Stains"). For best results, spots or
stains should
be removed as soon
as possible . S9rne types of stains
or soilage such
as lipstick, some
inks , certain typ
es of grease etc.,
are extrem ely difficult and, in some
cases , impossible to completely re
move. When cleaning this type .of
stain or soilage, care must be taken
not to enlarge the soiled area.
It is
sometimes more desirable to have
a small stain than an enlarged stain
a s a result of careless cleaning.
~
G.M. Spot Lifter (Solvent Type)
is excellent .for spot cleaning stains
containing grease, oil or fats from
fabric type trim. Exces s stain
should be gently scraped off trim
material with a clean
DULL knife
or
scraper. USE VERY LITTLE
CLEANER, light pressure , and
clean cloths (preferably cheese
cloth). Cleaning action should
be
from outside of stain FEATHER
ING toward s center of stain and
constantly changing to a clean sec
tion of cloth. When stain
is cleaned
from fabric, immediately dry area
with an
air hose, heat dryer or heat
lamp to
helppreverit a cleaning
ring (use caution with heat dryer
or heat lamp
to prevent damage to
fabric materi
al). If a ring forms,
immediately repeat the cleaning
operation over
a slightly larger
area with special emphasis on
FEA THERlNG towards center of
area.
If ring still persists, mark
off adjacent trim sections and clean
4-3
entire affected trim panel sectIOn
with G.M. Multi-Purpose Powdered
Cleaner
as previously described
under "Cleaning General Soilage
or Water
Spots with Foam Type
Cleaner."
Removal of Specific Stains
Grease or 011 Stains-Includes
grease, oil, butter , margarine shoe
polish , coffee with cream,
ch~wing
gum, cosmetic creams, vegetable
oils, wax crayon; tar and asphalts.
Carefully scrape
off excess stain;
then us.e Spot. Lifter (Solvent
Type) as previously described.
Shoe polish, wax crayons, tar and
asphalts will stain
if allowed to
remain on trim; they should
be
removed as soon as· possible-use
caution
as cleaner will dissolve
them and may cause them to bleed.
Non-Greasy StaIns-Includes cat
sup, coffee (black), egg, fruit, fruit
Page 70 of 102
Downloaded from www.Manualslib.com manuals search engine --;
protection at-20op (-2S0C) or
below to ensure pro;tection against
corrosion and loss
of coolant
from boiling even though freezing '
temperatures are not expected.
• Add ethylene glycol base coolant
that meets
GM Specification
IS99-M when coolant additions
are required because of coolant
loss
Or to provide additional pro"
tection against freezing at tem_
peratures lower than _20oP,
(-2S0C),' and in Canada to
_35°P ( -3JOC).
NOTE: AlcOhol Or methanol base
coolants or plain water are not
recommended for your vehicle at
any time.
Radiator Pressure Cap
The radiator cap, a 15 lb. pres
sure type, must be installed tightly,
otherwise coolant may be lost and
damage
, to engine may result from
overheating. Radiator pressure caps
should
be chef'ked periodically for
' proper operation.
If replacement is
required specify·AC.
Thermostat
The cooling system is protected
and controlled by a thermostat that
maintains a satisfactory
" engine
operating temperature . This
ther
mostat is installed in the engine
coolant outlet
arid is designed for
continuous use through both winter
and
s ·ummer. When replacement is
necessary, Delco parts are recom
mended.
5-9
CHASSIS ITEMS
Rear Axle Lubricant
Standard -
Every 6 months or
7,500 miles , whichever occurs first,
check lubricant level and add
lubri
cant, if necessary, to fill to level of
filler plug hole.
Use SAE SOW or
SAE SOW-90 GL-5 Gear Lubricant.
cant.
(Por vehicles operated in
Canada, use
SAE SOW Gear Lubri
cant.)
Posilraction -Drain and refill
after
the first 15,000 miles then
maintain same
as standard axle but
use only the special positraclion lu-·
bricant available from yo ur Chev
roletDealer , part number 1051022.
Rear Universal Joint Fitting
-Except Wagons
Every 6 months or 7,500 miles
lubricate universal joint with water
resistant
EP Chassis Lubricant
Part number 1050679 which meets
GM Specification 6040M.
Page 87 of 102
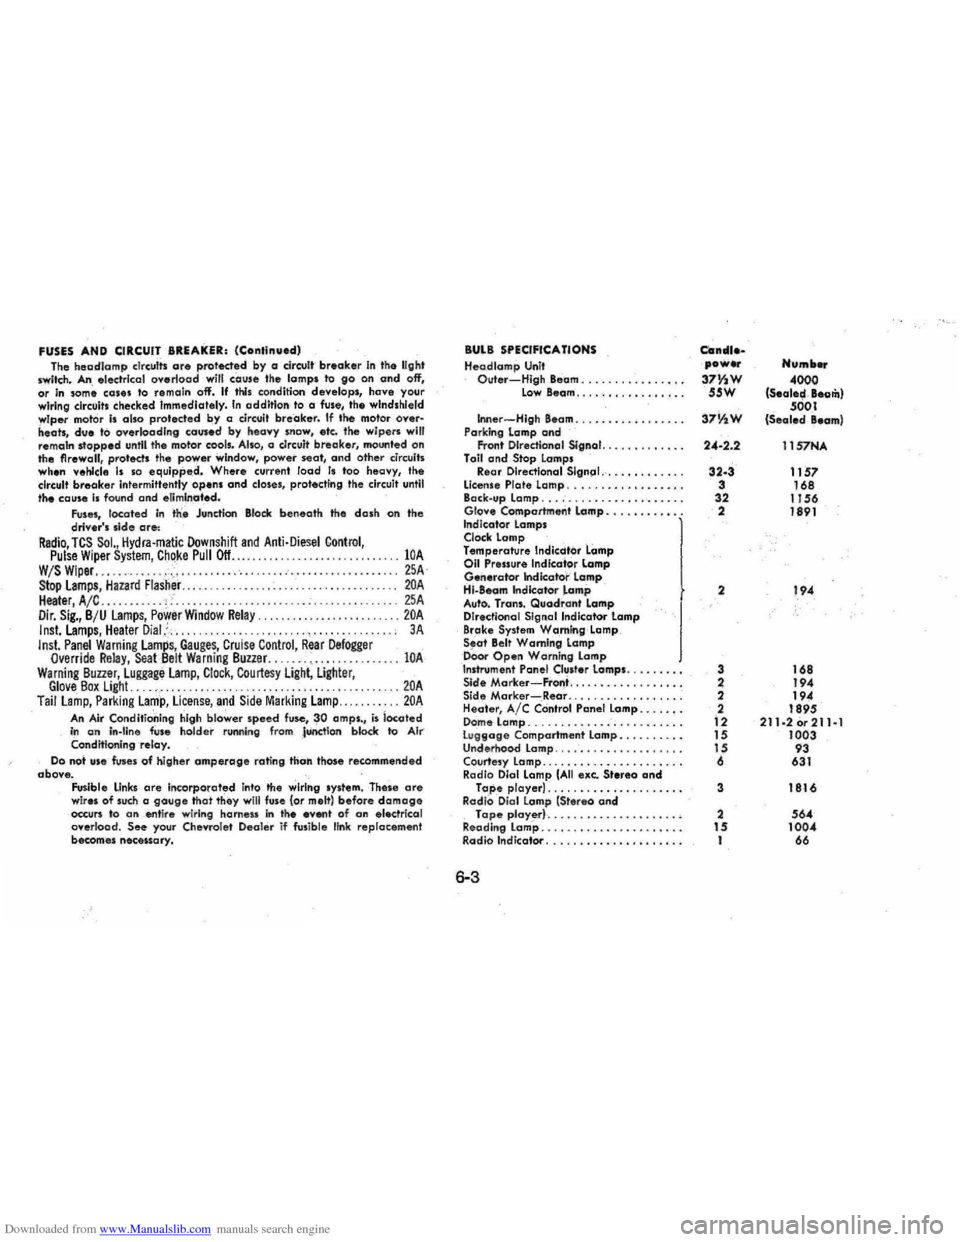
Downloaded from www.Manualslib.com manuals search engine FUSES AND CIRCUIT BREAKER: (Continued) Tho hSDdlomp clrculls are proleded by a dreult breaker In the light Iwitch. An slsc:trlcol overload will cause the lamps to go on and off, or In som~ cOles to remain off'. If this condition deve lo ps, have your
wiring circuit. checked Immediately. In addition to a fuse, the windshield
wiper mot or Is also protected by a circuit breaker. If the motor oyer· heats, due to overk>adlng caused by heClvy snow, etc. tl\e wipers will
remam stopped unltl the motor cools. Also, a c.Irc:uit brea ker. mounted on
the firewall, protects the power window, power seat, and other circuits when vehicle Is so equipp.d. Where current load Is too heavy, the
circuit breake r Intermittently opens and closes, protecting the circuit until the cause Is found and eliminated. Fuses, located in the Junction Block beneath the dash on the driver's .Ide are: Radio, TCS SoL, Hydra·matic Downshift and Anti·Diesel Control, Pulse Wiper System, ChQke Pull Off ........................ . W/S Wiper............. .• . .. . .................... . Stop Lamps, Hazard flasher..... . ......... . Heater, A /C ...... . . .. ' Dir. Sig., B /U lamps, Power Window Relay. Inst.lamps, Heater Dial,::, ..... Inst. Panel Warning Lamps, Gauges, Cruise Control, Rear Defogger Override Relay, SeaL8elt Warning Buzzer. ..... -. c •••••. Warning Buuer, Luggage Lamp, Clock, Courtesy Light, Ligflter,
lOA 25A lOA 25A .. 20A 3 A
lOA
Glove Box Light. . . . .. . . . . . . . ..... 20A Tail lamp, Parking Lamp, License, and Side Marking Lamp... . ..... 20A
An Air Conditioning high blower speed fuse, 30 amps., is located in an In-tine fuse holder runnin g from JUnction block to AI ... Conditioning -relay. Do not Ufe fuses of higher amperage rating than those recommended
obove. Fusible ,
LInks are in(:orporated into 'he wiring system. These are wires of such a gauge that they will fuse (or melt) before damage occun to an _ent ire wiring harn ess in tile even' of an electrical
overload. See your Chevrole t Deal er if fusible link re placement
becom es necessary.
BULB SPECIFICATIONS Heodlamp Unit Outer-High Beam ..........•..•.. Low 8eam .... · .•.••..••....
Inner -High Beam .......... , . •.. .. Parking lamp and Front Directional Signal. .......••... Toil and Stop Lamps Re,ar Directianal Slgn(ll .......•..... license Plate Lamp ............•..... Back.up Lamp ................•.••.. Glo .... Comportment lamp .•..••.....• Indicotor lamps Clock lamp Temperature Indicdtor Lamp 011 Pressure Indica'tor lamp Generator Indicator lamp Hi-880m Indkator lamp Auto. Trans. Quadrant Lamp
Directional Signal Indicator Lamp
Brake System W,a ,rn!ng Lamp Seat Belt Warning Lamp oOor Open Warning Lamp Inshvmen' Panel Ou.ter lamps. Sid. Morker-FrOl1i ................. . Side Marker-Rear ................. . Heater, Ale COntrol Panel Lamp .....•.
D ome Lamp ....................... . lU9t1oge Compartment Lamp ......... . Underhood lamp ................... . Courtesy Lamp ..................... .
Radio Dial Lamp (All exe. Stereo ond Tape player) . . ................ . RadiO, Oial Lamp (Stereo and Tape player) .................... .
Reading lamp ..................•... Radio Indicator .......••..••.•.••...
6-3
Can_uea power Humb ...
37Y~W 4000 55W (S.ale~, Beom)
37V1W 5001 (Sealed Beam)
24-2.2 11S7NA
32-3 1157 3 168
32 I J 56 2 1891
2 194
3 168
2 194
2
194
2 1895
12 211·2or211al 15 1003 15 93
6 631
3 1816
2 564 15 1004 I 66
Page 93 of 102
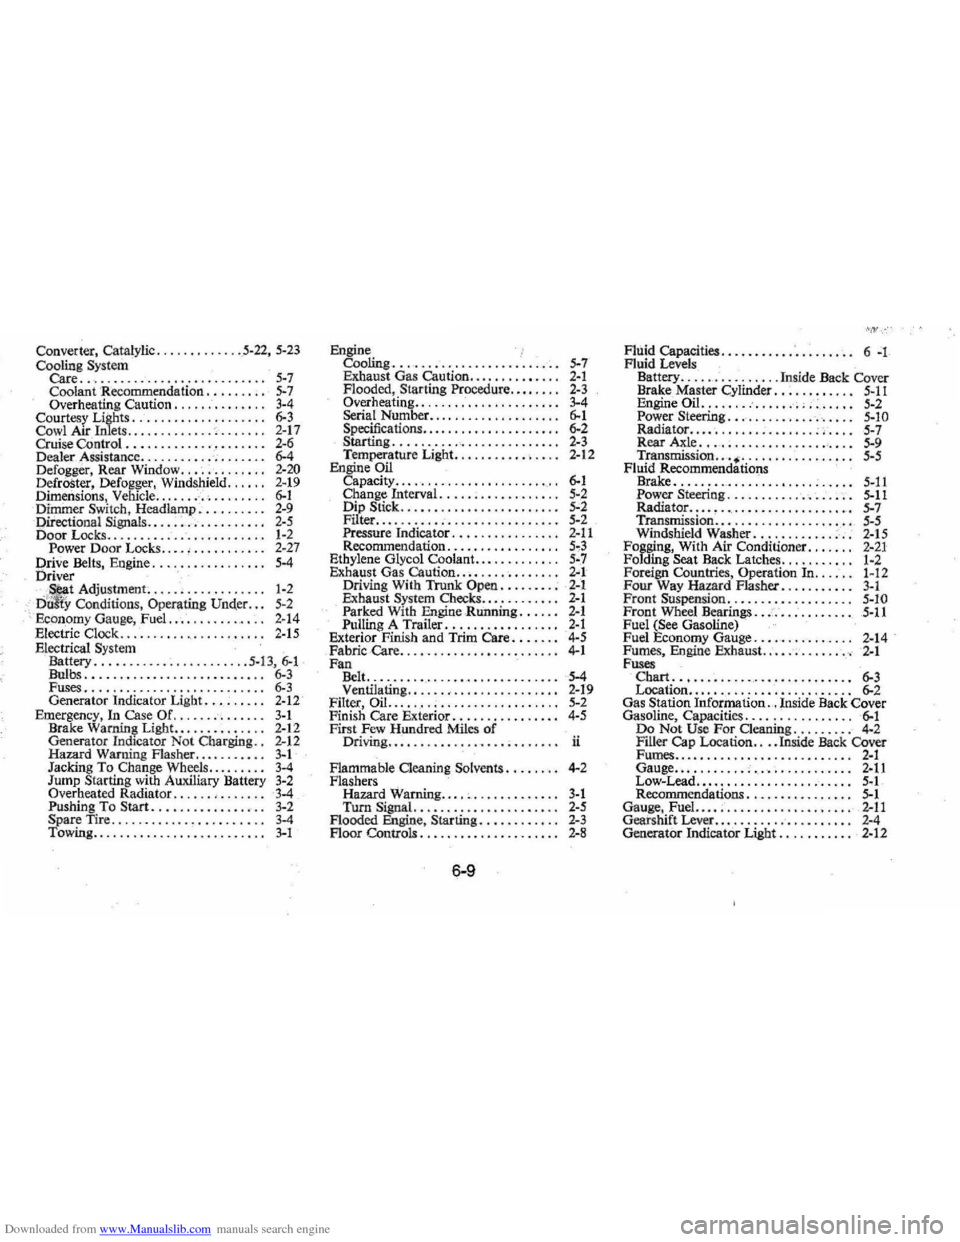
Downloaded from www.Manualslib.com manuals search engine Converter, Catalylic .............. .5-22, 5-23 Cooling System Care ............................ 5·7 Coolant "Recommendation ....... ;. 5-7 Overheating Caution. . . . . . . . . . . . .. 3-4 Courtesy Lights ............ ." ..... , 6-2.317 Cowl Air Inlets ...... , ...... , ...... . Cruise Control ............. -. . . . . . .. 2-6 Dealer. Assistance ........... -;. ...... 6-4 Defogger, Rear Window ......... , . .. 2-20 Defroster, Defogger, Windshield ...... 2-19 Dimensions, Vehicle ......• -', ........ ' 6-1 Dimmer Switch, Headlarnp : ........ ' 2-9 Directional Signals .. , . , ...... , . . . . .. 2-5 Door Locks... ....... ............ .. 1·2 Power Doo r Locks .... , •...••...... 2-27 prive Belts, Engine. . . . . . . . . . . . . . . .. 5-4 Driver ' Sj;at Adju stment; .......... , ,..... 1-2 ," D~titfy Conditions. Operating Unqer. .. 5-2 ~ Economy Gauge, Fuel...... .. ..... .. 2~14 Electric Clock ................ , .. , .. 2~15 Electrical System Battery ....................... 5·13. 6-1 Bulbs ........................... 6-3 Fuses ... " ...................... 6-3 Generator Indicator Light ..•...... 2~12 Emergency, In Case Of, . ' . , .. ~ . . . . .. 3~ 1
Brake Warnin~ Light ............. ' 2~12 Generator Indicator Not Charging.. 2-12 Hazard Warning Flasher ........... 3-1 Jacking To Change Wheels......... 3·4 Jump Starting with Auxiliary Battery 3-2
Overheated Radiator ............ ,. 3-4 Pushing To Start ................ ' 3-2 Spare Tire .... , . . . . . . . . . . . • . • . . .. 3-4
Towing .. , ...............•.... , ., 3-1
Engine
Cooling. . . . .. .. .. . .. .. .. .. .. .... 5-7 Exhaust Gas Caution, ........•... , 2-1 Flooded , Starting Procedure. .•• . . .. 2-3 Overheating .. , .. , . .. . . . . . . . . . . . .. 3-4 Serial Number.. .. .. .. .. .. .. .. .... 6-1 Specificati ons ......... , ....... , , .. 6-2
Starting .................. ....... 2·3 Temperature Light.. , ........ -. .. ,. 2-12
Engine Oil Capacity .... ' .... , .... , ....•••. ',," 6-1 Change Interval .......• ' .. , • . . . .. 5-2 Dip Stick........ ........ ........ 5-2 Filter .......... .-. . . . . . . . . . . • . . . .. 5-2
Pressure Indicator .•.......••.... , 2-11 Recommendation. . . . . . . . . . . . . . . .. 5-3 Ethylene Glycol Coolant... . . . . . . . . .. 5·7 Exhaust Gas caution.... .... ...... .. 2 .. 1
Driving With Trunk Open. ........ 2-1 Exhau st System Checks ........ ,' .. 2-1 Parked With Engine Running. , .... 2-1 Pulling A Trailer. .............. " 2_1 Exterior Finish and Trim Care. . . . . .. 4-5
Fabric Care.. .. .. .. .. ... .. .. .. .. ... 4-1 Fan Belt ............................. 5-4 Ventilating .•... , ................ , 2-19 Filter, Oil. .... " ................ , . .. 5-2 Finish Care Exterior .......... , . , .. , 4-5 First Few Hundred Miles of Driving .. , ........... ' .... ; . . . . . .. ii
Flammable Cleaning Solvents. . . . . . .. 4-2 Flashers Hazard Warning .... ~. ............ 3-1 Turn Signal. ..... ' ......... , . . . .. 2-5 Flooded. Engin e, Starting. . . . . • . • . . .. 2-3 Floor Controls. .. .. .. .. .. .. .. .. .... 2·8
6-9
Fluid Capacities ........... ·......... 6.1 Fluid Levels
Battery ..... , ......... Inside Back Cover
Brake Master Cylinder., ..... , .... 5-11 Engine Oil .............. , ........ 5·2 Power Steering .. , ......... '" . . .. 5.10 Radiator .................. ,. ,-... , 5-7 Rear Axle ................... '.... 5-9 Transmission ....... , . , ........... , 5-5
Fluid Recommendations
Brake
........................... 5.11 Power Steering, .......... '. -..... ~'. 5-11 Rad.iat~r, : ......... ....... ,.,."., 5-7 TranslOlsslon ....... , . . . . . . . . . . . .. 5·5 Windshield Washer .. , ., ....... ;--.-, 2-15 Fogging, With Air Conditioner ..... " 2-21 Folding Seat Back Latches ... ........ 1·2 Foreign Countries , Operation In .... ,. 1-12 Four Way Hazard Flasher. , . , , ... , ,. 3-1
Front Suspen sion. . . . . . . .. . . . . . . . . .. 5-10 Front Wheel Bearings ... :: ......... ,. 5·11 Fue l (See Gasoline) Fuel Economy Gauge ..... , ... , ,. . .. 2-14 Fumes, Engine Exhaust., ....•..... , .• 2-1 Fuses Cbart ........................... 6-3 Location.... . .. . . . . .. .. . . . . . . . . . . 6-2 Gas Station Information .,. Inside Back Cover Gasoline, Capacities ..... : , , . . . . . . .. 6-1 Do Not Use For Cleaning .. , . , . , ., 4-2 FlUer Cap Location .... Inside Back Cover
Fumes ........................... 2·1 Gauge ........... ,..... .......... 2·11 Low·Lead............ ...... ...... s· Recommendations, .... ,...... .... 5-1 Gauge, FueL .... ,........ .. ........ 2-11 Gearshift Lever... . . . . . . . . . . . . . . . . .. 2·4 Generator Indicator Light ........... 2·12
Page 96 of 102
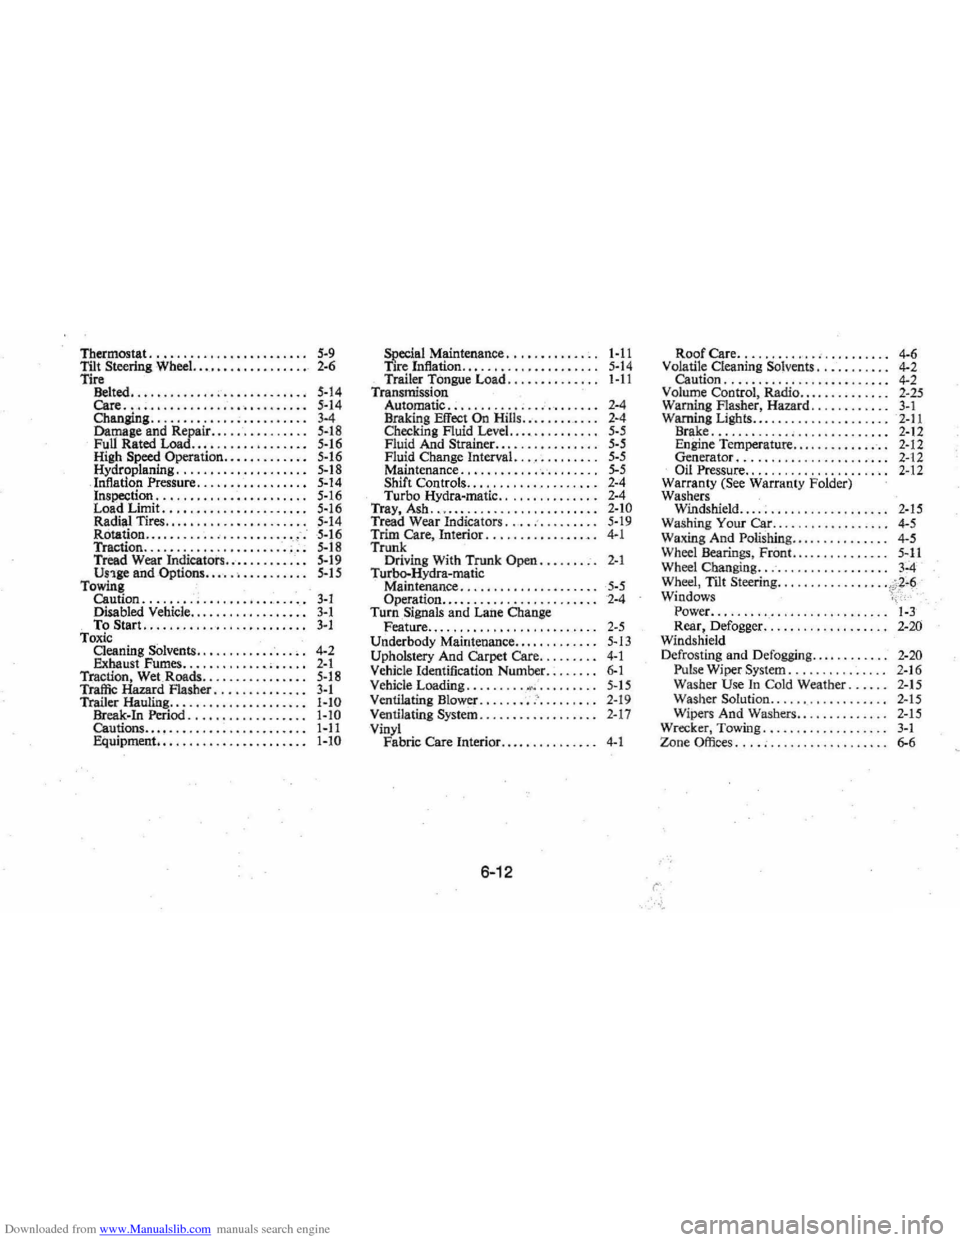
Downloaded from www.Manualslib.com manuals search engine Thermostat. . . . . . . . . . . . . . • • . . . . . . .. 5~9 Tilt Steering Wheel.. . . . . . . • • . . . . . . .. 2·6 Tire Belted ........................... 5·14 Care ............................ 5·14 Changing. . . . . . . . . . . . . .. . . . . . . . .. 34 Damage and Repair ............... 5·18 Full Rated Load...... ............ 5·16 High Speed Operation............. 5·16 Hydroplaning. . . .. .. . . .. . .. . .. ... 5·18 Inflation Pressure. . . . . • • . . • . . . . . .• 5:..14 Inspection ... ".,., ... ' .••.... "., 5~16 Load Limit. . .................... 5·16 Radial Tires....... .. ....... ...... 5·14 Rotation ... ,.,.,.,." ., " .. , .... -: ·5~16 Traction .. "., ... , .. , ... " . . ,'.;'~. 5-18 Tread Wear Indicators...... ....... 5-19 US1ge andOptions ..... ' .......... 5·15 Towing Caution ....•.•........•... , ...... 3~1 Disabled Vehicle.......... ........ 3·1 To Start. . .. . . . . . . .. . . .. . . .. .. . .. 3·1 Toxic .
Cleaning Solvents ..... , , . . .. .. . . •. 4~2 Exhaust Fumes ...... , ......•• , , .. 2~ 1
Traction, Wet.Roads."' .... ,.,.,,., 5~18 Traffic Hazard flasher. . . . .. .. .. . ... 3·1 Trailer Hauling .. , . , . , ........... , . . 1·10
Break ·In Period. . .. .. .. .......... I·JO Cautions ...•................•.. ,. 1·11 Equipment. .. . . . . . . . . . .. . . . . • .. .. 1·10 Sj?ecial
Maintenance .. ,
. , ........ , 1·11 TIre Inflation ..... , .. , . ........... 5·14 Trailer Tongue Load, .......... , .. 1~11 Transmission Automatic. . . . . . . . . . . . . . . . . . . . . . . 2-4
Braking Effect On Hills.......... .. 2·4 Checking Fluid Level. ..... . . . . . . . .. 5·5 Fluid And Strainer ............ , .,. 5·5 Fluid Change Interval ..• " ....• , . .. 5·5 Maintenance. , •...... , . , '. '. . . . . . .. 5-5 Shift Controls .......... " . . .. . . .. 2-4 Turbo Hydra~matic .........• . , . .. 2·4 Tray. Ash .......................... 2-JO Tread Wear Indicators .... .',.,., ... , 5-19 Trim Care, Interior ............. , ... , 4-1 Trunk Driving With Trunk Open. .. ...... 2·1 Turoo..Hydra~matic Maintenance. . . . . . . . . . . . . . . . . . . .. 5·5 Operation .................... , . .. 2-4 Turn. Signals and Lane Change Feature ............... , . . . . . . . . .. 2~5 Underbody Maintenance .... , . . . . . . .. 5~ 13 Upholstery And Carpet Care. . . . . . . .. 4·1 Vehicle Identification Number ....... , 6-1 Vehicle Loading, ...... , ...... , .. , , . . .. 5~ 15 Ventilating Blower., ...... :., .. " .. .. 2-19
Ventilating System .................. 2-17
Vinyl
Fabric Care Interior. . . . . . . . • • . . . .. 4·1
6-12 r
Roof Care .................... '" 4·6 Volatile Cleaning Solvents, .. ,., ..... 4-2 Caution ... , . , . , , . , .. , ......•.. ,. 4-2
Volume Control, Radio ... , ..... , .... 2~25 Warning Flasher. Hazard ............ 3-1 Warning Lights ..................... 2·11 Brake ........................... 2·12
Engine Temperature ......... , .... , 2-12 Generator •............... , . , .. .. 2~ 12 Oil Pressure. . . . . . . . . . . . . . . . . . . ... 2~ 12 Warranty (See Warranty Folder) Washers Windshield..... .. ... . . .. ... .. .... 2·15 Washing Your Car .................. 4-5
Waxing And Polishin g .. , , . . . • • • . . . .. 4·5 Wheel Bearings , Front.... . . . . . . . . . .. 5~11 Wheel Changing.. ... . . . . . . . . . . . . . .. 34 Wheel, Tilt Steering ........... ...... &2·6 Wmdows ;,; Power ....................••..... 1·3 Rear, Defogger. .......... ,' ...... 2-20 Windshield
Defrosting and Defoggin g ............ 2·20
Pulse Wiper System ...... ,. . .... .. 2~16 Washer Use In Cold Weather .. ,.,. 2-15 Washer Solution ....... , .......... 2-15 Wipers And Wasbers .............. 2~15 Wrecker, Towing .•.........•....... 3~1 Zone Offices. . . . . . . . . . . . . . . . • • . . . .. &.6
Page 99 of 102
Downloaded from www.Manualslib.com manuals search engine GAS STATION INFORMATION Refer to "Service and Maintenance"
Section for Further
Details.
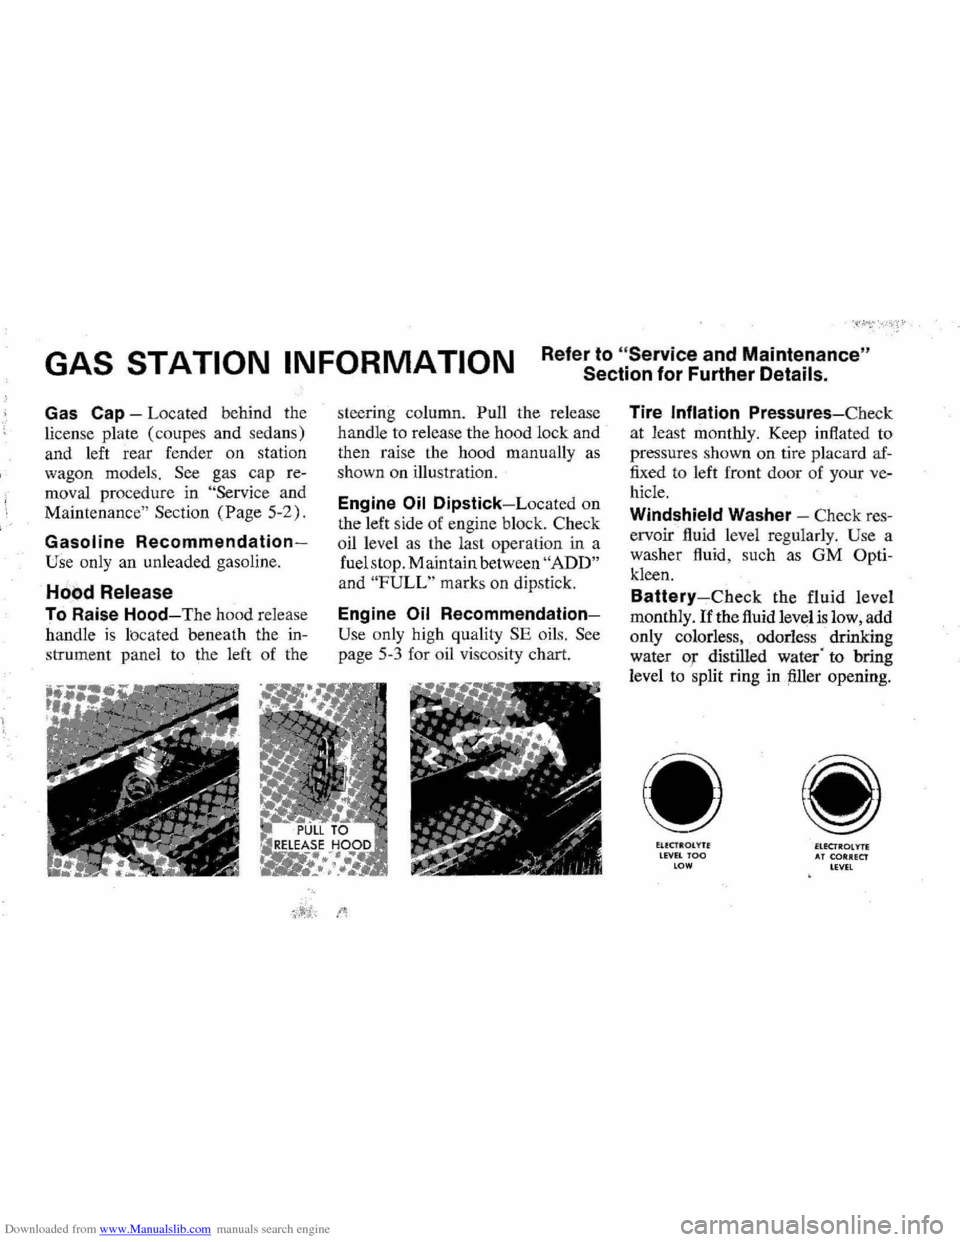
Gas Cap -Located behind the
licen
se plate (coupes and sedans)
and le
ft rear fender on station
wagon model
s. See gas cap re
moval procedure in "Service and
Maintenance" Section (Page 5-2).
Gasoline Recommendalion
Use only an unleaded gasoline.
. Hood Release
To Raise Hood-Th e hood release
handl e
is located beneath the in
strument panel to the left of the steering
column. Pull the release
handle to relea
se the hood lock and
then raise the hood manually
as
shown on illustr ation.
Engine Oil DipstiCk-Located on
the left side of engine block. Check
o
il l eve l as the last operation in a
fuel stop. Main tain betwee n
"ADD"
and "FULL" marks on dipstick .
Engine Oil Recommendation
Use only high quality SE oils. See
page 5-3 for oil viscosity chart.
Tire Inflation Pressures-Check
at least monthly. Keep inflated to
pressures shown on tire placard
af
fixed to left front door of your ve
hicle.
Windshield Washer -Check res
ervoir fluid level regularly.
Use a
washer fluid, such
as GM Opti
kleen.
Battery-Check the fluid level
monthly.
If the fluid level is low, add
only colorless, odorless drinking
water
oJ distilled water' to bring
level to
split ring in !iller opening.
EUCTROlY1E LEVEL TOO .O W
ElECTROLYTE AT CORRECt LEVEL