Page 8 of 86
Seats, rear-view mirrors, seat beltsStarting:
Anti-theft, ignition, starter
Gears, clutch, brakes
Signals and visibility:
Lights, signals, windscreen wipers/
washer
Air conditioning:
Ventilation, heating, de-misting Comfort:
Folding canvas hood
Accessories
07516
JULY 1975
AZ-KB AZ-KA 2 CV4 2 CV6
[Contents] [Notices] [Important Points] [Driving] [Maintenance] [Minor Repairs] [Miscellaneous Information]
Page 57 of 86
Diverse
Correct setting of rear-view mirrors Tyre pressure
Front grill muff Seat belts
Adjustment of seats
[Contents] [Notices] [Important Points] [Driving] [Maintenance] [Minor Repairs] [Miscellaneous Information]
Page 66 of 86
Diverse
Correct setting of rear-view mirrors Tyre pressure
Front grill muff Seat belts
Adjustment of seats
[Contents] [Notices] [Important Points] [Driving] [Maintenance] [Minor Repairs] [Miscellaneous Information]
Page 67 of 86

DRIVING
DRIVING POSITION
Seats, Rear-view Mirrors, Seat Belts
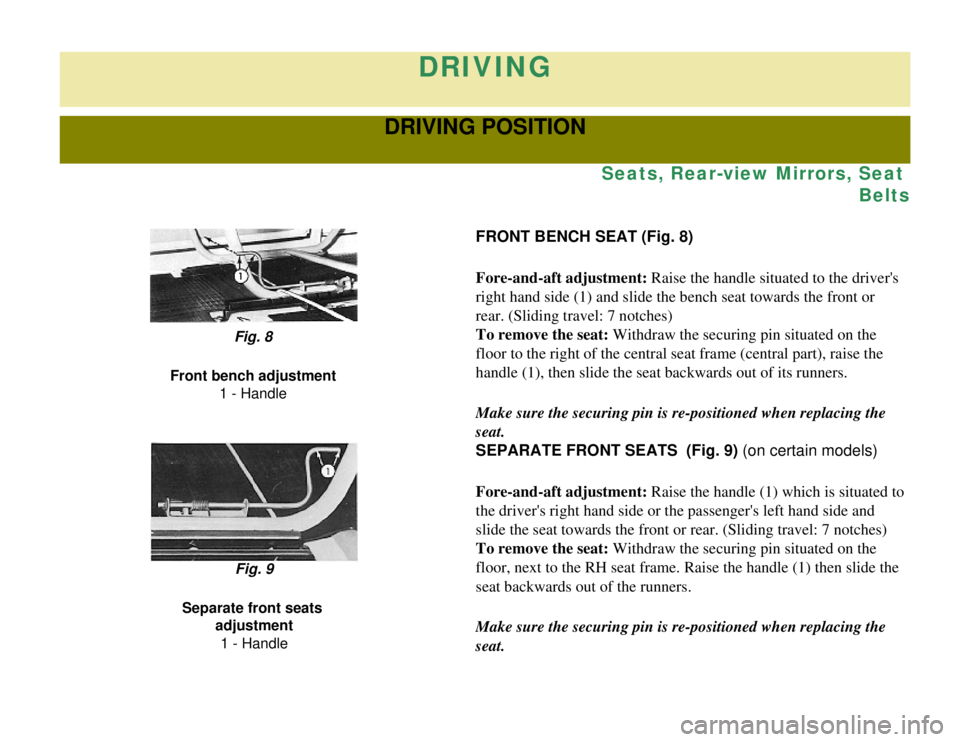
FRONT BENCH SEAT (Fig. 8)
Fore-and-aft adjustment: Raise the handle situated to the driver's
right hand side (1) and slide the bench seat towards the front or
rear. (Sliding travel: 7 notches)
To remove the seat: Withdraw the securing pin situated on the
floor to the right of the central seat frame (central part), raise the\
handle (1), then slide the seat backwards out of its runners.
Make sure the securing pin is re-positioned when replacing the
seat.
Fig. 8
Front bench adjustment 1 - Handle
SEPARATE FRONT SEATS (Fig. 9) (on certain models)
Fore-and-aft adjustment: Raise the handle (1) which is situated to
the driver's right hand side or the passenger's left hand side and
slide the seat towards the front or rear. (Sliding travel: 7 notches)
To remove the seat: Withdraw the securing pin situated on the
floor, next to the RH seat frame. Raise the handle (1) then slide the \
seat backwards out of the runners.
Make sure the securing pin is re-positioned when replacing the
seat.
Fig. 9
Separate front seats adjustment
1 - Handle
Page 68 of 86

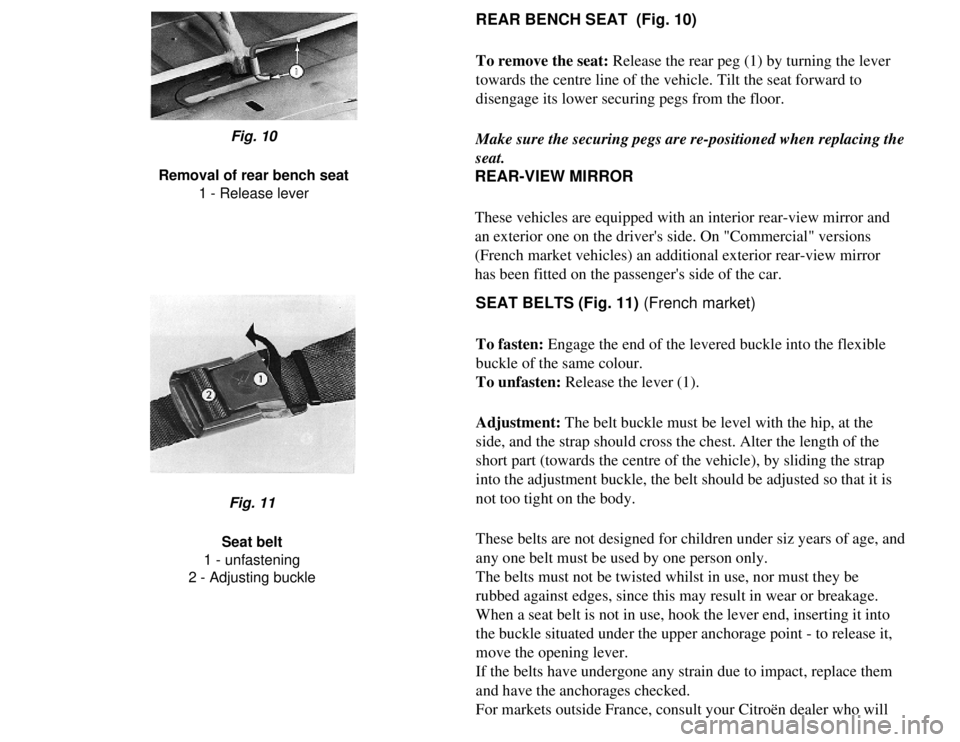
REAR BENCH SEAT (Fig. 10)
To remove the seat: Release the rear peg (1) by turning the lever
towards the centre line of the vehicle. Tilt the seat forward to
disengage its lower securing pegs from the floor.
Make sure the securing pegs are re-positioned when replacing the
seat.
Fig. 10
Removal of rear bench seat 1 - Release lever
REAR-VIEW MIRROR
These vehicles are equipped with an interior rear-view mirror and
an exterior one on the driver's side. On "Commercial" versions
(French market vehicles) an additional exterior rear-view mirror
has been fitted on the passenger's side of the car.
SEAT BELTS (Fig. 11) (French market)
To fasten: Engage the end of the levered buckle into the flexible
buckle of the same colour.
To unfasten: Release the lever (1).
Adjustment: The belt buckle must be level with the hip, at the
side, and the strap should cross the chest. Alter the length of the
short part (towards the centre of the vehicle), by sliding the strap
into the adjustment buckle, the belt should be adjusted so that it is
not too tight on the body.
These belts are not designed for children under siz years of age, and
any one belt must be used by one person only.
The belts must not be twisted whilst in use, nor must they be
rubbed against edges, since this may result in wear or breakage.
When a seat belt is not in use, hook the lever end, inserting it into
the buckle situated under the upper anchorage point - to release it,
move the opening lever.
If the belts have undergone any strain due to impact, replace them
and have the anchorages checked.
For markets outside France, consult your Citroën dealer who will
Fig. 11
Seat belt
1 - unfastening
2 - Adjusting buckle
Page 69 of 86
advise you on the legal requirements and fittings.
DRIVING POSITION
Adjust the fore-and-aft position of the bench-seat or of the front
driver's seat to suit the controls.
Adjust the rear-view mirrors to suit the driving position adopted.
Then fasten the seat belt and adjust its length as necessary.
[Contents] [Notices] [Important Points] [Driving] [Maintenance] [Minor Repairs] [Miscellaneous Information]
Page 85 of 86

l Changing a fuse
l Changing a sparking plug
l Changing a wheel
l Charge indicator
l Chassis number
l Chassis number stamping
l Choke
l Clutch
l Controls and accessories (LH) (RH)
D
l Dashboard
l Defrosting
l Demisting
l Dimensions, main
l Direction indicators
l Doors, opening
l Driving position
E
l Engine, data
l Engine, number plate
l Engine, oil level
l Engine, oil, warning lamp
F
l Fuel, filling up
l Fuel gauge
l Fuse boxes
l Fuses
l Rear floor
l Rear hammock for parcels
l Rear-view mirrors
l Reverse gear
l Replacement parts, orders
l Running-costs
l Running-in
S
l Seat belts
l Seats
l Seats, backrest adjustment
l Service at 600 miles
l Signalling
l Sparking plugs and gaps
l Speedometer
l Spots on upholstery
l Starting engine
l Starting engine with handle
l Steering wheel (cleaning)
l Stopping the engine
T
l Tar, removal
l Technical data
l Temperature, interior
l Touching-up paintwork
l Towing the car
l Towing a trailer
l Transmission
l Travelling abroad
l Tyre pressures