Page 17 of 86
BONNET (Fig. 5)
Lift the lever situated under the centre part of the front bumpers (1)\
to disengage the safety catch (2).
Raise the bonnet and insert the end-peg of the stay (3) into the
rubber ring of the bonnet, pressing in if necessary.
Before closing the bonnet, do not forget to replace the stay in the
notch of its support (4).FUEL FILLER
It is situated above the RH rear wing of the car.
Opening: Press the cap and turn anti-clockwise.
Closing: Press the cap and turn clockwise until it clicks.
Fig. 5
Opening the bonnet
1 - Location of the release lever
2 - Safety catch 3 - Stay
4 - Support
[Contents] [Notices] [Important Points] [Driving] [Maintenance] [Minor Repairs] [Miscellaneous Information]
Page 33 of 86
MINOR REPAIRS
Replacing a Wheel
TOOL KIT
The spare wheel and jack, the starting handle, and the wooden block
are positioned in the boot (trunk).
REMOVAL (Fig. 37 and 38)
Engage fully the handbrake
Position the wooden block under the wheel directly diagonally
opposite the one which is to be changed. If the road is on a slope,
wedge the wheel on the downward side.
Unlock but do not slacken the three wheel nuts with the wheel brace.
Place the base of the jack well under the car and turned slightly
towards the wheel to be changed, so as to avoid contact with the
bodywork in the final stage of jacking.
Engage lifting arm (1) fully into socket (2) (these sockets are
situated under the front and rear doors).
Turn the operating screw (3) clockwiase by hand until the jack is in
firm contact.
Fig. 37 Fig. 38
37 - Replacing a front wheel 1 - Lifting arm2 - Support3 - Screw
38 - Replacing a rear wheel
Page 35 of 86
MINOR REPAIRS
Headlamp Adjustment
To avoid dazzling oncoming drivers the headlamps should have a
range of between 30 to 50 metres (33 to 55 yards).
Adjustment from inside the car (Fig. 39):
To lower the beams: turn the knob (1) anti-clockwise.
To raise the beams: turn clockwise.
Adjustment from outside the car:
The range and direction of each headlamp can be modified by
operating the hexaganol nut which secures the headlamp to its ball
joint support.
As these adjustments from outside the car can only be carried out
in a workshop containing the necessary checking equipment, have
them done, or checked, by a specialist in these matters.
Fig. 39
Headlamp adjustments
from inside the car (LHD)
1 - Adjusting knob
Fig. 39a
Headlamp adjustments
from inside the car (RHD)
Page 70 of 86

DRIVING
STARTING
Anti-theft, Ignition, Starter
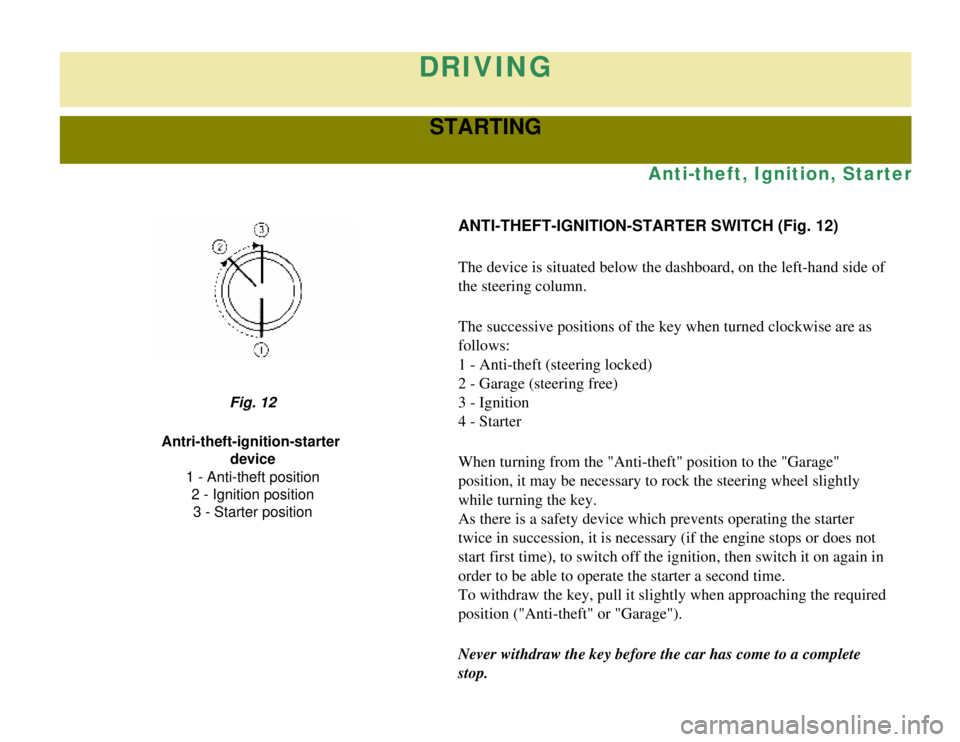
ANTI-THEFT-IGNITION-STARTER SWITCH (Fig. 12)
The device is situated below the dashboard, on the left-hand side of
the steering column.
The successive positions of the key when turned clockwise are as
follows:
1 - Anti-theft (steering locked)
2 - Garage (steering free)
3 - Ignition
4 - Starter
When turning from the "Anti-theft" position to the "Garage"
position, it may be necessary to rock the steering wheel slightly
while turning the key.
As there is a safety device which prevents operating the starter
twice in succession, it is necessary (if the engine stops or does not
start first time), to switch off the ignition, then switch it on again \
in
order to be able to operate the starter a second time.
To withdraw the key, pull it slightly when approaching the required
position ("Anti-theft" or "Garage").
Never withdraw the key before the car has come to a complete
stop.
Fig. 12
Antri-theft-ignition-starter device
1 - Anti-theft position 2 - Ignition position3 - Starter position
Page 77 of 86
DRIVING
Air Conditioning
Ventilation, heating, de-misting
FRONT VENTILATOR (Fig. 20)
Turn the knob (1) clockwise or anti-clockwise according to the
required output.
Fig. 20
Ventilation shutter 1 - Control knob
FRONT DOOR WINDOWS (Fig. 21)
To partly open them: Press the catch situated on the lower part of
the window frame. The windows will remain partially open during
the journey.
To open them fully: Push the mobile part of the window right up
in order to engage the retaining head in the opening of the upper
exterior lock (1).
To close them: Remove the retaining head from the lock while
operating the control (2) to bring it to the released position (3) t\
hen
close the window.