1973 CHEVROLET CAMARO brakes
[x] Cancel search: brakesPage 19 of 84
Downloaded from www.Manualslib.com manuals search engine place the transmission in an inter
mediate or low range.
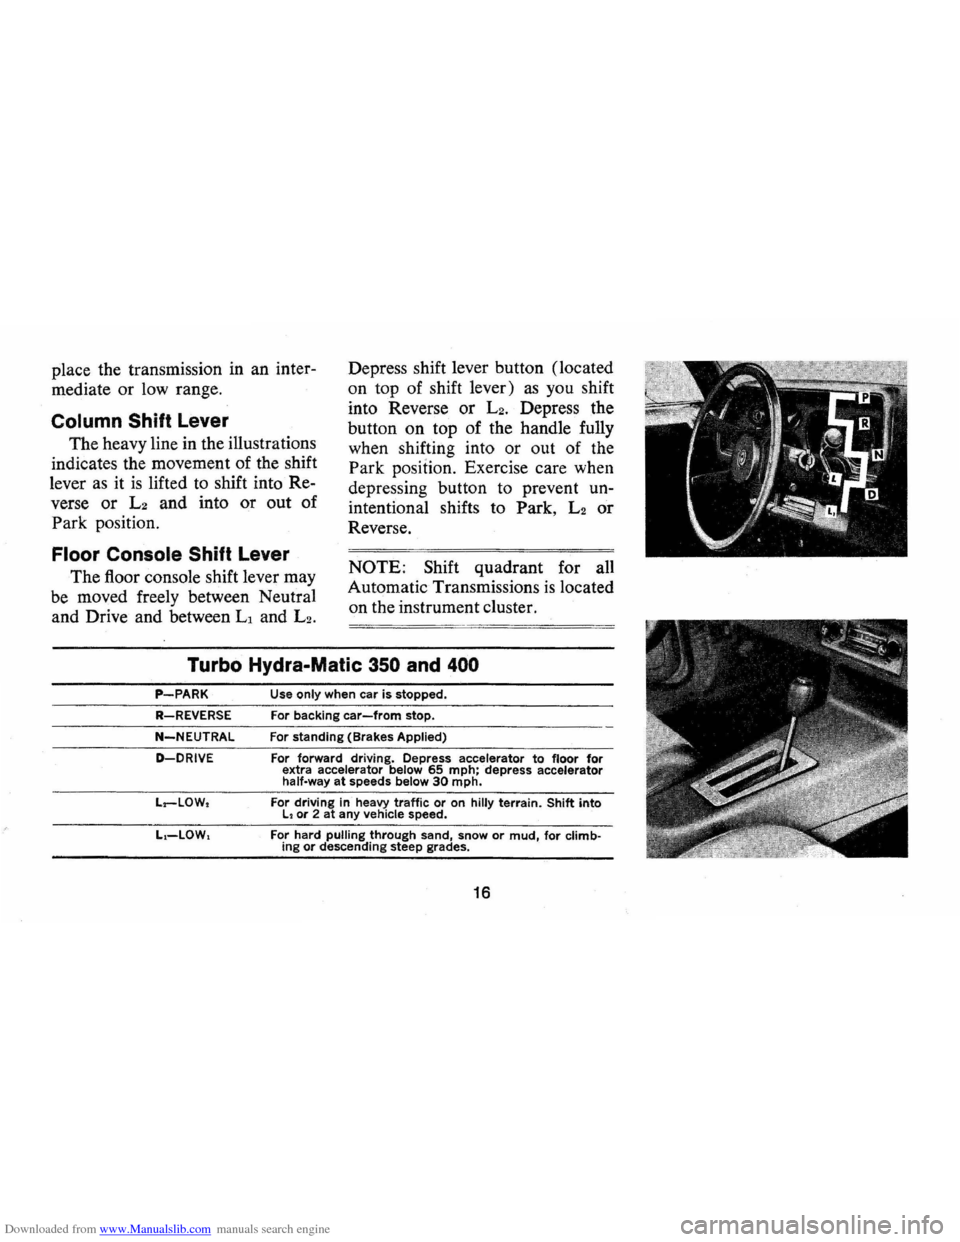
Column Shift Lever
The heavy line in the illustrations
indicates the movement of the shift
lever
as it is lifted to shift into Re
verse or L2 and into or out of
Park position.
Floor Console Shift Lever
The floor console shift lever may
be moved freely between Neutral
and Drive and between
Ll and L2.
Depress shift lever button (located
on top of shift lever)
as you shift
into Reverse or
L2• Depress
the
button on top of the handle fully
when shifting into or out of the
Park position. Exercise care when
depressing button to prevent
un
intentional shifts to Park, L2 or
Reverse.
NOTE: Shift quadrant for all
Automatic Transmissions
is located
on the instrument cluster.
Turbo Hydra-Matic 350 and 400
P-PARK
R-REVERSE
N-NEUTRAl
D-DRIVE
L.--lOW.
Use only when car is stopped.
For backing
car-from stop.
For
standing (Brakes Applied)
For forward dri ving. Depress accelerator to floor for extra accelerator below 65 mph; depress accelerator
half-way at speeds below 30 mph.
For
driving in heavy traffic or on hilly terrain. Shift into l , or 2 at any vehicle speed.
For hard
pulling through sand, snow or mud, for climbing or descending steep grades.
16
Page 21 of 84
Downloaded from www.Manualslib.com manuals search engine ing wheel. The lever is moved up
ward to signal a right turn and
downward
to signal a left turn.
Lamps on the front and rear of the
car transmit this signal to other
motorists and pedestrians. The
ig
nition switch must be in the "ON"
position in order for the turn sig
nals to be operational. This feature
prevents battery drain
if the lever
is left in an "ON" position when
your car
is not in use.
In a normal turning situation
such
as turning a corner, the turn
signal
is cancelled automatically
after the turn
is completed. How
ever, in some driving maneuvers
such as changing lanes
on an ex
pressway, the steering wheel
is not
turned back sufficiently after com
pleting the turn to automatically
cancel the turn signal. For con
venience in such maneuvers, the
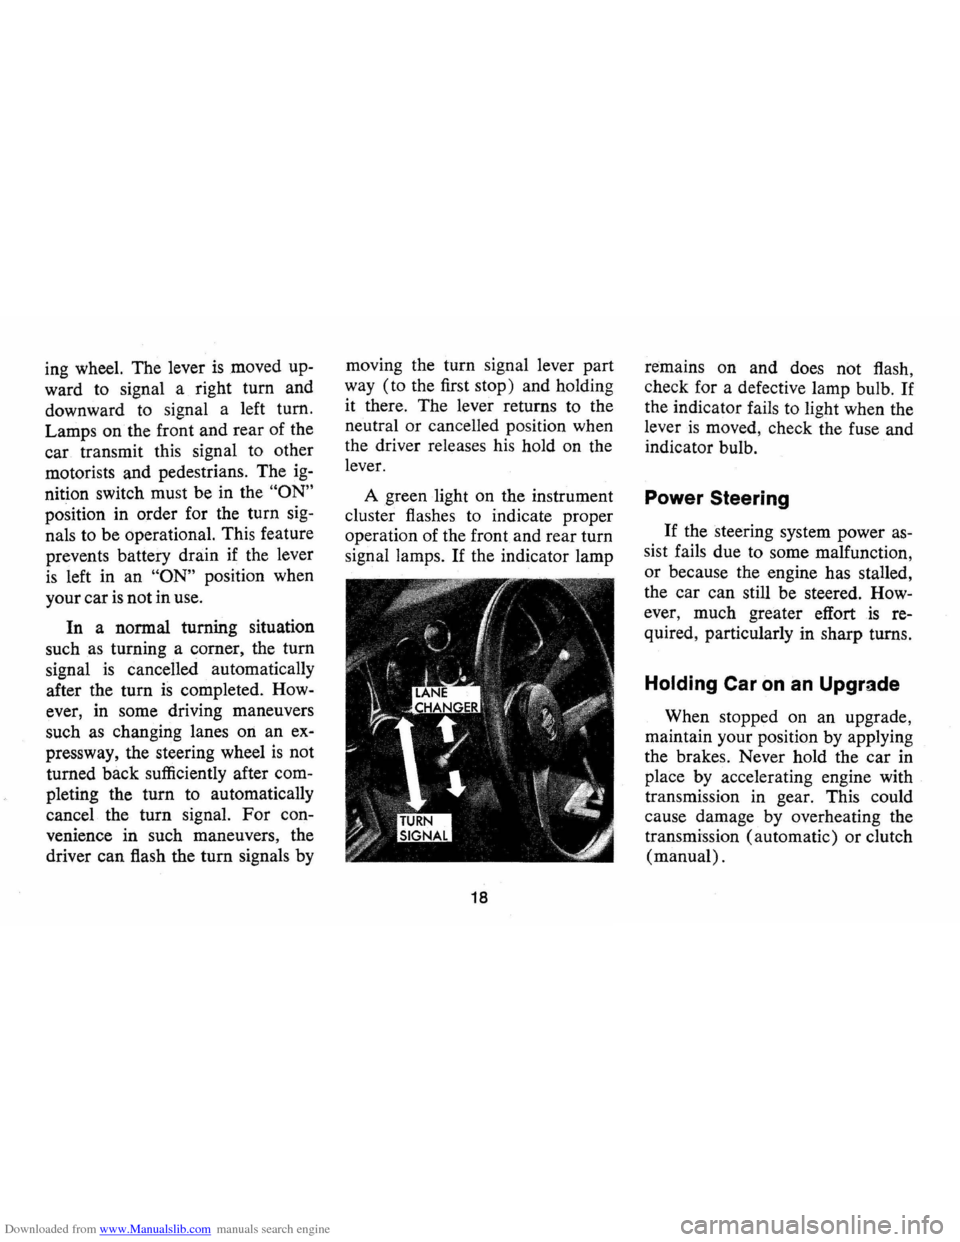
driver can flash the
tum signals by moving
the turn signal lever part
way (to the first stop) and holding
it there. The lever returns to the
neutral
or cancelled position when
the driver releases his hold on the
lever.
A green light on the instrument
cluster flashes to indicate proper
operation of the front and rear turn
signal lamps.
If the indicator lamp
18
remains on and does not flash,
check for a defective lamp bulb.
If
the indicator fails to light when the
lever
is moved, check the fuse and
indicator bulb.
Power Steering
If the steering system power as
sist fails due to some malfunction,
or because the engine has stalled,
the car can still be steered.
How
ever, much greater effort is re
quired, particularly in sharp turns.
Holding Car on an Upgrade
When stopped on an upgrade,
maintain your position by applying
the brakes. Never hold the car in
place
by accelerating engine with
transmission in gear. This could
cause damage by overheating the
transmission (automatic) or clutch
(manual).
Page 23 of 84
Downloaded from www.Manualslib.com manuals search engine FLOOR CONTROLS
Braking System
The service brake system is de
signed for braking performance
under a wide range of driving con
ditions even when the vehicle
is
loaded to its full rated vehicle load.
Power Brakes
On cars with power brakes if
power assist to the brakes
is inter
rupted due to a stalled engine
or
some malfunction, two or more
brake applications can be made
using reserve power.
• If the brake pedal is held down.
the system
is designed to bring
the
car to a full stop on reserve
power. However, the reserve
power
is partially depleted each
time the brake pedal
is applied
and released.
• When reserve power is exhausted,
vehicle
can still be stopped by ap
plying greater force to the pedal.
Parking Brake
• To set parking brake, fully de
press foot pedal
at far left side.
• For maximum holding power.
depress regular brake pedal with
the other foot at the same time.
• To release parking brake, pull
"BRAKE RELEASE" lever on
lower left instrument panel.
• As a reminder, the brake system
warning light
is designed to glow
whenever the parking brake con
trol ·
is not fully released , and the
ignition
is on.
• Never drive car with parking
20
brake set as this may overheat or
otherwise damage rear brakes.
NOTE: "Riding the brake" by rest
ing your foot on the brake pedal
when not intending to brake can
cause abnormally high brake tem
peratures, excessive lining wear
and possible damage to the brakes.
Page 24 of 84
Downloaded from www.Manualslib.com manuals search engine REMINDER: Brake linings should
be inspected for wear by a qualified
mechanic at least once a year
or
every 12,000 miles, whichever oc
curs first (disc brake pads should
be visually inspected for wear each
time the wheels and tires are ro
tated at
6,000 mile intervals).
More frequent inspections should
be made if driving conditions in
your area, such as traffic or terrain
or techniques of individual
driver~
result in frequent brake applica
tions. Your Chevrolet dealer
is best
qualified to advise you
as to how
often this inspection should be per
formed. When brakes require re
lining, use those Genuine General
Motors
Parts specified for your car,
and Delco, brake fluid
as required.
Automatic Brake Adjusters
• Brakes on this car (except for
the parking brake) are self- adjusting,
designed to eliminate
periodic brake adjustments.
• Drum brake adjustment is made
automatically
as the brakes are
applied while car
is moving
backwards.
• Disc brake adjustment is made
automatically with each brake
application.
• If excess brake pedal travel de
velops, drive alternately back
ward and forward several times
and apply brakes firmly in each
direction.
• See your dealer if normal pedal
travel
is not restored, or if there
is a rapid increase in pedal travel,
which could be a sign of other
brake trouble.
Clutch Adjustment
Clutch adjustment should be
checked and adjusted periodically
as necessary to compensate for
21
clutch facing wear. To check, de
press pedal by hand until resistance
is felt. Free travel of pedal should
~e approximately one inch; if very
httle
or no free travel is evident
clutch adjustment
is required. '
Headlight Beam Switch
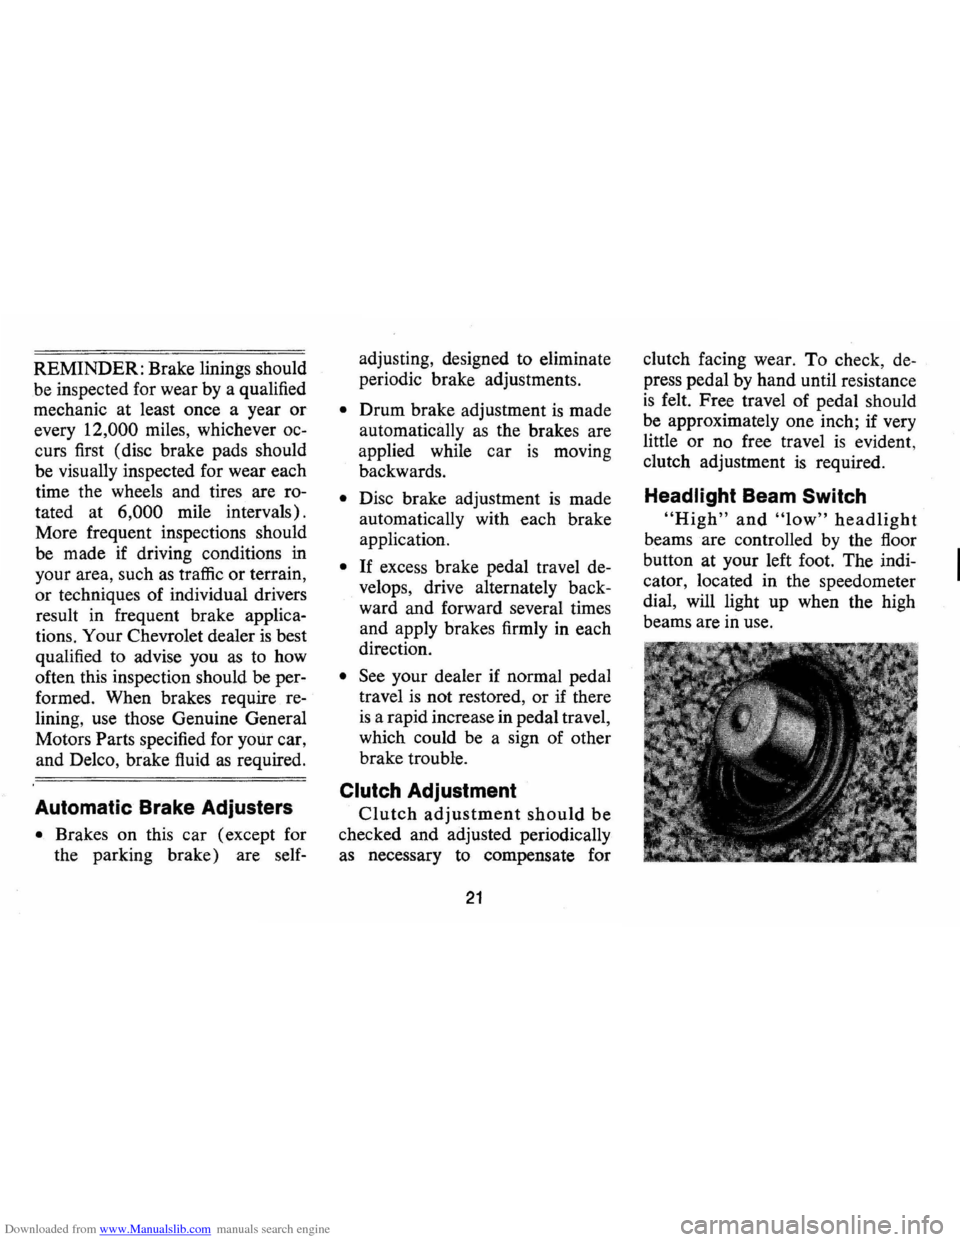
"High" and "low" headlight
beams are controlled by the floor
button at your left foot. The indi
cator, located in the speedometer
dial, will light up when the high
beams are in use.
I
Page 27 of 84
Downloaded from www.Manualslib.com manuals search engine Generator Indicator Light
The red light will go on when
the ignition key
is in the "on" posi
tion, but before the engine
is
started. After the engine starts, the
light should go out and remain out.
If the light remains on when engine
is running, have your Authorized
Chevrolet Dealer locate and correct
the trouble as soon
as possible.
Engine Temperature
Indicator Light
This indicator light is provided
in the instrument cluster to quickly
warn of an overheated engine. With
,the ignition switch in the START
position, the red
TEMP indicator
will light to let you know that it
is
operating properly.
When the engine
is started, the
red light will go out immediately.
It will light up at no other time
unless for some reason the engine reaches
a dangerously high oper
ating temperature.
If the red light
should come on, the engine must be
stopped until the cause of the over
heating
is corrected. Glance at in
strument cluster frequently
as you
drive to see if this light
is on.
Brake System Warning
Light
The service brake system is de
signed
so that half of the brake sys
tem will provide some braking ac
tion in the event of a hydraulic leak
in the other half of the system.
If
the warning light located at lower
left of instrument cluster (speed
ometer face), glows continuously
when the ignition
is on and after
the brakes have been firmly applied
it may indicate that there
is a mal
function in one half of the brake
hydraulic system.
On cars equipped
with front drum brakes, the light
24
will go out when foot is removed
from brake pedal.
• As a check on bulb condition
the light should glow with the
parking brake applied and the
ignition on. (Light
is also a re
minder to release parking brake.)
• Have system repaired if light
does not come
on during check.
• This warning light is. not a' sub
stitute for the visual check of
brake fluid level required
as part
of normal maintenance.
If the light glows red:
• The parking brake control is not
fully released or,
• The service brake system is par
tially inoperative.
What to do:
1. Check that the parking brake is
released. If it is ...
2. Pull off the road and stop, care
fully-remembering that:
Page 54 of 84
Downloaded from www.Manualslib.com manuals search engine Front Wheel Bearings
Every 24,000 miles-clean and
repack with a high melting point
wheel bearing lubricant.
Use wheel
bearing lubricant GM Part No.
1051344 or equivalent. This is a
premium high melting point lubri
cant. When replacement is neces
sary specify Delco parts.
Brakes
Brake linings should. be periodi
cally inspected for wear by a quali
fied technician. The frequency of
thi s inspection depends upon driv
ing conditions such
as traffic or
terrain, and also the driving tech
niques of individual owners.
Your
Chevrolet Dealer is best qualified
to advise you
as to how often this inspection
should be performed.
When replacement
is required ,
specify
GM and Delco parts.
Master Cylinder -Every 6,000
miles or 4 months -Check fluid
level in each reservoir and main
tain
1;4" below lowest edge of each
filler opening with Delco Hydrau
lic Brake Fluid,
Supreme No. 11.
Parking Brake Pulley, Cables
and Linkage-Every 6,000 miles
or 4 months-Apply water resist
ant EP Chassis Lubricant which
meets
GM Specification 6031 M, to
parking brake cable at cable guides
and at all operating links and
levers.
Standard Steering Gear
The steering gear is factory
filled with steering gear lubricant.
Seasonal change of this lubricant
should not be performed and the
housing should not be
drained-no
51
lubrication is required for the life
of the steering gear.
Every 36,000 miles, the gear
should be inspected for seal leak
age (actual solid
grease-not just
oily film) .
Ifa seal is replaced or
the gear is overhauled, the gear
housing should be refilled with
Part No.
105 1052 (13 oz. con
tainer) Steering Gear Lubricant
which meets GM Specification GM
4673M, or
its equivalent.
NOTE: Do not use EP Chassis
Lube, meeting
GM Specification
GM 603 I M, to lubricate the gear.
DO NOT OVER-FILL the gear
housing.
Power Steering System
Check the fluid level in the
pump reservoir at each oil change
period. Add GM Power Steering
Fluid
(or DEXRON Automatic
Page 77 of 84
Downloaded from www.Manualslib.com manuals search engine INDEX
Accessory Drive Belts. . . . . . . . . . . . . . . .. 48 Accessory Position, Steering
Column Lock. .. . . . . .. . . .. . .. .. .... 13 Acrylic Lacquer. . . . . . . . . . . . . . . . . . . . .. 43 Adjusters, Automatic Brake ............ 21 Air Circulation . . . . . . . . . . . . . . . . . .. . ... 28 Air Cleaner. . . . . . . . . . . . . . . . . . . . . . . . .. 48 Air Conditioning
Maintenance. . . . . . . . . . . . . . . . . . . . . .. 52 Air Inlets, Ventilating System .......... 28 Ammeter ............................ 26 Antenna ................ ............. 33 Anti-freeze (See Cooling System). . . . . . .. 53 Anti-Spin Differential. . . . . . . . . . . . . . . .. 35 Anti-Theft Key Buzzer System .......... 13 Anti-Theft Steering Column Lock ....... 13 Appearance Care ..................... 41 Ash Trays. . . . . . . . . . . . . . . . . . . . . . . . . .. 22 Automatic Brake Adjusters. . . . . . . . . . .. 21 Automatic Transmissions
Fluid Check ........................ 49 Fluid Recommendations ............. 49 Maintenance. . . . . . . . . . . . . . . . . . . . . .. 49 Operation .......................... 15 Starter Safety Switch. . . . . . .. . . . . . ... 14 Axle Rear
Fluid Level. . . . . . . . . . . . . . . . . . . . . . .. 48 Maintenance. . . . . . . . . . . . . . . . . . . . . .. 48 Ball Joints ........................... 50 Battery
Emergency Starting. . . . . . . . . . . . . . . .. 37 Fluid Level. . . . . . . . . . . . . . . . . . . . . . .. 61 Gas Caution ....................... 37 Specifications. . . . . . . . . . . . . . . . . . . . . .. 66 Bearings,
Front Wheel.
................ 51 Before Driving Your Camaro . . . . . . . . . . 3
Belted Tires .......................... 55 Belts
Engine Drive. . . . . . . . . . . . . . . . . . . . . .. 48 Lap ................................ 5 Shoulder............ . .............. 7 Body Identification Number ............ 66 Brakes
D.riying Through Deep Water. . . . . . .. 20 Lmmgs ............................ 21 Maintenance ....................... 51 Master Cylinder Level. .............. 51 Parking Brake ...................... 20 Pedal Travel. . . . . . . . . . . . . . . . . . . . . .. 21 Power. .............. .............. 20 Self-Adjusting. . . . . . . . . . . . . . . . . . .. .. 21 Trailer ............................ 10 Warning Ljght. .. . . . . . . .. . . . . . . . . .. 24 Break-In Period Cars Pulling Trailers. . . . . . . . . . . . . . .. 10 New Car.......................... 2
Bright Metal Cleaning .......... '" .... 44 "Brights" Headlamp Indicator .......... 25 Buckles, Seat Belt.. . . . . . . . . . . . . . . . . . .. 6
Bulbs and Fuses . . . . . . . . . . . . . . . . . . . . .. 69 Bumper Jack
Operation ...... " .................. 40 Stowage ........................... 40 Buzzer Key Reminder.. .. .. .. .. .. . .. .. .. ... 13 Cap, Filler
Engine Oil. .................... 46, IBC
Gasoline .......................... IBC
Radiator. . . . . . . . . . . . . . . . . . . . . . . . . .. 39 Capacities. . . . . . . . . . . . . . . . . . . . . . . . . .. 66
Carbon Monoxide Caution ............. 12 Carpet Care .......................... 41
74
Carrier, Infant Safety.... . . . . . . .. .. . . .. 9
Changing Wheels and Tires. . . . . . . . . . .. 39 Charging System Indicator Light. . . . . . .. 24
Chassis Maintenance . . . . . . . . . . . . . . . . .. 50 Child Restraint
Cars Not Equipped With
Special Child Restraints. . . . . . . . . . 9
Child Safety Seat. . . . . . . . . . . . . . . . . . .
9 Infant Safety Carrier. . . . . . . . . . . . . . .. 9 Chrome Protection .................... 44
Cigarette Lighter. . . . . . . . . . . . . . . . . . . .. 27 Circuit Breakers, Headlamps. . . . . . . . . .. 69 Cleaning
Carpet Care. . . . . . . . . . . . . . . . . . . . . . .. 41 Exterior Finish and Trim. . . . . . . . . . .. 43 Fabric and Interior Trim ............ 42
Solvents Recommended .............. 41 Spot Removal. . . . . . . . . . . . . . . . . . . . .. 42 Vinyl Top ... , . . . . . . . . . . . . . . . . . . . .. 44
Clock ............................... 27 Clutch Maintenance. . . . . . . . . . . . . . . . . . . . . .. 49 Pedal Adjustment ................... 21 Coat Hooks........ ...... ........ .... 4
Cold Weather Starting ................. 14 Compartment
Glove ............................. 3
Luggage. .......... ................ 3
Complaint Procedure .................. 70 Conditioner, Air ...................... 30 Controlled Differential. . . . . . . . . . . . . . .. 35 Controls ............................. 13 Cooling System
Care ........... ................... 53 Coolant Recommendation. . . . . . . . . .. 53 Overheating Caution. . . . . . . . . . . . . . .. 39 Cowl Air Inlets ....................... 28
Page 80 of 84

Downloaded from www.Manualslib.com manuals search engine Recommendations. . . . . . . . . . . . . . . . .. 46 Transmissions. . . . . . . . . . . . . . . . . . . . .. 49 Viscosity ., .......... ............... 47 Operation in Foreign Countries ......... II Other Controls and Features. . . . . . . . . .. 35 Outside
Air Vents .......................... 28 Overheated Engine
Indicator Light. ............. : . . . . .. 24 What To Do ....................... 24 Overseas Operation. . . . . . . . . . . . . . . . . .. 11 Owner Assistance ..................... 70 Paint Care ........ ............... ....... 43 Touch Up ......... ................ 43 Parking Brake ............................. 20 Brake Check . . . .. . . . . . . . . . . . . . . .. .. 20 Lights ........... .................. 69 "Park" (P) Transmission Position ... .. 16 Precautions. . . . . . . . . . . . . . . . . . . . . . .. 20 Polishing And Waxing ................. 43 Positive Traction Differential. . . . . . . . . .. 35 Power Brakes ........ .................... 20 Steering . . . . . . . . . . . . . . . . . . . . . . . . . .. 18 Pressure, Tire Inflation . . . . . . . . . . . . . . .. 56 Pushing To Start. . . . . . . . . . . . . . . . . . . .. 36 Radiator
Coolant ........................... 55 Coolant Level Inspection. . . . . . . . . . .. 53 Overheating.. . . .. . . . .. . . . . . . . . . .... 39 Pressure Cap. . . . . . . . . . . . . . . . . . . . . .. 55 Radio
AM/FM ......... .. .. .............. 33 Antenna ..................•.. ...... 33 Tape System. . . . . . . . . . . . . . . . . . . . . .. 34 Raising Car With Jack. . . . . . . . . . . . . . .. 40
Rear
Axle .............................. 48 Speaker ................... ...... .. 34 Window Defogger. . . . . . . . . . . . . . . . . . 30 Registration, Vehicle Engine Number. . . . . . . . . . . . . . . . . . . . 66 Vehicle Identification Number ........ 66 Release, Hood ....................... IBC
Replacement Tires. . . . . . . . . . . . . . . . . . .. 58 Replacement Wheels. . . . . . . . . . . . . . . . .. 59 Restarting. . . . . . . . . . . . . . . . . . . . . .. . . .. 14 Restraints
Child ........... . ........ .......... 9
Lap Belts .... ...................... 5
Methods Of Restraining Children. .. . . 9 Shoulder Belts . . . . . . . . . . . . . . . . . . . . . . 7
Retractors, Lap Belt. . . . . . . . . . . . . . . . . . 5
"Reverse " (R) Transmission Range ..... 16 Roof Care, Vinyl . . . . . . . . . . . . . . . . . . . .. 44 Rotation, Tire.. . . . . . . . . . . . . . . . . . . . . .. 57 Safet y Belts (Seat Belts).. . . . . . . . . . . . . . . . . . . 5
Carrier, Infant.... . . . . . . . . . . . . . . . . . . 9
Seat , Child ....................... " 9
Schedule .
Break-In... .. . ... ..
... ...... . .. .. .. 2
Maintenance. . . . . . . . . . . . . . . . . . .. . .. 45 Seat Adjustment, Manual. . . . . . . . . . . . . . . . 5
Back Latch, Folding Front. . . . . . . . . .. 4
Child
Safety.. .. . . .. . . . . . . . . . . . . . . .. 9 Seat Belts
Buzzer Light Reminder. ... .. .. .. .... 6
Child Restraint. . . . . . . . . . . . . . . . . . . .. 9
Inspection and Care. . . . . . . . . . . . . . . . . 8
Lap
............... ................ 5
Retractors. . . . . . . . . . . . . . . . . . . . . . . .. 5 Shoulder........................... 7
77
Self-Adjusting Brakes. . . . . . . . . . . . . . . .. 21 Service and Maintenance. . . . . . . . . . . ... 45 Shift Linkage Maintenance . . . . . . . . . . . . . .. 50 Operation (See Transmission) .. : . . . .. 15 Shoulder Belts Adjustment . . . .. . . . . . . . . 7 Side Marker Lights. . • . . . . . . . . . . . . . . .. 69 Signals, Turn ......................... 17 Solvents , Recommended Cleaning ....... 41 Sound Systems (See Radio) Space Saver Tire ........ .. ; ......... .. 60 Spare Tire
Jacking Instructions. . . . . . . . . . . . . . . .. 40 Spark Knock (See Fuel
Recommendations)
Speaker, Rear. . . . . . . . . . . . . . . . . . . . . . .. 34 Specifications Body.:: .. ......................... 66 CapacIties. . . . . . . . . . . . . . . . . . . . . . . .. 66 Dimensions . . . . . . . . . . . . . . . . . . . . . . . . 66 Engine ................ ........ .... 66 Filters ............................. 46 Fuses .......................... ; .. 69 General ....... .................... 66 Light Bulbs. . . . . . . . . . . . . . . . . . . . . . . . 69 Lubricants . . . . . . . .. .. . . . . . . . .. . .. .. 46
Speedometer. . . . . . . . . . . . . . . . . . . . . . . . . 22 Spot Cleaning ........................ 41 Stainless Steel Protection. . . . . . . . . . . . .. 43 Stains, Removal of ........ ............ 41 Starter Interlock. . . . . . . . . . .. . . . . . . . . . . . . .. 13 Safety Switch.. .. . . . .. . . . . .. . . . . .... 14 Starting
Automatic Transmission Cars. . . . . . .. 13 Emergency ......................... 37 Manual Transmission Cars ........... 14