1971 CHEVROLET CAMARO fuel pressure
[x] Cancel search: fuel pressurePage 17 of 88

Downloaded from www.Manualslib.com manuals search engine Driving with the Chevrolet Automatic Transmissions
The Powerglide and the Turbo
Hydra-matic 350 and 400 are com
pletely automatic transmissions.
All replace the standard clutch
and
transmission.
Powerglide, Turbo Hydra
Malic
350 and Turbo Hydra
Matic
400
After starting the engine with the
selector lever in N (Neutral)
or P
(Park) position select the range de- sired
(see tables)
and depress the
accelerator.
All Automatic Transmissions
A gradual start with a steady in
crease in accelerator pressure will
result in best possible fuel economy.
Rapid acceleration for fast starts
will result in greater fuel consump
tion.
Automatic transmission shift
quadrants of all OM cars continue
the uniform sequence of selector positions.
This particularly benefits
multicar families
and those who
occasionally drive other cars.
Shift
indicators are arranged with "Park"
position at one end, followed in se
quence by
"Reverse", "Neutral"
and the forward driving ranges.
All automatic transmission are
POWERGLIDE
P-PARK Use only when car Is stopped.
R-REVERSE
N-NEUTRAL
D-DRIVE
L-LOW
For backing car-from stop.
For standing (Brakes Applied)
For forward driving.
Depress accelerator
to floor for extra acceleration at speeds
(depending on engine, axle and tire combinations) as high as 40 to 60 mph.
For hard pulling through sand, snow or mud, and for climbing or descending steep grades. Do not shift to Labove 40 mph.
14
Page 23 of 88

Downloaded from www.Manualslib.com manuals search engine Instruments
The instruments, gauges and in
dicator lights conveniently grouped
in the instrument cluster are de
signed to tell you at a glance many
important things about the per
formance of your car. The follow
ing information will enable you to
more quickly understand and prop
erly interpret these instruments.
Fuel Gauge
This electrically operated gauge
registers correctly when the igni
tion switch
is in the "on" position.
When the ignition switch
is turned
BRAKE WARNING liGHT
"off", the needle will not necessar
ily return to the empty mark but
may stop at any point on the dial.
Oil Pressure Indicator Light
This light will be on when the
ignition switch
is turned on and
should go out after the engine
is
started. Occasionally the light may
be seen to flicker momentarily, but
this will do no harm. However, if
the light remains on during normal
driving speeds the engine should be
stopped until the cause of the trou
ble can be located and corrected.
20
Driving the car with low oil pres
sure can cause serious engine
damage.
Page 54 of 88

Downloaded from www.Manualslib.com manuals search engine SERVICE AND MAINTENANCE
The time or mileage intervals on
the following pages are intended
as
a guide for establishing regular
maintenance and lubrication
periods for your car. Sustained
Fuel
Requirements
Your Camaro is designed to
operate efficiently on fuel of
ap
proximately 91 Research Octane
Number or higher, commonly sold
in the United
States and Canada.
Use of a fuel which is too low in
anti-knock quality will result in
"spark knock" and/or "after-run."
Since
the anti-knock quality of all
gasoline
is not the same and factors
such
as altitude, terrain, and air
temperature affect operating
effi-
heavy duty or high speed operations
or operation under adverse condi
tions may necessitate more frequent
servicing. To determine specific
recommendations for conditions
ciency, knocking
and/or after-run
may result even though you are
using the fuel recommended.
If
these conditions persist consult
your authorized Chevrolet Dealer.
In any case, continuous or
ex
cessive knocking may result in en
gine damage and constitutes mis
use of the engine for which Chev
rolet Division is not responsible
under the terms of the New Vehicle
Warranty.
NOTE: Read page 42 regarding
the importance
of using unleaded
or
low lead gasolines.
51
under which you use your car, con
sult your Authorized Chevrolet
Dealer.
Gas Cap-The fuel tank filler cap
has a new two-step removal and
installation procedure plus a
pres
sure-vacuum safety relief valve. It
is equipped with a double set of
locking tangs.
To remove:
• Rotate cap one-half turn coun
terclockwise to clear the first set
of tangs from the slots inside the
filler neck. This will allow any
residual pressure to escape.
• Pull the cap outward and rotate
one-quarter turn counterclock
wise to clear second set of tangs
and remove the cap.
• To install, reverse this procedure.
Page 58 of 88

Downloaded from www.Manualslib.com manuals search engine the crankcase ventilation valve.
Regular replacement of the PCV
Valve
is recommended at 24-month
or
24,000-mile intervals.
G.M. Evaporation
Control SYltem
The Evaporation Control System
requires only periodic canister filter
servicing.
Every 12 months
or 12,000
miles, whichever occurs first, (more
often under dusty conditions) the
filter in the base of the canister
must be replaced and the canister
inspected.
Drive Beltl
Every 6,000 miles or 4 months
inspect drive belts for wear, fray
ing, cracking, and tension. Belts
which are in poor condition should
be replaced immediately.
Check tension by applying
mod
erate thumb pressure midway be
tween pUlleys. If the center-to
center distance between pulleys
is
13 to 16 inches, the belt should
deflect
lh inch. If the center-to
center distance
is 7 to 10 inches,
the belt should deflect
1;4 inch.
Loose belts should be retensioned
to give the correct deflection.
Air Cleaner
Paper Ellment Type -First
12,000 miles, inspect element for
dust leaks, holes
or other damage,
replace
if necessary. If satisfac
tory, rotate element
1800 from
originally installed position.
Re
place element at 24,000, miles.
Element must not be washed,
oiled, tapped or cleaned with an
air hose.
Crankca.e Ventilation Filter
(located within Air Cleaner)
If so equipped, inspect at every oil
change and replace if necessary.
Replace at least every
24,000
miles; more often under dusty
driving conditions.
Flame Arrester -Every 12,000
55
miles-Clean the arrester (located
in the base of the air cleaner) with
kerosene
or a suitable solvent. Dry
with compressed air.
The engine air cleaner should
be installed at all times unless
temporary removal
is necessary
during repair or maintenance of
the vehicle, because in the absence
of the air cleaner backfiring could
cause
fire in the engine compart
ment.
For maximum protection spe
cify an AC Acron air filter ele
ment.
Fuel Filter
Replace carburetor inlet filter
element every 12 months or
12,000 miles, whichever occurs
first or, if an in-line filter
is also
used, every
24,000 miles.
Replace in-line filter every
24,000 miles.
When replacement
is necessary,
always insist on AC Acron filters.
Page 87 of 88

Downloaded from www.Manualslib.com manuals search engine Headlamp Aim
............................... 35 Flickering (Circuit Breaker). . . . . . . . . . 76
Dimmer Switch ..................... 32 High Beam Indicator ................ 22
Light Switch. . . . . . . . . . . .. . . . . . . . . .. 22
Heater Operation ..................... 25
Hood
Latch Maintenance. . . . . . . . . . . . . . .
.. 59
Release ............... Inside Back Cover
Identification Numbers. . . . . . . . . . . . .
.. 72
Ignition Keys and Lock. . . . . . . . . . . . . . . 3
Inflation Pressure, Tires. . . . . . . . . . . . . .. 62
Instrument Panel. . . . . . . . . . . . . . . . . . .
.. 19
Keys................................ 3
Knocking Engine
(See Fuel
Recommendations)
Lane Changer and Turn
Signal. . . . . . . . . 16
Lights
Bulb Chart. . . . . . . . . . . . . . . . . . . . . . .
.. 76
Hazard Flasher. .. . .. . .. . . .. . . .. . ... 38
Headlamps. . . . . . . . . . . . . . . . . . . . . . . .. 32
Turn Signal. . . . .. .. . .. . .. . . .. . . . ... 16
Locks Door............. ................. 3
Ignition. . . . . . . . . . . . . . . . . . . . . . . . . . . 3
Steering Column .................... 12
Maintenance. . . . . . . . . . . . . . . . . . . . . . . .. 51
Maintenance Schedule. . . . . . . . . . . . . . . .. 66
Overheated Engine
Indicator Light. .
.. .. .. .. .. .. .. .. 21, 23
What To Do. . . . . . . . . . . . . . . . . . . . . .. 39 Owner Relations ...................... 77
Owner Safety Checks .................. 33
Polishing and Waxing. . . . . . . . . . . . . . . .. 47 Radiator
Coolant
................... .. ...... 60
Overheating. . . . . . . . . . . . . . . . . . . . . . .. 39
Pressure Cap. . . . . . . . . . . . . . . . . . . . . .. 61
Radio ......... .. .................... 29
Safety Check Schedule.. .. . . . . . . . . . . . .. 33
Seat
Adjustment, Manual. . . . . . . . . . . . . .
.. 4
Back Latch, Folding Front. ......... , 4
Child
Safety. . . . . . . . . . . . . . . . . . . . . . .. 8
Folding............................ 4
Sea t Belts. . . . . . . . . . . . . . . . . . . . . . . . . . .. 5
Child Restraint. ..
.. .. . . . . . . . . . . . . .. 8
Inspection and Care. . . . . . . . . . . . . . .
.. 7
Lap............................... 5
Releasing Belts. .. . . . . . . . . . . . . . . . . .. 7
Shoulder...
.. . . .. . ... . .... . . . . . . . .. 6
Self~Adjusting Brakes .............. ... 31 Spare Tire
Jacking Instructions
................ , 40
Specifications ......................... 72
Starter Safety Switch. . . . . . . . . . . . . . . . .. 37
Starting
Automatic Transmission Cars. . . . . . .. 13
Emergency . . . . . . . . . . . . . . . . . . . . . . . .. 39 Manual Transmission Cars ........... 13
Steering
Column Controls. . . . . . . . . . . . . . . . . .. 12
Gear Lubricant. . . . . . . . . . . . . . . . . . . .. 59
Maintenance . . . . . . . . . . . . . . . . . . . . . .. 59
Power. ............................ 17
Stuck in Sand, Snow or Mud ........... 39
Tachometer. . . . . . . . . . . . . . . . . . . . . . . . .. 23
Thermostat. . . . . . . . . . . . . . . . . . . . . . . . .. 61
Tires ................................ 61
Towing .......... ........... ......... 38
Trailer Hauling. . . . . . . . . . . . . . . . . . . . . . . 9
Transmission
3-Speed Manual. ........... ~ . . . . . .. 16
4-Speed Manual.. . .. . . .. . . . .. . . .... 16
Automatic. . . . . . . . . . . . . . . . . . . . . . . .. 14
Turn Signals. . . . . • . . . . . . . . . . . . . . . . . .. 16
Warning Lights
Generator. . . . . . . . . . . . . . . . . . . . . . .
.. 21 Brake ............................. 21
Engine Temperature .............. 21, 23
Oil Pressure ........................ 23
Wheel Changing .................... .. 40
Windshield
Defrosting and Defogging.. . . . . . . . . ..
25
Washer Solution .................... 24
Wipers and Washers ................ 24
Zone Offices. . . . . . . . . . . . . . . . . . . . . . . .. 79
Page 88 of 88

Downloaded from www.Manualslib.com manuals search engine GAS STATION INFORMATION Refer to "Service and Maintenance"
Section for Further Details.
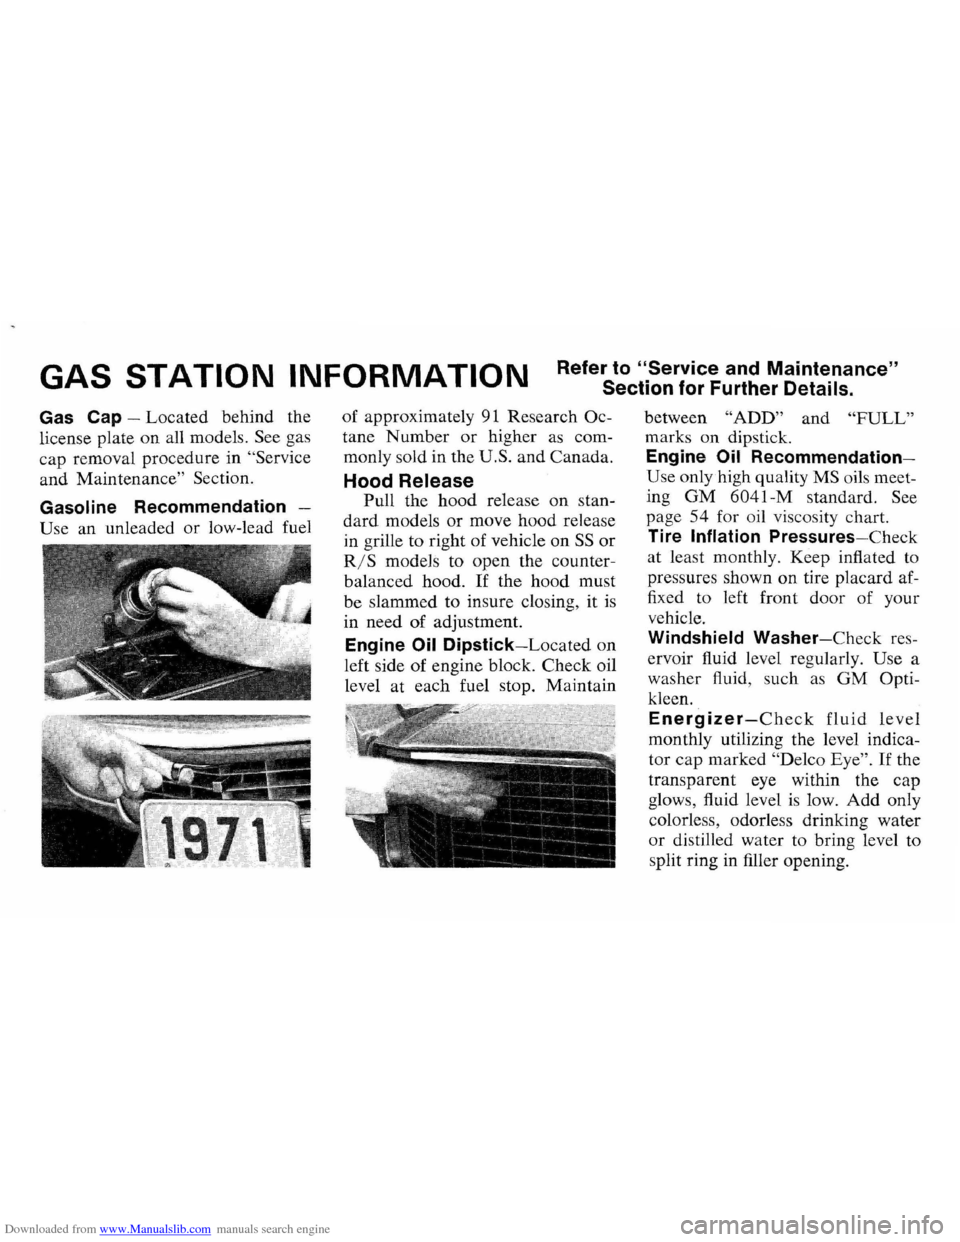
Gas Cap -Located behind the
license plate
on all models. See gas
cap removal procedure in
"Service
and Maintenance" Section.
Gasoline Recommendation -
Use an unleaded or low-lead fuel of
approximately
91 Resea rch Oc
tane Number or higher as com
monly sold in the
U.S. and Canada.
Hood Release
Pull the hood release on stan
dard models or move hood release
in grille to right of vehicle
on SS or
RjS models to open the counter
balanced hood.
If the hood must
be slamme d to insure closing , it is
in need of adjustment.
Engine Oil Dipstick-Located on
left side of engine block. Check oil
level at each fuel stop. Maintain between
"ADD" and "FULL
"
marks on dipstick.
Engine Oil Recommendation
Use only high quality MS oils meet
ing
OM 6041-M s tand ard. See
page 54 for oil viscosity chart.
Tire Inflation PressureS-Check
at least monthly. Keep inflated to
pressures shown
on tire placard af
fixed to lef t front door of your
vehicle.
Windshield Washer-Che ck res
ervoir fluid level regularly.
Use a
washer fluid, such
as OM Opti
kleen.
Energizer-Check fluid level
monthly utilizing the level indica
tor
cap marked "Delco Eye". If the
tran
sparent eye within the cap
glows, fluid level
is low. Add only
colorless, odorless drinking water
or distill ed water to bring level to
sp lit ring in filler opening.