1964 CHEVROLET CORVETTE window
[x] Cancel search: windowPage 7 of 52
Starting the Engine
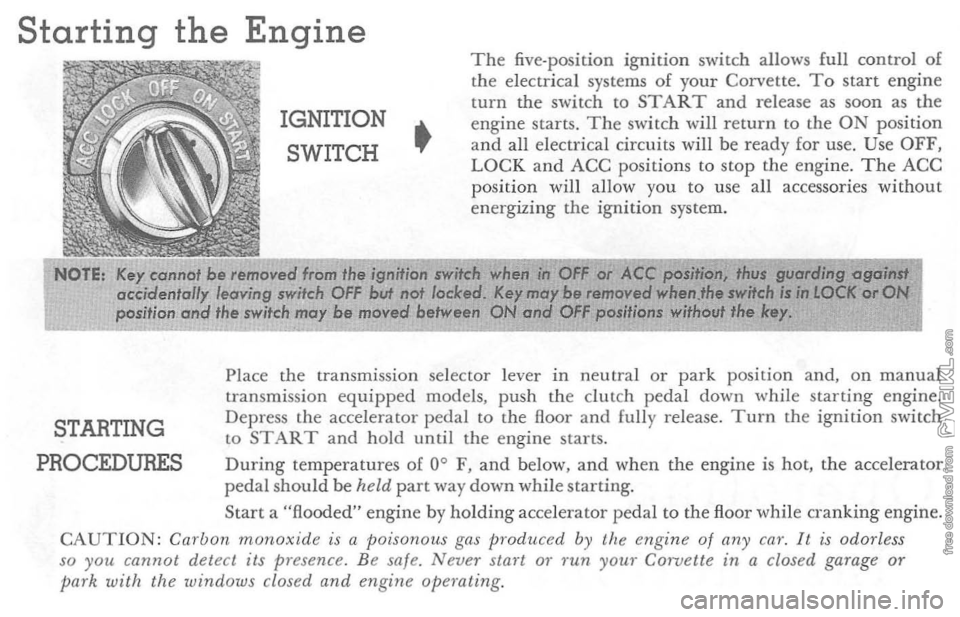
IGNITION SWITCH
•
The five-position ignition switch allows full control of the electrical systems of your Corvette. To start engine turn the switch to START and release as soon as the engine starts. The switch will r eturn to the ON position and all electrical circuits will be ready for use. Use OFF, LOCK and ACC positio ns to stop the engi ne. The ACC position will anow you to use all accessories without e n ergizi ng the ignition system.
NOTE, /(ey cannot
be ,emoved from the ignition ..... itch . ';f;;;.#fi';;'..;;a.;:" i;h~'i4i;C't:;o:N:' accidentally leaving IWifeh OFF but IlOl ladeed. /(fl' 111(" b. nollllOVed 11 position and the switch may be moved between
STARTING
PROCEDURES
Place the transmission selector lever in neutral or park position and, on manual transmission equipped models, push the clutch pedal down while starting engine.
Depress the accelerator pedal to the floor and fully release. Turn the ignition switch to START and hold until the engine starts. During temperatures of 0 ° F, and below, and when the engine is hot, the acce lerator pedal should be held part way down while starting. Start a "flooded" engine by holding accelerator pedal to the floor while o'anking engine. CAUTION: Carbon monoxide is a poisonous gas produced by the engine of any ca?'. It is odorless
so you cannot detect its presence. B e safe. Never Sial"t or run YOW" C01"Velte in a closed garage or park with the windows closed and engine operating.
Page 22 of 52
AIR
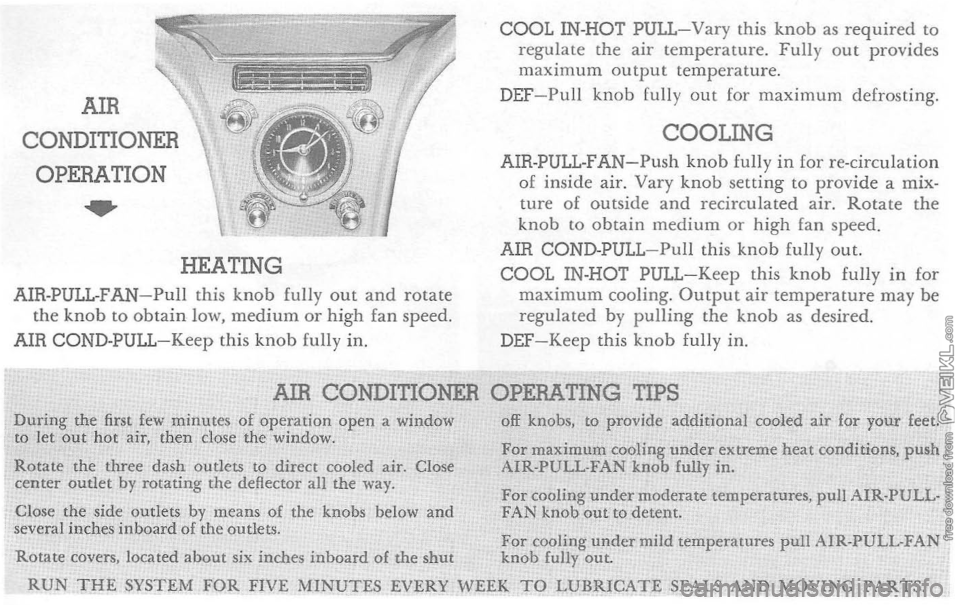
CONDITIONER OPERATION
..
HEATING
AIR-PULL -FAN-Pull this knob fully out and rotate the knob to obtain low, medium or high fan speed.
AIR COND- PULL -Keep this knob fully in.
COOL IN-HOT PULL-Vary this knob as required to regulate the air temperature. Fully out provides maximum output temperature.
DEF-Pull knob fully out for maximum defrosting.
COOLING AIR-PULL-FAN-Push knob fully in for re-circulation of inside air. Vary knob setting to provide a mixture of outside and recirculated air. Rotate the knob to obtain medium or high fan speed.
AIR COND-PULL-Pull this knob fully out. COOL IN -HOT PULL-Keep this knob fully in for maximum cooling. Output air temperature may be regulated b y pulling the knob as desired. DEF-Keep this knob fully in.
AIR CONDITIONER OPERATING
TIPS During the first few minutes of operation open a window to Jet out hot air, then close the window.
Rotate the three dash outlets to direct cooled air. Close center outlet by rotating the deflector all the way.
Close the side outlets by means
of the knobs below and several inches inboard of the outlets.
off knobs, to provide additional cooled ai.r for your feet.
For maximum cooling under extreme heat conditions, push AIR-PULL-FAN knob fully in.
For cooling under moderate temperatures, pull AIR·PULL· FAN knob out to detent.
For cooling under mild temperatures pull AIR·PULL·FAN Rotate covers, located about six inches inboard of the shut knob fully out.
RUN T!iE SYSTEM FOR FIVE MINUTES EVERY WEEK TO LUBR.JCATE SSALS AND MOVING PARTS.
Page 24 of 52
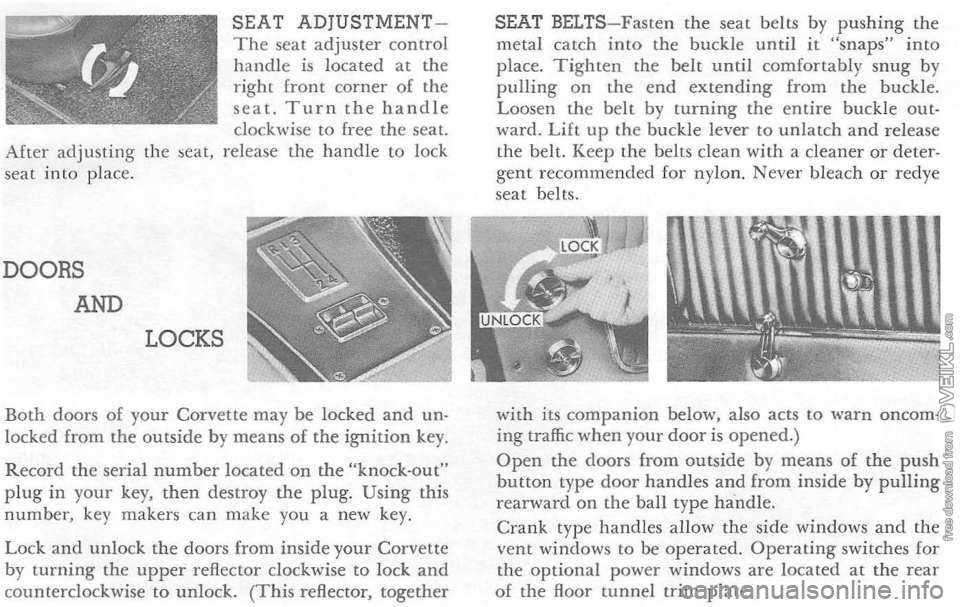
SEAT ADjUSTMENTThe seat adjuster control handle is located at the right front corner of the seat. Turn the handle clockwise to free the seat. After adjusting the seat, release the handle to lock
seat into place.
DOORS
AND
LOCKS
Both doors of your Corvette may be locked and un· locked from the outside by means of the ignition key.
Record the serial number located on the "knock·out" plug in your key, then destroy the plug. Using this number, key makers can make you a new key.
Lock and unlock the doors from inside your Corvette by turning the upper reflector clockwise to lock and counterclockwise to unlock. (This reflector, together
SEAT BELTS-Fasten the seat belts by pushing the metal catch into the buckle until it "snaps" into place. Tighten the belt until comfortably snug by pulling on the end extending from the buckle.
Loosen the belt by turning the entire buckle out· ward. Lift up the buckle lever to unlatch and release
the belt. Keep the belts clean with a cleaner or deter· gent recommended for nylon. Never bleach or redye
seat belts.
w
ith its companion below, also acts to warn oncoming traffic when your door is opened.) Open the doors from outside by means of the push bu tton type door handles and from inside by pulling rearward on the ball type handle .
Crank type handles allow the side windows and the vent windows to be operated. Operating switches for
the optional power windows are located at the rear o f the floor tunnel trim plate.
Page 30 of 52
HARD
TOP
CARE
The optional hard top has the same durable
acrylic lacquer finish as the other painted sur
[aces of your Corvette and may be cleaned, pol.
ished and waxed as previously outlined.
same manner as the rest of the interior.
When the tOP is not in use, it should be stored inside in a clean, dry place . 1£ it is to be stored
[or a long period of time keep it well covered to avoid a build up of dust and dirt on the painted surface or headlining. The interior headlining may be cleaned in the
PLASTIC
WINDOW
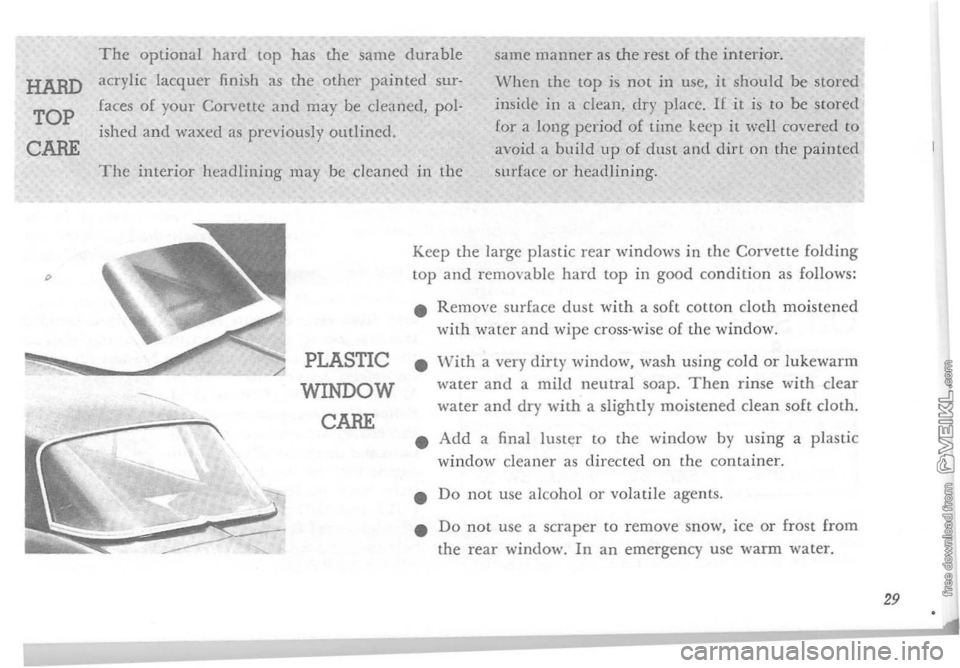
CARE Keep
the large
p lastic rear windows in the Corvette folding LOp and removable hard top in good condition as follows:
•
Remove surface dust with a soft cotton cloth moistened with water and wipe cross-wise of the window.
• \ ' Vith a very
dirty window, wash using cold or lukewarm water and a mild neutral soap. Then rinse with clear water and dry with a slightly moistened clean soft cloth.
•
Add a final IUSl~ r to t h e window by using a plastic window cleaner as directed on the container.
• Do not use alcoho l or volatile agents.
•
Do not use a scraper to remove snow. ice or frost from the rear window. In an emergency use warm water.
29
Page 40 of 52
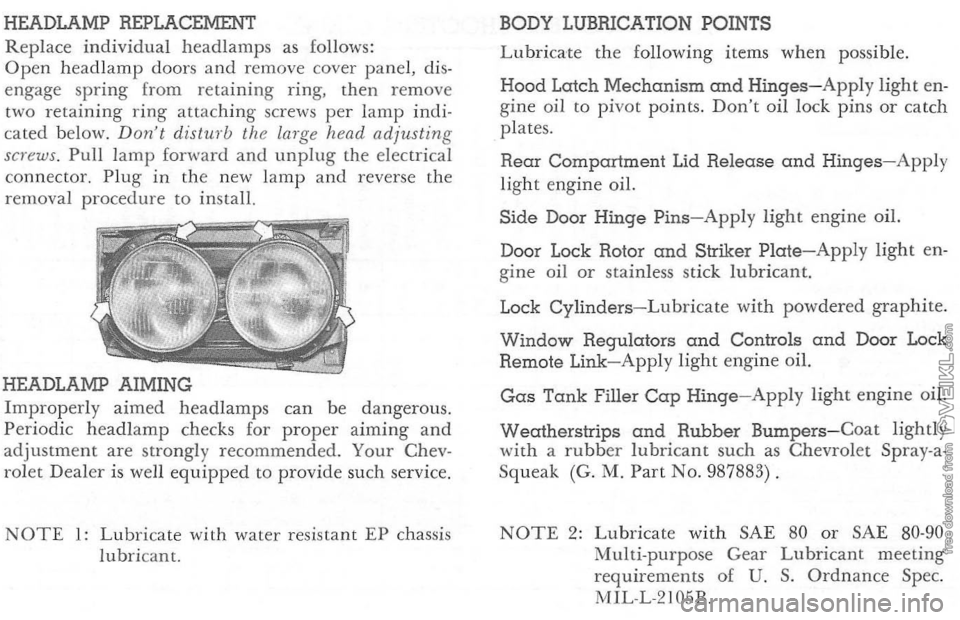
HEADLAMP REPLACEMENT
Replace individual head lamp s as follows:
Open head lamp doors and remove cover panel, dis
e n gage spring from retaining ring, then remove
two retai
ning ring attaching screws per lamp indi
cate d b elow. Don·t dist",·b the larg e head adjusting
screws . Pull lamp fanltard and unplug the electri cal
connector. Plug in the new l amp and reverse the
removal procedure to install.
HEADLAMP AIMING
Improperly aimed headlamps can be dangerous.
Periodic headlam p checks for proper aiming and adjustm en t are strongly recommend ed. Your Chev
rol et Dea l er is well equipped to provide such service.
NOTE 1: Lubricate with water resi stant EP chassis
lubri cant. BODY
LUBRICATION POINTS
L ubric ate the following items when possible.
Hood Latch Mechanism and Hinges-Apply light en
gine oil to pivot points. Don't oil lock pins or catch
plates.
Rear Compartment Lid Release and Hinges-Apply
light engine oil.
Side Door Hinge Pins-Apply light engine oil.
Door Lock Rotor
and Striker Plate-Apply light en
g ine oil or stai nles s stick lubric ant.
Lock
Cylinders-Lubricate wit h powdered graphite.
Window Regulators and Controls and Door Lock
Remote Link-Apply light engine oil.
Gas Tank Filler Cap Hinge-Apply light engine oil.
Wecdherstrips and Rubber Bumpers-Coat lightly
wit h a rubber lubricant such as Chevrolet Spray-a
Squeak (G. M. Part No. 987883) .
NOTE 2: Lubricate with SAE 80 or SAE 80-90 Multi-purp ose Gear Lubricant meeting
requirements of U. S. Ordnance Spec.
M1L-L-2105B.
Page 48 of 52
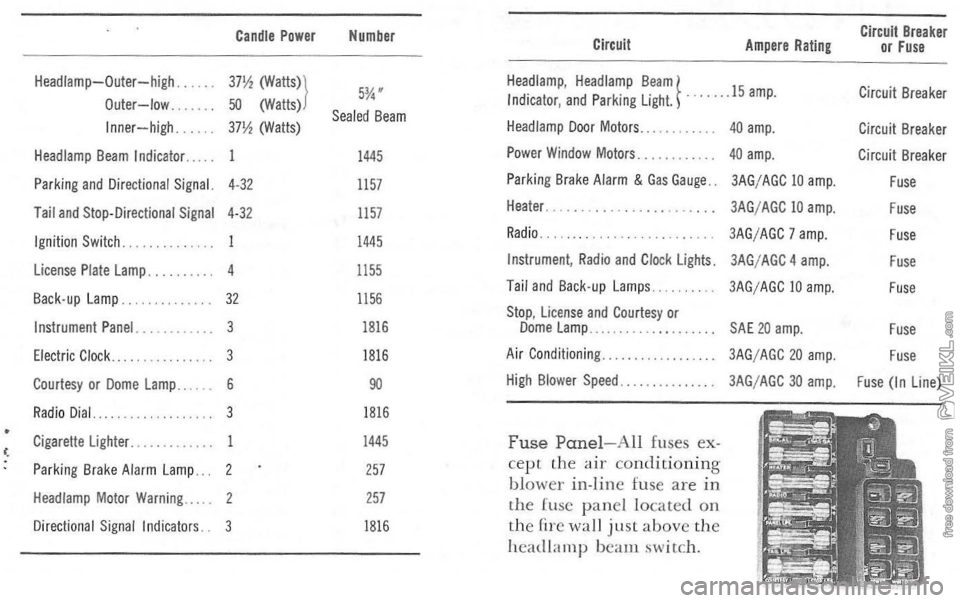
Candle Power Number Circuit Breaker Circuit Ampere Rating or Fuse
HeadJamp-Outer-high. 37\ (watts») 5%" Headlamp. Headlamp Beam} . ..... 15amp. Circuit Breaker Outer-low. 50 (Watts) Indicator. and Parking light. Sealed Beam Inner-high. 311l (Watts) Headlamp Door Motors . . 40 amp. Circuit Breaker Headlamp Beam Indicator ... 1445 Power Window Motors . . 40 amp. Circuit Breaker
Parking
and Directional Signal. 4·32 1157 Parking Brake Alarm & Gas Gauge .. 3AG/AGe 10 amp. Fuse
Tail and Stop-Directional Signal 4·32 1157 Heater .. 3AG/AGe 10 amp. Fuse
Ignition Switch. 1445 Radio. 3AG/AGe 7 amp. Fuse
license Plate lamp. 1155 Instrument, Radio and Clock Ughts. 3AG/AGe 4 amp. Fuse
Back-up lamp. 32 1156 Tail and Back-up lamps . . 3AG/AGe 10 amp. Fuse
Instrument Panel. Stop. license and Courtesy or 1816 Dome lamp .. SAE 20 amp. Fuse Electric Clock . . 1816 Air Conditioning ... 3AG/AGC 20 amp. Fuse Courtesy or Dome lamp ... 90 High Blower Speed 3AG/AGe 30 amp. Fuse (In line)
Radio Dial.. 1816
Cigarette lighter . . 1445 Fuse Panel- All fuses ex-Parking Brake Alarm lamp . . 257 cept the air conditioning b lower in-line fu se are in Headlamp Motor Warning . ... 257 lhe [usc pane l loca ted on Directional Signal Indicators. 1816 t h e {-ire wall just above the
head lamp bea m s witch.