2024 PEUGEOT 308 turn signal
[x] Cancel search: turn signalPage 103 of 280
101
Driving
6activation of the rechargeable hybrid system
(confirmed by an audible signal).
To exit Park mode, wait for the READY indicator lamp to come on.
By default, the system starts in Electric mode.
Depending on certain parameters (battery
charge level or outside temperature), the system
determines whether it is necessary to start the
petrol engine.
It is possible to change the driving mode at any
time using the mode selector.
When the vehicle starts in electric mode,
it makes no noise.
Pay particular attention to pedestrians and
cyclists who may not hear the vehicle coming
despite the pedestrian horn.
Switching off
► Deactivate cruise control alone or Drive
Assist Plus (depending on version).
►
Immobilise the vehicle using the parking
brake.
►
With a
manual gearbox, ideally put the gear
lever into neutral.
►
With an
automatic gearbox, ideally select
mode
P or N.
►
Press the
START/STOP button.
►
For rechargeable hybrid vehicles, before
leaving the vehicle, check that the READY
indicator lamp is switched off.
The automatic gearbox locks in mode P.
In some circumstances, it is necessary to turn
the steering wheel to lock the steering column.
If the vehicle is not immobilised, the
engine will not stop.
With the engine off, the braking and
steering assistance systems are also cut
off - risk of loss of control of the vehicle!
Never leave your vehicle with the
electronic key still inside.
Starting/Switching off
electric vehicles
Starting
The drive selector must be in mode P.
► Fully depress the brake pedal and briefly
press the
START/STOP button.
►
Keep the foot on the brake pedal until the
READY
indicator lamp comes on and an audible
signal is emitted, indicating that the vehicle is
ready to drive.
►
With the foot on the brake, select the
mode
D/B or R.
►
Release the brake pedal, then accelerate.
On starting, the instrument panel lights up and
the power indicator cursor moves to the "neutral"
position.
The steering column automatically
unlocks (you may hear a sound and feel the
steering wheel move).
Switching off
► Press the START/STOP button.
Before exiting the vehicle, check that:
–
The drive selector is in mode P
.
–
The READY indicator lamp is off.
If the driver's door is opened while the
required conditions for stopping are not
satisfied, an audible signal is emitted,
accompanied by the display of a warning
message.
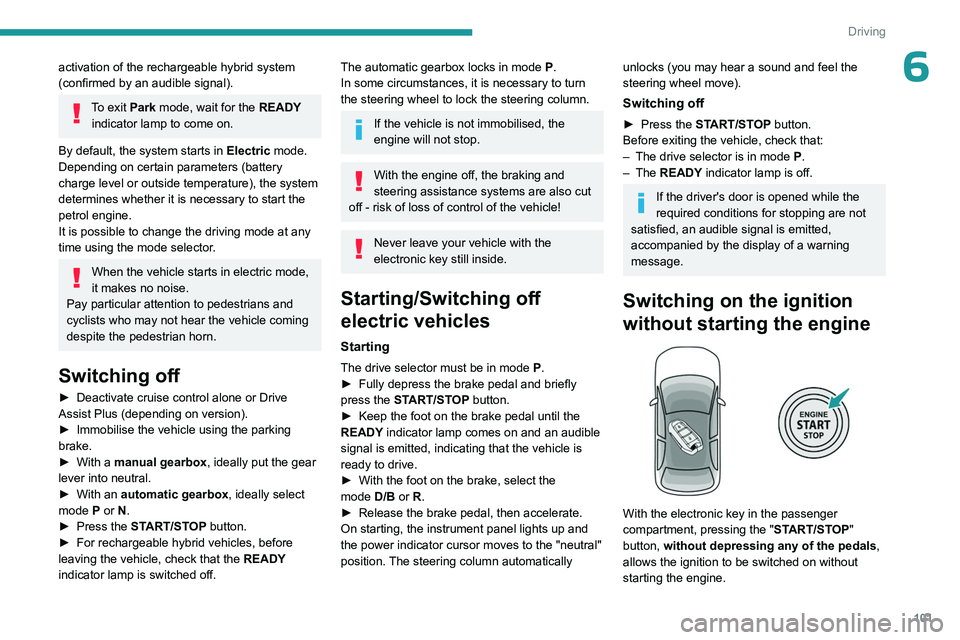
Switching on the ignition
without starting the engine
With the electronic key in the passenger
compartment, pressing the " START/STOP"
button, without depressing any of the pedals ,
allows the ignition to be switched on without
starting the engine.
Page 105 of 280
103
Driving
6The indicator lamp flashes in response to a
manual request to apply or release the brake.
In the event of a battery failure, the
electric parking brake will not operate.
As a safety measure, with a manual gearbox,
if the parking brake is not applied, immobilise
the vehicle by engaging a gear.
As a safety measure, with an automatic
gearbox or drive selector, if the parking brake
is not applied, immobilise the vehicle by
placing the supplied chock against one of the
wheels.
Contact a PEUGEOT dealer or a qualified
workshop.
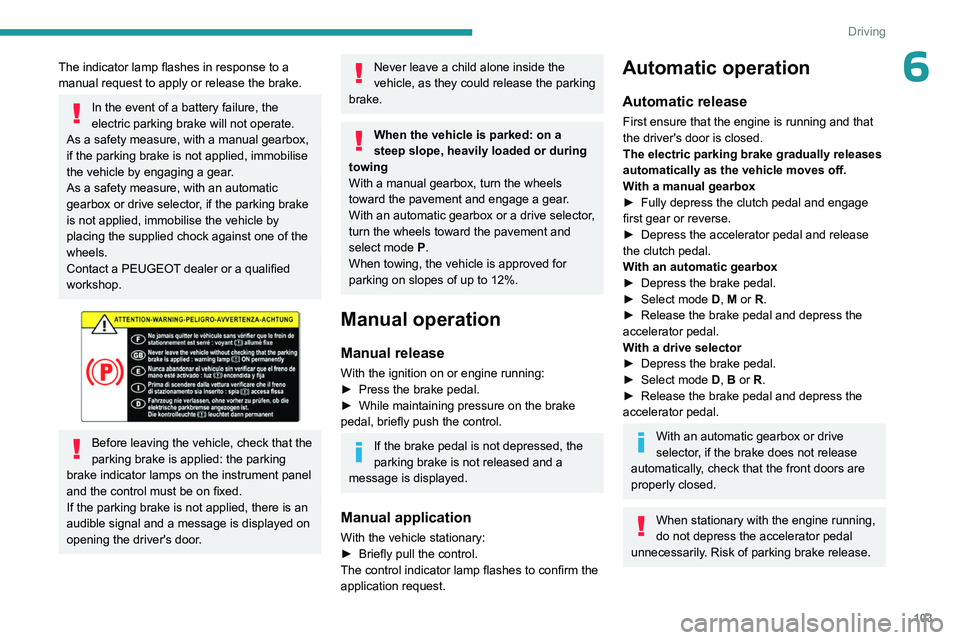
Before leaving the vehicle, check that the
parking brake is applied: the parking
brake indicator lamps on the instrument panel
and the control must be on fixed.
If the parking brake is not applied, there is an
audible signal and a message is displayed on
opening the driver's door.
Never leave a child alone inside the
vehicle, as they could release the parking
brake.
When the vehicle is parked: on a
steep slope, heavily loaded or during
towing
With a manual gearbox, turn the wheels
toward the pavement and engage a gear.
With an automatic gearbox or a drive selector,
turn the wheels toward the pavement and
select mode
P.
When towing, the vehicle is approved for
parking on slopes of up to 12%.
Manual operation
Manual release
With the ignition on or engine running:
► Press the brake pedal.
►
While maintaining pressure on the brake
pedal, briefly push the control.
If the brake pedal is not depressed, the
parking brake is not released and a
message is displayed.
Manual application
With the vehicle stationary:
► Briefly pull the control.
The control indicator lamp flashes to confirm the
application request.
Automatic operation
Automatic release
First ensure that the engine is running and that
the driver's door is closed.
The electric parking brake gradually releases
automatically as the vehicle moves off.
With a manual gearbox
►
Fully depress the clutch pedal and engage
first gear or reverse.
►
Depress the accelerator pedal and release
the clutch pedal.
W
ith an automatic gearbox
►
Depress the brake pedal.
►
Select mode
D, M or R.
►
Release the brake pedal and depress the
accelerator pedal.
W
ith a drive selector
►
Depress the brake pedal.
►
Select mode
D, B or R.
►
Release the brake pedal and depress the
accelerator pedal.
With an automatic gearbox or drive
selector, if the brake does not release
automatically, check that the front doors are
properly closed.
When stationary with the engine running,
do not depress the accelerator pedal
unnecessarily. Risk of parking brake release.
Page 108 of 280
106
Driving
Special cases
To avoid mode N (quick change from D to R and
back again):
►
In mode
R, push backwards past the point of
resistance, mode D is selected.
►
In mode
D, push forwards past the point of
resistance, mode R is selected.
►
T
o return to mode N, push without passing
the point of resistance.
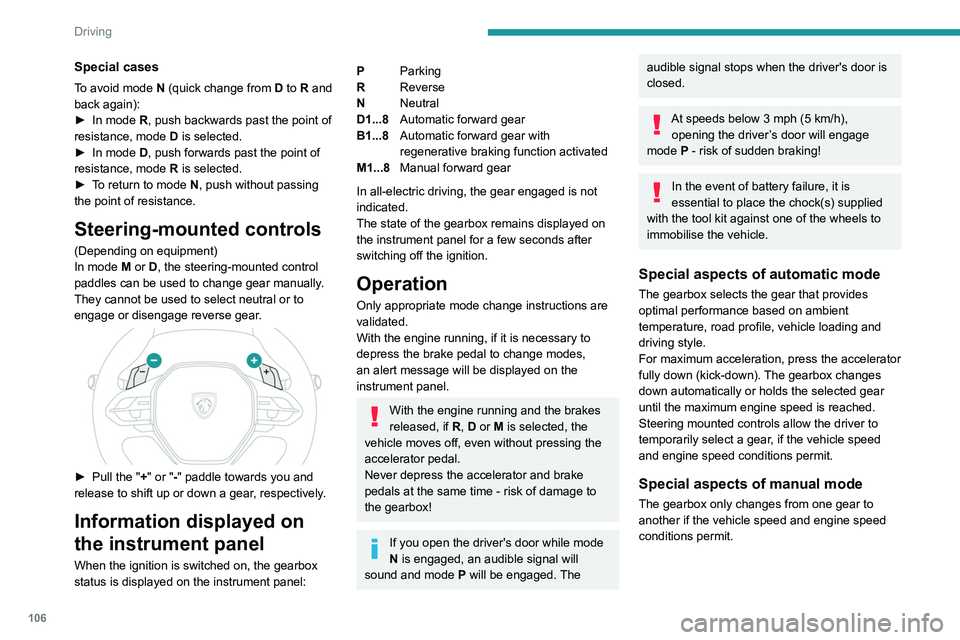
Steering-mounted controls
(Depending on equipment)
In mode M or D, the steering-mounted control
paddles can be used to change gear manually.
They cannot be used to select neutral or to
engage or disengage reverse gear.
► Pull the " +" or "-" paddle towards you and
release to shift up or down a gear, respectively.
Information displayed on
the instrument panel
When the ignition is switched on, the gearbox
status is displayed on the instrument panel:
P Parking
R Reverse
N Neutral
D1...8 Automatic forward gear
B1...8 Automatic forward gear with
regenerative braking function activated
M1...8 Manual forward gear
In all-electric driving, the gear engaged is not
indicated.
The state of the gearbox remains displayed on
the instrument panel for a few seconds after
switching off the ignition.
Operation
Only appropriate mode change instructions are
validated.
With the engine running, if it is necessary to
depress the brake pedal to change modes,
an alert message will be displayed on the
instrument panel.
With the engine running and the brakes
released, if R, D or M is selected, the
vehicle moves off, even without pressing the
accelerator pedal.
Never depress the accelerator and brake
pedals at the same time - risk of damage to
the gearbox!
If you open the driver's door while mode
N is engaged, an audible signal will
sound and mode P will be engaged. The
audible signal stops when the driver's door is
closed.
At speeds below 3 mph (5 km/h),
opening the driver ’s door will engage
mode P
- risk of sudden braking!
In the event of battery failure, it is
essential to place the chock(s) supplied
with the tool kit against one of the wheels to
immobilise the vehicle.
Special aspects of automatic mode
The gearbox selects the gear that provides
optimal performance based on ambient
temperature, road profile, vehicle loading and
driving style.
For maximum acceleration, press the accelerator
fully down (kick-down). The gearbox changes
down automatically or holds the selected gear
until the maximum engine speed is reached.
Steering mounted controls allow the driver to
temporarily select a gear, if the vehicle speed
and engine speed conditions permit.
Special aspects of manual mode
The gearbox only changes from one gear to
another if the vehicle speed and engine speed
conditions permit.
Page 111 of 280
109
Driving
6► To return to mode N, push without passing
the point of resistance.
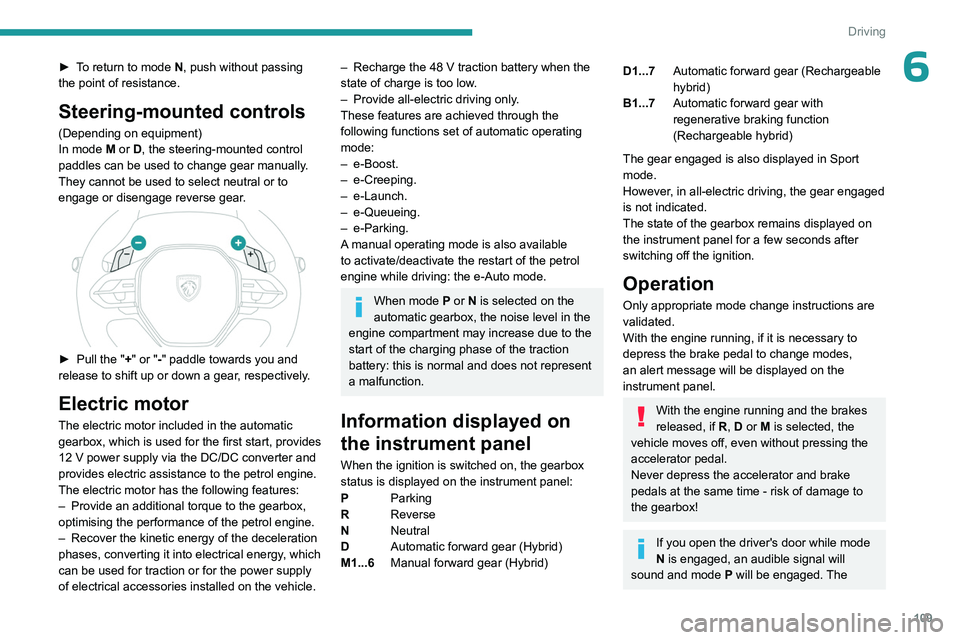
Steering-mounted controls
(Depending on equipment)
In mode M or D, the steering-mounted control
paddles can be used to change gear manually.
They cannot be used to select neutral or to
engage or disengage reverse gear.
► Pull the " +" or "-" paddle towards you and
release to shift up or down a gear, respectively.
Electric motor
The electric motor included in the automatic
gearbox, which is used for the first start, provides
12
V power supply via the DC/DC converter and
provides electric assistance to the petrol engine.
The electric motor has the following features:
–
Provide an additional torque to the gearbox,
optimising the performance of the petrol engine.
–
Recover the kinetic energy of the deceleration
phases, converting it into electrical energy
, which
can be used for traction or for the power supply
of electrical accessories installed on the vehicle.
– Recharge the 48 V traction battery when the
state of charge is too low.
–
Provide all-electric driving only
.
These features are achieved through the
following functions set of automatic operating
mode:
–
e-Boost.
–
e-Creeping.
–
e-Launch.
–
e-Queueing.
–
e-Parking.
A manual operating mode is also available
to activate/deactivate the restart of the petrol
engine while driving: the e-Auto mode.
When mode P or N is selected on the
automatic gearbox, the noise level in the
engine compartment may increase due to the
start of the charging phase of the traction
battery: this is normal and does not represent
a malfunction.
Information displayed on
the instrument panel
When the ignition is switched on, the gearbox
status is displayed on the instrument panel:
P Parking
R Reverse
N Neutral
D Automatic forward gear (Hybrid)
M1...6 Manual forward gear (Hybrid)
D1...7Automatic forward gear (Rechargeable
hybrid)
B1...7 Automatic forward gear with
regenerative braking function
(Rechargeable hybrid)
The gear engaged is also displayed in Sport
mode.
However, in all-electric driving, the gear engaged
is not indicated.
The state of the gearbox remains displayed on
the instrument panel for a few seconds after
switching off the ignition.
Operation
Only appropriate mode change instructions are
validated.
With the engine running, if it is necessary to
depress the brake pedal to change modes,
an alert message will be displayed on the
instrument panel.
With the engine running and the brakes
released, if R, D or M is selected, the
vehicle moves off, even without pressing the
accelerator pedal.
Never depress the accelerator and brake
pedals at the same time - risk of damage to
the gearbox!
If you open the driver's door while mode
N is engaged, an audible signal will
sound and mode P will be engaged. The
Page 124 of 280

122
Driving
► Press this button to return to the
previous page.
The functions to deactivate are saved in the
system.
Deactivation of these functions
► Press and hold this bu tton on
the dashboard.
All previously selected functions are deactivated
until the vehicle is next restarted (confirmed by
an audible signal).
Road signs recognition
For more information, refer to the
General recommendations on the use
of driving and manoeuvring aids .
This system displays the maximum speed
authorised locally on the instrument panel, using:
–
Speed limit signs detected by the camera.
–
Speed limit information from the on-board
navigation system’
s mapping. –
Speed limit information from the connected
services.
–
Signs indicating a shared traffic zone detected
by the camera.
Sign detected Suggested speed (calculated)
Entry into a shared traffic zoneExample:
Without PEUGEOT
i-Connect
Advanced
10 mph or 20
km/h
(depending on
the units on the
instrument panel) With PEUGEOT i-Connect
Advanced
Display of the speed
in force in the country you are driving in.
–
Some supplementary traffic signs detected by
the camera.
Supplementary
traffic sign detected Display of the
speed associated with the
supplementary traffic sign
Speed limit when raining
Examples:
If the wiper control stalk is in the
"intermittent wipe"
or "automatic wipe" position (in order
to activate the rain sensor):
68 mph (110
km/h)
(for example)
Speed limit when towing
If an approved towing device is fixed to the vehicle:
56 mph (90
km/h)
(for example)
Speed limit
applicable over a certain distance Example:
43 mph (70 km/h)
(for example)
Page 129 of 280
127
Driving
6Information displayed on
the instrument panel
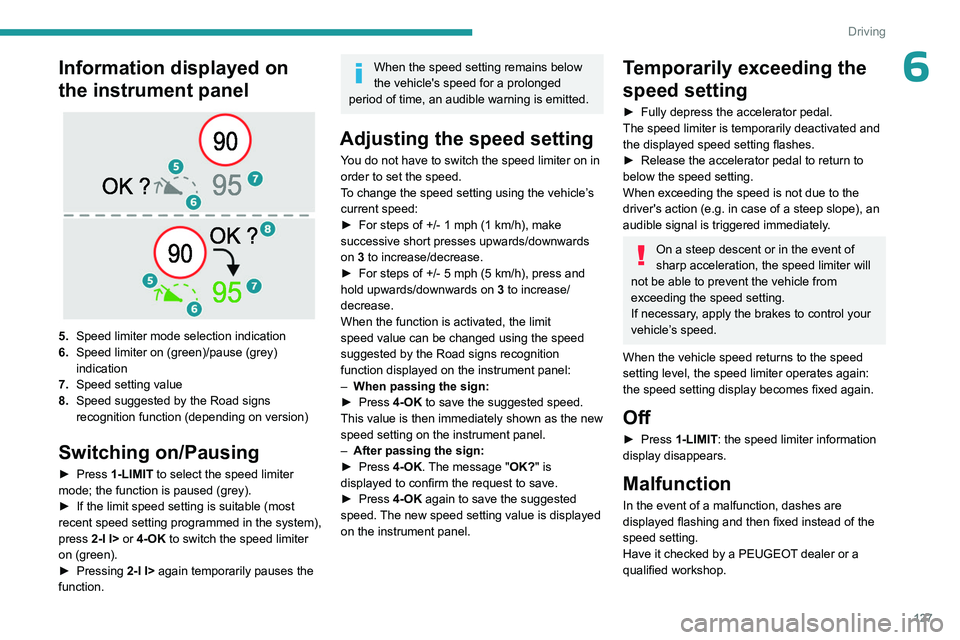
5.Speed limiter mode selection indication
6. Speed limiter on (green)/pause (grey)
indication
7. Speed setting value
8. Speed suggested by the Road signs
recognition function (depending on version)
Switching on/Pausing
► Press 1-LIMIT to select the speed limiter
mode; the function is paused (grey).
►
If the limit speed setting is suitable (most
recent speed setting programmed in the system),
press
2-I I> or 4-OK to switch the speed limiter
on (green).
►
Pressing
2-I I> again temporarily pauses the
function.
When the speed setting remains below
the vehicle's speed for a prolonged
period of time, an audible warning is emitted.
Adjusting the speed setting
You do not have to switch the speed limiter on in
order to set the speed.
To change the speed setting using the vehicle’s
current speed:
►
For steps of +/- 1 mph (1 km/h), make
successive short presses upwards/downwards
on
3 to increase/decrease.
►
For steps of +/- 5 mph (5
km/h), press and
hold upwards/downwards on 3 to increase/
decrease.
When the function is activated, the limit
speed value can be changed using the speed
suggested by the Road signs recognition
function displayed on the instrument panel:
–
When passing the sign:
►
Press
4-OK to save the suggested speed.
This value is then immediately shown as the new
speed setting on the instrument panel.
–
After passing the sign:
►
Press
4-OK. The message "OK?" is
displayed to confirm the request to save.
►
Press
4-OK again to save the suggested
speed. The new speed setting value is displayed
on the instrument panel.
Temporarily exceeding the
speed setting
► Fully depress the accelerator pedal.
The speed limiter is temporarily deactivated and
the displayed speed setting flashes.
►
Release the accelerator pedal to return to
below the speed setting.
When exceeding the speed is not due to the
driver's action (e.g.
in case of a steep slope), an
audible signal is triggered immediately.
On a steep descent or in the event of
sharp acceleration, the speed limiter will
not be able to prevent the vehicle from
exceeding the speed setting.
If necessary, apply the brakes to control your
vehicle’s speed.
When the vehicle speed returns to the speed
setting level, the speed limiter operates again:
the speed setting display becomes fixed again.
Off
► Press 1-LIMIT: the speed limiter information
display disappears.
Malfunction
In the event of a malfunction, dashes are
displayed flashing and then fixed instead of the
speed setting.
Have it checked by a PEUGEOT dealer or a
qualified workshop.
Page 142 of 280
140
Driving
The driver must hold the steering wheel correctly.
As soon as the semi-automatic lane change
begins, the system directs the vehicle to the
target lane by small actions on the steering to
position it in the destination lane.
You can feel the steering wheel moving.
Interrupting the lane change
It is possible that while changing lane, the
necessary conditions for the operation of the
system
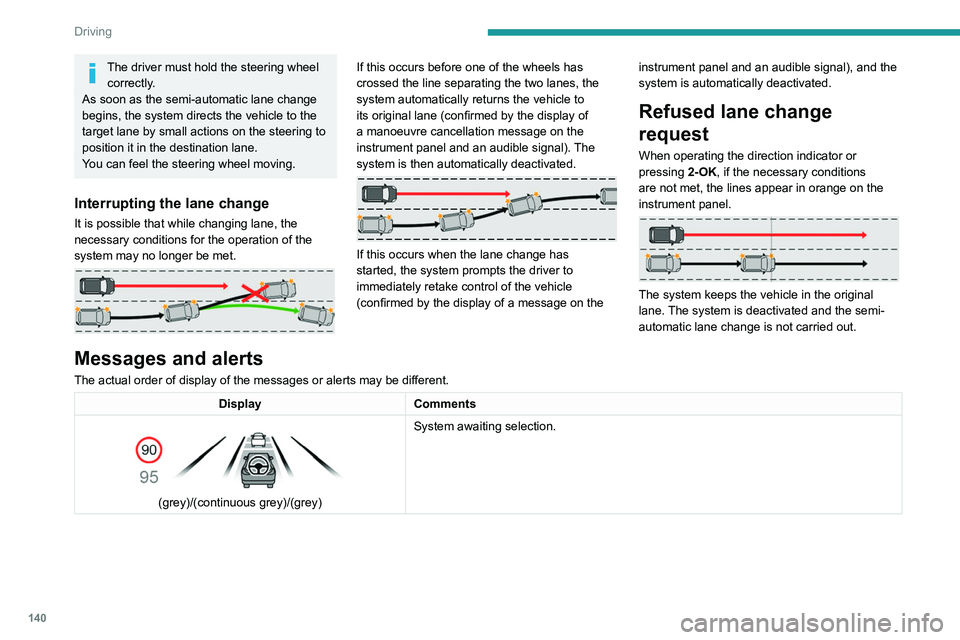
may no longer be met.
If this occurs before one of the wheels has
crossed the line separating the two lanes, the
system automatically returns the vehicle to
its original lane (confirmed by the display of
a manoeuvre cancellation message on the
instrument panel and an audible signal). The
system is then automatically deactivated.
If this occurs when the lane change has
started, the system prompts the driver to
immediately retake control of the vehicle
(confirmed by the display of a message on the instrument panel and an audible signal), and the
system is automatically deactivated.
Refused lane change
request
When operating the direction indicator or
pressing
2-OK, if the necessary conditions
are not met, the lines appear in orange on the
instrument panel.
The system keeps the vehicle in the original
lane. The system is deactivated and the semi-
automatic lane change is not carried out.
Messages and alerts
The actual order of display of the messages or alerts may be different.
Display Comments
(grey)/(continuous grey)/(grey) System awaiting selection.
Page 193 of 280

191
Practical information
7Brake fluid
The level of this fluid should be close to the "MAX" mark. If not, check the brake
pads for wear.
To know how often the brake fluid should be
replaced, refer to the manufacturer's servicing
schedule.
Clean the cap before removing it to refill.
Use only DOT4 brake fluid from a sealed
container.
Engine coolant
For petrol, Diesel, hybrid or rechargeable
hybrid versions
It is normal to top up this fluid between
two services.
The check and top-up must only be done with
the engine cold.
A level of coolant that is too low risks causing
major damage to the engine; the coolant level
must be close to the "MAX" mark without ever
going above it.
If the level is close to or below the " MIN" mark, it
is essential to top it up.
When the engine is hot, the temperature of the
coolant is regulated by the fan.
As the cooling system is pressurised, wait at
least one hour after switching off the engine
before carrying out any work.
In order to avoid the risk of scalding if you need
to top up in an emergency, wrap a cloth around
the cap and unscrew the cap by two turns to
allow the pressure to drop.
Once the pressure has dropped, remove the cap
and top up to the required level.
For electric versionsDo not top up the coolant.
If the level is close to or below
the "MIN" mark, it is essential to contact a
PEUGEOT dealer or a qualified workshop.
Screenwash fluid
Top up to the required level when necessary.
Fluid specification
The fluid must be topped up with a pre-mixed
product.
In winter (temperatures below zero), a fluid
containing an anti-freeze agent which is
appropriate for the temperature conditions
must be used in order to protect the system's
components (pump, tank, ducts, jets).
Filling with pure water is prohibited in all
circumstances (risk of freezing,
limescale, etc.).
Diesel fuel additive (Diesel
with particle filter)
On reaching the minimum level in the
particle filter additive tank, this warning
lamp comes on fixed, accompanied by an
audible signal and a warning message.
Topping up
The topping up of this additive must be carried
out quickly.
Go to a PEUGEOT dealer or a qualified
workshop.
AdBlue® (BlueHDi)
An alert is triggered when the reserve level is
reached.
For more information on the Indicators and in
particular the AdBlue range indicators, refer to
the corresponding section.
To avoid the vehicle being immobilised in
accordance with regulations, you must top up the
AdBlue tank.
For more information on AdBlue
® (BlueHDi),
and in particular the supply of AdBlue, refer to
the corresponding section.
Checks
Unless otherwise indicated, check these
components in accordance with the
Manufacturer's service schedule and according
to your engine.