2024 GMC SIERRA fuel cap
[x] Cancel search: fuel capPage 119 of 440

GMC Sierra/Sierra Denali 2500 HD/3500 HD Owner Manual (GMNA-
Localizing-U.S./Canada-16908340) - 2024 - CRC - 12/15/22
Instruments and Controls 117
The fuel gauge may:
.Take a little more, or less fuel to fill up
than it indicates. For example, the gauge
may have indicated the tank is half full,
but it actually takes a little more, or less
than half the tank's capacity to fill
the tank.
.Moves a little while turning a corner,
speeding up, or braking.
.Takes a few seconds to stabilize after the
ignition is turned on and goes back to
empty when the ignition is turned off.
These are normal conditions, none of which
indicate a problem with the fuel gauge.
Fuel Range
The uplevel instrument cluster has a
estimated fuel range located in the bottom
center of the display. The fuel range is
displayed with the approximate distance the
vehicle can be driven without refueling. The
fuel range estimate is based on an average
of the vehicle’s fuel economy over recent
driving history and the amount of fuel
remaining in the fuel tank.
When the estimated fuel range is low, the
range shows LOW and a message may also
display in the Driver Information
Center (DIC).
Engine Oil Pressure Gauge
Metric Base Level
English Base Level
Metric Uplevel
English Uplevel
The engine oil pressure gauge shows the
engine oil pressure in kPa (kilopascals)
or psi (pounds per square inch) when the
engine is running.
Oil pressure can vary with engine speed,
outside temperature, coolant temperature,
and oil viscosity.
On some models, the oil pump will vary
engine oil pressure according to engine
needs. Oil pressure may change quickly as
the engine speed or load varies. This is
normal. If the oil pressure warning light or
Driver Information Center (DIC) message
Page 125 of 440
GMC Sierra/Sierra Denali 2500 HD/3500 HD Owner Manual (GMNA-
Localizing-U.S./Canada-16908340) - 2024 - CRC - 12/15/22
Instruments and Controls 123
Caution
If the vehicle is driven continually with
this light on, the emission control system
may not work as well, the fuel economy
may be lower, and the vehicle may not
run smoothly. This could lead to costly
repairs that might not be covered by the
vehicle warranty.
Caution
Modifications to the engine, transmission,
exhaust, intake, or fuel system, or the
use of replacement tires that do not
meet the original tire specifications, can
cause this light to come on. This could
lead to costly repairs not covered by the
vehicle warranty. This could also affect
the vehicle’s ability to pass an Emissions
Inspection/Maintenance test. See
Accessories and Modifications0310.
If the light is flashing : A malfunction has
been detected that could damage the
emission control system and increase vehicle
emissions. Diagnosis and service may be
required. To help prevent damage, reduce vehicle
speed and avoid hard accelerations and
uphill grades. If towing a trailer, reduce the
amount of cargo being hauled as soon as
possible.
If the light continues to flash, find a safe
place to park. Turn the vehicle off and wait
at least 10 seconds before restarting the
engine. If the light is still flashing, follow
the previous guidelines and see your dealer
for service as soon as possible.
If the light is on steady :
A malfunction has
been detected. Diagnosis and service may be
required.
Check the following:
.If fuel has been added to the vehicle
using the capless funnel adapter, make
sure that it has been removed. See
“Filling the Tank with a Portable Gas Can”
under Filling the Tank (Chassis Cab and
Box Delete Models) 0275 or
Filling the Tank (Pickup Models) 0273.
The diagnostic system can detect if the
adapter has been left installed in the
vehicle, allowing fuel to evaporate into
the atmosphere. A few driving trips with
the adapter removed may turn off the
light.
.Poor fuel quality can cause inefficient
engine operation and poor driveability,
which may go away once the engine is
warmed up. If this occurs, change the fuel
brand. It may require at least one full
tank of the proper fuel to turn the light
off. See Recommended Fuel 0272.
If the light remains on, see your dealer.
Emissions Inspection and Maintenance
Programs
If the vehicle requires an Emissions
Inspection/Maintenance test, the test
equipment will likely connect to the
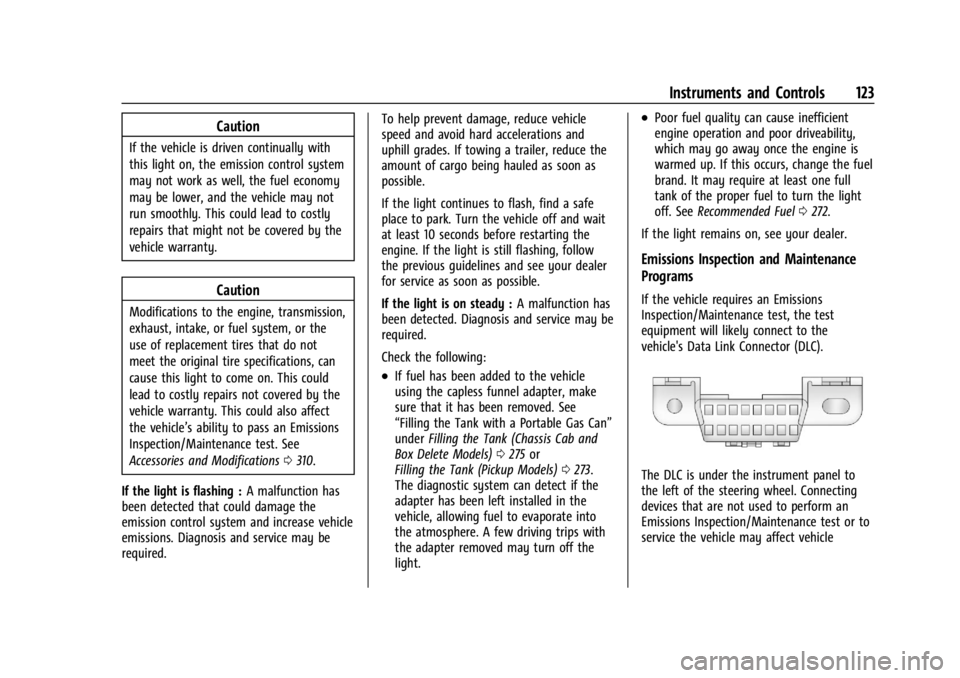
vehicle's Data Link Connector (DLC).
The DLC is under the instrument panel to
the left of the steering wheel. Connecting
devices that are not used to perform an
Emissions Inspection/Maintenance test or to
service the vehicle may affect vehicle
Page 218 of 440
GMC Sierra/Sierra Denali 2500 HD/3500 HD Owner Manual (GMNA-
Localizing-U.S./Canada-16908340) - 2024 - CRC - 12/13/22
216 Driving and Operating
See“Certification/Tire Label” under
Vehicle Load Limits 0210. If weight
ratings are exceeded, move or remove
items to bring all weights below the
ratings.
See your dealer for more information
on curb weights, cargo weights, Cargo
Weight Rating, and the correct center of
gravity zone.
Starting and Operating
New Vehicle Break-In
Caution
During the first 800 km (500 mi) of
driving this vehicle, overall performance
will benefit by following these break-in
period recommendations:
.Avoid full throttle starts and abrupt
stops.
(Continued)
Caution (Continued)
.Avoid exceeding the following engine
speeds when accelerating or
downshifting to slow or brake the
vehicle:
Gasoline engines: 4000 rpm
Diesel engines: 3000 rpm
.Avoid making hard stops for the first
300 km (200 mi). Hard stops with new
brake linings can result in premature
wear and earlier replacement. Follow
this guideline every time brake linings
are replaced.
.Do not tow a trailer. See Trailer
Towing 0280 for the trailer towing
capabilities of the vehicle and more
information.
After the break-in period, the engine
speed and load can be gradually
increased.
On new vehicles, the various mechanical and
electrical systems adjust during the first
6,400 km (4,000 miles) of routine driving to
provide optimal fuel economy and
transmission shift performance. Electrical systems will adapt and calibrate
during the break-in period. A one-time
occurrence of clicks and similar vehicle
noises is normal during this process.
Normal driving charges the vehicle battery
to achieve the best operation of the vehicle.
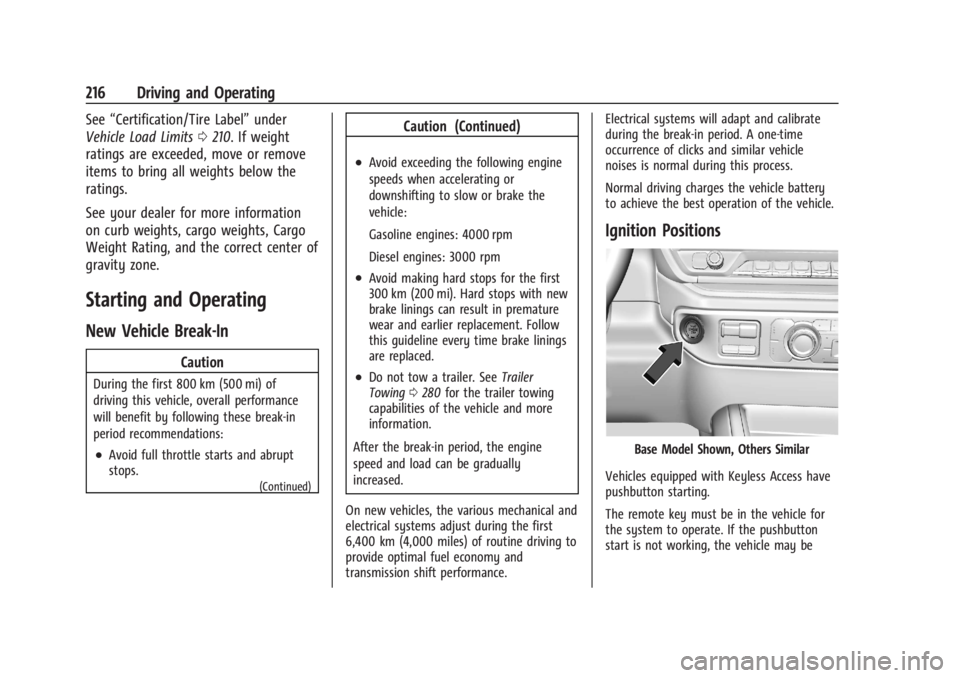
Ignition Positions
Base Model Shown, Others Similar
Vehicles equipped with Keyless Access have
pushbutton starting.
The remote key must be in the vehicle for
the system to operate. If the pushbutton
start is not working, the vehicle may be
Page 276 of 440

GMC Sierra/Sierra Denali 2500 HD/3500 HD Owner Manual (GMNA-
Localizing-U.S./Canada-16908340) - 2024 - CRC - 12/13/22
274 Driving and Operating
Warning (Continued)
.Keep children away from the fuel
pump and never let children
pump fuel.
.Before touching the fill nozzle, touch a
metallic object to discharge static
electricity from your body.
.Fuel can spray out if the fill nozzle is
inserted too quickly. This spray can
happen if the tank is nearly full, and is
more likely in hot weather. Insert the
fill nozzle slowly and wait for any hiss
noise to stop before beginning to
flow fuel.
The capless refueling system does not have
a fuel cap. Fully insert and latch the fill
nozzle, begin fueling.
{Warning
Overfilling the fuel tank by more than
three clicks of a standard fill nozzle may
cause:
.Vehicle performance issues, including
engine stalling and damage to the fuel
system.
.Fuel spills.
.Under certain conditions, fuel fires.
Be careful not to spill fuel. Wait five seconds
after you have finished pumping before
removing the fill nozzle. Clean fuel from
painted surfaces as soon as possible. See
Exterior Care 0383. Push the fuel door
closed.
{Warning
If a fire starts while you are refueling, do
not remove the fill nozzle. Shut off the
flow of fuel by shutting off the pump or
by notifying the station attendant. Leave
the area immediately. Filling the Tank with a Portable Fuel
Container
If the vehicle runs out of fuel and must be
filled from a portable fuel container:
1. Locate the capless funnel adapter.
2. Insert and latch the funnel into the
capless fuel system.
{Warning
Attempting to refuel from a portable fuel
container without using the funnel
adapter may cause fuel spillage and
damage the capless fuel system. This
could cause a fire. You or others could be
badly burned and the vehicle could be
damaged.
3. Remove and clean the funnel adapter and return it to the storage location.
Page 277 of 440
GMC Sierra/Sierra Denali 2500 HD/3500 HD Owner Manual (GMNA-
Localizing-U.S./Canada-16908340) - 2024 - CRC - 12/13/22
Driving and Operating 275
Filling the Tank (Chassis Cab and
Box Delete Models)
If the vehicle has a diesel engine, see the
Duramax diesel supplement.
An arrow on the fuel gauge indicates which
side of the vehicle the fuel fill is on. See
Fuel Gauge0116.
{Warning
Fuel vapors and fuel fires burn violently
and can cause injury or death.
Follow these guidelines to help avoid
injuries to you and others:
.Read and follow all the instructions on
the fuel pump island.
.Turn off the engine when refueling.
.Keep sparks, flames, and smoking
materials away from fuel.
.Do not leave the fuel pump
unattended.
.Avoid using electronic devices while
refueling.
.Do not re-enter the vehicle while
pumping fuel.
(Continued)
Warning (Continued)
.Keep children away from the fuel
pump and never let children
pump fuel.
.Before touching the fill nozzle, touch a
metallic object to discharge static
electricity from your body.
.Fuel can spray out if the fuel cap is
opened too quickly. This spray can
happen if the tank is nearly full, and is
more likely in hot weather. Open the
fuel cap slowly and wait for any hiss
noise to stop, then unscrew the cap all
the way.
Turn the fuel cap counterclockwise to
remove. Fully insert and latch the fill nozzle,
begin fueling. For models with dual fuel
tanks, the fuel gauge shows an average of
both tanks. When refueling, refuel the
primary front tank first, then add fuel to the
auxiliary rear tank.
{Warning
Overfilling the fuel tank by more than
three clicks of a standard fill nozzle may
cause:
.Vehicle performance issues, including
engine stalling and damage to the fuel
system.
.Fuel spills.
.Under certain conditions, fuel fires.
Be careful not to spill fuel. Wait five seconds
after you have finished pumping before
removing the fill nozzle. Clean fuel from
painted surfaces as soon as possible. See
Exterior Care 0383. Reinstall the cap by
turning it clockwise until it clicks.
{Warning
If a fire starts while you are refueling, do
not remove the fill nozzle. Shut off the
flow of fuel by shutting off the pump or
by notifying the station attendant. Leave
the area immediately.
Page 278 of 440

GMC Sierra/Sierra Denali 2500 HD/3500 HD Owner Manual (GMNA-
Localizing-U.S./Canada-16908340) - 2024 - CRC - 12/13/22
276 Driving and Operating
Caution
If a new fuel cap is needed, get the right
type of cap from your dealer. The wrong
type of fuel cap may not fit properly,
may turn on the malfunction indicator
lamp, and could damage the fuel system
and emissions system. SeeMalfunction
Indicator Lamp (Check Engine Light) 0122.
Filling a Portable Fuel Container
{Warning
Never fill a portable fuel container while
it is in the vehicle. Static electricity
discharge from the container can ignite
the fuel vapor. You or others could be
badly burned and the vehicle could be
damaged. To help avoid injury to you
and others:
.Dispense fuel only into approved
containers.
.Do not fill a container while it is
inside a vehicle, in a vehicle's trunk, in
a pickup bed, or on any surface other
than the ground.
(Continued)
Warning (Continued)
.Bring the fill nozzle in contact with
the inside of the fill opening before
operating the nozzle. Maintain contact
until filling is complete.
.Keep sparks, flames, and smoking
materials away from fuel.
.Avoid using electronic devices while
pumping fuel.
.When transporting a fuel container or
other material that can catch fire in
the truck bed, secure the container to
prevent spills.
Trailer Towing
General Towing Information
Only use towing equipment that has been
designed for the vehicle. Contact your dealer
or trailering dealer for assistance with
preparing the vehicle to tow a trailer. Read
the entire section before towing a trailer.
To tow a disabled vehicle, see Transporting
a Disabled Vehicle 0379. To tow the vehicle
behind another vehicle such as a motor
home, see Recreational Vehicle Towing
0 380.
Driving Characteristics and
Towing Tips
{Warning
You can lose control when towing a
trailer if the correct equipment is not
used or the vehicle is not driven properly.
For example, if the trailer is too heavy or
the trailer brakes are inadequate for the
load, the vehicle may not stop as
expected. You and others could be
seriously injured. The vehicle may also be
damaged, and the repairs would not be
covered by the vehicle warranty. Pull a
trailer only if all the steps in this section
have been followed. Ask your dealer for
advice and information about towing a
trailer with the vehicle.
Driving with a Trailer
Trailering is different than just driving the
vehicle by itself. Trailering affects handling,
acceleration, braking, and durability.
Successful and safe trailering requires proper
use of the correct equipment.
Page 283 of 440
GMC Sierra/Sierra Denali 2500 HD/3500 HD Owner Manual (GMNA-
Localizing-U.S./Canada-16908340) - 2024 - CRC - 12/13/22
Driving and Operating 281
Trailer Weight
{Warning
Never exceed the towing capacity for
your vehicle.
Safe trailering requires monitoring the
weight, speed, altitude, road grades, outside
temperature, and how frequently the vehicle
is used to tow a trailer.
Trailer Weight Ratings
When towing a trailer, the combined weight
of the vehicle, vehicle contents, trailer, and
trailer contents must be below all of the
maximum weight ratings for the vehicle,
including:
.Gross Combined Weight Rating (GCWR)
.Gross Vehicle Weight Rating (GVWR)
.Maximum Trailer Weight Rating
.Gross Axle Weight Rating-Rear (GAWR-RR)
.Maximum Trailer Tongue Weight Rating
See “Weight-Distributing Hitch and
Adjustment” underTowing Equipment 0284
to determine if equalizer bars are required
to obtain the maximum trailer weight
rating. See
“Trailer Brakes” underTowing
Equipment 0284 to determine if brakes are
required based on the trailer weight.
The only way to be sure the weight is not
exceeding any of these ratings is to weigh
the tow vehicle and trailer combination,
fully loaded for the trip, getting individual
weights for each of these items.
A trailering information label on the B-pillar
shows tow rating information for the
vehicle.
{Warning
You and others could be seriously injured
or killed if the trailer is too heavy or the
trailer brakes are inadequate for the load.
The vehicle may be damaged, and the
repairs would not be covered by the
vehicle warranty.
Only tow a trailer if all the steps in this
section have been followed. Ask your
dealer for advice and information about
towing a trailer.
Gross Combined Weight Rating (GCWR)
GCWR is the total allowable weight of the
completely loaded vehicle and trailer
including any fuel, passengers, cargo,
equipment, and accessories. Do not exceed
the GCWR for your vehicle. The GCWR for
the vehicle is on the Trailering Information
Label.
To check that the weight of the vehicle and
trailer are within the GCWR for the vehicle,
follow these steps:
1. Start with the "curb weight" from the Trailering Information Label.
2. Add the weight of the trailer loaded with cargo and ready for the trip.
3. Add the weight of all passengers.
4. Add the weight of all cargo in the vehicle.
5. Add the weight of hitch hardware such as a draw bar, ball, load equalizer bars,
or sway bars.
6. Add the weight of any accessories or aftermarket equipment added to the
vehicle.
The resulting weight cannot exceed the
GCWR value on the Trailering Information
Label.
Page 309 of 440
GMC Sierra/Sierra Denali 2500 HD/3500 HD Owner Manual (GMNA-
Localizing-U.S./Canada-16908340) - 2024 - CRC - 12/13/22
Driving and Operating 307
The plow the vehicle can carry depends on
many things, such as:
.The options the vehicle came with, and
the weight of those options.
.The weight and number of passengers to
be carried.
.The weight of items added to the vehicle,
like a tool box or truck cap.
.The total weight of any additional cargo
to be carried.
To safely carry a snow plow on the vehicle:
.With a snow plow attached, the engine
coolant temperature gauge may show a
higher temperature than while driving
without one. The snow plow could block
the airflow to the radiator. This could be
more noticeable as vehicle speed
increases. At speeds above 72 km/h
(45 mph), this may cause the engine
coolant to overheat. Move or angle the
snow plow blade to allow increased
airflow to the radiator.
.To increase the airflow, move the snow
plow blade position.
.If driving more than 24 km/h (15 mph),
angle the plow blade position.
.Make sure the weight on the front and
rear axles does not exceed the axle rating
for each.
.Follow the snowplow manufacturer’s
recommendations for any rear ballast that
may be required. Rear ballast may be
required to ensure a proper front and rear
weight distribution ratio even though the
actual weight at the front axle may be
less than the front axle rating.
.The snowplow manufacturer or installer
can assist in determining the amount of
rear ballast required to ensure that the
vehicle with the attached snowplow does
not exceed the GVW rating, the front and
rear axle ratings, or the front and rear
weight distribution ratio (refer to the GM
Upfitter Manual).
Front axle reserve capacity is the difference
between the Front Gross Axle Weight
Rating (GAWR) and the front axle weight of
the vehicle with full fuel, passengers, and
any other cargo. This is the amount of
weight that can be added to the front axle
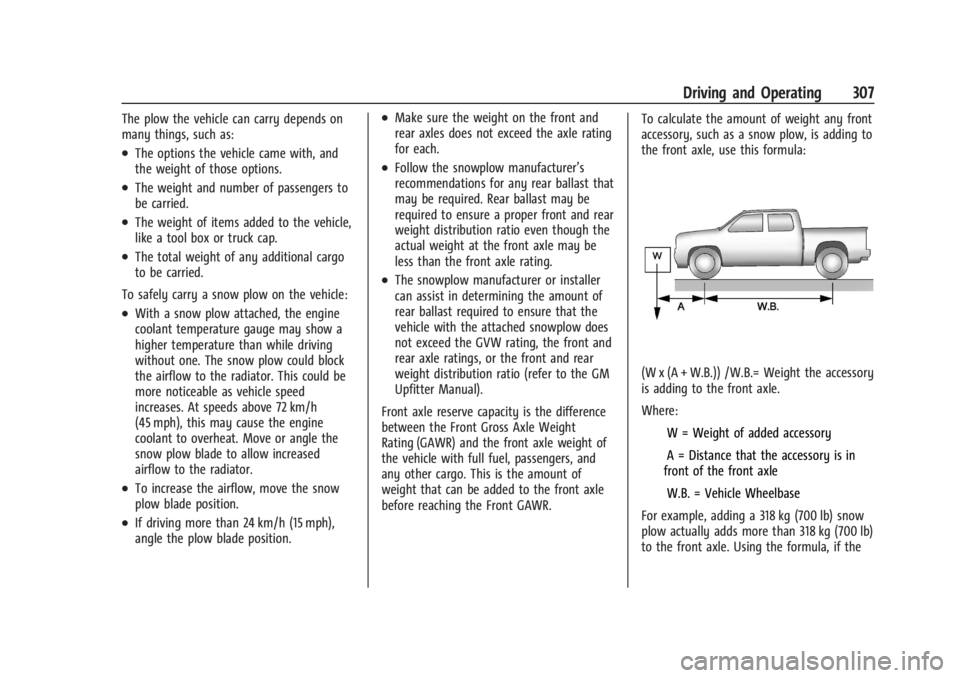
before reaching the Front GAWR. To calculate the amount of weight any front
accessory, such as a snow plow, is adding to
the front axle, use this formula:
(W x (A + W.B.)) /W.B.= Weight the accessory
is adding to the front axle.
Where:
IW = Weight of added accessory
IA = Distance that the accessory is in
front of the front axle
IW.B. = Vehicle Wheelbase
For example, adding a 318 kg (700 lb) snow
plow actually adds more than 318 kg (700 lb)
to the front axle. Using the formula, if the