2024 GMC SIERRA DENALI ad blue
[x] Cancel search: ad bluePage 246 of 440
GMC Sierra/Sierra Denali 2500 HD/3500 HD Owner Manual (GMNA-
Localizing-U.S./Canada-16908340) - 2024 - CRC - 12/13/22
244 Driving and Operating
ACC can also be set while the vehicle is
stopped if ACC is on and the brake pedal is
applied.
The ACC indicator displays in the instrument
cluster and Head-Up Display (HUD),
if equipped. When ACC is turned on, the
indicator will be lit white. When the ACC is
active, the indicator turns green.
Be mindful of speed limits, surrounding
traffic speeds, and weather conditions when
selecting the set speed.
Resuming a Set Speed
If the ACC is set at a desired speed and then
the brakes are applied, ACC is disengaged
without erasing the set speed from memory.
To begin using ACC again, press RES+ up
briefly.
.If the vehicle is moving more than 5 km/h
(3 mph), it returns to the previous set
speed.
.If the vehicle is stopped with the brake
pedal applied, press RES+ and release the
brake pedal. ACC will hold the vehicle
until RES+ or the accelerator pedal is
pressed.A green ACC indicator and the set speed
display on the instrument cluster. The
vehicle ahead indicator may be flashing if a
vehicle ahead was present and moved. See
“Approaching and Following a Vehicle”
later
in this section.
Once ACC has resumed, the vehicle speed
will increase to the set speed under the
following conditions:
.There is no vehicle ahead.
.The vehicle ahead is beyond the selected
following gap.
.The vehicle speed is not being limited
because of a sharp turn.
Increasing Speed While ACC Is at a Set Speed
If ACC is already activated, do one of the
following:
.Use the accelerator to get to the higher
speed. Press SET–. Release SET– and the
accelerator pedal. The vehicle will now
cruise at the higher speed.
When the accelerator pedal is pressed,
ACC will not brake because it is
overridden. The ACC indicator will turn
blue on the instrument cluster and HUD,
if equipped.
.Press and hold RES+ until the desired set
speed is displayed, then release it.
.To increase vehicle speed in smaller
increments, press RES+ briefly. For each
press, the vehicle goes about 1 km/h
(1 mph) faster.
.To increase vehicle speed in larger
increments, hold RES+. While holding
RES+, the vehicle speed increases to the
next 5 km/h (5 mph) step, then continues
to increase by 5 km/h (5 mph) at a time.
The set speed can also be increased while
the vehicle is stopped.
.If stopped with the brake pedal applied,
press RES+ until the desired set speed is
displayed.
.If ACC is holding the vehicle at a stop and
there is another vehicle directly ahead,
pressing RES+ will increase the set speed.
.Pressing RES+ when there is no longer a
vehicle ahead or the vehicle ahead is
pulling away and the brake is not applied
with cause the ACC to resume.
When it is determined that there is no
vehicle ahead or the vehicle ahead is beyond
the selected following gap, then the vehicle
speed will increase to the set speed.
Page 251 of 440
GMC Sierra/Sierra Denali 2500 HD/3500 HD Owner Manual (GMNA-
Localizing-U.S./Canada-16908340) - 2024 - CRC - 12/13/22
Driving and Operating 249
{Warning
If ACC has stopped the vehicle, and if ACC
is disengaged, turned off, or canceled, the
vehicle will no longer be held at a stop.
The vehicle can move. When ACC is
holding the vehicle at a stop, always be
prepared to manually apply the brakes.
{Warning
Leaving the vehicle without placing it in
P (Park) can be dangerous. Do not leave
the vehicle while it is being held at a
stop by ACC. Always place the vehicle in
P (Park) and turn off the ignition before
leaving the vehicle.
ACC Override
If using the accelerator pedal while ACC is
active, the ACC indicator turns blue on the
instrument cluster and in the HUD,
if equipped, to indicate that automatic
braking will not occur. ACC will resume
operation when the accelerator pedal is not
being pressed.
{Warning
The ACC will not automatically apply the
brakes if your foot is resting on the
accelerator pedal. You could crash into a
vehicle ahead of you.
Curves in the Road
{Warning
On curves, ACC may not detect a vehicle
ahead in your lane. You could be startled
if the vehicle accelerates up to the set
speed, especially when following a vehicle
exiting or entering exit ramps. You could
lose control of the vehicle or crash. Do
not use ACC while driving on an entrance
or exit ramp. Always be ready to use the
brakes if necessary.
{Warning
On curves, ACC may respond to a vehicle
in another lane, or may not have time to
react to a vehicle in your lane. You could
crash into a vehicle ahead of you, or lose
control of your vehicle. Give extra (Continued)
Warning (Continued)
attention in curves and be ready to use
the brakes if necessary. Select an
appropriate speed while driving in curves.
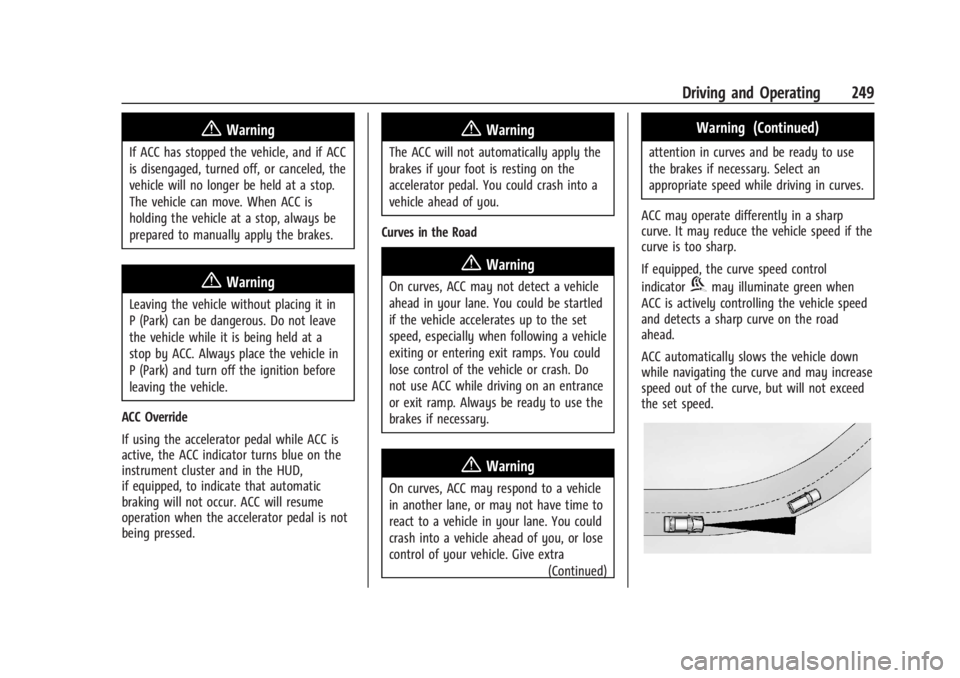
ACC may operate differently in a sharp
curve. It may reduce the vehicle speed if the
curve is too sharp.
If equipped, the curve speed control
indicator
bmay illuminate green when
ACC is actively controlling the vehicle speed
and detects a sharp curve on the road
ahead.
ACC automatically slows the vehicle down
while navigating the curve and may increase
speed out of the curve, but will not exceed
the set speed.
Page 258 of 440
GMC Sierra/Sierra Denali 2500 HD/3500 HD Owner Manual (GMNA-
Localizing-U.S./Canada-16908340) - 2024 - CRC - 12/13/22
256 Driving and Operating
2. Front/Rear Top-Down View
Displays a front or rear overhead view
of the vehicle. To view, select Front/
Rear Top-Down View on the
infotainment display when the camera
app is active.
3. Front/Rear side View
Displays a view that shows objects
next to the front or rear sides of the
vehicle. To select, touch Front/Rear
Side View on the infotainment display
when a camera view is active. Touch
the button to toggle between front
and rear camera views. Park Assist and
RCTA overlays are not available when
Front/Rear Side View is active.
4. Hitch View
Displays a zoomed-in view of the hitch
area to assist with aligning the
vehicle’s hitch ball with the trailer
coupler and monitoring the trailer
connection. To view, select Hitch View
on the infotainment display when the
Camera App is active. To access this
view when in a forward gear above
12 km/h (8 mph), select CAMERA on
the infotainment display and select
Hitch View. The view will close after
eight seconds and can be closed earlyby selecting X, Home or Back. Shifting
into P (Park) while in this view will
automatically engage the Electric
Parking Brake (EPB).
5. Surround View
Displays an image of the area
surrounding the vehicle. Surround
View is displayed alongside the
currently selected view when below
12 km/h (8 mph). Surround View is
disabled when above 12 km/h (8 mph).
6. Camera App Guidance Lines
The Camera App supports three
possible guidance modes: No
Guidance, Vehicle Guidance and
Trailering Guidance. To change
guidance mode, select the appropriate
guidance icon. Depending on the
guidance mode and view selected,
different guidance lines may appear.
A grayed-out icon indicates that
guidance lines are not available.
Certain views do not support Guidance
lines.
.Standard Guidance Lines are
available in Front/Rear Standard
Views, Front/Rear Top-Down Views
and Surround View when the
vehicle guidance mode is selected.
Standard Guidance Lines show
current and intended vehicle path.
.Hitch Guidance Line is available in
Rear Standard View or Cargo Bed
View when the Trailering Guidance
mode is selected. Hitch Guidance
displays a single centered guidance
line on the infotainment display to
assist with aligning the vehicle’s
hitch with a trailer coupler. Align
the Hitch Guidance Line with the
trailer coupler by continuously
steering the vehicle to keep the
guidance line centered on the
coupler when backing. Park Assist
overlays will not display when the
Hitch Guidance Line is active.
.Rear Trailer Guidance Lines are
available in the Rear Trailer View
when the Trailering Guidance
mode is selected and the rear
trailer camera calibration has been
successfully completed. Rear Trailer
Guidance Lines show the intended
path (yellow) and the current path
(blue) of the trailer. The current
path guidance lines will converge
with the intended path guidance
lines.
Page 290 of 440
GMC Sierra/Sierra Denali 2500 HD/3500 HD Owner Manual (GMNA-
Localizing-U.S./Canada-16908340) - 2024 - CRC - 12/13/22
288 Driving and Operating
to the attaching points on the bumper;
otherwise, safety chains should be attached
to holes on the trailer hitch.
Cross the safety chains under the tongue of
the trailer to help prevent the tongue from
contacting the road if it becomes separated
from the hitch. Always leave enough slack in
the safety chains to allow the combination
to turn. Never allow safety chains to drag
on the ground.
Trailer Brakes
Loaded trailers over 900 kg (2,000 lb) must
be equipped with brake systems and with
brakes for each axle. Trailer braking
equipment conforming to Canadian
Standards Association (CSA) requirement
CAN3-D313, or its equivalent, is
recommended.
State or local regulations may require
trailers to have their own braking system if
the loaded weight of the trailer exceeds
certain minimums that can vary from state
to state. Read and follow the instructions for
the trailer brakes so they are installed,
adjusted, and maintained properly. Never
attempt to tap into your vehicle's hydraulicbrake system. If you do, both the vehicle
antilock brakes and the trailer brakes may
not function, which could result in a crash.
Auxiliary Battery
If equipped, the vehicle's auxiliary battery
can be used to supply electrical power to
additional equipment that may be added,
such as a slide-in camper.
Locate the auxiliary battery connector under
the hood on the driver side of the vehicle,
next to the engine compartment fuse block.
Follow the proper installation instructions
included with any electrical equipment that
is installed.
Caution
To prevent draining the auxiliary battery,
always turn off electrical equipment
when not in use and do not use any
equipment that may exceed the
maximum amperage rating of 30 amps.
Trailer Wiring Harness
Basic Trailer Wiring
If the vehicle is not equipped with a trailer
connector on the rear bumper, a seven-wire
trailering harness is tied to the vehiclesframe. The harness requires the installation
of a trailer connector, which is available
through your dealer.
Use only a round, seven-wire connector with
flat blade terminals meeting SAE J2863
specifications for proper electrical
connectivity.
The seven-wire harness contains the
following trailer circuits:
Stop/Turn
Signal Left Yellow/Blue
Stop/Turn Signal
Right Green/Violet
Tail/Parking Lamps Gray/Brown
Reverse Lamps White/Green
Battery Feed Red/Green
Ground White
Electric Trailer Brake Blue
Heavy-Duty Trailer Wiring Harness Package
If equipped, the trailer wiring harness, with
a seven-pin connector and a four-pin
connector, is mounted on the vehicle's rear
bumper.
Page 292 of 440
GMC Sierra/Sierra Denali 2500 HD/3500 HD Owner Manual (GMNA-
Localizing-U.S./Canada-16908340) - 2024 - CRC - 12/13/22
290 Driving and Operating
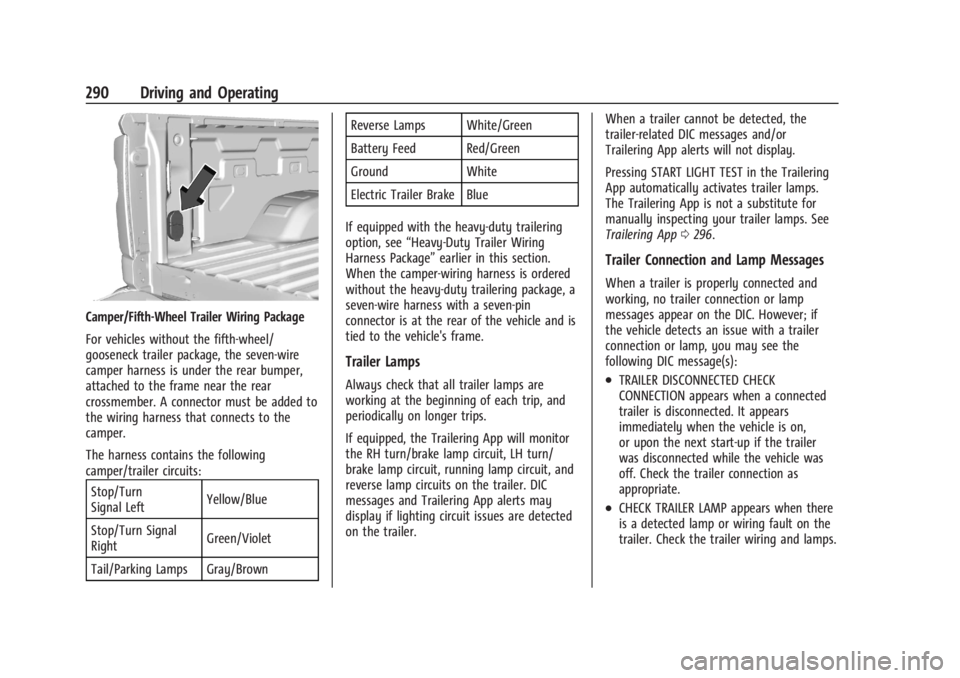
Camper/Fifth-Wheel Trailer Wiring Package
For vehicles without the fifth-wheel/
gooseneck trailer package, the seven-wire
camper harness is under the rear bumper,
attached to the frame near the rear
crossmember. A connector must be added to
the wiring harness that connects to the
camper.
The harness contains the following
camper/trailer circuits:Stop/Turn
Signal Left Yellow/Blue
Stop/Turn Signal
Right Green/Violet
Tail/Parking Lamps Gray/Brown Reverse Lamps White/Green
Battery Feed Red/Green
Ground White
Electric Trailer Brake Blue
If equipped with the heavy-duty trailering
option, see “Heavy-Duty Trailer Wiring
Harness Package” earlier in this section.
When the camper-wiring harness is ordered
without the heavy-duty trailering package, a
seven-wire harness with a seven-pin
connector is at the rear of the vehicle and is
tied to the vehicle's frame.
Trailer Lamps
Always check that all trailer lamps are
working at the beginning of each trip, and
periodically on longer trips.
If equipped, the Trailering App will monitor
the RH turn/brake lamp circuit, LH turn/
brake lamp circuit, running lamp circuit, and
reverse lamp circuits on the trailer. DIC
messages and Trailering App alerts may
display if lighting circuit issues are detected
on the trailer. When a trailer cannot be detected, the
trailer-related DIC messages and/or
Trailering App alerts will not display.
Pressing START LIGHT TEST in the Trailering
App automatically activates trailer lamps.
The Trailering App is not a substitute for
manually inspecting your trailer lamps. See
Trailering App
0296.
Trailer Connection and Lamp Messages
When a trailer is properly connected and
working, no trailer connection or lamp
messages appear on the DIC. However; if
the vehicle detects an issue with a trailer
connection or lamp, you may see the
following DIC message(s):
.TRAILER DISCONNECTED CHECK
CONNECTION appears when a connected
trailer is disconnected. It appears
immediately when the vehicle is on,
or upon the next start-up if the trailer
was disconnected while the vehicle was
off. Check the trailer connection as
appropriate.
.CHECK TRAILER LAMP appears when there
is a detected lamp or wiring fault on the
trailer. Check the trailer wiring and lamps.
Page 417 of 440
GMC Sierra/Sierra Denali 2500 HD/3500 HD Owner Manual (GMNA-
Localizing-U.S./Canada-16908340) - 2024 - CRC - 12/7/22
Customer Information 415
Vehicle Data Recording and
Privacy
The vehicle has a number of computers that
record information about the vehicle’s
performance and how it is driven or used.
For example, the vehicle uses computer
modules to monitor and control engine and
transmission performance, to monitor the
conditions for airbag deployment and
deploy them in a crash, and, if equipped, to
provide antilock braking to help the driver
control the vehicle. These modules may
store data to help the dealer technician
service the vehicle or to help GM improve
safety or features. Some modules may also
store data about how the vehicle is
operated, such as rate of fuel consumption
or average speed. These modules may retain
personal preferences, such as radio presets,
seat positions, and temperature settings.
Cybersecurity
GM collects information about the use of
your vehicle including operational and safety
related information. We collect this
information to provide, evaluate, improve,
and troubleshoot our products and services
and to develop new products and services.
The protection of vehicle electronics systems
and customer data from unauthorized
outside electronic access or control is
important to GM. GM maintains appropriate
security standards, practices, guidelines and
controls aimed at defending the vehicle and
the vehicle service ecosystem against
unauthorized electronic access, detecting
possible malicious activity in related
networks, and responding to suspected
cybersecurity incidents in a timely,
coordinated and effective manner. Security
incidents could impact your safety or
compromise your private data. To minimize
security risks, please do not connect your
vehicle electronic systems to unauthorized
devices or connect your vehicle to any
unknown or untrusted networks (such as
Bluetooth, WIFI or similar technology). In
the event you suspect any security incident
impacting your data or the safe operation of
your vehicle, please stop operating your
vehicle and contact your dealer.
Event Data Recorders
This vehicle is equipped with an Event Data
Recorder (EDR). The main purpose of an EDR
is to record, in certain crash or near
crash-like situations, such as an air bag
deployment or hitting a road obstacle, data
that will assist in understanding how a
vehicle’s systems performed. The EDR is
designed to record data related to vehicle
dynamics and safety systems for a short
period of time, typically 30 seconds or less.
The EDR in this vehicle is designed to record
such data as:
.How various systems in your vehicle were
operating;
.Whether or not the driver and passenger
safety belts were buckled/fastened;
.How far (if at all) the driver was
depressing the accelerator and/or brake
pedal; and,
.How fast the vehicle was traveling.
These data can help provide a better
understanding of the circumstances in which
crashes and injuries occur.
Note
EDR data are recorded by your vehicle only
if a non-trivial crash situation occurs; no
data are recorded by the EDR under normal
Page 419 of 440

GMC Sierra/Sierra Denali 2500 HD/3500 HD Owner Manual (GMNA-
Localizing-U.S./Canada-16908340) - 2024 - CRC - 12/7/22
OnStar 417
OnStar
OnStar Overview
OnStar Overview . . . . . . . . . . . . . . . . . . . . . . 417
OnStar Services
Emergency . . . . . . . . . . . . . . . . . . . . . . . . . . . . 418
Security . . . . . . . . . . . . . . . . . . . . . . . . . . . . . . . 418
OnStar Additional Information
OnStar Additional Information . . . . . . . . . 419
OnStar Overview
=Voice Command Button
QBlue OnStar Button
>Red Emergency Button
This vehicle may be equipped with a
comprehensive, in-vehicle system that can
connect to an OnStar Advisor for Emergency,
Security, Navigation, Connections, and
Diagnostics Services. OnStar services may
require a paid service plan and data plan.
OnStar requires the vehicle battery and
electrical system, cellular service, and GPS
satellite signals to be available and
operating. OnStar acts as a link to existing
emergency service providers. OnStar may
collect information about you and your
vehicle, including location information. See
OnStar User Terms, Privacy Statement, and
Software Terms for more details including
system limitations at www.onstar.com (U.S.)
or www.onstar.ca (Canada). The OnStar system status light is next to
the OnStar buttons. If the status light is:
.Solid Green: System is ready.
.Flashing Green: On a call.
.Red: Indicates a problem.
.Off: System is off. PressQtwice to
speak with an OnStar Advisor.
Press
Qor call 1-888-4ONSTAR
(1-888-466-7827) to speak to an Advisor.
Functionality of the Voice Command button
may vary by vehicle and region.
Press
=to:
.Open the OnStar app on the infotainment
display. If equipped, the infotainment
system has OnStar controls in the
embedded OnStar app on the Home Page.
Most OnStar functions that can be
performed with the buttons can be done
using the app. To open the app, touch the
OnStar icon on the Home Page. App
updates require a corresponding service
plan. Features vary by region and model.
Features are subject to change. For more
information, see my.gmc.com/learn or
press
Q.
Page 428 of 440

GMC Sierra/Sierra Denali 2500 HD/3500 HD Owner Manual (GMNA-
Localizing-U.S./Canada-16908340) - 2024 - CRC - 12/7/22
426 Index
Assistance Program, Roadside . . . . . . . . . . . . 408
Assistance SystemsAdvanced . . . . . . . . . . . . . . . . . . . . . . . . . . . . . . 252
Automatic EmergencyBraking (AEB) . . . . . . . . . . . . . . . . . . . . . . . . 265
Driving . . . . . . . . . . . . . . . . . . . . . . . . . . . . . . . . 263
Forward Collision Alert (FCA) System . . . . . . . . . . . . . . . . . . . . . . . . . . . . . . 263
Front Pedestrian Braking (FPB) . . . . . . . . . 266
Lane Change Alert (LCA) . . . . . . . . . . . . . . . 268
Lane Departure Warning (LDW) . . . . . . . . 270
Parking . . . . . . . . . . . . . . . . . . . . . . . . . . . . . . . . 262
Parking and Backing . . . . . . . . . . . . . . . . . . . 253
Rear Cross Traffic Alert (RCTA) . . . . . . . . . 263
Rear Vision Camera (RVC) . . . . . . . . . . . . . . 253
Surround Vision System . . . . . . . . . . . . . . . 254
Audio Bluetooth . . . . . . . . . . . . . . . . . . . . . . . . . 163, 164
Automatic Dimming Mirrors . . . . . . . . . . . . . . . . . . . . . . . 37
Door Locks . . . . . . . . . . . . . . . . . . . . . . . . . . . . . . 23
Emergency Braking (AEB) DisabledLight . . . . . . . . . . . . . . . . . . . . . . . . . . . . . . . . . 126
Headlamp System . . . . . . . . . . . . . . . . . . . . . 145
Transmission . . . . . . . . . . . . . . . . . . . . . . . . . . . 223
Transmission Fluid . . . . . . . . . . . . . . . . . . . . . . 317
Transmission Shift Lock Control Function Check . . . . . . . . . . . . . . . . . . . . . . . 330 Automatic Transmission
Manual Mode . . . . . . . . . . . . . . . . . . . . . . . . . 226
Auxiliary Roof Mounted Lamp . . . . . . . . . . . . . . . . . . . 148
Avoiding Untrusted Media Devices . . . . . . . 163
Axle Front . . . . . . . . . . . . . . . . . . . . . . . . . . . . . . . . . . 329
Rear . . . . . . . . . . . . . . . . . . . . . . . . . . . . . . . . . . . 329
B
BatteryExterior Lighting Battery Saver . . . . . . . . 152
Load Management . . . . . . . . . . . . . . . . . . . . . 152
Power Protection . . . . . . . . . . . . . . . . . . . . . . 152
Battery - North America . . . . . . . . . . . . .327, 376
Blade Replacement, Wiper . . . . . . . . . . . . . . . . 331
Blind Spot Mirrors . . . . . . . . . . . . . . . . . . . . . . . . .37
Bluetooth Audio . . . . . . . . . . . . . . . . . . . . . . . . . . . . . 163, 164
Overview . . . . . . . . . . . . . . . . . . . . . . 170, 171, 174
Brake
Fluid . . . . . . . . . . . . . . . . . . . . . . . . . . . . . . . . . . . 326
Pad Life System . . . . . . . . . . . . . . . . . . . . . . . 325
System Warning Light . . . . . . . . . . . . . . . . . 124
Brake Pad Life System . . . . . . . . . . . . . . . . . . . 325
Brakes . . . . . . . . . . . . . . . . . . . . . . . . . . . . . . . . . . . 325 Antilock . . . . . . . . . . . . . . . . . . . . . . . . . . . . . . . . 233
Brake Assist . . . . . . . . . . . . . . . . . . . . . . . . . . . 235 Brakes (cont'd)
Electric Parking Brake . . . . . . . . . . . . . . . . . . 234
Braking . . . . . . . . . . . . . . . . . . . . . . . . . . . . . . . . . . 200 Automatic Emergency (AEB) . . . . . . . . . . . 265
Front Pedestrian (FPB) System . . . . . . . . . 266
Break-In, New Vehicle . . . . . . . . . . . . . . . . . . . . 216
Buckle To Drive . . . . . . . . . . . . . . . . . . . . . . . . . . . 58
Bulb Replacement . . . . . . . . . . . . . . . . . . . . . . . . 333 Center High-Mounted Stoplamp(CHMSL) and Cargo Lamp . . . . . . . . . . . . 335
Halogen Bulbs . . . . . . . . . . . . . . . . . . . . . . . . . 333
Headlamp Aiming . . . . . . . . . . . . . . . . . . . . . . 333
Headlamps, Front Turn Signal, Sidemarker, and Parking Lamps . . . . . . 333
License Plate Lamps . . . . . . . . . . . . . . . . . . . 335
Taillamps, Turn Signal, Stoplamps, and Back-up Lamps . . . . . . . . . . . . . . . . . . 334
Buying New Tires . . . . . . . . . . . . . . . . . . . . . . . . 360
C
Calibration Compass . . . . . . . . . . . . . . . . . . . . . . . . . . . . . . . 107
California Perchlorate Materials Requirements . . . 310
California Proposition 65 Warning . . . . . 1, 376
Camera Rear Vision (RVC) . . . . . . . . . . . . . . . . . . . . . . 253
Truck Bed . . . . . . . . . . . . . . . . . . . . . . . . . . . . . . . 41