2024 GMC SIERRA DENALI engine
[x] Cancel search: enginePage 235 of 440
GMC Sierra/Sierra Denali 2500 HD/3500 HD Owner Manual (GMNA-
Localizing-U.S./Canada-16908340) - 2024 - CRC - 12/13/22
Driving and Operating 233
flashing until the shift request has
completed. A DIC message displays to
indicate the state of the request.
Once the 4x4 shift has completed, the
DIC message disappears, the
4x4 indicator stops flashing, and the
current setting is indicated.
If vehicle speed is higher when shift
request occurs, a DIC message displays.
Reduce vehicle speed.
If the transmission is not in N (Neutral)
when shift request occurs, DIC messages will
display. The vehicle will allow 20 seconds for
this shift to occur. After this time, a
indicator in the instrument cluster will
indicate that the transfer case is in 4
n.
Caution
Shifting the transmission into gear before
the requested mode indicator light has
stopped flashing could damage the
transfer case.
If the transmission is not shifted into
N (Neutral) or the vehicle has not slowed to
5 km/h (3 mph) within 20 seconds, the
transfer case will remain in its original state.
This will be indicated in the instrument
cluster. With the vehicle moving less than 5 km/h
(3 mph), and the transmission in N (Neutral),
attempt the shift again.
Shifting Into N (Neutral)
To shift into N (Neutral):
1. Start the vehicle.
2. Shift the transmission to N (Neutral).
3. Shift the transfer case to 2
m.
4. Apply the parking brake and/or brake pedal.
5. Press 2
mfive times in 10 seconds until
the N (Neutral) indicator starts flashing in
the instrument cluster. When the shift is
complete, the indicator stops flashing.
If the parking brake and/or brake pedal
is not applied within 20 seconds, the
transfer case will remain in the original
state.
6. If the transmission is not shifted into N (Neutral) or the vehicle has not slowed
to 5 km/h (3 mph) within 20 seconds,
the transfer case will remain in its
original state. This will be indicated in
the instrument cluster. Shifting Out of N (Neutral)
To shift out of N (Neutral):
1. Turn the ignition on with the engine off. See Ignition Positions 0216.
2. Set the parking brake. See Electric
Parking Brake 0234.
3. Shift the transmission to N (Neutral).
4. Shift the transfer case to 2
m. Transfer
case shifts out of N (Neutral) can only be
made into 2
m. When the shift to 2mis
complete, the indicator in the instrument
cluster will stop flashing. If the transfer
case cannot complete a shift, the
indicator will return to the previously
selected setting.
Brakes
Antilock Brake System (ABS)
The Antilock Brake System (ABS) helps
prevent a braking skid and maintain steering
while braking hard.
ABS performs a system check when the
vehicle is first driven. A momentary motor
or clicking noise may be heard while this
test is going on, and the brake pedal may
move slightly. This is normal.
Page 238 of 440
GMC Sierra/Sierra Denali 2500 HD/3500 HD Owner Manual (GMNA-
Localizing-U.S./Canada-16908340) - 2024 - CRC - 12/13/22
236 Driving and Operating
HSA is available when the vehicle is facing
uphill in a forward gear, or when facing
downhill in R (Reverse). The vehicle must
come to a complete stop on a grade for HSA
to activate.
Ride Control Systems
Traction Control/Electronic
Stability Control
System Operation
The vehicle has a Traction Control System
(TCS) and StabiliTrak/Electronic Stability
Control (ESC) system. These systems help
limit wheel spin and assist the driver in
maintaining control, especially on slippery
road conditions.
TCS activates if it senses any of the drive
wheels are spinning or beginning to lose
traction. When this happens, TCS applies the
brakes to the spinning wheels and reduces
engine power to limit wheel spin.
StabiliTrak/ESC activates when the vehicle
senses a difference between the intended
path and the direction the vehicle is actually
traveling. StabiliTrak/ESC selectively applies
braking pressure to any one of the vehicle
wheel brakes to assist the driver in keepingthe vehicle on the intended path. Trailer
Sway Control (TSC) is also on automatically
when the vehicle is started. See
Trailer Sway
Control (TSC) 0294.
If cruise control is being used and traction
control or StabiliTrak/ESC begins to limit
wheel spin, cruise control will disengage.
Cruise control may be turned back on when
road conditions allow.
Both systems come on automatically when
the vehicle is started and begins to move.
The systems may be heard or felt while
they are operating or while performing
diagnostic checks. This is normal and does
not mean there is a problem with the
vehicle.
It is recommended to leave both systems on
for normal driving conditions, but it may be
necessary to turn TCS off if the vehicle gets
stuck in sand, mud, ice, or snow. See If the
Vehicle Is Stuck 0209 and“Turning the
Systems Off and On” later in this section.
When the transfer case (if equipped) is in
Four-Wheel Drive Low, the stability system
is automatically disabled,
gcomes on, and
the appropriate message will appear on the Driver Information Center (DIC). Both
traction control and StabiliTrak/ESC are
automatically disabled in this condition.
The indicator light for both systems is in the
instrument cluster. This light will:
.Flash when TCS is limiting wheel spin.
.Flash when StabiliTrak/ESC is activated.
.Turn on and stay on when either system
is not working.
If either system fails to turn on or to
activate, a message displays in the Driver
Information Center (DIC), and
dcomes on
and stays on to indicate that the system is
inactive and is not assisting the driver in
maintaining control. The vehicle is safe to
drive, but driving should be adjusted
accordingly.
If
dcomes on and stays on:
1. Stop the vehicle.
2. Turn the engine off and wait 15 seconds.
3. Start the engine.
Page 241 of 440
GMC Sierra/Sierra Denali 2500 HD/3500 HD Owner Manual (GMNA-
Localizing-U.S./Canada-16908340) - 2024 - CRC - 12/13/22
Driving and Operating 239
standard/default mode. There is no
persistent indicator in the instrument cluster
for this mode.
6Snow/Ice Mode :Snow/Ice Mode
improves vehicle acceleration on snow and
ice covered roads. When active, Snow/Ice
Mode will adjust acceleration to optimize
traction on slippery surfaces. This can
compromise the acceleration on dry asphalt.
This feature is not intended for use when
the vehicle is stuck in sand, mud, ice, snow,
or gravel. If the vehicle becomes stuck, see If
the Vehicle Is Stuck 0209.
7Off-Road Mode : Use this mode for
off-road recreational driving. Off-Road Mode
should be used to improve driving at
moderate speeds, on grass, gravel, dirt,
unpaved roads, or snow-covered roads. The
accelerator pedal is tuned for off-road use.
This mode modifies pedal mapping,
transmission shift pattern, Antilock Brake
System (ABS), StabiliTrak/Electronic Stability
Control (ESC), and Traction Control System
(TCS) performance.
For more information on off-road driving see
Off-Road Driving 0203.
_Tow/Haul Mode : Use this mode
when hauling heavy loads to provide
increased performance and vehicle control.
Tow/Haul Mode adjusts the transmission
shift pattern, trailer sway, and steering.
If the vehicle is turned off with Tow/Haul
Mode active and then restarted within four
hours or less, Tow/Haul will remain active.
Otherwise, the vehicle will start in
Normal Mode.
If the vehicle has a diesel engine, exhaust
braking is automatically activated when
Tow/Haul Mode is selected. It maintains
vehicle speed by automatically
implementing a shift pattern that uses the
engine and the transmission to slow the
vehicle. The system will command
downshifts and use the turbocharger on the
engine to reduce vehicle speed when the
brake is applied. The normal tow/haul shift
pattern will return once the vehicle is on a
low grade or when the accelerator pedal is
pressed.
While in the Electronic Range Select (ERS)
Mode, grade breaking is deactivated,
allowing the driver to select a range and
limiting the highest gear available. See
Manual Mode 0226. For more information on trailer weight
specifications, see
Towing Equipment 0284.
Locking Rear Axle
Vehicles with a locking rear axle can give
more traction on snow, mud, ice, sand,
or gravel. It works like a standard axle most
of the time, but when traction is low, this
feature will allow the rear wheel with the
most traction to move the vehicle.
Cruise Control
If equipped, cruise control allows the vehicle
to maintain a set speed of 40 km/h
(25 mph) or more without active
acceleration. Cruise control does not work at
speeds below about 40 km/h (25 mph).
{Warning
Cruise control can be dangerous where
you cannot drive safely at a steady
speed. Do not use cruise control on
winding roads or in heavy traffic.
Cruise control can be dangerous on
slippery roads. On such roads, fast
changes in tire traction can cause
(Continued)
Page 243 of 440

GMC Sierra/Sierra Denali 2500 HD/3500 HD Owner Manual (GMNA-
Localizing-U.S./Canada-16908340) - 2024 - CRC - 12/13/22
Driving and Operating 241
The speedometer reading can be displayed
in either English or metric units. See
Instrument Cluster (Base Level)0112 or
Instrument Cluster (Uplevel) 0113. The
increment value used depends on the units
displayed.
Reducing Speed While Using Cruise Control
If cruise control is already activated:
.Press and hold SET– down until the
desired lower speed is reached, then
release it.
.To decrease vehicle speed in small
increments, briefly press SET– down. For
each press, the vehicle goes about 1 km/h
(1 mph) slower.
The speedometer reading can be displayed
in either English or metric units. See
Instrument Cluster (Base Level) 0112 or
Instrument Cluster (Uplevel) 0113. The
increment value used depends on the units
displayed.
Passing Another Vehicle While Using Cruise
Control
Use the accelerator pedal to increase the
vehicle speed. When you take your foot off
the accelerator pedal, the vehicle will slow
down to the previously set cruise speed.
While pressing the accelerator pedal or shortly following the release to override
cruise control, briefly pressing SET–
will
result in cruise control set to the current
vehicle speed.
Using Cruise Control on Hills
How well cruise control works on a hill
depends on the vehicle speed, the load, and
the steepness of the hill. When going up a
steep hill, you may have to apply the
accelerator pedal to maintain the set speed.
While going downhill, cruise braking helps
maintain driver selected speed.
Cruise Grade Braking is enabled when the
vehicle is started and cruise control is active.
It assists in maintaining driver selected
speed when driving on downhill grades by
using the engine and transmission to slow
the vehicle.
For other forms of descent control, see Hill
Descent Control (HDC) 0237, Automatic
Transmission 0223, and Tow/Haul Mode
0 227.
Ending Cruise Control
There are four ways to end cruise control:
.Lightly apply the brake pedal.
.Press*.
.Shift the transmission to N (Neutral).
.Press5.
Erasing Speed Memory
The cruise control set speed is erased from
memory if
5is pressed or the ignition is
turned off.
Adaptive Cruise Control (Camera)
If equipped, Adaptive Cruise Control (ACC)
allows the cruise control set speed and
following gap to be selected. Read this
entire section before using this system. The
following gap is the following time between
your vehicle and a vehicle detected directly
ahead in your path, moving in the same
direction. If no vehicle is detected in your
path, ACC works like regular cruise control.
ACC uses a windshield mounted front
camera sensor.
See Radio Frequency Statement 0413.
If a vehicle is detected in your path, ACC can
apply acceleration or limited, moderate
braking to maintain the selected following
gap. To disengage ACC, apply the brake.
If ACC is controlling the vehicle speed when
the Traction Control System (TCS) or
StabiliTrak/Electronic Stability Control (ESC)
system activates, ACC may automatically
Page 273 of 440

GMC Sierra/Sierra Denali 2500 HD/3500 HD Owner Manual (GMNA-
Localizing-U.S./Canada-16908340) - 2024 - CRC - 12/13/22
Driving and Operating 271
direction of lane departure, or if LDW
detects that you are accelerating, braking or
actively steering.
{Warning
The LDW system does not steer the
vehicle. The LDW system may not:
.Provide enough time to avoid a crash.
.Detect lane markings under poor
weather or visibility conditions. This
can occur if the windshield or
headlamps are blocked by dirt, snow,
or ice; if they are not in proper
condition; or if the sun shines directly
into the camera.
.Detect road edges.
.Detect lanes on winding or hilly roads.
If LDW only detects lane markings on one
side of the road, it will only warn you
when departing the lane on the side
where it has detected a lane marking.
Always keep your attention on the road
and maintain proper vehicle position
within the lane, or vehicle damage,
injury, or death could occur. Always keep (Continued)
Warning (Continued)
the windshield, headlamps, and camera
sensors clean and in good repair. Do not
use LDW in bad weather conditions.
How the System Works
LDW utilizes a camera sensor installed on
the windshield ahead of the rearview mirror
to detect lane markings.
To turn LDW on and off, press
@on the
center stack. The control indicator will light
when LDW is on.
BaseUplevel
When LDW is on,
@ornis green if
LDW is available to warn of a lane
departure. If the vehicle crosses a detected
lane marking without using the turn signal
in that direction,
@ornchanges to
amber and flashes. Additionally, there will
be three beeps, on the right or left, depending on the lane departure direction.
LDW will not alert if the turn signal is active
in the direction of lane departure or if LDW
detects that you are accelerating, braking or
actively steering.
Fuel
Top Tier Fuel
GM recommends the use of TOP TIER
Detergent Gasoline to keep the engine clean,
reduce engine deposits, and maintain
optimal vehicle performance. Look for the
TOP TIER Logo or see www.toptiergas.com
for a list of TOP TIER Detergent Gasoline
marketers and applicable countries.
Page 274 of 440

GMC Sierra/Sierra Denali 2500 HD/3500 HD Owner Manual (GMNA-
Localizing-U.S./Canada-16908340) - 2024 - CRC - 12/13/22
272 Driving and Operating
Recommended Fuel
For diesel engine vehicles, see“Fuel for
Diesel Engines” in the Duramax diesel
supplement.
If the vehicle has a yellow sticker on the
fuel door, E85 or FlexFuel can be used. If the
vehicle does not have a yellow sticker, do
not use gasoline with ethanol levels greater
than 15% by volume. See E85 or FlexFuel
0 272.
Regular unleaded gasoline meeting ASTM
specification D4814 with a posted octane
rating (R+M)/2 of 87 or greater is
recommended. Do not use gasoline with a
posted octane rating of less than 87, as this
will result in reduced performance and
driveability. If heavy knocking is heard when
using gasoline rated at 87 or greater, the
engine needs service.
Prohibited Fuels
Caution
Do not use fuels with any of the
following conditions; doing so may
damage the vehicle and void its
warranty:
.For vehicles that are not FlexFuel, fuel
labeled greater than 15% ethanol by
volume, such as mid-level ethanol
blends (16–50% ethanol), E85,
or FlexFuel.
.Fuel with any amount of methanol,
methylal, ferrocene, and aniline. These
fuels can corrode metal fuel system
parts or damage plastic and rubber
parts.
.Fuel containing metals such as
methylcyclopentadienyl manganese
tricarbonyl (MMT), which can damage
the emissions control system and
spark plugs.
.Fuel with a posted octane rating of
less than the recommended fuel. Using
this fuel will lower fuel economy and
performance, and may decrease the
life of the emissions catalyst.
Fuels in Foreign Countries
The U.S., Canada, and Mexico post fuel
octane ratings in anti-knock index (AKI). For
fuel not to use in a foreign country, see
Prohibited Fuels 0272.
Fuel Additives
TOP TIER Detergent Gasoline is highly
recommended for use with your vehicle.
If your country does not have TOP TIER
Detergent Gasoline, add ACDelco Fuel
System Treatment Plus−Gasoline to the
vehicle’s gasoline fuel tank at every oil
change or 15 000 km (9,000 mi), whichever
occurs first. TOP TIER Detergent Gasoline and
ACDelco Fuel System Treatment Plus
−Gasoline will help keep your vehicle’s
engine fuel deposit free and performing
optimally.
E85 or FlexFuel
Vehicles with a yellow fuel sticker on the
fuel door can use either unleaded gasoline
or fuel containing up to 85% ethanol (E85).
All other vehicles should use only the
unleaded gasoline as described in
Recommended Fuel 0272.
Page 275 of 440
GMC Sierra/Sierra Denali 2500 HD/3500 HD Owner Manual (GMNA-
Localizing-U.S./Canada-16908340) - 2024 - CRC - 12/13/22
Driving and Operating 273
The use of E85 or FlexFuel is encouraged
when the vehicle is designed to use it. E85
or FlexFuel is made from renewable sources.
To help locate fuel stations that carry E85 or
FlexFuel, the U.S. Department of Energy has
an alternative fuel website. See
www.afdc.energy.gov/afdc/locator/stations.
E85 or FlexFuel should meet ASTM
Specification D 5798 or CAN/CGSB–3.512 in
Canada. Do not use the fuel if the ethanol
content is greater than 85%. Fuel mixtures
that do not meet ASTM or CGSB
specifications can affect driveability and
could cause the malfunction indicator lamp
to come on.
The starting characteristics of E85 or FlexFuel
make it unsuitable for use when
temperatures fall below−18 °C (0 °F). Use
gasoline or add gasoline to the E85 or
FlexFuel.
Because E85 or FlexFuel has less energy per
liter (gallon) than gasoline, the vehicle will
need to be refilled more often. See Filling
the Tank (Chassis Cab and Box Delete
Models) 0275 or
Filling the Tank (Pickup Models) 0273. The only GM approved aftermarket additive
is ACDelco Fuel System Treatment
Plus-FlexFuel. Follow the instructions on the
bottle for proper use. This product is
available at your GM dealer.
Caution
Some additives are not compatible with
E85 or FlexFuel and can harm the
vehicle's fuel system. Use only additives
approved by GM for E85 or FlexFuel
vehicles. Damage caused by unapproved
additives would not be covered by the
vehicle warranty.
Caution
Do not use fuel containing methanol.
It can corrode metal parts in the fuel
system and also damage plastic and
rubber parts. That damage would not be
covered under the vehicle warranty.
To help keep the engine running efficiently,
fill the tank with gasoline, up to E15, after
filling the tank with E85 one or two times.
Filling the Tank (Pickup Models)
If the vehicle has a diesel engine, see the
Duramax diesel supplement.
An arrow on the fuel gauge indicates which
side of the vehicle the fuel door is on. See
Fuel Gauge 0116.
{Warning
Fuel vapors and fuel fires burn violently
and can cause injury or death.
Follow these guidelines to help avoid
injuries to you and others:
.Read and follow all the instructions on
the fuel pump island.
.Turn off the engine when refueling.
.Keep sparks, flames, and smoking
materials away from fuel.
.Do not leave the fuel pump
unattended.
.Avoid using electronic devices while
refueling.
.Do not re-enter the vehicle while
pumping fuel.
(Continued)
Page 276 of 440
GMC Sierra/Sierra Denali 2500 HD/3500 HD Owner Manual (GMNA-
Localizing-U.S./Canada-16908340) - 2024 - CRC - 12/13/22
274 Driving and Operating
Warning (Continued)
.Keep children away from the fuel
pump and never let children
pump fuel.
.Before touching the fill nozzle, touch a
metallic object to discharge static
electricity from your body.
.Fuel can spray out if the fill nozzle is
inserted too quickly. This spray can
happen if the tank is nearly full, and is
more likely in hot weather. Insert the
fill nozzle slowly and wait for any hiss
noise to stop before beginning to
flow fuel.
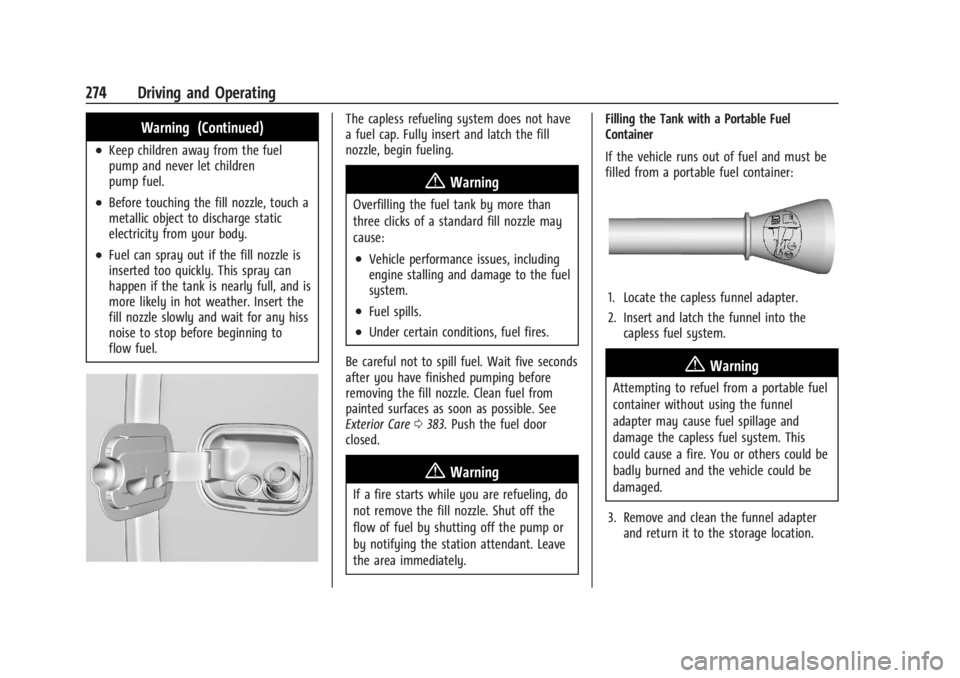
The capless refueling system does not have
a fuel cap. Fully insert and latch the fill
nozzle, begin fueling.
{Warning
Overfilling the fuel tank by more than
three clicks of a standard fill nozzle may
cause:
.Vehicle performance issues, including
engine stalling and damage to the fuel
system.
.Fuel spills.
.Under certain conditions, fuel fires.
Be careful not to spill fuel. Wait five seconds
after you have finished pumping before
removing the fill nozzle. Clean fuel from
painted surfaces as soon as possible. See
Exterior Care 0383. Push the fuel door
closed.
{Warning
If a fire starts while you are refueling, do
not remove the fill nozzle. Shut off the
flow of fuel by shutting off the pump or
by notifying the station attendant. Leave
the area immediately. Filling the Tank with a Portable Fuel
Container
If the vehicle runs out of fuel and must be
filled from a portable fuel container:
1. Locate the capless funnel adapter.
2. Insert and latch the funnel into the
capless fuel system.
{Warning
Attempting to refuel from a portable fuel
container without using the funnel
adapter may cause fuel spillage and
damage the capless fuel system. This
could cause a fire. You or others could be
badly burned and the vehicle could be
damaged.
3. Remove and clean the funnel adapter and return it to the storage location.