2024 CHEVROLET SILVERADO Interior lights
[x] Cancel search: Interior lightsPage 31 of 433

Chevrolet Silverado 2500 HD/3500 HD Owner Manual (GMNA-Localizing-U.
S./Canada/Mexico-16908339) - 2024 - CRC - 12/5/22
Keys, Doors, and Windows 29
Keep hands, children, pets, objects, and
clothing clear of the power assist steps
when in motion. The steps will reverse
direction if they encounter an obstruction
when opening or closing. Remove the
obstruction, then open and close the door
on the same side to complete the motion of
the assist steps. If the obstruction is not
cleared, the assist steps remain extended
while driving.
Extend or retract both power assist steps for
cleaning through the vehicle settings menu.
To view available settings from the
infotainment screen, touch Settings >
Vehicle > Comfort and Convenience.
Enable/Disable
The power assist steps can be enabled or
disabled through the vehicle settings menu.
To view available settings from the
infotainment screen, touch Settings >
Vehicle > Comfort and Convenience.
Vehicle Security
This vehicle has theft-deterrent features;
however, they do not make the vehicle
impossible to steal.
Vehicle Alarm System
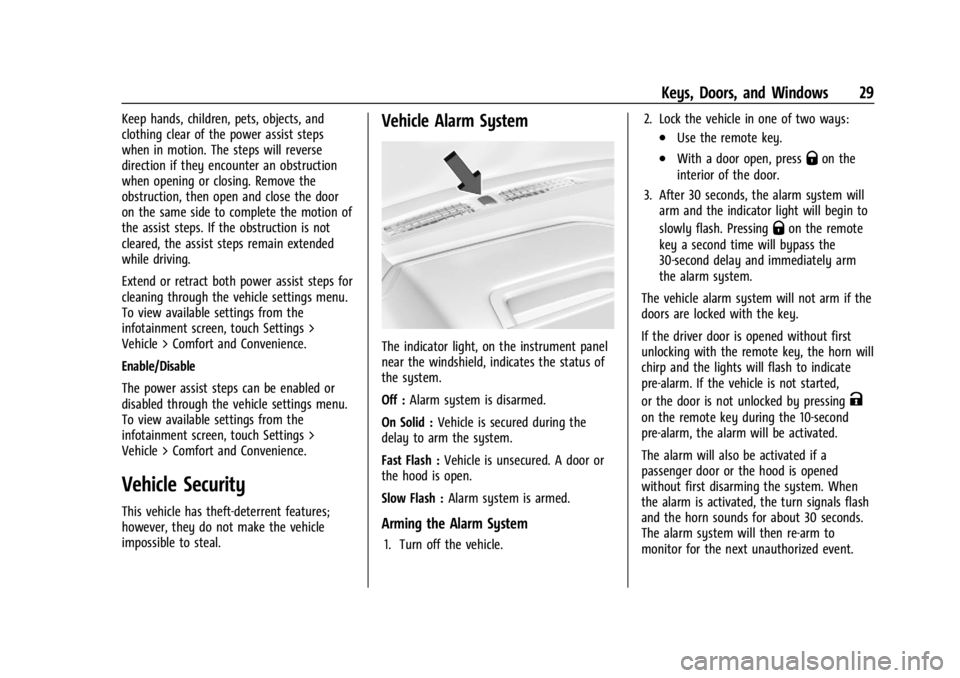
The indicator light, on the instrument panel
near the windshield, indicates the status of
the system.
Off :Alarm system is disarmed.
On Solid : Vehicle is secured during the
delay to arm the system.
Fast Flash : Vehicle is unsecured. A door or
the hood is open.
Slow Flash : Alarm system is armed.
Arming the Alarm System
1. Turn off the vehicle. 2. Lock the vehicle in one of two ways:
.Use the remote key.
.With a door open, pressQon the
interior of the door.
3. After 30 seconds, the alarm system will arm and the indicator light will begin to
slowly flash. Pressing
Qon the remote
key a second time will bypass the
30-second delay and immediately arm
the alarm system.
The vehicle alarm system will not arm if the
doors are locked with the key.
If the driver door is opened without first
unlocking with the remote key, the horn will
chirp and the lights will flash to indicate
pre-alarm. If the vehicle is not started,
or the door is not unlocked by pressing
K
on the remote key during the 10-second
pre-alarm, the alarm will be activated.
The alarm will also be activated if a
passenger door or the hood is opened
without first disarming the system. When
the alarm is activated, the turn signals flash
and the horn sounds for about 30 seconds.
The alarm system will then re-arm to
monitor for the next unauthorized event.
Page 53 of 433

Chevrolet Silverado 2500 HD/3500 HD Owner Manual (GMNA-Localizing-U.
S./Canada/Mexico-16908339) - 2024 - CRC - 12/5/22
Seats and Restraints 51
Press the button once for the highest
setting. With each press of the button, the
seat will change to the next lower setting,
and then to the off setting. The indicator
lights next to the buttons indicate three for
the highest setting and one for the lowest.
If the heated seats are on high for
30 minutes, their level will automatically be
lowered.
Auto Heated and Ventilated Seats
When the vehicle is on, this feature,
if enabled, will automatically activate the
heated or ventilated seats at the level
required by the vehicle’s interior
temperature.
The active high, medium, low, or off heated
or ventilated seat level will be indicated by
the manual heated or ventilated seat
buttons on the center stack. Use the manual
heated or ventilated seat buttons on the
center stack to turn auto heated or
ventilated seats off. If the passenger seat is
unoccupied, the auto heated or ventilated
seats feature will not activate that seat.
If equipped with a heated steering wheel,
the auto heated steering wheel activation
will follow the heated seat auto activation
and the heated wheel indicator will follow
the state of the steering wheel heat.To enable or disable auto heated or
ventilated seats, select Settings > Vehicle >
Climate and Air Quality > Auto Cooled or
Auto Heated Seats > ON or OFF.
Remote Start Heated and Ventilated Seats
If equipped, the heated seats will turn on
automatically during a remote start if it is
cold outside and the ventilated seats will
turn on automatically if it is hot outside.
If equipped, the heated steering wheel will
turn on automatically during a remote start
if it is cold outside. The heated and
ventilated seat indicators and heated
steering wheel indicator may come on
during this operation.
The heated and ventilated seats and heated
steering wheel may cancel when the vehicle
is started. These features can be manually
selected after the vehicle is turned on.
The temperature performance of an
unoccupied seat may be reduced. This is
normal.
To enable or disable remote start heated or
ventilated seats, select Settings > Vehicle >
Remote Lock, Unlock, and Start > Remote
Start Auto Heat Seats or Remote Start Auto
Cool Seats > ON or OFF. See
Remote Vehicle
Start 018.Rear Seats
Rear Seat Reminder
If equipped, the message REAR SEAT
REMINDER LOOK IN REAR SEAT displays
under certain conditions indicating there
may be an item or passenger in the rear
seat. Check before exiting the vehicle.
This feature will activate when a second row
door is opened while the vehicle is on or up
to 10 minutes before the vehicle is turned
on. There will be an alert when the vehicle
is turned off. The alert does not directly
detect objects in the rear seat; instead,
under certain conditions, it detects when a
rear door is opened and closed, indicating
that there may be something in the
rear seat.
The feature is active only once each time
the vehicle is turned on and off, and will
require reactivation by opening and closing
the second row doors. There may be an
alert even when there is nothing in the rear
seat; for example, if a child entered the
vehicle through the rear door and left the
vehicle without the vehicle being shut off.
Page 140 of 433

Chevrolet Silverado 2500 HD/3500 HD Owner Manual (GMNA-Localizing-U.
S./Canada/Mexico-16908339) - 2024 - CRC - 12/5/22
138 Lighting
Lighting
Exterior Lighting
Exterior Lamp Controls . . . . . . . . . . . . . . . . 138
Exterior Lamps Off Reminder . . . . . . . . . . 140
Headlamp High/Low-Beam Changer . . . 140
Flash-to-Pass . . . . . . . . . . . . . . . . . . . . . . . . . . . 140
Daytime Running Lamps (DRL) . . . . . . . . 140
Automatic Headlamp System . . . . . . . . . . 140
Hazard Warning Flashers . . . . . . . . . . . . . . . 141
Turn and Lane-Change Signals . . . . . . . . . 142
Fog Lamps . . . . . . . . . . . . . . . . . . . . . . . . . . . . . 142
Task Lighting . . . . . . . . . . . . . . . . . . . . . . . . . . 143
Auxiliary Roof-Mounted Lamp . . . . . . . . . 143
Exterior Cargo Lamps . . . . . . . . . . . . . . . . . . 144
Interior Lighting
Instrument Panel IlluminationControl . . . . . . . . . . . . . . . . . . . . . . . . . . . . . . 144
Dome Lamps . . . . . . . . . . . . . . . . . . . . . . . . . . 145
Reading Lamps . . . . . . . . . . . . . . . . . . . . . . . . 145
Lighting Features
Entry Lighting . . . . . . . . . . . . . . . . . . . . . . . . . 146
Exit Lighting . . . . . . . . . . . . . . . . . . . . . . . . . . . 146
Battery Load Management . . . . . . . . . . . . 146
Battery Power Protection . . . . . . . . . . . . . . 147
Exterior Lighting Battery Saver . . . . . . . . 147
Exterior Lighting
Exterior Lamp Controls
The exterior lamp controls are on the
instrument panel to the left of the steering
wheel.
O: Turns off the automatic headlamps and
Daytime Running Lamps (DRL). Turn the
headlamp control to
Oagain to turn the
automatic headlamps or DRL back on.
For vehicles first sold in Canada, off will only
work when the vehicle is in P (Park). AUTO :
Automatically turns on the
headlamps, parking lamps, taillamps,
instrument panel lights, roof marker lamps
(if equipped), front/rear sidemarker lamps,
and license plate lamps.
;: Turns on all lamps, except the
headlamps and fog lamps, if equipped.
For some trim levels and trucks first sold in
Canada, the headlamps may turn on with
the parking lamps.
2: Turns on the headlamps, the parking
lamps, taillamps, instrument panel lights,
roof marker lamps (if equipped), front/rear
sidemarker lamps, and license plate lamps.
#: If equipped, turns on the fog lamps.
See Fog Lamps 0142.
IntelliBeam System
If equipped, this system turns the vehicle
high-beam headlamps on and off according
to surrounding traffic conditions.
The system turns the high-beam headlamps
on when it is dark enough and there is no
other traffic present.
Page 146 of 433

Chevrolet Silverado 2500 HD/3500 HD Owner Manual (GMNA-Localizing-U.
S./Canada/Mexico-16908339) - 2024 - CRC - 12/5/22
144 Lighting
Exterior Cargo Lamps
Work Truck and Custom
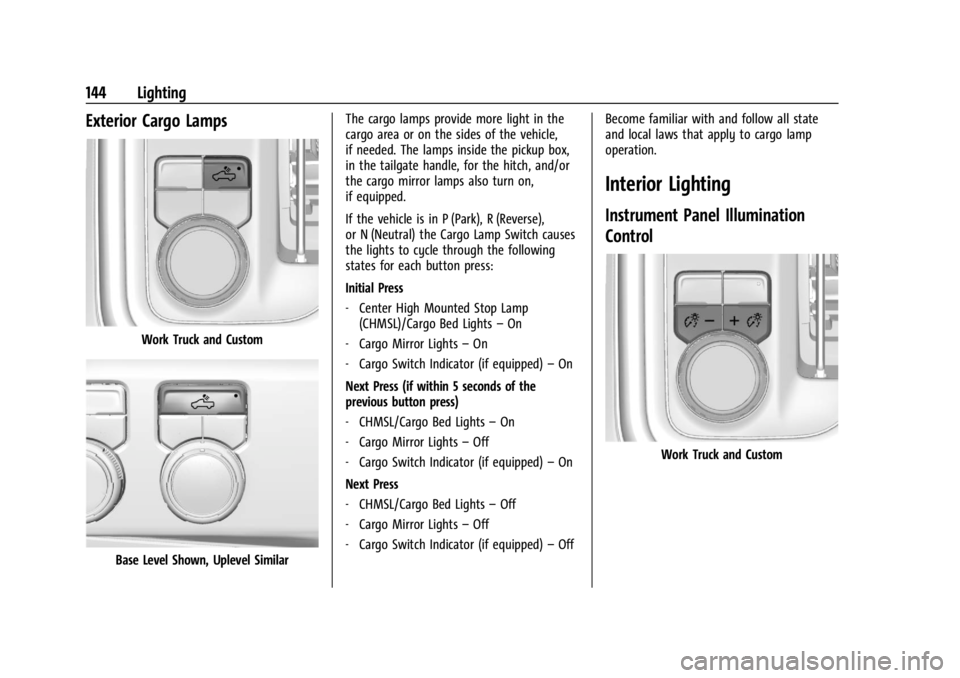
Base Level Shown, Uplevel SimilarThe cargo lamps provide more light in the
cargo area or on the sides of the vehicle,
if needed. The lamps inside the pickup box,
in the tailgate handle, for the hitch, and/or
the cargo mirror lamps also turn on,
if equipped.
If the vehicle is in P (Park), R (Reverse),
or N (Neutral) the Cargo Lamp Switch causes
the lights to cycle through the following
states for each button press:
Initial Press
‐
Center High Mounted Stop Lamp
(CHMSL)/Cargo Bed Lights –On
‐ Cargo Mirror Lights –On
‐ Cargo Switch Indicator (if equipped) –On
Next Press (if within 5 seconds of the
previous button press)
‐ CHMSL/Cargo Bed Lights –On
‐ Cargo Mirror Lights –Off
‐ Cargo Switch Indicator (if equipped) –On
Next Press
‐ CHMSL/Cargo Bed Lights –Off
‐ Cargo Mirror Lights –Off
‐ Cargo Switch Indicator (if equipped) –Off Become familiar with and follow all state
and local laws that apply to cargo lamp
operation.
Interior Lighting
Instrument Panel Illumination
Control
Work Truck and Custom
Page 148 of 433

Chevrolet Silverado 2500 HD/3500 HD Owner Manual (GMNA-Localizing-U.
S./Canada/Mexico-16908339) - 2024 - CRC - 12/5/22
146 Lighting
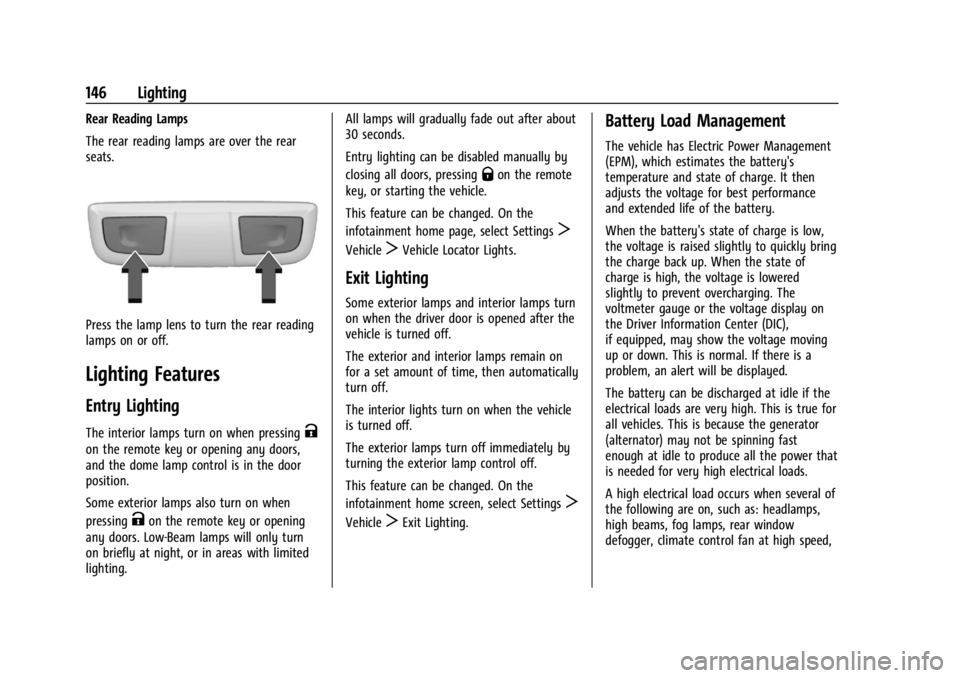
Rear Reading Lamps
The rear reading lamps are over the rear
seats.
Press the lamp lens to turn the rear reading
lamps on or off.
Lighting Features
Entry Lighting
The interior lamps turn on when pressingK
on the remote key or opening any doors,
and the dome lamp control is in the door
position.
Some exterior lamps also turn on when
pressing
Kon the remote key or opening
any doors. Low-Beam lamps will only turn
on briefly at night, or in areas with limited
lighting. All lamps will gradually fade out after about
30 seconds.
Entry lighting can be disabled manually by
closing all doors, pressing
Qon the remote
key, or starting the vehicle.
This feature can be changed. On the
infotainment home page, select Settings
T
VehicleTVehicle Locator Lights.
Exit Lighting
Some exterior lamps and interior lamps turn
on when the driver door is opened after the
vehicle is turned off.
The exterior and interior lamps remain on
for a set amount of time, then automatically
turn off.
The interior lights turn on when the vehicle
is turned off.
The exterior lamps turn off immediately by
turning the exterior lamp control off.
This feature can be changed. On the
infotainment home screen, select Settings
T
VehicleTExit Lighting.
Battery Load Management
The vehicle has Electric Power Management
(EPM), which estimates the battery's
temperature and state of charge. It then
adjusts the voltage for best performance
and extended life of the battery.
When the battery's state of charge is low,
the voltage is raised slightly to quickly bring
the charge back up. When the state of
charge is high, the voltage is lowered
slightly to prevent overcharging. The
voltmeter gauge or the voltage display on
the Driver Information Center (DIC),
if equipped, may show the voltage moving
up or down. This is normal. If there is a
problem, an alert will be displayed.
The battery can be discharged at idle if the
electrical loads are very high. This is true for
all vehicles. This is because the generator
(alternator) may not be spinning fast
enough at idle to produce all the power that
is needed for very high electrical loads.
A high electrical load occurs when several of
the following are on, such as: headlamps,
high beams, fog lamps, rear window
defogger, climate control fan at high speed,
Page 425 of 433

Chevrolet Silverado 2500 HD/3500 HD Owner Manual (GMNA-Localizing-U.
S./Canada/Mexico-16908339) - 2024 - CRC - 12/5/22
Index 423
General InformationService and Maintenance . . . . . . . . . . . . . . 387
Towing . . . . . . . . . . . . . . . . . . . . . . . . . . . . . . . . 270
Vehicle Care . . . . . . . . . . . . . . . . . . . . . . . . . . . 304
Glass Replacement . . . . . . . . . . . . . . . . . . . . . . . 325
Global Positioning System (GPS) . . . . . . . . . 162
Glove Box . . . . . . . . . . . . . . . . . . . . . . . . . . . . . . . . 94
GM Mobility Reimbursement Program . . . . . . . . . . . . . . . . . . . . . . . . . . . . . . . 402
Guidance Problems with the Route . . . . . . . . . . . . . . 163
H
Halogen Bulbs . . . . . . . . . . . . . . . . . . . . . . . . . . . 327
Hazard Warning Flashers . . . . . . . . . . . . . . . . . 141
Head Restraints . . . . . . . . . . . . . . . . . . . . . . . . . . . 44
Head-Up Display (HUD) . . . . . . . . . . . . . . . . . . 130
Headlamps
Aiming . . . . . . . . . . . . . . . . . . . . . . . . . . . . . . . . 327
Automatic . . . . . . . . . . . . . . . . . . . . . . . . . . . . . 140
Bulb Replacement . . . . . . . . . . . . . . . . . . . . . . 327
Daytime Running Lamps (DRL) . . . . . . . . . 140
Flash-to-Pass . . . . . . . . . . . . . . . . . . . . . . . . . . . 140
Headlamps, Front Turn Signal,Sidemarker, and Parking Lamps . . . . . . 327
High-Beam On Light . . . . . . . . . . . . . . . . . . . 125
High/Low Beam Changer . . . . . . . . . . . . . . 140
Lamps On Reminder . . . . . . . . . . . . . . . . . . . 125 Heated
Mirrors . . . . . . . . . . . . . . . . . . . . . . . . . . . . . . . . . 34
Rear Seats . . . . . . . . . . . . . . . . . . . . . . . . . . . . . . 52
Steering Wheel . . . . . . . . . . . . . . . . . . . . . . . . 100
Ventilated Front Seats . . . . . . . . . . . . . . . . . . 50
Heater Engine . . . . . . . . . . . . . . . . . . . . . . . . . . . . . . . . . 213
Heating . . . . . . . . . . . . . . . . . . . . . . . . . . . . . . 185, 187
High-Beam On Light . . . . . . . . . . . . . . . . . . . . . . 125
Hill Descent Control (HDC) . . . . . . . . . . . . . . . . . 231
Descent Control Light . . . . . . . . . . . . . . . . . . . 121
Hill and Mountain Roads . . . . . . . . . . . . . . . . 201
Hill Start Assist (HSA) . . . . . . . . . . . . . . . . . . . . 229
Hood . . . . . . . . . . . . . . . . . . . . . . . . . . . . . . . . . . . . 305
Horn . . . . . . . . . . . . . . . . . . . . . . . . . . . . . . . . . . . . . .101
How to Wear Seat Belts Properly . . . . . . . . . 54
HVAC . . . . . . . . . . . . . . . . . . . . . . . . . . . . . . . . 185, 187
I
Ignition Positions . . . . . . . . . . . . . . . . . . . . . . . . . 211
Immobilizer . . . . . . . . . . . . . . . . . . . . . . . . . . . . . . . 30
Indicator Pedestrian Ahead . . . . . . . . . . . . . . . . . . . . . . . 121
Vehicle Ahead . . . . . . . . . . . . . . . . . . . . . . . . . . 121
Indicators
Warning Lights and Gauges . . . . . . . . . . . . 106
Infants and Young Children, Restraints . . . . .72 Information
Publication Ordering . . . . . . . . . . . . . . . . . . . 406
Infotainment Using the System . . . . . . . . . . . . . . . . . . . . . . 152
Infotainment System . . . . . . . . . . . . . . . . . . . . 409
Inspection Multi-Point Vehicle . . . . . . . . . . . . . . . . . . . . 390
Instrument Cluster . . . . . . . . . . . . . . . . . . .107, 108
Instrument Panel Overview . . . . . . . . . . . . . . . . .5
Interior Rearview Mirrors . . . . . . . . . . . . . . . . . .35
Introduction . . . . . . . . . . . . . . . . . . . . . . . . . . . 2, 148
J
Jump Starting - North America . . . . . . . . . . . . . . . 370
K
Keys . . . . . . . . . . . . . . . . . . . . . . . . . . . . . . . . . . . . . . . 11Remote . . . . . . . . . . . . . . . . . . . . . . . . . . . . . . . . . . 12
Remote Operation . . . . . . . . . . . . . . . . . . . . . . . 12
L
Labeling, Tire Sidewall . . . . . . . . . . . . . . . . . . . .341
LampsAuxiliary Roof Mounted Lamp . . . . . . . . . 143
Daytime Running (DRL) . . . . . . . . . . . . . . . . 140
Dome . . . . . . . . . . . . . . . . . . . . . . . . . . . . . . . . . . 145
Exterior Cargo . . . . . . . . . . . . . . . . . . . . . . . . . 144
Exterior Controls . . . . . . . . . . . . . . . . . . . . . . . 138