2024 CHEVROLET SILVERADO brake light
[x] Cancel search: brake lightPage 323 of 433
Chevrolet Silverado 2500 HD/3500 HD Owner Manual (GMNA-Localizing-U.
S./Canada/Mexico-16908339) - 2024 - CRC - 12/5/22
Vehicle Care 321
installed. Add or remove fluid, as necessary,
only when work is done on the brake
hydraulic system.
{Warning
If too much brake fluid is added, it can
spill on the engine and burn, if the
engine is hot enough. You or others could
be burned, and the vehicle could be
damaged. Add brake fluid only when
work is done on the brake hydraulic
system.
When the brake fluid falls to a low level,
the brake warning light comes on. See Brake
System Warning Light 0119.
Brake fluid absorbs water over time which
degrades the effectiveness of the brake fluid.
Replace brake fluid at the specified intervals
to prevent increased stopping distance. See
Maintenance Schedule 0388.
What to Add
Use only GM approved DOT 4 brake fluid
from a clean, sealed container. See
Recommended Fluids and Lubricants 0392.
{Warning
The wrong or contaminated brake fluid
could result in damage to the brake
system. This could result in the loss of
braking leading to a possible injury.
Always use the proper GM approved
brake fluid.
Caution
If brake fluid is spilled on the vehicle's
painted surfaces, the paint finish can be
damaged. Immediately wash off any
painted surface.
Battery - North America
The original equipment battery is
maintenance free. Do not remove the cap
and do not add fluid.
Refer to the replacement number shown on
the original battery label when a new
battery is needed. See Engine Compartment
Overview 0307 for battery location.
{Warning
WARNING: Battery posts, terminals and
related accessories can expose you to
chemicals including lead and lead
compounds, which are known to the
State of California to cause cancer and
birth defects or other reproductive harm.
Wash hands after handling. For more
information go to
www.P65Warnings.ca.gov.
See California Proposition 65 Warning 01.
Vehicle Storage
{Warning
Batteries have acid that can burn you and
gas that can explode. You can be badly
hurt if you are not careful. Always wear
eye protection. See Jump Starting - North
America 0370 for tips on working
around a battery without getting hurt.
Infrequent Usage: Remove the black,
negative (−) cable from the battery to keep
the battery from running down.
Page 336 of 433

Chevrolet Silverado 2500 HD/3500 HD Owner Manual (GMNA-Localizing-U.
S./Canada/Mexico-16908339) - 2024 - CRC - 12/5/22
334 Vehicle Care
FusesUsage
25 EBCM 1 –Electronic
Brake Control Module 1
26 –
27 Horn
28 Parking Lamp Mirror/ Grill (LD)/Parking Lamp
Left (HD)
29 Parking Lamp Right (HD)
30 ELM 3 –Electronic
Lighting Module 3
31 ELM 1 –Electronic
Lighting Module 1
32 –
33 Not R/C
34 Radars (LD) 37 MISC IP Headliner Ignition
38 Seat Fan Ignition
39 Trailer Ignition Module
40 Misc Ignition 41 Trailer Parking Lamp Fuses
Usage
42 Tail Lamp Left (HD)
44 DEFC/ICCM Ignition (LD/ HD)/FTZM Ignition (HD)
45 Secondary Axle Motor
46 Engine Control Module Ignition
47 –
48 –
49 Transmission Auxiliary Oil Pump (LD)
50 A/C Clutch 51 Transfer Case Control Module
52 Front Wiper
53 Center High-Mounted Stop Lamp
54 Tail Lamp Right (HD) 55 Trailer Back-up Lamp
56 SADS (LD)/Fuel Tank Zone Module 2 (HD)
57 TTPM/SBZA
58 Starter Motor (LD) Fuses
Usage
60 Powertrain Sensor 2 (DSL)
61 Active Hydraulic Steering (HD)
62 DEFC Batt 1/CVS
63 Trailer Brake
65 –
66 Cooling Fan Motor Left (LD)
67 –
68 DEFC Batt 2
69 Starter Pinion (LD Gas)/ Starter Motor (HD)
71 Cooling Fan Lower (LD)
72 Cooling Fan Right (LD)
73 Trailer Stop/Turn Lamp Left
74 Trailer Interface Module 2
75 Integrated Chassis Control Module
76 Electric RNG BDS
Page 350 of 433

Chevrolet Silverado 2500 HD/3500 HD Owner Manual (GMNA-Localizing-U.
S./Canada/Mexico-16908339) - 2024 - CRC - 12/5/22
348 Vehicle Care
Tire Fill Alert (If Equipped)
This feature provides visual and audible
alerts outside the vehicle to help when
inflating an underinflated tire to the
recommended cold tire pressure.
When the low tire pressure warning light
comes on:1. Park the vehicle in a safe, level place.
2. Set the parking brake firmly.
3. Place the vehicle in P (Park).
4. Add air to the tire that is underinflated. The turn signal lamp will flash.
When the recommended pressure is
reached, the horn sounds once and the
turn signal lamp will stop flashing and
briefly turn solid.
Repeat these steps for all underinflated tires
that have illuminated the low tire pressure
warning light.
{Warning
Overinflating a tire could cause the tire
to rupture and you or others could be
injured. Do not exceed the maximum (Continued)
Warning (Continued)
pressure listed on the tire sidewall. See
Tire Sidewall Labeling0341 and
Vehicle Load Limits 0204.
If the tire is overinflated by more than
35 kPa (5 psi), the horn will sound multiple
times and the turn signal lamp will continue
to flash for several seconds after filling
stops. To release and correct the pressure,
while the turn signal lamp is still flashing,
briefly press the center of the valve stem.
When the recommended pressure is reached,
the horn sounds once.
If the turn signal lamp does not flash within
15 seconds after starting to inflate the tire,
the tire fill alert has not been activated or is
not working.
If the hazard warning flashers are on, the
tire fill alert visual feedback will not work
properly.
The TPMS will not activate the tire fill alert
properly under the following conditions:
.There is interference from an external
device or transmitter.
.The air pressure from the inflation device
is not sufficient to inflate the tire.
.There is a malfunction in the TPMS.
.There is a malfunction in the horn or turn
signal lamps.
.The TPMS sensor identification code is not
registered to the system.
.The TPMS sensor battery is low.
If the tire fill alert does not operate due to
TPMS interference, move the vehicle about
1 m (3 ft) back or forward and try again.
If the tire fill alert feature is not working,
use a tire pressure gauge.
TPMS Sensor Matching Process
Use this TPMS Sensor Matching Process if
your vehicle is equipped with dual rear
wheels:
Each TPMS sensor has a unique
identification code. The identification code
needs to be matched to a new tire/wheel
position after rotating the vehicle’s tires or
replacing one or more of the TPMS sensors.
Also, the TPMS sensor matching process
should be performed after replacing a spare
tire with a road tire containing the TPMS
sensor. The malfunction light and the DIC
message should go off at the next ignition
cycle. The sensors are matched to the tire/
wheel positions, using a TPMS relearn tool,
in the following order: driver side front tire,
Page 356 of 433
Chevrolet Silverado 2500 HD/3500 HD Owner Manual (GMNA-Localizing-U.
S./Canada/Mexico-16908339) - 2024 - CRC - 12/5/22
354 Vehicle Care
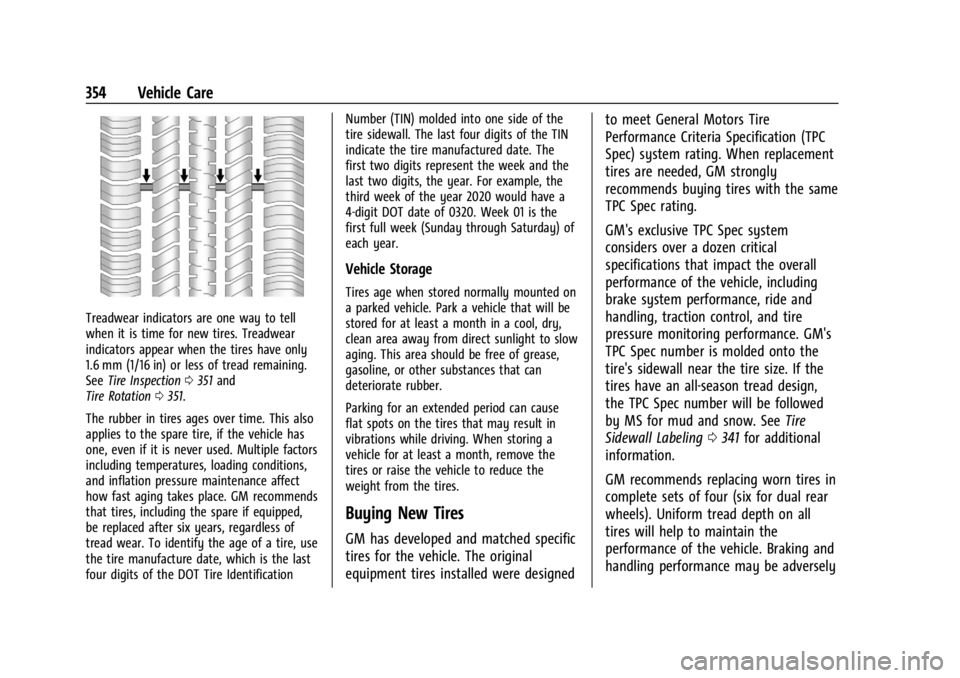
Treadwear indicators are one way to tell
when it is time for new tires. Treadwear
indicators appear when the tires have only
1.6 mm (1/16 in) or less of tread remaining.
SeeTire Inspection 0351 and
Tire Rotation 0351.
The rubber in tires ages over time. This also
applies to the spare tire, if the vehicle has
one, even if it is never used. Multiple factors
including temperatures, loading conditions,
and inflation pressure maintenance affect
how fast aging takes place. GM recommends
that tires, including the spare if equipped,
be replaced after six years, regardless of
tread wear. To identify the age of a tire, use
the tire manufacture date, which is the last
four digits of the DOT Tire Identification Number (TIN) molded into one side of the
tire sidewall. The last four digits of the TIN
indicate the tire manufactured date. The
first two digits represent the week and the
last two digits, the year. For example, the
third week of the year 2020 would have a
4-digit DOT date of 0320. Week 01 is the
first full week (Sunday through Saturday) of
each year.
Vehicle Storage
Tires age when stored normally mounted on
a parked vehicle. Park a vehicle that will be
stored for at least a month in a cool, dry,
clean area away from direct sunlight to slow
aging. This area should be free of grease,
gasoline, or other substances that can
deteriorate rubber.
Parking for an extended period can cause
flat spots on the tires that may result in
vibrations while driving. When storing a
vehicle for at least a month, remove the
tires or raise the vehicle to reduce the
weight from the tires.
Buying New Tires
GM has developed and matched specific
tires for the vehicle. The original
equipment tires installed were designed
to meet General Motors Tire
Performance Criteria Specification (TPC
Spec) system rating. When replacement
tires are needed, GM strongly
recommends buying tires with the same
TPC Spec rating.
GM's exclusive TPC Spec system
considers over a dozen critical
specifications that impact the overall
performance of the vehicle, including
brake system performance, ride and
handling, traction control, and tire
pressure monitoring performance. GM's
TPC Spec number is molded onto the
tire's sidewall near the tire size. If the
tires have an all-season tread design,
the TPC Spec number will be followed
by MS for mud and snow. See
Tire
Sidewall Labeling 0341 for additional
information.
GM recommends replacing worn tires in
complete sets of four (six for dual rear
wheels). Uniform tread depth on all
tires will help to maintain the
performance of the vehicle. Braking and
handling performance may be adversely
Page 374 of 433
Chevrolet Silverado 2500 HD/3500 HD Owner Manual (GMNA-Localizing-U.
S./Canada/Mexico-16908339) - 2024 - CRC - 12/5/22
372 Vehicle Care
The discharged battery positive (+) terminal
is under a cover. Open the cover to expose
the terminal.1. Check the other vehicle. It must have a 12-volt battery with a negative ground
system.
Caution
If the other vehicle does not have a
12-volt system with a negative ground,
both vehicles can be damaged. Only use
a vehicle that has a 12-volt system with a
negative ground for jump starting.
2. If you have a vehicle with a diesel engine with two batteries, you should
know before you begin that, especially in
cold weather, you may not be able to
get enough power from a single battery
in another vehicle to start your diesel
engine. If your vehicle has more than
one battery, using the battery that is
closer to the starter will reduce electrical
resistance. This is located on the
passenger side, in the rear of the engine
compartment.
3. Get the vehicles close enough so the jumper cables can reach, but be sure the
vehicles are not touching each other. If they are, it could cause an unwanted
ground connection. You would not be
able to start your vehicle, and the bad
grounding could damage the electrical
systems.
To avoid the possibility of the vehicles
rolling, set the parking brake firmly on
both vehicles involved in the jump start
procedure. Put the automatic
transmission in P (Park) before setting
the parking brake. If you have a
four-wheel-drive vehicle, be sure the
transfer case is in a drive gear, not in
N (Neutral).
Caution
If any accessories are left on or plugged
in during the jump starting procedure,
they could be damaged. The repairs
would not be covered by the vehicle
warranty. Whenever possible, turn off or
unplug all accessories on either vehicle
when jump starting.
4. Turn the ignition off on both vehicles. Unplug unnecessary accessories plugged
into the accessory power outlets. Turn
off the radio and all the lamps that are not needed. This will avoid sparks and
help save both batteries. And it could
save the radio!
5. Open the hood on the other vehicle and locate the positive (+) and negative (−)
terminal locations on that vehicle.
{Warning
An electric fan can start up even when
the engine is not running and can injure
you. Keep hands, clothing, and tools
away from any underhood electric fan.
{Warning
Using a match near a battery can cause
battery gas to explode. People have been
hurt doing this, and some have been
blinded. Use a flashlight if you need
more light.
Battery fluid contains acid that can burn
you. Do not get it on you. If you
accidentally get it in your eyes or on
your skin, flush the place with water and
get medical help immediately.
Page 378 of 433
Chevrolet Silverado 2500 HD/3500 HD Owner Manual (GMNA-Localizing-U.
S./Canada/Mexico-16908339) - 2024 - CRC - 12/5/22
376 Vehicle Care
{Warning
Shifting a four-wheel-drive vehicle's
transfer case into N (Neutral) can allow
the vehicle to move even if the
transmission is in P (Park). You or others
could be injured. Set the parking brake
and use wheel blocks before shifting the
transfer case to N (Neutral).
To dinghy tow: 1. Position the vehicle being towed behind the tow vehicle, facing forward and on a
level surface.
2. Securely attach the vehicle being towed to the tow vehicle.
3. Apply the parking brake and start the engine.
4. Shift the transfer case to N (Neutral). See “Shifting into N (Neutral)” under
Four-Wheel Drive 0221.
5. With the engine running, release the parking brake and verify that the
transfer case is in N (Neutral) by shifting
the transmission to D (Drive) and then to
R (Reverse). There should be no
movement while shifting the
transmission. 6. Shift the transmission to D (Drive).
7. Turn the vehicle off. Disregard the Shift
to P (Park) DIC message. See Ignition
Positions 0211.
{Warning
To avoid death, serious injury,
or property damage, before dinghy
towing the vehicle, always disconnect and
secure the negative battery cable and
cover the negative battery post and cable
with a non-conductive material. If the
battery is left connected or the battery
cable contacts the post, the Electric
Parking Brake may activate during
towing, which could cause a crash.
8. Disconnect the negative (–) battery cable. See “Negative Battery Cable
Disconnection” inBattery - North
America 0321.
9. Shift the transmission to P (Park).
Caution
If the steering column is locked, vehicle
damage may occur. 10. Move the steering wheel to make sure
the steering column is unlocked.
11. Keep the remote key outside of the vehicle and manually lock the doors.
Access the vehicle by using the key in
the door lock. See Door Locks019.
Disconnecting the Towed Vehicle
Before disconnecting from the tow vehicle: 1. Park on a level surface. Secure the vehicle with wheel blocks.
2. Reconnect the negative (–) battery. See Battery - North America 0321.
3. Turn on the vehicle. With your foot off the brake pedal, press and hold ENGINE
START/STOP for five seconds until the
green light comes on in the button. See
Ignition Positions 0211.
4. Set the parking brake. See Electric
Parking Brake 0228.
5. Disconnect from the tow vehicle.
6. Shift the transmission to N (Neutral).
7. Shift the transfer case to 2
m(Two-Wheel
Drive High). When the shift to 2
m
(Two-Wheel Drive High) is complete, the
light in the instrument cluster will stop
flashing and stay lit. See
Four-Wheel-Drive Light 0120.
Page 379 of 433
Chevrolet Silverado 2500 HD/3500 HD Owner Manual (GMNA-Localizing-U.
S./Canada/Mexico-16908339) - 2024 - CRC - 12/5/22
Vehicle Care 377
8. Start the engine. Check that the vehicleis in 2
m(Two-Wheel Drive High) by
starting the engine and shifting the
transmission to D (Drive) and then to
R (Reverse). There should be movement
of the vehicle while shifting.
9. Shift the transmission to P (Park) and turn off the vehicle.
10. Release the parking brake and remove the wheel blocks.
11. Reset any lost presets. The outside temperature display will
default to 0 °C (32 °F) but will reset with
normal usage.
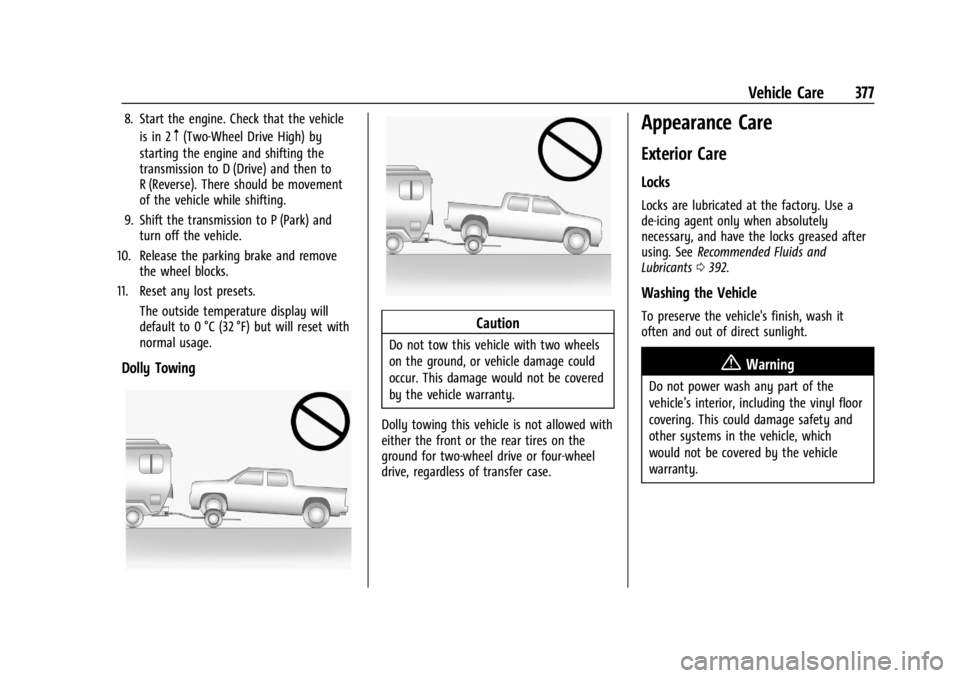
Dolly Towing
Caution
Do not tow this vehicle with two wheels
on the ground, or vehicle damage could
occur. This damage would not be covered
by the vehicle warranty.
Dolly towing this vehicle is not allowed with
either the front or the rear tires on the
ground for two-wheel drive or four-wheel
drive, regardless of transfer case.
Appearance Care
Exterior Care
Locks
Locks are lubricated at the factory. Use a
de-icing agent only when absolutely
necessary, and have the locks greased after
using. See Recommended Fluids and
Lubricants 0392.
Washing the Vehicle
To preserve the vehicle's finish, wash it
often and out of direct sunlight.
{Warning
Do not power wash any part of the
vehicle’s interior, including the vinyl floor
covering. This could damage safety and
other systems in the vehicle, which
would not be covered by the vehicle
warranty.
Page 392 of 433

Chevrolet Silverado 2500 HD/3500 HD Owner Manual (GMNA-Localizing-U.
S./Canada/Mexico-16908339) - 2024 - CRC - 12/5/22
390 Service and Maintenance
* Footnote: Under extreme driving
conditions listed above, it may be
necessary to replace your spark plugs at
more frequent intervals. For further
assistance in determining the most
suitable service maintenance intervals for
your vehicle, please contact your
authorized GM Dealer.
Extreme service is for vehicles mainly
driven off-road in four-wheel drive or used
in farming, mining, forestry, or snow
plowing.
Additional Required Services–Severe
Service
Every 40 000 km (25,000 mi)
.Change transfer case fluid, if equipped
with 4WD. Do not directly power wash
the transfer case and/or front/rear axle
output seals. High pressure water can
overcome the seals and contaminate the
transfer case fluid. Contaminated fluid will
decrease the life of the transfer case and/
or axles and should be replaced.
Every 72 000 km (45,000 mi)
.Change automatic transmission fluid and
filter.
Owner Checks and Services
Every Five Years
.Replace brake fluid.
Every Seven Years
.Replace Air Conditioning Desiccant every
seven years. The air conditioning system
requires maintenance every seven years.
This service requires replacement of the
desiccant to help the longevity and
efficient operation of the air conditioning
system. This service can be complex. See
your dealer.
Multi-Point Vehicle
Inspection (MPVI)
A Multi Point Vehicle Inspection (MPVI)
completed by a GM dealer technician is a
maintenance assessment of your vehicle.
The benefit of the MPVI is to identify and
inform the customer of service items that
require immediate attention and those that
may require attention in the future.
The technician will perform the following
checks on your vehicle. For a complete list
of checks, inspections, and services, see your
dealer. Some items may not apply to your vehicle
and/or region.
Diagnostics
.OnStar active, if equipped
.Service history/recall check
Engine Oil and Filter
.Engine oil
.Oil life monitor
‐
Reset oil life monitor
Exterior Lights
.Visual inspection
Windshield and Wipers
.Visual inspection
Battery
.Battery visual inspection
.Battery test results
.Battery cables and connections
Systems, Fluids, and Visible Leak
Inspection
.Engine oil
.Transmission
.Drive axle
.Transfer case