2024 CHEVROLET SILVERADO ESP
[x] Cancel search: ESPPage 266 of 433

Chevrolet Silverado 2500 HD/3500 HD Owner Manual (GMNA-Localizing-U.
S./Canada/Mexico-16908339) - 2024 - CRC - 12/12/22
264 Driving and Operating
LCA/TSBZA displays may not come on when
passing a vehicle quickly, or when passing a
stopped vehicle. LCA/TSBZA may alert to
objects attached to the vehicle, such as a
bicycle, or object extending out to either
side of the vehicle or trailer. This is normal
system operation; the vehicle does not need
service.
LCA/TSBZA can be disabled through vehicle
settings. To view available settings from the
infotainment screen, touch Settings >
Vehicle > Collision/Detection Systems.
If SBZA is disabled by the driver, the TSBZA
mirror displays will not light up.
When the System Does Not Seem to
Work Properly
LCA/TSBZA displays may not come on when
passing a vehicle quickly, or when passing a
stopped vehicle. The LCA/TSBZA detection
zones that extend back from the side of the
vehicle do not move further back when a
trailer is towed. Use caution while changing
lanes when towing a trailer. LCA/TSBZA may
alert to objects attached to the vehicle, such
as a trailer, bicycle, or object extending out
to either side of the vehicle or trailer. This is
normal system operation; the vehicle does
not need service.LCA/TSBZA may not always alert the driver
to vehicles in the side blind zone, especially
in wet conditions. The system does not need
to be serviced. The system may light up due
to guardrails, signs, trees, shrubs, and other
non-moving objects. This is normal system
operation; the vehicle does not need service.
LCA/TSBZA may not operate when the LCA/
TSBZA sensors in the left or right corners of
the rear bumper are covered with mud, dirt,
snow, ice, or slush, or in heavy rainstorms.
For cleaning instructions, see "Washing the
Vehicle" under
Exterior Care0377. If the DIC
displays the system unavailable message
after cleaning both sides of the vehicle
toward the rear corners of the vehicle, see
your dealer.
If the DIC displays the system unavailable
message after cleaning both sides of the
vehicle toward the rear corners of the
vehicle, see your dealer
If the LCA/TSBZA displays do not light up
when vehicles are in the blind zone and the
system is clean, the system may need
service. Take the vehicle to your dealer. When TSBZA is disabled for any reason
other than the driver turning it off, the
Trailer Side Blind Zone Alert On option will
not be available on the
personalization menu.
Driving with a Trailer
Although this system is intended to help
drivers avoid lane change crashes, it does
not replace driver vision and therefore
should be considered a lane change aid.
Even with the TSBZA system, the driver
must check carefully for objects outside of
the reporting zone (e.g., a fast approaching
vehicle) or vehicle along the side of the
trailer before changing lanes.
Use caution while changing lanes when
towing a trailer.
Lane Departure Warning (LDW)
If equipped, LDW may help avoid crashes
due to unintentional lane departures. LDW
uses a camera sensor to detect the lane
markings at speeds of 56 km/h (35 mph) or
greater. It may provide an alert if the
vehicle is crossing a lane without using a
turn signal in that direction. LDW light will
not alert if the turn signal is active in the
Page 273 of 433
Chevrolet Silverado 2500 HD/3500 HD Owner Manual (GMNA-Localizing-U.
S./Canada/Mexico-16908339) - 2024 - CRC - 12/12/22
Driving and Operating 271
The following information has many
time-tested, important trailering tips and
safety rules. Many of these are important
for your safety and that of your passengers.
Read this section carefully before towing a
trailer.
When towing a trailer:
.Become familiar with, and follow all state
and local laws that apply to trailer
towing. These requirements vary from
state to state.
.State laws may require the use of
extended side view mirrors. If your
visibility is limited or restricted while
towing, install extended side view mirrors
on your vehicle, even if not required.
.Do not tow a trailer during the first
800 km (500 mi) of vehicle use to prevent
damage to the engine, axle, or other
parts.
.Perform the first oil change before heavy
towing.
.Do not drive over 80 km/h (50 mph) and
do not make starts at full throttle during
the first 800 km (500 mi) of trailer
towing.
.Tow in D (Drive). Tow/Haul Mode is
recommended for heavier trailers. See
Tow/Haul Mode0221. If the transmission downshifts too often, a lower gear may
be selected using Manual Mode. See
Manual Mode
0220.
The following advanced driver assistance
features should be turned off when towing
a trailer, and may turn off automatically
when a trailer is detected:
.Park Assist
.Reverse Automatic Braking (RAB)
.Rear Cross Traffic Alert (RCTA)
.Rear Cross Traffic Braking (RCTB)
.Lane Change Alert (LCA)
.Super Cruise and Adaptive Cruise Control
(ACC), unless equipped with trailering
functionality, see Adaptive Cruise Control
(Camera) 0235.
Automatic Emergency Braking (AEB) and
Front Pedestrian Braking (FPB) should be set
to Alert unless equipped with Super Cruise.
Do not use Automatic Parking Assist (APA)
while towing a trailer.
{Warning
To prevent serious injury or death from
carbon monoxide (CO), when towing a
trailer: (Continued)
Warning (Continued)
.Do not drive with the liftgate, trunk/
hatch, or rear-most window open.
.Fully open the air outlets on or under
the instrument panel.
.Adjust the climate control system to a
setting that brings in only outside air.
See“Climate Control Systems” in the
Index.
For more information about carbon
monoxide, see Engine Exhaust 0217.
Towing a trailer requires experience. The
combination of the vehicle and trailer is
longer and not as responsive as the vehicle
itself. Get used to the handling and braking
of the combination by driving on a level
road surface before driving on public roads.
The trailer structure, the tires, and the
brakes must all be rated to carry the
intended cargo. Inadequate trailer
equipment can cause the combination to
operate in an unexpected or unsafe manner.
Before driving, inspect all trailer hitch parts
and attachments, safety chains, electrical
connectors, lamps, tires, and mirrors. See
Towing Equipment 0278. If the trailer has
electric brakes, start the combination
Page 275 of 433
Chevrolet Silverado 2500 HD/3500 HD Owner Manual (GMNA-Localizing-U.
S./Canada/Mexico-16908339) - 2024 - CRC - 12/12/22
Driving and Operating 273
When parking your vehicle and your trailer
on a hill:1. Press and hold the brake pedal, but do not shift into P (Park). Turn the wheels
toward the curb if facing downhill or
into traffic if facing uphill.
2. Have someone place chocks under the trailer wheels.
3. Gradually release the brake pedal to allow the chocks to absorb the load of
the trailer.
4. Reapply the brake pedal. Then apply the parking brake and shift into P (Park).
5. Release the brake pedal.
Leaving After Parking on a Hill
1. Apply and hold the brake pedal.
.Start the engine.
.Shift into a gear.
.Release the parking brake.
2. Let up on the brake pedal.
3. Drive slowly until the trailer is clear of the chocks.
4. Stop and have someone pick up and store the chocks.
Launching and Retrieving a Boat
Backing the Trailer into the Water
{Warning
.Have all passengers get out of the
vehicle before backing onto the sloped
part of the ramp. Lower the driver and
passenger side windows before
backing onto the ramp. This will
provide a means of escape in the
unlikely event the vehicle slides into
the water.
.If the boat launch surface is slippery,
have the driver remain in the vehicle
with the brake pedal applied while the
boat is being launched. The boat
launch can be especially slippery at
low tide when part of the ramp was
previously submerged at high tide. Do
not back onto the ramp to launch the
boat if you are not sure the vehicle
can maintain traction.
.Do not move the vehicle if someone is
in the path of the trailer. Some parts
of the trailer might be underwater and
not visible to people who are assisting
in launching the boat. Disconnect the trailer wiring before backing
the trailer into the water to prevent damage
to the electrical circuits. Reconnect the
wiring to the trailer after removing the
trailer from the water. If the trailer has
electric brakes that can function when the
trailer is submerged, it might help to leave
the electrical trailer connector attached to
maintain trailer brake functionality while on
the boat ramp.
To back the trailer into the water:
1. If equipped, place the vehicle in Four-Wheel Drive High or Automatic
Four-Wheel Drive.
2. Slowly back down the boat ramp until the boat is floating, but no further than
necessary.
3. Press and hold the brake pedal, but do not shift into P (Park).
4. Have someone place chocks under the front wheels of the vehicle.
5. Gradually release the brake pedal to allow the chocks to absorb the load of
the trailer.
6. Reapply the brake pedal. Then, apply the parking brake and shift into P (Park).
7. Release the brake pedal.
Page 276 of 433
Chevrolet Silverado 2500 HD/3500 HD Owner Manual (GMNA-Localizing-U.
S./Canada/Mexico-16908339) - 2024 - CRC - 12/12/22
274 Driving and Operating
Pulling the Trailer from the Water
To pull the trailer out of the water:1. Press and hold the brake pedal.
2. Start the engine and shift into gear.
3. Release the parking brake.
4. Let up on the brake pedal.
5. Drive slowly until the tires are clear of the chocks.
6. Stop and have someone pick up and store the chocks.
7. Slowly pull the trailer from the water.
8. Once the vehicle and trailer have been driven from the sloped part of the boat
ramp, the vehicle can be shifted from
four-wheel-drive high. Shift into the drive
mode that is appropriate for the road
conditions.
Caution
If the vehicle tires begin to spin and the
vehicle begins to slide toward the water,
remove your foot from the accelerator
pedal and apply the brake pedal. Seek
help to have the vehicle towed up
the ramp.
Maintenance when Trailer Towing
The vehicle needs service more often when
used to tow trailers. See Maintenance
Schedule 0388. It is especially important to
check the engine oil, axle lubricant, belts,
cooling system, and brake system before
and during each trip.
Check periodically to see that all nuts and
bolts on the trailer hitch are tight.
Engine Cooling When Trailer Towing
The cooling system may temporarily
overheat during severe operating conditions.
See Engine Overheating 0315.
Trailer Towing
If equipped with a diesel engine, see the
Duramax diesel supplement.
Caution
Towing a trailer improperly can damage
the vehicle and result in costly repairs
not covered by the vehicle warranty. To
tow a trailer correctly, follow the
directions in this section and see your
dealer for important information about
towing a trailer with the vehicle. Trailering is different than just driving the
vehicle by itself. Trailering means changes in
handling, acceleration, braking, and
durability. Successful, safe trailering takes
correct equipment, and it has to be used
properly.
The following information has many
time-tested, important trailering tips and
safety rules. Many of these are important
for your safety and that of your passengers.
Read this section carefully before pulling a
trailer.
Trailer Weight
{Warning
Never exceed the towing capacity for
your vehicle.
Safe trailering requires monitoring the
weight, speed, altitude, road grades, outside
temperature, and how frequently the vehicle
is used to tow a trailer.
Trailer Weight Ratings
When towing a trailer, the combined weight
of the vehicle, vehicle contents, trailer, and
trailer contents must be below all of the
maximum weight ratings for the vehicle,
including:
Page 283 of 433
Chevrolet Silverado 2500 HD/3500 HD Owner Manual (GMNA-Localizing-U.
S./Canada/Mexico-16908339) - 2024 - CRC - 12/12/22
Driving and Operating 281
MeasurementHeight Example 2500/3500 (mm)
H1 1 040
H2 1 080
H2−H1 40
(H2−H1)/4 10
H2−[(H2−H1)/4] 1 070
Tires
.Do not tow a trailer while using a
compact spare tire on the vehicle.
.Tires must be properly inflated to support
loads while towing a trailer. SeeTires
0 339 for instructions on proper tire
inflation.
Fifth-Wheel and Gooseneck Trailering
Fifth-wheel and gooseneck trailers can be
used with many pickup models. These
trailers place a larger percentage of the
weight (kingpin weight) on the tow vehicle
than conventional trailers. Make sure this
weight does not cause the vehicle to exceed
Gross Axle Weight Rating (GAWR) or Gross
Vehicle Weight Rating (GVWR). Fifth-wheel
or gooseneck kingpin weight should be 15 –
25% of the trailer weight up to the maximum amount specified on the Trailering
Information Label. See
“Trailer Weight"
under Trailer Towing 0274.
The hitch should be in the pickup bed so
that its centerline is over or near the rear
axle. Take care that it is not so far forward
that it will contact the back of the cab in
sharp turns. This is especially important for
short box pickups. Trailer pin box extensions
and sliding fifth-wheel hitch assemblies may
be used. There should be at least 15 cm
(6 in) of clearance between the top of the
pickup box and the bottom of the trailer
shelf that extends over the box.
Attach the hitch to the tow vehicle frame
rails. Do not use the pickup box for support.
Two Inch Adapter Sleeve and
Retainer Pin
The 2500/3500 series vehicles are equipped
with a 2-1/2” square receiver. An adapter is
provided to allow the use of a 2” draw bar,
along with a hitch retainer pin, and
retainer clip.
Safety Chains
Always attach safety chains between the
vehicle and the trailer. Instructions about
safety chains may be provided by the hitch
manufacturer or by the trailer manufacturer.
If the trailer being towed weighs up to
2 271 kg (5,000 lb) with a factory-installed
step bumper, safety chains may be attached
Page 296 of 433

Chevrolet Silverado 2500 HD/3500 HD Owner Manual (GMNA-Localizing-U.
S./Canada/Mexico-16908339) - 2024 - CRC - 12/12/22
294 Driving and Operating
If trailer dimensions are out of range, this
feature will be unavailable.
Status View
If a trailer is connected, the Status view
shows status information for the active
trailer profile.
If no trailer is connected, the Status view
shows the last trailer profile with a status of
Not Connected.
The Status view shows:
.Lights
.Tires
.Maintenance
.Cameras
.Checklists
.Weight
.Towing AssistScroll right or left to see more options.
Each section shows high level status
information for the feature. Selecting a
section will open up a new screen with
additional information and/or options.
Selecting a camera view will open up a new
screen to preview the camera image. The
status view displays mileage and fuel
economy information.
Lights
This view displays the names of the trailer
connector pins, a graphic of the trailer
connector, and a graphic of the back of the
trailer.
Any connector pin that failed will be amber
color, and the location of the corresponding
connection will be highlighted on the
graphic of the back of the trailer.
If a trailer connection is detected without
any faults, the view will display No Issues
Found.
When a trailer is connected, the Trailering
App detects the trailer connection using the
Stop/Turn Signal lighting circuits and alerts
the driver by requesting a trailer profile
setup through the Trailering App on the
infotainment screen. If a default trailer
profile is selected, the Trailering App will not
display a Trailer Detection Alert to the user
when a trailer is connected.
When a trailer is connected and the vehicle
is off, the Trailering App will periodically
pulse the lighting circuits of the trailer to
verify it is still connected. The trailer lights
may periodically flash as a result of this
trailer connection detection. These flashes
may be more visible in dark ambient light
environments. The flashing or flickering
lights are a normal condition and the
Trailering App has built-in protections to
prevent the battery from draining. When
Theft Alert is enabled, the frequency and
pattern of this flashing will change.
If a connected trailer becomes disconnected,
a message about the trailer disconnect will
appear on the Driver Information Center
(DIC) immediately (if vehicle is on) or the
Page 310 of 433
Chevrolet Silverado 2500 HD/3500 HD Owner Manual (GMNA-Localizing-U.
S./Canada/Mexico-16908339) - 2024 - CRC - 12/5/22
308 Vehicle Care
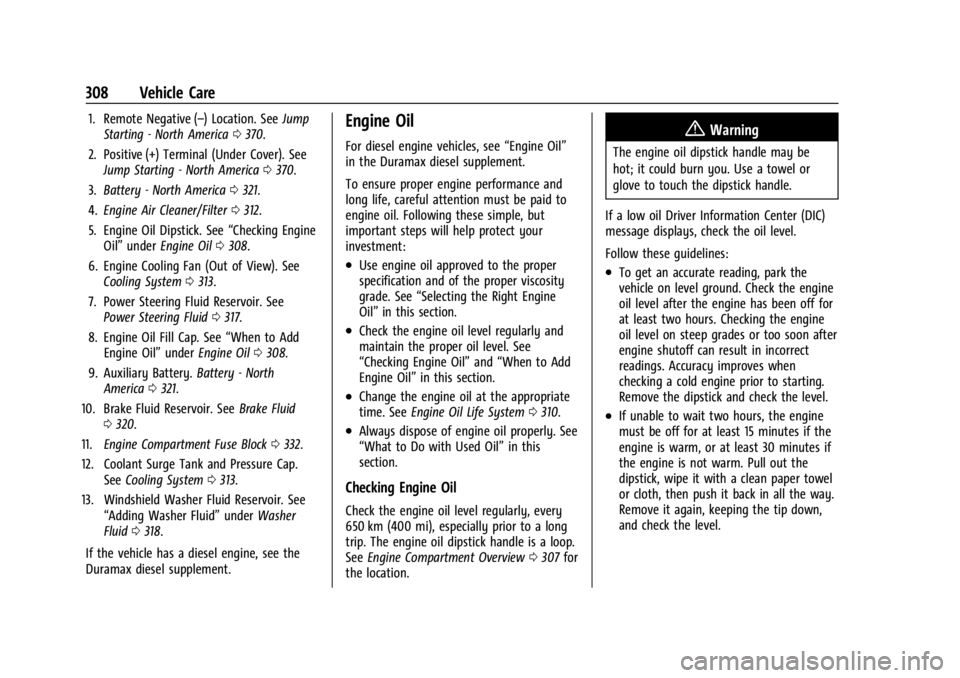
1. Remote Negative (–) Location. SeeJump
Starting - North America 0370.
2. Positive (+) Terminal (Under Cover). See Jump Starting - North America 0370.
3. Battery - North America 0321.
4. Engine Air Cleaner/Filter 0312.
5. Engine Oil Dipstick. See “Checking Engine
Oil” under Engine Oil 0308.
6. Engine Cooling Fan (Out of View). See Cooling System 0313.
7. Power Steering Fluid Reservoir. See Power Steering Fluid 0317.
8. Engine Oil Fill Cap. See “When to Add
Engine Oil” underEngine Oil 0308.
9. Auxiliary Battery. Battery - North
America 0321.
10. Brake Fluid Reservoir. See Brake Fluid
0 320.
11. Engine Compartment Fuse Block 0332.
12. Coolant Surge Tank and Pressure Cap. SeeCooling System 0313.
13. Windshield Washer Fluid Reservoir. See “Adding Washer Fluid” underWasher
Fluid 0318.
If the vehicle has a diesel engine, see the
Duramax diesel supplement.Engine Oil
For diesel engine vehicles, see “Engine Oil”
in the Duramax diesel supplement.
To ensure proper engine performance and
long life, careful attention must be paid to
engine oil. Following these simple, but
important steps will help protect your
investment:
.Use engine oil approved to the proper
specification and of the proper viscosity
grade. See “Selecting the Right Engine
Oil” in this section.
.Check the engine oil level regularly and
maintain the proper oil level. See
“Checking Engine Oil” and“When to Add
Engine Oil” in this section.
.Change the engine oil at the appropriate
time. SeeEngine Oil Life System 0310.
.Always dispose of engine oil properly. See
“What to Do with Used Oil” in this
section.
Checking Engine Oil
Check the engine oil level regularly, every
650 km (400 mi), especially prior to a long
trip. The engine oil dipstick handle is a loop.
See Engine Compartment Overview 0307 for
the location.
{Warning
The engine oil dipstick handle may be
hot; it could burn you. Use a towel or
glove to touch the dipstick handle.
If a low oil Driver Information Center (DIC)
message displays, check the oil level.
Follow these guidelines:
.To get an accurate reading, park the
vehicle on level ground. Check the engine
oil level after the engine has been off for
at least two hours. Checking the engine
oil level on steep grades or too soon after
engine shutoff can result in incorrect
readings. Accuracy improves when
checking a cold engine prior to starting.
Remove the dipstick and check the level.
.If unable to wait two hours, the engine
must be off for at least 15 minutes if the
engine is warm, or at least 30 minutes if
the engine is not warm. Pull out the
dipstick, wipe it with a clean paper towel
or cloth, then push it back in all the way.
Remove it again, keeping the tip down,
and check the level.
Page 345 of 433

Chevrolet Silverado 2500 HD/3500 HD Owner Manual (GMNA-Localizing-U.
S./Canada/Mexico-16908339) - 2024 - CRC - 12/5/22
Vehicle Care 343
Belt:A rubber coated layer of cords
that is located between the plies and
the tread. Cords may be made from
steel or other reinforcing materials.
Bead
:The tire bead contains steel
wires wrapped by steel cords that hold
the tire onto the rim.
Bias Ply Tire
:A pneumatic tire in which
the plies are laid at alternate angles
less than 90 degrees to the centerline
of the tread.
Cold Tire Pressure
:The amount of air
pressure in a tire, measured in kPa
(kilopascal) or psi (pounds per square
inch) before a tire has built up heat
from driving. See Tire Pressure0344.
DOT Markings
:A code molded into the
sidewall of a tire signifying that the tire
is in compliance with the U.S.
Department of Transportation (DOT)
Motor Vehicle Safety Standards. The
DOT code includes the Tire Identification
Number (TIN), an alphanumeric
designator which can also identify the
tire manufacturer, production plant,
brand, and date of production. GVWR
:Gross Vehicle Weight Rating.
See Vehicle Load Limits 0204.
GAWR FRT
:Gross Axle Weight Rating
for the front axle. See Vehicle Load
Limits 0204.
GAWR RR
:Gross Axle Weight Rating
for the rear axle. See Vehicle Load
Limits 0204.
Intended Outboard Sidewall
:The side
of an asymmetrical tire, that must
always face outward when mounted on
a vehicle.
Kilopascal (kPa)
:The metric unit for air
pressure.
Light Truck (LT-Metric) Tire
:A tire used
on light duty trucks and some
multipurpose passenger vehicles.
Load Index
:An assigned number
ranging from 1 to 279 that corresponds
to the load carrying capacity of a tire.
Maximum Inflation Pressure
:The
maximum air pressure to which a cold
tire can be inflated. The maximum air
pressure is molded onto the sidewall. Maximum Load Rating
:The load rating
for a tire at the maximum permissible
inflation pressure for that tire.
Occupant Distribution
:Designated
seating positions.
Outward Facing Sidewall
:The side of
an asymmetrical tire that has a
particular side that faces outward when
mounted on a vehicle. The side of the
tire that contains a whitewall, bears
white lettering, or bears manufacturer,
brand, and/or model name molding
that is higher or deeper than the same
moldings on the other sidewall of
the tire.
Passenger (P-Metric) Tire
:A tire used
on passenger cars and some light duty
trucks and multipurpose vehicles.
Recommended Inflation Pressure
:
Vehicle manufacturer's recommended
tire inflation pressure as shown on the
tire placard. See Tire Pressure0344 and
Vehicle Load Limits 0204.