2024 CHEVROLET SILVERADO torque
[x] Cancel search: torquePage 218 of 433
Chevrolet Silverado 2500 HD/3500 HD Owner Manual (GMNA-Localizing-U.
S./Canada/Mexico-16908339) - 2024 - CRC - 12/12/22
216 Driving and Operating
If you have to leave the vehicle with the
engine running, be sure the vehicle is in
P (Park) and the parking brake is firmly set
before you leave it. After moving the shift
lever into P (Park), hold the regular brake
pedal down. Then, see if you can move the
shift lever away from P (Park) without first
pulling it toward you. If you can, it means
that the shift lever was not fully locked into
P (Park).
Torque Lock
If you are parking on a hill and you do not
shift the transmission into P (Park) properly,
the weight of the vehicle may put too much
force on the parking pawl in the
transmission. You may find it difficult to pull
the shift lever out of P (Park). This is called
torque lock. To prevent torque lock, set the
parking brake and then shift into P (Park)
properly before you leave the driver seat.
When you are ready to drive, move the
shift lever out of P (Park) before you release
the parking brake.
If torque lock does occur, you may need to
have another vehicle push yours a little
uphill to take some of the pressure from theparking pawl in the transmission. You will
then be able to pull the shift lever out of
P (Park).
Shifting out of Park
This vehicle is equipped with an electronic
shift lock release system. The system is
designed to prevent movement of the shift
lever out of P (Park), unless the brake pedal
is applied and the ignition is on or in
Service Mode.
The shift lock release is always functional
except in the case of an uncharged or low
voltage
–less than 9 volt –battery.
If the vehicle has an uncharged or low
voltage battery, try charging or jump
starting the battery. See Jump Starting -
North America 0370.
To shift out of P (Park): 1. Apply the brake pedal.
2. Release the parking brake if it is applied. See Electric Parking Brake 0228.
3. Pull the shift lever toward you, then move it to the desired position, and
release. If the vehicle still cannot be shifted out of
P (Park):
1. Ease the pressure on, or release the shift lever.
2. While holding the brake pedal, push the shift lever all the way into P (Park).
3. Pull the shift lever toward you, then move it to the desired position, and
release.
If equipped, the Buckle to Drive feature may
prevent shifting from P (Park). See Buckle To
Drive 054.
If there is still a problem shifting, have the
vehicle serviced soon.
Parking over Things That Burn
{Warning
Things that can burn could touch hot
exhaust parts under the vehicle and
ignite. Do not park over papers, leaves,
dry grass, or other things that can burn.
Page 220 of 433
Chevrolet Silverado 2500 HD/3500 HD Owner Manual (GMNA-Localizing-U.
S./Canada/Mexico-16908339) - 2024 - CRC - 12/12/22
218 Driving and Operating
Automatic Transmission
If equipped, there is an electronic shift lever
position indicator within the instrument
cluster. This display comes on when the
ignition is in accessory mode, on,
or service mode.
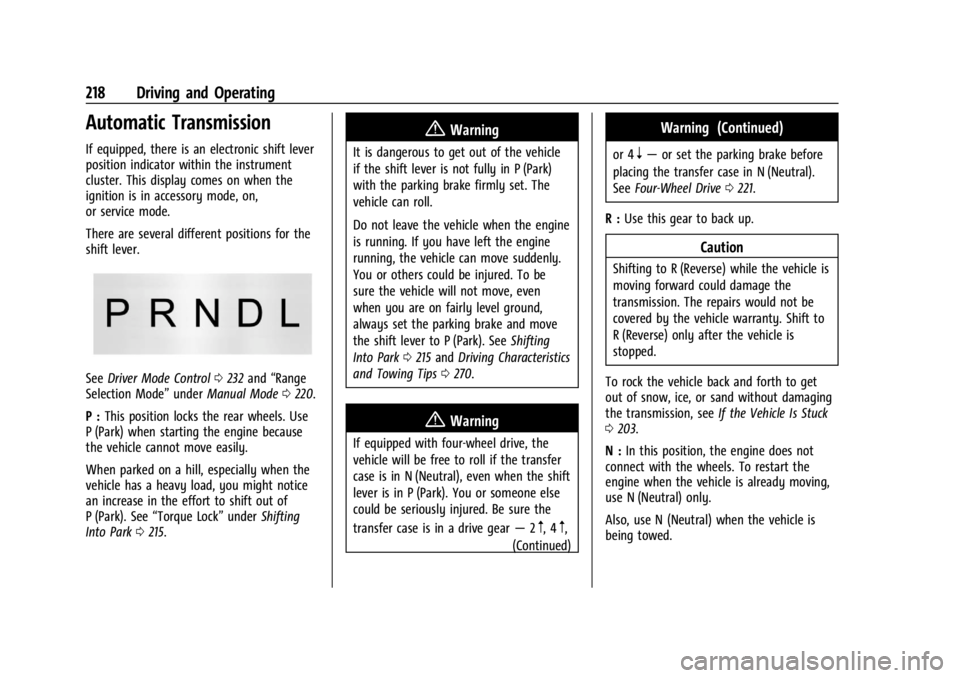
There are several different positions for the
shift lever.
SeeDriver Mode Control 0232 and “Range
Selection Mode” underManual Mode 0220.
P : This position locks the rear wheels. Use
P (Park) when starting the engine because
the vehicle cannot move easily.
When parked on a hill, especially when the
vehicle has a heavy load, you might notice
an increase in the effort to shift out of
P (Park). See “Torque Lock” underShifting
Into Park 0215.
{Warning
It is dangerous to get out of the vehicle
if the shift lever is not fully in P (Park)
with the parking brake firmly set. The
vehicle can roll.
Do not leave the vehicle when the engine
is running. If you have left the engine
running, the vehicle can move suddenly.
You or others could be injured. To be
sure the vehicle will not move, even
when you are on fairly level ground,
always set the parking brake and move
the shift lever to P (Park). See Shifting
Into Park 0215 and Driving Characteristics
and Towing Tips 0270.
{Warning
If equipped with four-wheel drive, the
vehicle will be free to roll if the transfer
case is in N (Neutral), even when the shift
lever is in P (Park). You or someone else
could be seriously injured. Be sure the
transfer case is in a drive gear —2
m, 4m,
(Continued)
Warning (Continued)
or 4n— or set the parking brake before
placing the transfer case in N (Neutral).
See Four-Wheel Drive 0221.
R : Use this gear to back up.
Caution
Shifting to R (Reverse) while the vehicle is
moving forward could damage the
transmission. The repairs would not be
covered by the vehicle warranty. Shift to
R (Reverse) only after the vehicle is
stopped.
To rock the vehicle back and forth to get
out of snow, ice, or sand without damaging
the transmission, see If the Vehicle Is Stuck
0 203.
N : In this position, the engine does not
connect with the wheels. To restart the
engine when the vehicle is already moving,
use N (Neutral) only.
Also, use N (Neutral) when the vehicle is
being towed.
Page 225 of 433
Chevrolet Silverado 2500 HD/3500 HD Owner Manual (GMNA-Localizing-U.
S./Canada/Mexico-16908339) - 2024 - CRC - 12/12/22
Driving and Operating 223
When the shift is complete the indicator will
stop flashing. The DIC message turns off
once the shift is complete. If the transfer
case cannot complete a shift request, it will
go back to its last chosen setting.
The settings are:
N (Neutral) :Use only when the vehicle
needs to be towed. See Recreational Vehicle
Towing 0374 or
Transporting a Disabled Vehicle 0373.
2
m(Two-Wheel Drive High) : Use for driving
on most streets and highways. The front
axle is not engaged. This setting provides
the best fuel economy.
AUTO (Automatic Four-Wheel Drive) : Use
when road surface conditions are variable.
When driving in AUTO, the front axle is
engaged, and the vehicle's power is sent to
the front and rear wheels automatically
based on driving conditions. This setting
provides slightly lower fuel economy
than 2
m.
4
m(Four-Wheel Drive High) : Use this
setting when extra traction is needed, such
as when driving on snowy or icy roads,
when off-roading, or when plowing snow. 4
n(Four-Wheel Drive Low) :
This setting
engages the front axle and delivers extra
torque. Choose 4
nwhen driving off-road in
deep sand, deep mud, or deep snow, and
while climbing or descending steep hills.
While driving in 4
n, keep vehicle speed
below 60 km/h (36 mph).
Shifting into 4
nwill turn Traction Control
and StabiliTrak/ESC off. See Traction Control/
Electronic Stability Control 0230.
Shifts between 2
m, 4m, and AUTO
Any of these shifts can be made at normal
driving speed.
The actual 4x4 shift request is only made
after the button is released. The
4x4 indicator will remain flashing until the
shift request has completed. A DIC message
displays to indicate that the 4x4 transfer
case has been requested to shift to the new
desired state.
Once the 4x4 shift has completed, the DIC
message disappears, the 4x4 indicator stops
flashing, and the current setting is indicated.
When a shift to 2
mis completed successfully
while in P (Park), the parking brake will
engage. To resume driving, shift the transmission to the desired gear and
manually release the parking brake or press
the accelerator pedal to begin driving. See
Electric Parking Brake
0228.
If equipped, use 4
n, AUTO, or 4mto provide
additional traction when parking on a steep
grade with poor traction such as ice, snow,
mud, or gravel.
Shifting Into 4
n
1. The ignition must be on and the vehicle must be stopped or moving less than
5 km/h (3 mph) with the transmission in
N (Neutral). It is best for the vehicle to
be moving 1.6 to 3.2 km/h (1 to 2 mph).
2. Press 4
n. The actual 4x4 shift request is
only made after the button is released.
The 4x4 indicator will remain flashing
until the shift request has completed.
A DIC message displays to indicate that
the 4x4 transfer case has been requested
to shift to the new desired state.
Once the 4x4 shift has completed, the
DIC message disappears, the
4x4 indicator stops flashing and the
current setting is indicated.
If vehicle speed is higher when shift request
occurs, a DIC message displays. Reduce
vehicle speed.
Page 227 of 433
Chevrolet Silverado 2500 HD/3500 HD Owner Manual (GMNA-Localizing-U.
S./Canada/Mexico-16908339) - 2024 - CRC - 12/12/22
Driving and Operating 225
Shifting Out of N (Neutral)
To shift out of N (Neutral):1. Turn the ignition on with the engine off. See Ignition Positions 0211.
2. Set the parking brake. See Electric
Parking Brake 0228.
3. Shift the transmission to N (Neutral).
4. Shift the transfer case to 2
m. Transfer
case shifts out of N (Neutral) can only be
made into 2
m. When the shift to 2mis
complete, the indicator in the instrument
cluster will stop flashing. If the transfer
case cannot complete a shift, the
indicator will return to the previously
selected setting.
Part-time Transfer Case
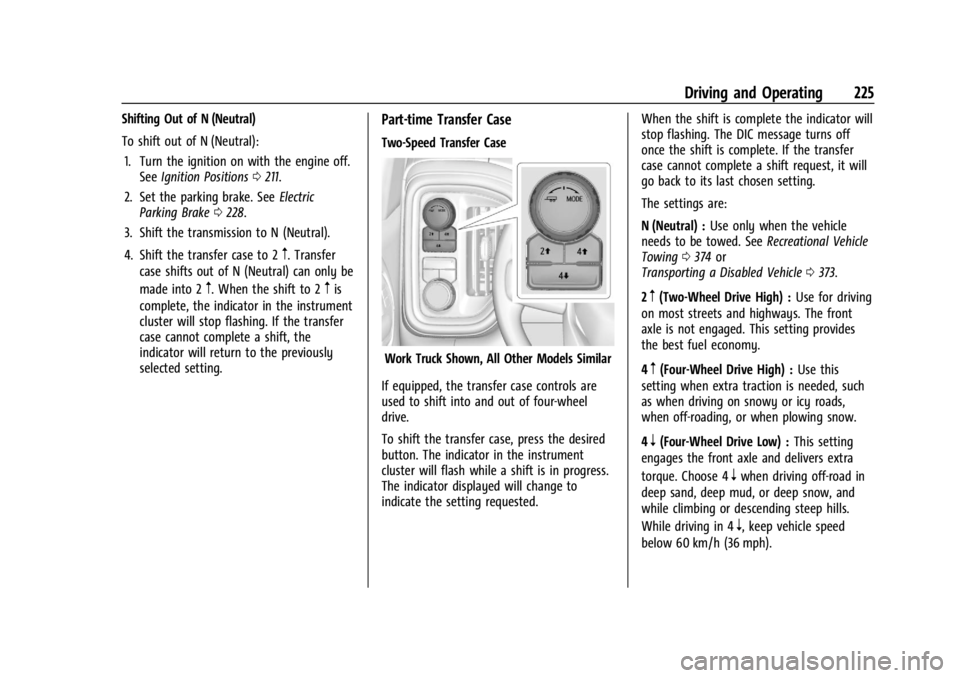
Two-Speed Transfer Case
Work Truck Shown, All Other Models Similar
If equipped, the transfer case controls are
used to shift into and out of four-wheel
drive.
To shift the transfer case, press the desired
button. The indicator in the instrument
cluster will flash while a shift is in progress.
The indicator displayed will change to
indicate the setting requested. When the shift is complete the indicator will
stop flashing. The DIC message turns off
once the shift is complete. If the transfer
case cannot complete a shift request, it will
go back to its last chosen setting.
The settings are:
N (Neutral) :
Use only when the vehicle
needs to be towed. See Recreational Vehicle
Towing 0374 or
Transporting a Disabled Vehicle 0373.
2
m(Two-Wheel Drive High) : Use for driving
on most streets and highways. The front
axle is not engaged. This setting provides
the best fuel economy.
4
m(Four-Wheel Drive High) : Use this
setting when extra traction is needed, such
as when driving on snowy or icy roads,
when off-roading, or when plowing snow.
4
n(Four-Wheel Drive Low) : This setting
engages the front axle and delivers extra
torque. Choose 4
nwhen driving off-road in
deep sand, deep mud, or deep snow, and
while climbing or descending steep hills.
While driving in 4
n, keep vehicle speed
below 60 km/h (36 mph).
Page 291 of 433
Chevrolet Silverado 2500 HD/3500 HD Owner Manual (GMNA-Localizing-U.
S./Canada/Mexico-16908339) - 2024 - CRC - 12/12/22
Driving and Operating 289
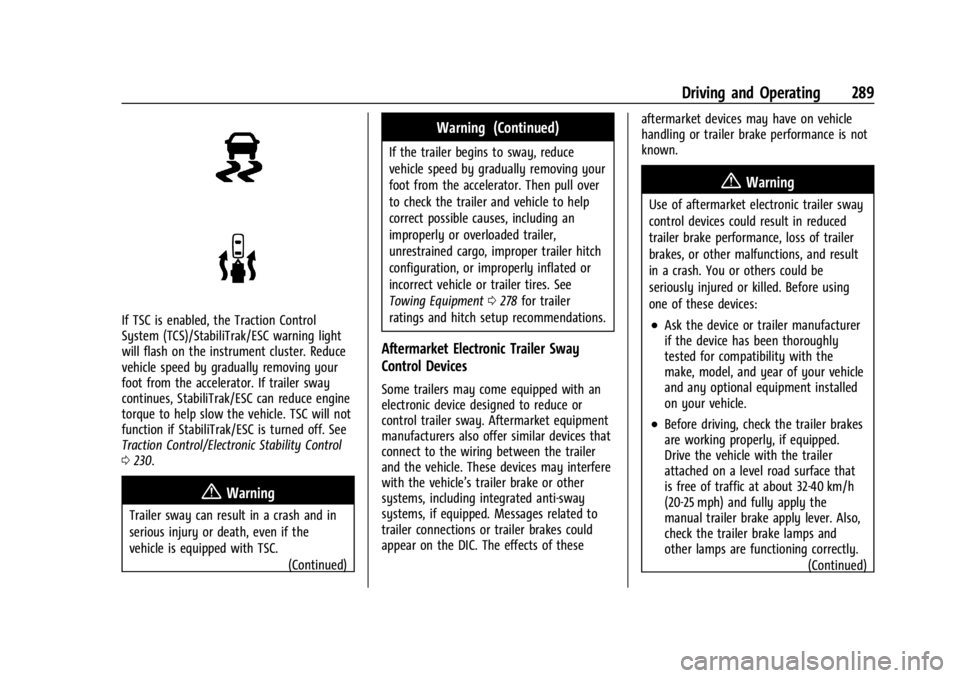
If TSC is enabled, the Traction Control
System (TCS)/StabiliTrak/ESC warning light
will flash on the instrument cluster. Reduce
vehicle speed by gradually removing your
foot from the accelerator. If trailer sway
continues, StabiliTrak/ESC can reduce engine
torque to help slow the vehicle. TSC will not
function if StabiliTrak/ESC is turned off. See
Traction Control/Electronic Stability Control
0230.
{Warning
Trailer sway can result in a crash and in
serious injury or death, even if the
vehicle is equipped with TSC.
(Continued)
Warning (Continued)
If the trailer begins to sway, reduce
vehicle speed by gradually removing your
foot from the accelerator. Then pull over
to check the trailer and vehicle to help
correct possible causes, including an
improperly or overloaded trailer,
unrestrained cargo, improper trailer hitch
configuration, or improperly inflated or
incorrect vehicle or trailer tires. See
Towing Equipment0278 for trailer
ratings and hitch setup recommendations.
Aftermarket Electronic Trailer Sway
Control Devices
Some trailers may come equipped with an
electronic device designed to reduce or
control trailer sway. Aftermarket equipment
manufacturers also offer similar devices that
connect to the wiring between the trailer
and the vehicle. These devices may interfere
with the vehicle’s trailer brake or other
systems, including integrated anti-sway
systems, if equipped. Messages related to
trailer connections or trailer brakes could
appear on the DIC. The effects of these aftermarket devices may have on vehicle
handling or trailer brake performance is not
known.
{Warning
Use of aftermarket electronic trailer sway
control devices could result in reduced
trailer brake performance, loss of trailer
brakes, or other malfunctions, and result
in a crash. You or others could be
seriously injured or killed. Before using
one of these devices:
.Ask the device or trailer manufacturer
if the device has been thoroughly
tested for compatibility with the
make, model, and year of your vehicle
and any optional equipment installed
on your vehicle.
.Before driving, check the trailer brakes
are working properly, if equipped.
Drive the vehicle with the trailer
attached on a level road surface that
is free of traffic at about 32-40 km/h
(20-25 mph) and fully apply the
manual trailer brake apply lever. Also,
check the trailer brake lamps and
other lamps are functioning correctly.
(Continued)
Page 321 of 433
Chevrolet Silverado 2500 HD/3500 HD Owner Manual (GMNA-Localizing-U.
S./Canada/Mexico-16908339) - 2024 - CRC - 12/5/22
Vehicle Care 319
Caution (Continued)
.Do not use engine coolant (antifreeze)
in the windshield washer. It can
damage the windshield washer system
and paint.
.Do not mix water with ready-to-use
washer fluid. Water can cause the
solution to freeze and damage the
washer fluid tank and other parts of
the washer system.
.When using concentrated washer fluid,
follow the manufacturer instructions
for adding water.
.Fill the washer fluid tank only
three-quarters full when it is very cold.
This allows for fluid expansion if
freezing occurs, which could damage
the tank if it is completely full.
Brakes
Disc brake linings have built-in wear
indicators that make a high-pitched warning
sound when the brake linings are worn and
new linings are needed. The sound can come
and go or can be heard all the time when
the vehicle is moving, except when applying
the brake pedal firmly.
{Warning
The brake wear warning sound means
that soon the brakes will not work well.
That could lead to a crash. When the
brake wear warning sound is heard, have
the vehicle serviced.
Caution
Continuing to drive with worn-out brake
linings could result in costly brake
repairs.
Some driving conditions or climates can
cause a brake squeal when the brakes are
first applied, clearing up following several
applications. This does not mean something
is wrong with the brakes.
Properly torqued wheel nuts are necessary
to help prevent brake pulsation. When tires
are rotated, inspect brake linings for wear
and evenly tighten wheel nuts in the proper
sequence to torque specifications. See
Capacities and Specifications 0396.
Brake pads should be replaced as complete
axle sets.
Brake Pedal Travel
See your dealer if the brake pedal does not
return to normal height, or if there is a
rapid increase in pedal travel. This could be
a sign that brake service may be required.
Replacing Brake System Parts
Always replace brake system parts with
new, approved replacement parts. If this is
not done, the brakes may not work
properly. The braking performance can
change in many ways if the wrong brake
parts are installed or if parts are improperly
installed.
Brake Pad Life System
When to Change Brake Pads
This vehicle has a system that estimates the
remaining life of the front and rear brake
pads. Brake pad life is displayed in the
Driver Information Center (DIC), along with
a percentage for each axle. The system must
be reset every time the brake pads are
changed.
When the system has determined that the
brake pads need to be replaced, a message
will display, which may include mileage
remaining.
Page 354 of 433
Chevrolet Silverado 2500 HD/3500 HD Owner Manual (GMNA-Localizing-U.
S./Canada/Mexico-16908339) - 2024 - CRC - 12/5/22
352 Vehicle Care
rotation, check the wheel alignment.
SeeWhen It Is Time for New Tires 0353
and Wheel Replacement 0357.
If the full-size spare tire is part of the
tire rotation, make sure the tire rotated
into the spare position is stored
securely. Push, pull, and then try to
rotate or turn the tire. If it moves, use
the wheel wrench/hoist shaft to tighten
the cable. See Tire Changing0360.
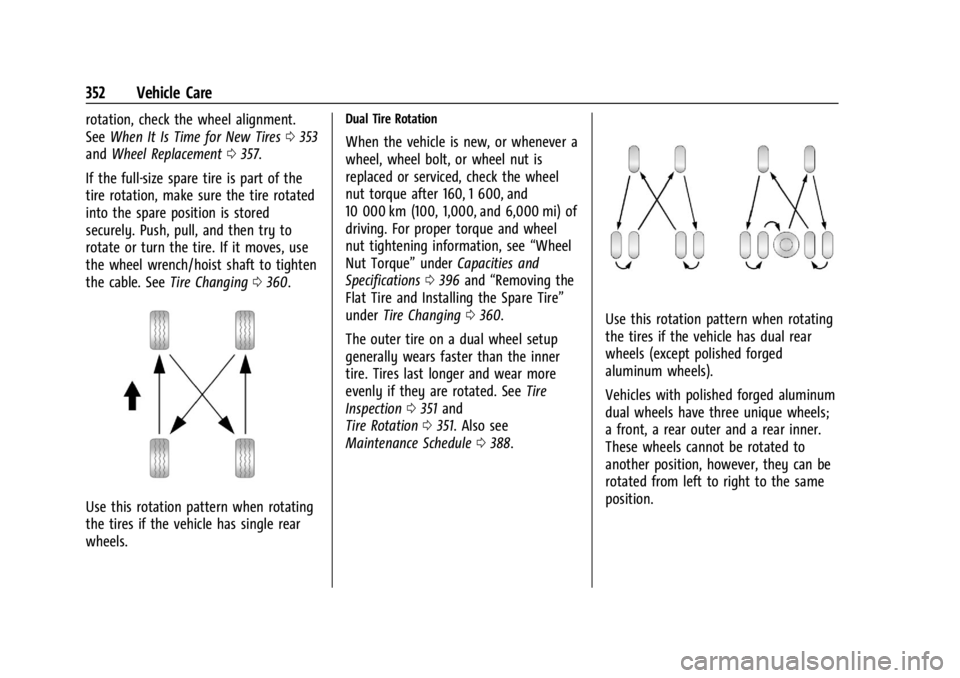
Use this rotation pattern when rotating
the tires if the vehicle has single rear
wheels.
Dual Tire Rotation
When the vehicle is new, or whenever a
wheel, wheel bolt, or wheel nut is
replaced or serviced, check the wheel
nut torque after 160, 1 600, and
10 000 km (100, 1,000, and 6,000 mi) of
driving. For proper torque and wheel
nut tightening information, see “Wheel
Nut Torque” underCapacities and
Specifications 0396 and “Removing the
Flat Tire and Installing the Spare Tire”
under Tire Changing 0360.
The outer tire on a dual wheel setup
generally wears faster than the inner
tire. Tires last longer and wear more
evenly if they are rotated. See Tire
Inspection 0351 and
Tire Rotation 0351. Also see
Maintenance Schedule 0388.
Use this rotation pattern when rotating
the tires if the vehicle has dual rear
wheels (except polished forged
aluminum wheels).
Vehicles with polished forged aluminum
dual wheels have three unique wheels;
a front, a rear outer and a rear inner.
These wheels cannot be rotated to
another position, however, they can be
rotated from left to right to the same
position.
Page 355 of 433
Chevrolet Silverado 2500 HD/3500 HD Owner Manual (GMNA-Localizing-U.
S./Canada/Mexico-16908339) - 2024 - CRC - 12/5/22
Vehicle Care 353
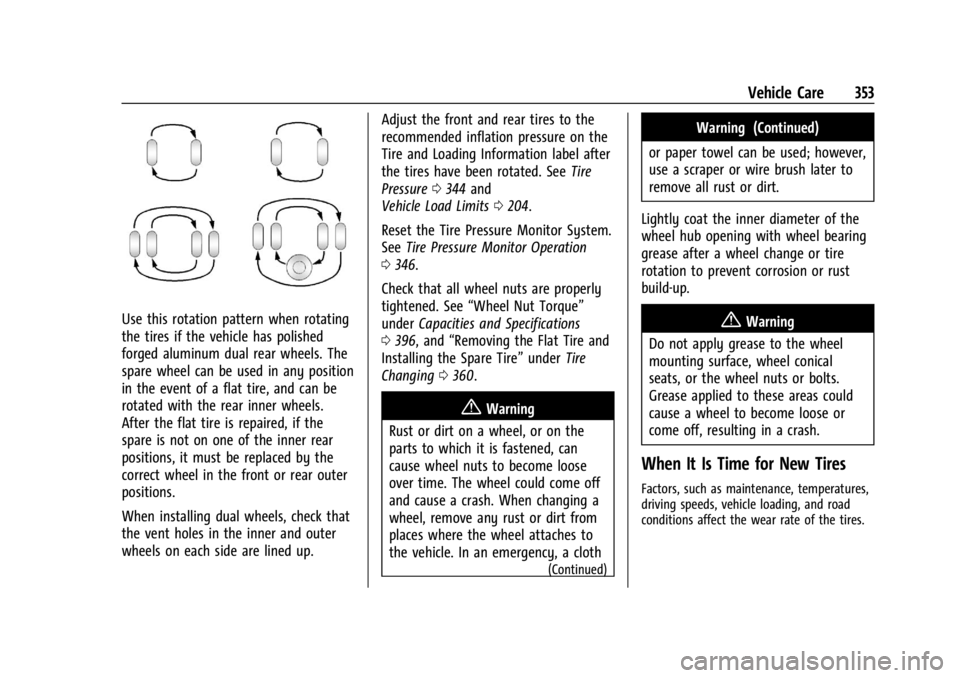
Use this rotation pattern when rotating
the tires if the vehicle has polished
forged aluminum dual rear wheels. The
spare wheel can be used in any position
in the event of a flat tire, and can be
rotated with the rear inner wheels.
After the flat tire is repaired, if the
spare is not on one of the inner rear
positions, it must be replaced by the
correct wheel in the front or rear outer
positions.
When installing dual wheels, check that
the vent holes in the inner and outer
wheels on each side are lined up.Adjust the front and rear tires to the
recommended inflation pressure on the
Tire and Loading Information label after
the tires have been rotated. See
Tire
Pressure 0344 and
Vehicle Load Limits 0204.
Reset the Tire Pressure Monitor System.
See Tire Pressure Monitor Operation
0 346.
Check that all wheel nuts are properly
tightened. See “Wheel Nut Torque”
under Capacities and Specifications
0 396, and “Removing the Flat Tire and
Installing the Spare Tire” underTire
Changing 0360.
{Warning
Rust or dirt on a wheel, or on the
parts to which it is fastened, can
cause wheel nuts to become loose
over time. The wheel could come off
and cause a crash. When changing a
wheel, remove any rust or dirt from
places where the wheel attaches to
the vehicle. In an emergency, a cloth
(Continued)
Warning (Continued)
or paper towel can be used; however,
use a scraper or wire brush later to
remove all rust or dirt.
Lightly coat the inner diameter of the
wheel hub opening with wheel bearing
grease after a wheel change or tire
rotation to prevent corrosion or rust
build-up.
{Warning
Do not apply grease to the wheel
mounting surface, wheel conical
seats, or the wheel nuts or bolts.
Grease applied to these areas could
cause a wheel to become loose or
come off, resulting in a crash.
When It Is Time for New Tires
Factors, such as maintenance, temperatures,
driving speeds, vehicle loading, and road
conditions affect the wear rate of the tires.