2024 CHEVROLET SILVERADO EV ECU
[x] Cancel search: ECUPage 28 of 429
Chevrolet Silverado EV Owner Manual (GMNA-Localizing-U.S./Canada-
16702912) - 2024 - CRC - 1/23/23
Keys, Doors, and Windows 27
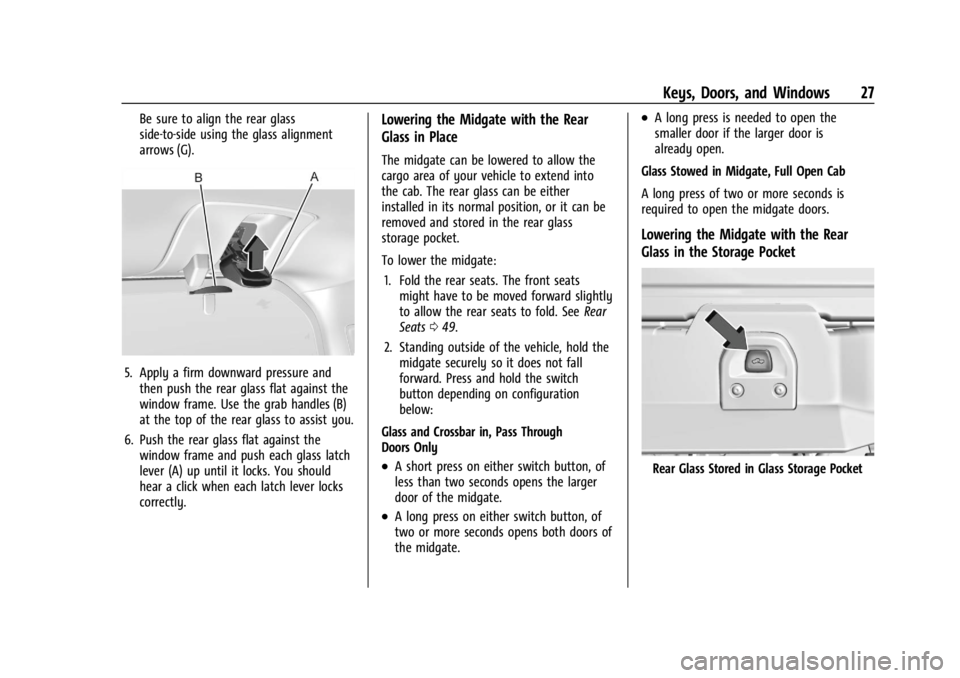
Be sure to align the rear glass
side-to-side using the glass alignment
arrows (G).
5. Apply a firm downward pressure andthen push the rear glass flat against the
window frame. Use the grab handles (B)
at the top of the rear glass to assist you.
6. Push the rear glass flat against the window frame and push each glass latch
lever (A) up until it locks. You should
hear a click when each latch lever locks
correctly.
Lowering the Midgate with the Rear
Glass in Place
The midgate can be lowered to allow the
cargo area of your vehicle to extend into
the cab. The rear glass can be either
installed in its normal position, or it can be
removed and stored in the rear glass
storage pocket.
To lower the midgate:
1. Fold the rear seats. The front seats might have to be moved forward slightly
to allow the rear seats to fold. See Rear
Seats 049.
2. Standing outside of the vehicle, hold the midgate securely so it does not fall
forward. Press and hold the switch
button depending on configuration
below:
Glass and Crossbar in, Pass Through
Doors Only
.A short press on either switch button, of
less than two seconds opens the larger
door of the midgate.
.A long press on either switch button, of
two or more seconds opens both doors of
the midgate.
.A long press is needed to open the
smaller door if the larger door is
already open.
Glass Stowed in Midgate, Full Open Cab
A long press of two or more seconds is
required to open the midgate doors.
Lowering the Midgate with the Rear
Glass in the Storage Pocket
Rear Glass Stored in Glass Storage Pocket
Page 29 of 429
Chevrolet Silverado EV Owner Manual (GMNA-Localizing-U.S./Canada-
16702912) - 2024 - CRC - 1/23/23
28 Keys, Doors, and Windows
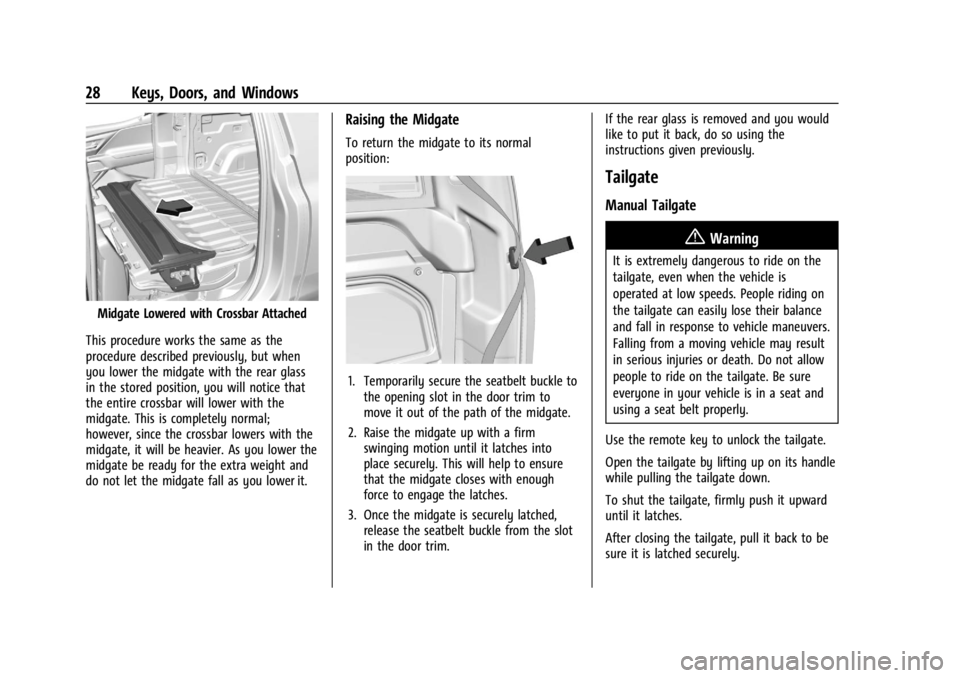
Midgate Lowered with Crossbar Attached
This procedure works the same as the
procedure described previously, but when
you lower the midgate with the rear glass
in the stored position, you will notice that
the entire crossbar will lower with the
midgate. This is completely normal;
however, since the crossbar lowers with the
midgate, it will be heavier. As you lower the
midgate be ready for the extra weight and
do not let the midgate fall as you lower it.
Raising the Midgate
To return the midgate to its normal
position:
1. Temporarily secure the seatbelt buckle to the opening slot in the door trim to
move it out of the path of the midgate.
2. Raise the midgate up with a firm swinging motion until it latches into
place securely. This will help to ensure
that the midgate closes with enough
force to engage the latches.
3. Once the midgate is securely latched, release the seatbelt buckle from the slot
in the door trim. If the rear glass is removed and you would
like to put it back, do so using the
instructions given previously.
Tailgate
Manual Tailgate
{Warning
It is extremely dangerous to ride on the
tailgate, even when the vehicle is
operated at low speeds. People riding on
the tailgate can easily lose their balance
and fall in response to vehicle maneuvers.
Falling from a moving vehicle may result
in serious injuries or death. Do not allow
people to ride on the tailgate. Be sure
everyone in your vehicle is in a seat and
using a seat belt properly.
Use the remote key to unlock the tailgate.
Open the tailgate by lifting up on its handle
while pulling the tailgate down.
To shut the tailgate, firmly push it upward
until it latches.
After closing the tailgate, pull it back to be
sure it is latched securely.
Page 31 of 429
Chevrolet Silverado EV Owner Manual (GMNA-Localizing-U.S./Canada-
16702912) - 2024 - CRC - 1/23/23
30 Keys, Doors, and Windows
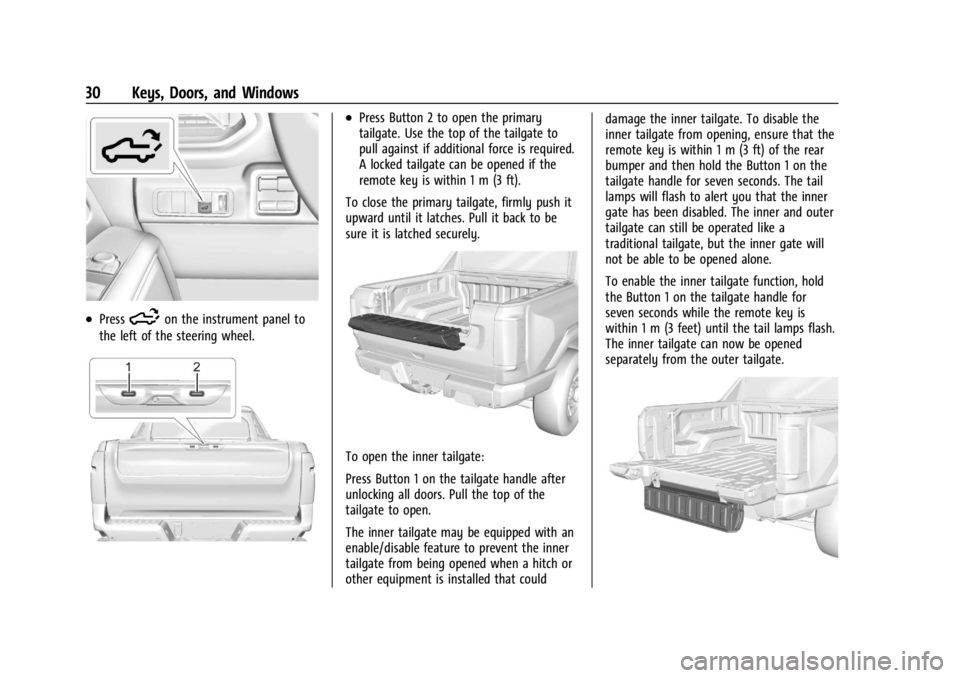
.Press5on the instrument panel to
the left of the steering wheel.
.Press Button 2 to open the primary
tailgate. Use the top of the tailgate to
pull against if additional force is required.
A locked tailgate can be opened if the
remote key is within 1 m (3 ft).
To close the primary tailgate, firmly push it
upward until it latches. Pull it back to be
sure it is latched securely.
To open the inner tailgate:
Press Button 1 on the tailgate handle after
unlocking all doors. Pull the top of the
tailgate to open.
The inner tailgate may be equipped with an
enable/disable feature to prevent the inner
tailgate from being opened when a hitch or
other equipment is installed that could damage the inner tailgate. To disable the
inner tailgate from opening, ensure that the
remote key is within 1 m (3 ft) of the rear
bumper and then hold the Button 1 on the
tailgate handle for seven seconds. The tail
lamps will flash to alert you that the inner
gate has been disabled. The inner and outer
tailgate can still be operated like a
traditional tailgate, but the inner gate will
not be able to be opened alone.
To enable the inner tailgate function, hold
the Button 1 on the tailgate handle for
seven seconds while the remote key is
within 1 m (3 feet) until the tail lamps flash.
The inner tailgate can now be opened
separately from the outer tailgate.
Page 32 of 429
Chevrolet Silverado EV Owner Manual (GMNA-Localizing-U.S./Canada-
16702912) - 2024 - CRC - 1/23/23
Keys, Doors, and Windows 31
Caution
To avoid vehicle damage, do not open
the inner tailgate when the primary
tailgate is open if there is not enough
distance to the attached hitch ball or
trailer.
To close the inner tailgate with the primary
tailgate closed, firmly push or pull it upward
until it latches. Pull or push it back to be
sure it is latched securely.
To close the inner tailgate with the primary
tailgate open:
.Hold the primary tailgate and firmly close
the inner tailgate.
.Raise the inner tailgate so it meets the
primary tailgate and close together at the
same time.
When using the tailgate step as a load stop,
the load must be secured as the load could
shift. See Cargo Tie-Downs 094.
Tailgate Step (Step Mode)
{Warning
To avoid personal injury, keep hands
away from the hinges when operating
the tailgate step.
With the primary and inner tailgates open,
the tailgate step can be lowered to access
the pickup bed.
Using the Step
Caution
When using the tailgate as a step, the
load rating is 170 kg (375 lb), which
includes a person and cargo. Overloading
the tailgate step can cause damage to
the tailgate system.
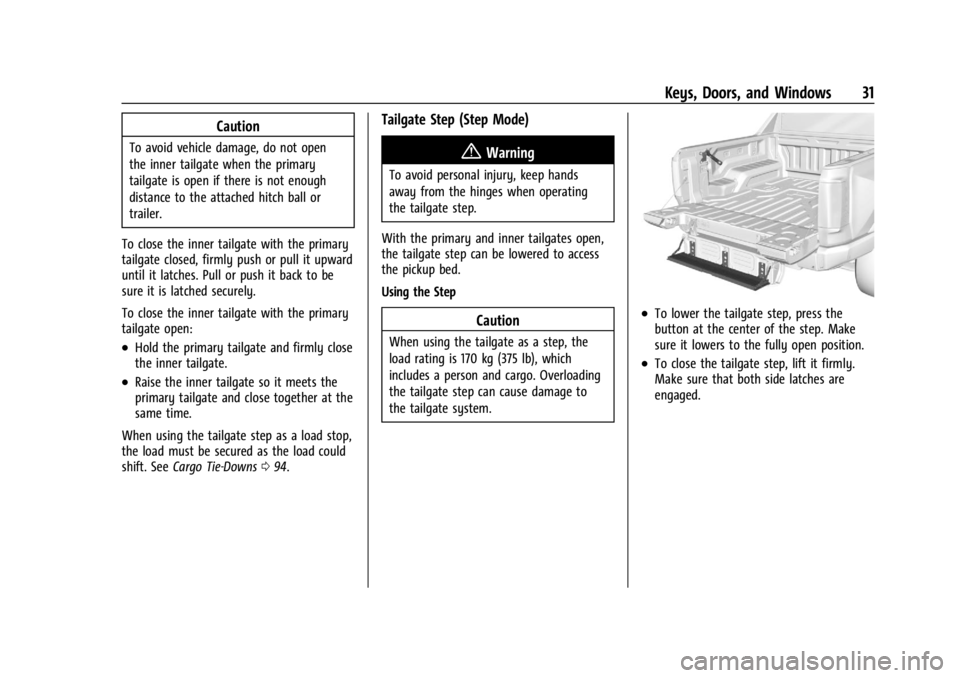
.To lower the tailgate step, press the
button at the center of the step. Make
sure it lowers to the fully open position.
.To close the tailgate step, lift it firmly.
Make sure that both side latches are
engaged.
Page 33 of 429
Chevrolet Silverado EV Owner Manual (GMNA-Localizing-U.S./Canada-
16702912) - 2024 - CRC - 1/23/23
32 Keys, Doors, and Windows
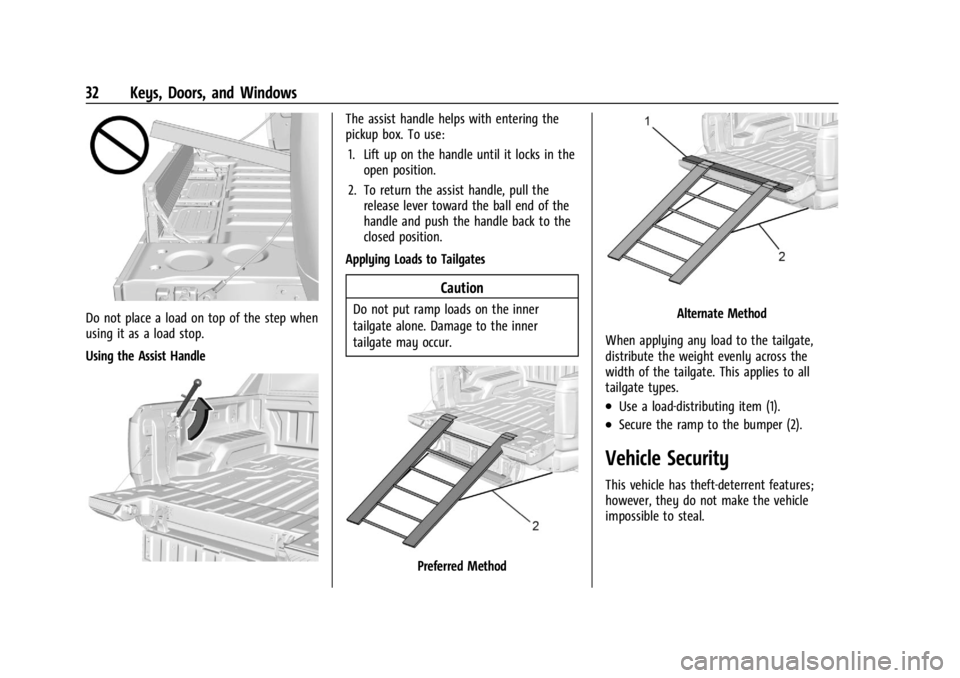
Do not place a load on top of the step when
using it as a load stop.
Using the Assist Handle
The assist handle helps with entering the
pickup box. To use:1. Lift up on the handle until it locks in the open position.
2. To return the assist handle, pull the release lever toward the ball end of the
handle and push the handle back to the
closed position.
Applying Loads to Tailgates
Caution
Do not put ramp loads on the inner
tailgate alone. Damage to the inner
tailgate may occur.
Preferred Method
Alternate Method
When applying any load to the tailgate,
distribute the weight evenly across the
width of the tailgate. This applies to all
tailgate types.
.Use a load-distributing item (1).
.Secure the ramp to the bumper (2).
Vehicle Security
This vehicle has theft-deterrent features;
however, they do not make the vehicle
impossible to steal.
Page 35 of 429
Chevrolet Silverado EV Owner Manual (GMNA-Localizing-U.S./Canada-
16702912) - 2024 - CRC - 1/23/23
34 Keys, Doors, and Windows
The vehicle is automatically immobilized
when the vehicle is turned off.
The immobilization system is disarmed
when the vehicle is turned on and a valid
remote key is present in the vehicle.
The security light in the instrument cluster
comes on if there is a problem with arming
or disarming the theft-deterrent system.
The system has one or more remote keys
matched to an immobilizer control unit in
the vehicle. Only a correctly matched
remote key will start the vehicle. If the
remote key is ever damaged, you may not
be able to start your vehicle.
When trying to start the vehicle, the
security light may come on briefly.
If the vehicle does not start and the security
light stays on, there is a problem with the
system. Turn the vehicle off and try again.If the vehicle will not turn on or off, and the
remote key appears to be undamaged, try
another remote key. You may also try
placing the remote key in the backup
location. See
Remote Key Operation 09.
If the vehicle will not turn on or off with
the other remote key or in the backup
location, the vehicle needs service. If the
vehicle does turn on or off, the first remote
key may be faulty. See your dealer.
It is possible for the immobilizer system to
learn new or replacement remote keys. Up
to eight remote keys can be programmed
for the vehicle. To program additional
remote keys, see “Programming Remote
Keys to the Vehicle” underRemote Key
Operation 09.
Do not leave the remote key or device that
disarms or deactivates the theft-deterrent
system in the vehicle.
Exterior Mirrors
Power Mirrors
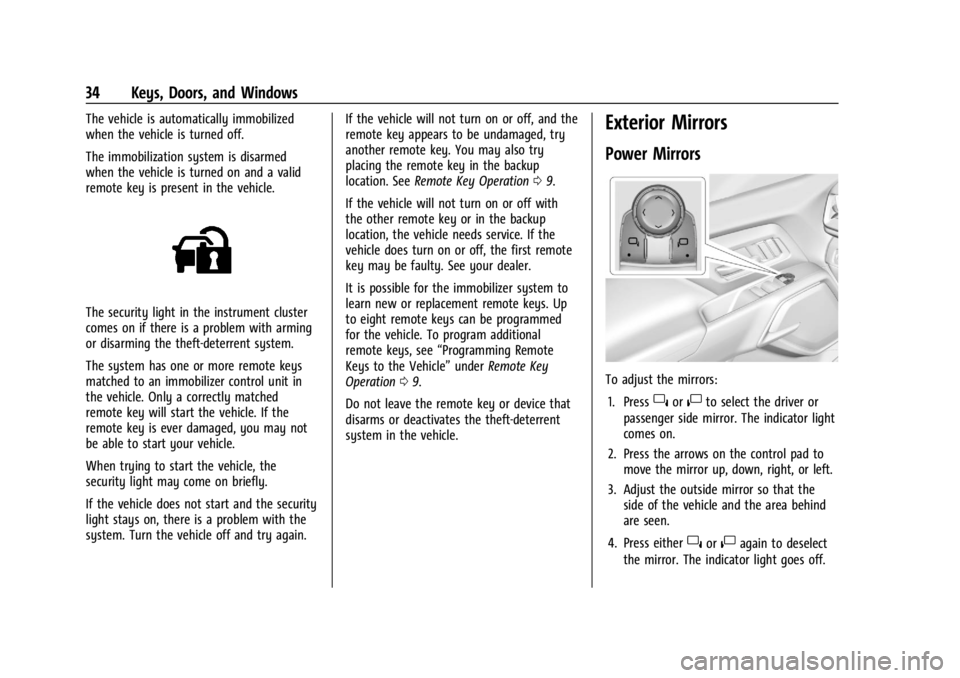
To adjust the mirrors:
1. Press
}or|to select the driver or
passenger side mirror. The indicator light
comes on.
2. Press the arrows on the control pad to move the mirror up, down, right, or left.
3. Adjust the outside mirror so that the side of the vehicle and the area behind
are seen.
4. Press either
}or|again to deselect
the mirror. The indicator light goes off.
Page 42 of 429
Chevrolet Silverado EV Owner Manual (GMNA-Localizing-U.S./Canada-
16702912) - 2024 - CRC - 1/13/23
Seats and Restraints 41
Seats and Restraints
Head Restraints
Head Restraints . . . . . . . . . . . . . . . . . . . . . . . . . 41
Front Seats
Seat Adjustment . . . . . . . . . . . . . . . . . . . . . . . . 43
Power Seat Adjustment . . . . . . . . . . . . . . . . 43
Reclining Seatbacks . . . . . . . . . . . . . . . . . . . . . 43
Lumbar Adjustment . . . . . . . . . . . . . . . . . . . . 45
Memory Seats . . . . . . . . . . . . . . . . . . . . . . . . . . 45
Heated and Ventilated Front Seats . . . . . 47
Rear Seats
Rear Seats . . . . . . . . . . . . . . . . . . . . . . . . . . . . . . 49
Heated Rear Seats . . . . . . . . . . . . . . . . . . . . . . 51
Seat Belts
Seat Belts . . . . . . . . . . . . . . . . . . . . . . . . . . . . . . 52
Buckle To Drive . . . . . . . . . . . . . . . . . . . . . . . . . 53
How to Wear Seat Belts Properly . . . . . . 54
Lap-Shoulder Belt . . . . . . . . . . . . . . . . . . . . . . . 56
Seat Belt Use During Pregnancy . . . . . . . . 58
Seat Belt Extender . . . . . . . . . . . . . . . . . . . . . . 59
Safety System Check . . . . . . . . . . . . . . . . . . . 59
Seat Belt Care . . . . . . . . . . . . . . . . . . . . . . . . . . 59
Replacing Seat Belt System Parts after aCrash . . . . . . . . . . . . . . . . . . . . . . . . . . . . . . . . . 59
Airbag System
Airbag System . . . . . . . . . . . . . . . . . . . . . . . . . 60
Where Are the Airbags? . . . . . . . . . . . . . . . . 61
When Should an Airbag Inflate? . . . . . . . . 62
What Makes an Airbag Inflate? . . . . . . . . . 63
How Does an Airbag Restrain? . . . . . . . . . 63
What Will You See after an AirbagInflates? . . . . . . . . . . . . . . . . . . . . . . . . . . . . . . 64
Passenger Sensing System . . . . . . . . . . . . . 65
Servicing the Airbag-Equipped Vehicle . . . . . . . . . . . . . . . . . . . . . . . . . . . . . . . 68
Adding Equipment to the Airbag-Equipped Vehicle . . . . . . . . . . . . . . 68
Airbag System Check . . . . . . . . . . . . . . . . . . . 69
Replacing Airbag System Parts after a Crash . . . . . . . . . . . . . . . . . . . . . . . . . . . . . . . . . 69
Child Restraints
Older Children . . . . . . . . . . . . . . . . . . . . . . . . . . 70
Infants and Young Children . . . . . . . . . . . . . 71
Child Restraint Systems . . . . . . . . . . . . . . . . . 73
Where to Put the Restraint . . . . . . . . . . . . . 75
Lower Anchors and Tethers for Children(LATCH System) . . . . . . . . . . . . . . . . . . . . . . . 76
Replacing LATCH System Parts After a Crash . . . . . . . . . . . . . . . . . . . . . . . . . . . . . . . . . 85
Securing Child Restraints (With the Seat Belt in the Rear Seat) . . . . . . . . . . . . . . . . 86
Securing Child Restraints (With the Seat Belt in the Front Passenger Seat) . . . . . 88
Head Restraints
{
Warning
With head restraints that are not
installed and adjusted properly, there is a
greater chance that occupants will suffer
a neck/spinal injury in a crash. Do not
drive until the head restraints for all
occupants are installed and adjusted
properly.
Front Seats
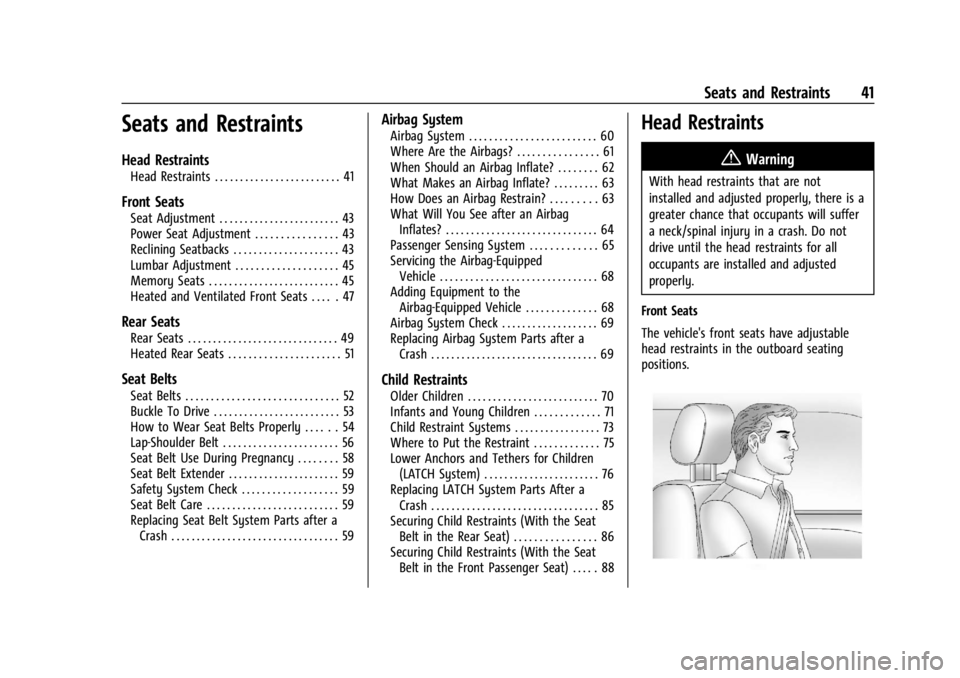
The vehicle's front seats have adjustable
head restraints in the outboard seating
positions.
Page 58 of 429
Chevrolet Silverado EV Owner Manual (GMNA-Localizing-U.S./Canada-
16702912) - 2024 - CRC - 1/13/23
Seats and Restraints 57
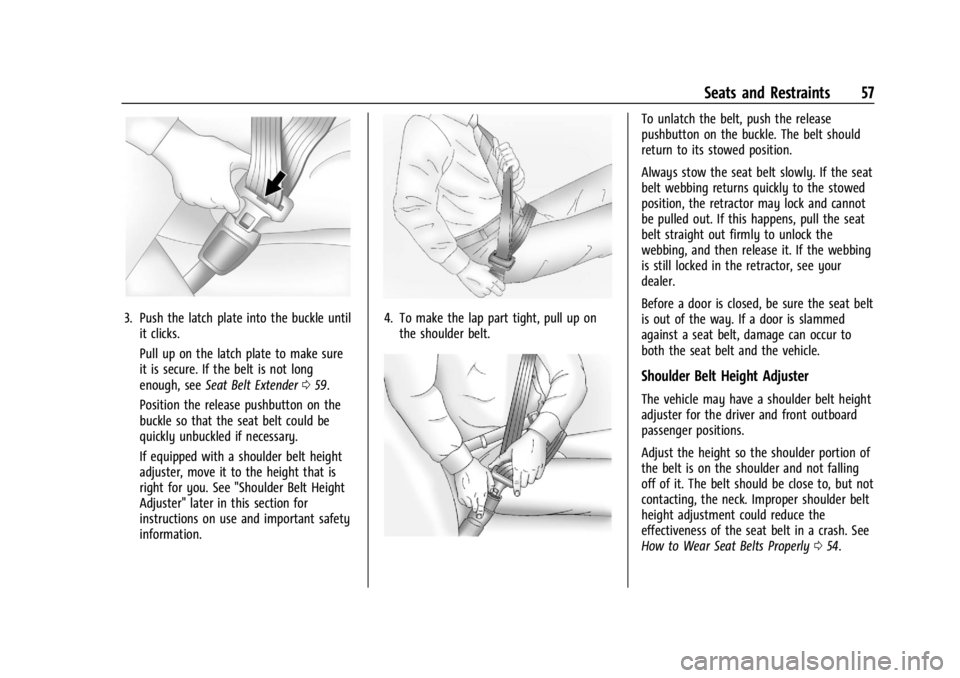
3. Push the latch plate into the buckle untilit clicks.
Pull up on the latch plate to make sure
it is secure. If the belt is not long
enough, see Seat Belt Extender 059.
Position the release pushbutton on the
buckle so that the seat belt could be
quickly unbuckled if necessary.
If equipped with a shoulder belt height
adjuster, move it to the height that is
right for you. See "Shoulder Belt Height
Adjuster" later in this section for
instructions on use and important safety
information.4. To make the lap part tight, pull up on the shoulder belt.
To unlatch the belt, push the release
pushbutton on the buckle. The belt should
return to its stowed position.
Always stow the seat belt slowly. If the seat
belt webbing returns quickly to the stowed
position, the retractor may lock and cannot
be pulled out. If this happens, pull the seat
belt straight out firmly to unlock the
webbing, and then release it. If the webbing
is still locked in the retractor, see your
dealer.
Before a door is closed, be sure the seat belt
is out of the way. If a door is slammed
against a seat belt, damage can occur to
both the seat belt and the vehicle.
Shoulder Belt Height Adjuster
The vehicle may have a shoulder belt height
adjuster for the driver and front outboard
passenger positions.
Adjust the height so the shoulder portion of
the belt is on the shoulder and not falling
off of it. The belt should be close to, but not
contacting, the neck. Improper shoulder belt
height adjustment could reduce the
effectiveness of the seat belt in a crash. See
How to Wear Seat Belts Properly 054.