2024 CHEVROLET CORVETTE accident
[x] Cancel search: accidentPage 24 of 362

Chevrolet Corvette Owner Manual (GMNA-Localizing-U.S./Canada/Mexico-
17272984) - 2024 - CRC - 2/20/23
Keys, Doors, and Windows 23
or the door is not unlocked by pressingK
on the remote key during the 10-second
pre-alarm, the alarm will be activated.
The alarm will also be activated if the
passenger door, the hatch/trunk, or the
hood is opened without first disarming the
system. When the alarm is activated, the
turn signals flash and the horn sounds for
about 30 seconds. The alarm system will
then re-arm to monitor for the next
unauthorized event.
Disarming the Alarm System
To disarm the alarm system or turn off the
alarm if it has been activated, do one of the
following:
.PressKon the remote key.
.Unlock the vehicle using the Keyless
Access system.
.Start the vehicle.
To avoid setting off the alarm by accident:
.Lock the vehicle after all occupants have
left the vehicle and both doors are closed.
.Always unlock a door with the remote
key or use the Keyless Access system.
Unlocking the driver door with the key will
not disarm the system or turn off the alarm.
How to Detect a Tamper Condition
IfKis pressed on the remote key and the
horn chirps and the lights flash three times,
a previous alarm occurred while the system
was armed.
If the alarm has been activated, a message
will appear on the DIC.
Inclination Sensor and Intrusion Sensor
In addition to the standard theft-deterrent
system features, this system may also have
an inclination sensor and intrusion sensor.
The inclination sensor can activate the alarm
if it senses movement of the vehicle, such
as a change in vehicle orientation.
The intrusion sensor monitors the vehicle
interior, and can activate the alarm if it
senses unauthorized entry into the vehicle’s
interior. Do not allow passengers or pets to
remain in the vehicle when the intrusion
sensor is activated.
Before arming the theft-deterrent system
and activating the intrusion sensor:
.Make sure both doors and windows are
completely closed.
.Secure any loose items such as
sunshades.
.Make sure there are no obstructions
blocking the sensors.
Intrusion and Inclination Sensors Disable
Switch
It is recommended that the intrusion and
inclination sensors be deactivated if pets are
left in the vehicle or if the vehicle is being
transported.
When the roof panel is off, or the
convertible top is down, the intrusion
system is turned off.
From the infotainment home screen, touch
Settings > Vehicle > Motion Sensor to turn
the system off. The indicator light will
display momentarily, indicating that these
sensors have been disabled until the next
time the alarm system is armed.
Immobilizer
See Radio Frequency Statement 0337.
Page 26 of 362
Chevrolet Corvette Owner Manual (GMNA-Localizing-U.S./Canada/Mexico-
17272984) - 2024 - CRC - 2/20/23
Keys, Doors, and Windows 25
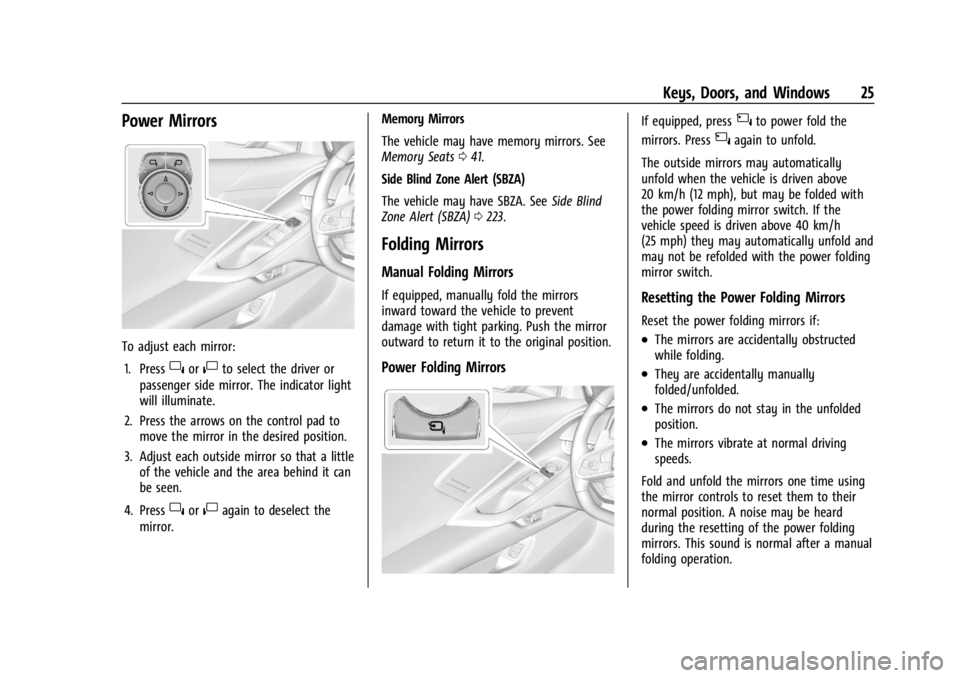
Power Mirrors
To adjust each mirror:1. Press
}or|to select the driver or
passenger side mirror. The indicator light
will illuminate.
2. Press the arrows on the control pad to move the mirror in the desired position.
3. Adjust each outside mirror so that a little of the vehicle and the area behind it can
be seen.
4. Press
}or|again to deselect the
mirror. Memory Mirrors
The vehicle may have memory mirrors. See
Memory Seats
041.
Side Blind Zone Alert (SBZA)
The vehicle may have SBZA. See Side Blind
Zone Alert (SBZA) 0223.
Folding Mirrors
Manual Folding Mirrors
If equipped, manually fold the mirrors
inward toward the vehicle to prevent
damage with tight parking. Push the mirror
outward to return it to the original position.
Power Folding Mirrors
If equipped, press{to power fold the
mirrors. Press
{again to unfold.
The outside mirrors may automatically
unfold when the vehicle is driven above
20 km/h (12 mph), but may be folded with
the power folding mirror switch. If the
vehicle speed is driven above 40 km/h
(25 mph) they may automatically unfold and
may not be refolded with the power folding
mirror switch.
Resetting the Power Folding Mirrors
Reset the power folding mirrors if:
.The mirrors are accidentally obstructed
while folding.
.They are accidentally manually
folded/unfolded.
.The mirrors do not stay in the unfolded
position.
.The mirrors vibrate at normal driving
speeds.
Fold and unfold the mirrors one time using
the mirror controls to reset them to their
normal position. A noise may be heard
during the resetting of the power folding
mirrors. This sound is normal after a manual
folding operation.
Page 59 of 362
Chevrolet Corvette Owner Manual (GMNA-Localizing-U.S./Canada/Mexico-
17272984) - 2024 - CRC - 2/20/23
58 Seats and Restraints
According to accident statistics, children are
safer when properly secured in a rear seat
in the correct child restraint for their weight
and size.
Rear-facing child restraints should not be
transported in the vehicle, even if the airbag
is off.
Never put a rear-facing child seat in the
front. This is because the risk to the
rear-facing child is so great, if the airbag
inflates.
{Warning
A child in a rear-facing child restraint can
be seriously injured or killed if the
passenger frontal airbag inflates. This is
because the back of the rear-facing child
restraint would be very close to the
inflating airbag. A child in a
forward-facing child restraint can be
seriously injured or killed if the passenger
frontal airbag inflates and the passenger
seat is in a forward position.
Even if the passenger sensing system has
turned off the passenger frontal airbag,
no system is fail-safe. No one can(Continued)
Warning (Continued)
guarantee that an airbag will not inflate
under some unusual circumstance, even
though the airbag is off.
Never put a rear-facing child restraint in
the front seat, even if the airbag is off.
If securing a forward-facing child restraint
in the front outboard passenger seat,
always move the seat as far back as it
will go. It is better to secure child
restraints in the rear seat. Consider using
another vehicle to transport the child
when a rear seat is not available.
The passenger sensing system is designed to
turn off the front outboard passenger
frontal airbag if:
.The front outboard passenger seat is
unoccupied.
.The system determines an infant is
present in a child restraint.
.A front outboard passenger takes his/her
weight off of the seat for a period
of time. When the passenger sensing system has
turned off the front outboard passenger
frontal airbag, the OFF indicator will light
and stay lit as a reminder that the airbag is
off. See
Passenger Airbag Status Indicator
0 89.
The passenger sensing system is designed to
turn on the front outboard passenger frontal
airbag anytime the system senses that a
person of adult size is sitting properly in the
front outboard passenger seat.
When the passenger sensing system has
allowed the airbag to be enabled, the ON
indicator will light and stay lit as a reminder
that the airbag is active.
For some children, including children in child
restraints, and for very small adults, the
passenger sensing system may or may not
turn off the front outboard passenger
frontal airbag, depending upon the person's
seating posture and body build. Everyone in
the vehicle who has outgrown child
restraints should wear a seat belt
properly —whether or not there is an
airbag for that person.
Page 63 of 362
Chevrolet Corvette Owner Manual (GMNA-Localizing-U.S./Canada/Mexico-
17272984) - 2024 - CRC - 2/20/23
62 Seats and Restraints
Replacing Airbag System Parts
after a Crash
{Warning
A crash can damage the airbag systems
in the vehicle. A damaged airbag system
may not properly protect you and your
passenger(s) in a crash, resulting in
serious injury or even death. To help
make sure the airbag systems are
working properly after a crash, have
them inspected and any necessary
replacements made as soon as possible.
If an airbag inflates, you will need to
replace airbag system parts. See your dealer
for service.
If the airbag readiness light stays on after
the vehicle is started or comes on when you
are driving, the airbag system may not work
properly. Have the vehicle serviced right
away. See Airbag Readiness Light 088.
Child Restraints
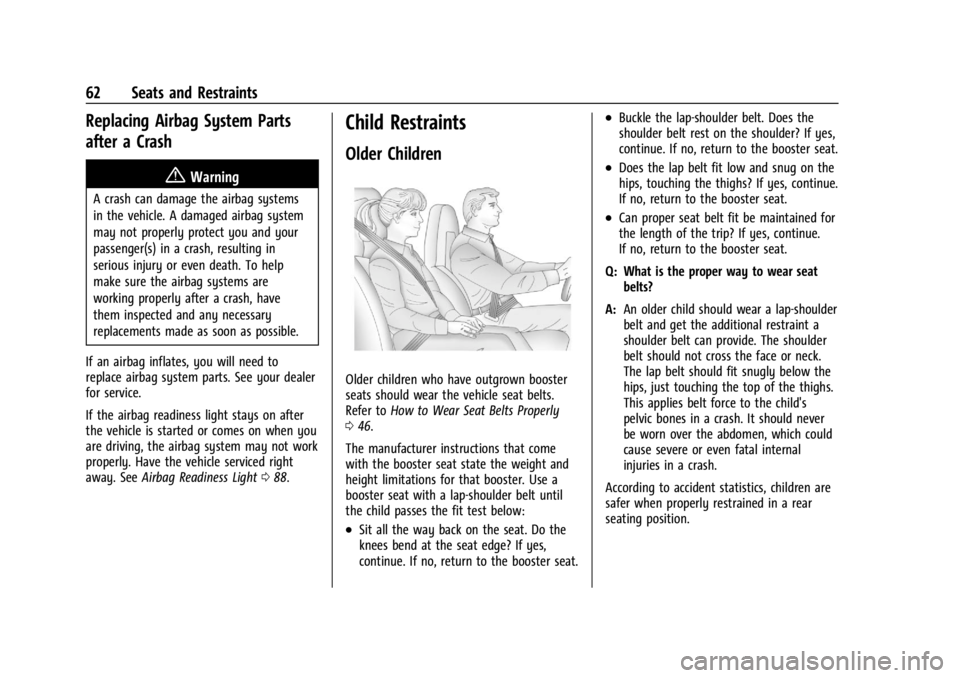
Older Children
Older children who have outgrown booster
seats should wear the vehicle seat belts.
Refer to How to Wear Seat Belts Properly
0 46.
The manufacturer instructions that come
with the booster seat state the weight and
height limitations for that booster. Use a
booster seat with a lap-shoulder belt until
the child passes the fit test below:
.Sit all the way back on the seat. Do the
knees bend at the seat edge? If yes,
continue. If no, return to the booster seat.
.Buckle the lap-shoulder belt. Does the
shoulder belt rest on the shoulder? If yes,
continue. If no, return to the booster seat.
.Does the lap belt fit low and snug on the
hips, touching the thighs? If yes, continue.
If no, return to the booster seat.
.Can proper seat belt fit be maintained for
the length of the trip? If yes, continue.
If no, return to the booster seat.
Q: What is the proper way to wear seat belts?
A: An older child should wear a lap-shoulder
belt and get the additional restraint a
shoulder belt can provide. The shoulder
belt should not cross the face or neck.
The lap belt should fit snugly below the
hips, just touching the top of the thighs.
This applies belt force to the child's
pelvic bones in a crash. It should never
be worn over the abdomen, which could
cause severe or even fatal internal
injuries in a crash.
According to accident statistics, children are
safer when properly restrained in a rear
seating position.
Page 102 of 362
Chevrolet Corvette Owner Manual (GMNA-Localizing-U.S./Canada/Mexico-
17272984) - 2024 - CRC - 2/20/23
Instruments and Controls 101
thumbwheel to save it. On the next
acceleration, the performance timer will
record the time. Pressing the thumbwheel
while the timer is running will cancel the
timer if done before reaching the End Speed.
Lap Timer (without PDR) :Press
Twhen
Lap Timer is displayed to start, stop, or reset
the lap timer. Press the thumbwheel while
the Lap Timer page is active to start the
timer. If the lap timer is active, pressing the
thumbwheel will stop the current lap timer
and start a new lap. Pressing the
thumbwheel within 10 seconds after
completing the last lap (Stop Lap Timer
option is displayed), the Lap Timer will stop.
Lap Timer (with PDR) : The lap times
recorded with the PDR system will
automatically be displayed in this window.
This only happens if a track has been
selected in the PDR system and a video
recording is started. See Performance Data
Recorder (PDR) 0130.
Maintenance
Press the thumbwheel to enter the
Maintenance menu. Scroll through the
available items. Oil Life :
Displays an estimate of the oil's
remaining useful life. If REMAINING OIL LIFE
99% is displayed, that means 99% of the
current oil life remains.
When the remaining oil life is low, the
CHANGE ENGINE OIL SOON message will
appear on the display. The oil should be
changed as soon as possible. See Engine Oil
(5.5L LT6 Engine) 0246 or
Engine Oil (6.2L LT2 Engine) 0249. In
addition to the engine oil life system
monitoring the oil life, additional
maintenance is recommended in the
Maintenance Schedule. See Maintenance
Schedule 0316.
The Oil Life display must be reset after each
oil change. It will not reset itself. Do not
reset the Oil Life display accidentally at any
time other than when the oil has just been
changed. It cannot be reset accurately until
the next oil change. To reset, see Engine Oil
Life System 0252.
Transmission Fluid Life : Displays an
estimate of the fluid's remaining useful life.
If REMAINING FLUID LIFE 99% is displayed,
that means 99% of the current fluid life
remains. When the remaining fluid life is low, the
CHANGE TRANSMISSION FLUID SOON
message will appear on the display. The
fluid should be changed as soon as possible.
See
Dual Clutch Transmission Fluid Life
System 0253. In addition to the
Transmission Fluid Life system monitoring
the fluid life, additional maintenance is
recommended in the Maintenance Schedule.
See Maintenance Schedule 0316.
The Fluid Life display must be reset after
each fluid change. It will not reset itself. Do
not reset the Fluid Life display accidentally
at any time other than when the fluid has
just been changed. It cannot be reset
accurately until the next fluid change. To
reset, see Dual Clutch Transmission Fluid Life
System 0253.
Transmission Filter Life : Displays an
estimate of the filter’s remaining useful life.
If REMAINING FILTER LIFE 99% is displayed,
that means 99% of the current filter life
remains.
When the remaining filter life is low, the
REPLACE TRANSMISSION FILTER SOON
message will appear on the display. The
external canister filter should be replaced as
soon as possible. See Dual Clutch
Transmission Fluid Life System 0253. In
Page 103 of 362
Chevrolet Corvette Owner Manual (GMNA-Localizing-U.S./Canada/Mexico-
17272984) - 2024 - CRC - 2/20/23
102 Instruments and Controls
addition to the Transmission Filter Life
system monitoring the filter life, additional
maintenance is recommended in the
Maintenance Schedule. SeeMaintenance
Schedule 0316.
The Transmission Filter Life display must be
reset after each filter replacement. It will
not reset itself. Do not reset the
Transmission Filter Life display accidentally
at any time other than when the filter has
just been replaced. It cannot be reset
accurately until the next filter change. To
reset, see Dual Clutch Transmission Fluid Life
System 0253.
Engine Life : Displays the total number of
hours the engine has run, and the total
number of hours the engine has sat idle.
It also shows total engine revolutions
divided by 10,000.
Air Filter Life : Shows an estimate of the
engine air filter’s remaining useful life and
the state of the system. Engine Air Filter Life
95% means 95% of the current air filter life
remains. Messages are displayed based on
the engine air filter life and the state of the
system. When the REPLACE AT NEXT OIL
CHANGE message displays, the engine air
filter should be replaced at the time of the next oil change. When the REPLACE NOW
message displays, the engine air filter
should be replaced as soon as possible.
Air filter life message states:
.Green
–OK
.Yellow –Replace at Next Oil Change
.Red –Replace Now, and Check System
Head-Up Display (HUD)
{Warning
If the HUD image is too bright, or too
high in your field of view, it may take
you more time to see things you need to
see when it is dark outside. Be sure to
keep the HUD image dim and placed low
in your field of view.
If equipped with HUD, some information
concerning the operation of the vehicle is
projected onto the windshield.
The HUD information appears as an image
focused out toward the front of the vehicle.
Caution
If you try to use the HUD image as a
parking aid, you may misjudge the
distance and damage your vehicle. Do not
use the HUD image as a parking aid.
The HUD information can be displayed in
various languages. The speedometer reading
and other numerical values can be displayed
in either English or metric units.
The language selection is changed through
the radio and the units of measurement are
changed through the instrument cluster. See
Settings 0142 and “Options” under
Instrument Cluster 081.
The HUD may display different alerts and
information for vehicles equipped with these
features:
.Speedometer
.Tachometer
.Manual Paddle Shift Gear Indicator
These displays on the HUD are for use
when using the manual paddle shift
controls to shift the transmission. See
“Manual Paddle Shift” inDual Clutch
Transmission 0184.
.G-Force Gauge
Page 115 of 362
Chevrolet Corvette Owner Manual (GMNA-Localizing-U.S./Canada/Mexico-
17272984) - 2024 - CRC - 2/20/23
114 Lighting
Engine Compartment Lamp
Your vehicle may be equipped with an
engine compartment lamp. The vehicle must
be in P (Park) and it must be dark outside
for the engine compartment to activate.
The engine compartment lamp will turn on
briefly when:
.Kis pressed on the remote key.
.Keyless Access is used to unlock the door.
.Any door is opened.
.The engine compartment hatch is opened.
.The vehicle is remote started.
The engine compartment lamp will turn
off when:
.The vehicle begins to move after shifting
out of P (Park).
.It is bright outside.
.All doors and the engine compartment
hatch are closed.
.Qis pressed on the remote key.
If any door, or the engine compartment
hatch/trunk remains open while the vehicle
is off, a timer will turn the lamp off.
Lighting Features
Entry Lighting
The interior lamps turn on when pressingK
on the remote key or opening any doors,
and the dome lamp control is in the door
position.
Some exterior lamps also turn on when
pressing
Kon the remote key or opening
any doors. Low-Beam lamps will only turn
on briefly at night, or in areas with limited
lighting.
All lamps will gradually fade out after about
30 seconds.
Entry lighting can be disabled manually by
closing all doors, pressing
Qon the remote
key, or starting the vehicle.
This feature can be changed. On the
infotainment home screen, select Settings
T
VehicleTVehicle Locator Lights.
Exit Lighting
Some exterior lamps and interior lamps turn
on when the driver door is opened after the
vehicle is turned off.
The exterior and interior lamps remain on
for a set amount of time, then automatically
turn off.
The interior lights turn on when the vehicle
is turned off.
The exterior lamps turn off immediately by
turning the exterior lamp control off.
This feature can be changed. On the
infotainment home screen, select Settings
T
VehicleTExit Lighting.
Battery Power Protection
This feature helps prevent the battery from
being drained, if the interior courtesy lamps
or reading lamps are accidentally left on.
If any of these lamps are left on, they
automatically turn off after 10 minutes,
if the ignition is off. The lamps will not
come back on again until one of the
following occurs:
.The ignition is turned on.
.The doors are closed and then re-opened.
Page 235 of 362
Chevrolet Corvette Owner Manual (GMNA-Localizing-U.S./Canada/Mexico-
17272984) - 2024 - CRC - 2/20/23
234 Vehicle Care
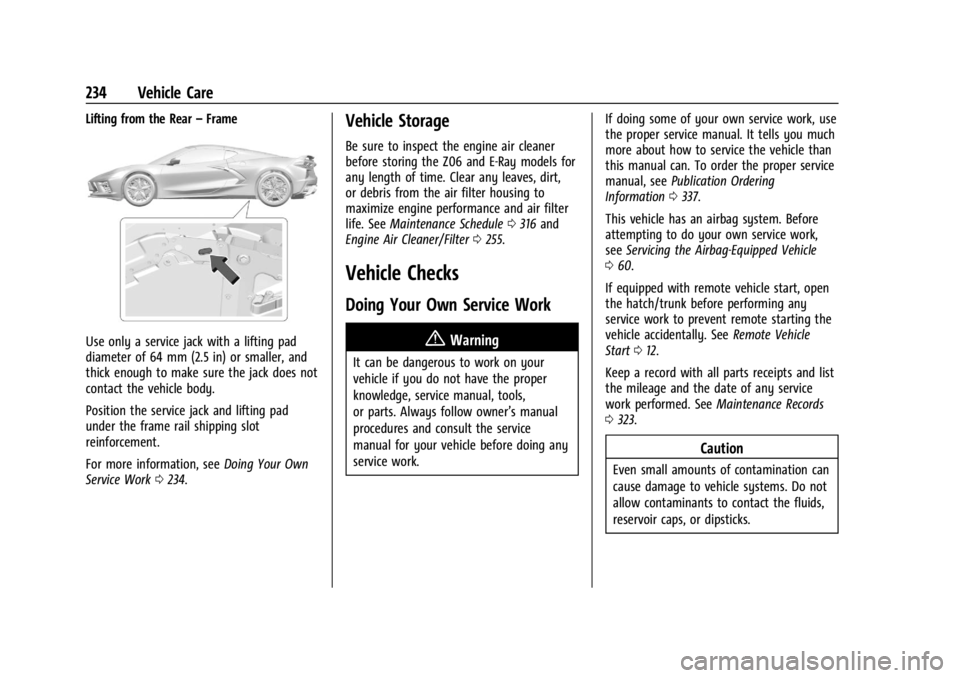
Lifting from the Rear–Frame
Use only a service jack with a lifting pad
diameter of 64 mm (2.5 in) or smaller, and
thick enough to make sure the jack does not
contact the vehicle body.
Position the service jack and lifting pad
under the frame rail shipping slot
reinforcement.
For more information, see Doing Your Own
Service Work 0234.
Vehicle Storage
Be sure to inspect the engine air cleaner
before storing the Z06 and E-Ray models for
any length of time. Clear any leaves, dirt,
or debris from the air filter housing to
maximize engine performance and air filter
life. See Maintenance Schedule 0316 and
Engine Air Cleaner/Filter 0255.
Vehicle Checks
Doing Your Own Service Work
{Warning
It can be dangerous to work on your
vehicle if you do not have the proper
knowledge, service manual, tools,
or parts. Always follow owner’s manual
procedures and consult the service
manual for your vehicle before doing any
service work. If doing some of your own service work, use
the proper service manual. It tells you much
more about how to service the vehicle than
this manual can. To order the proper service
manual, see
Publication Ordering
Information 0337.
This vehicle has an airbag system. Before
attempting to do your own service work,
see Servicing the Airbag-Equipped Vehicle
0 60.
If equipped with remote vehicle start, open
the hatch/trunk before performing any
service work to prevent remote starting the
vehicle accidentally. See Remote Vehicle
Start 012.
Keep a record with all parts receipts and list
the mileage and the date of any service
work performed. See Maintenance Records
0 323.
Caution
Even small amounts of contamination can
cause damage to vehicle systems. Do not
allow contaminants to contact the fluids,
reservoir caps, or dipsticks.