2023 TOYOTA TUNDRA HYBRID change wheel
[x] Cancel search: change wheelPage 41 of 618
411-1. For safe use
Owners Manual_USA_M0C052_en
1
For safety and security
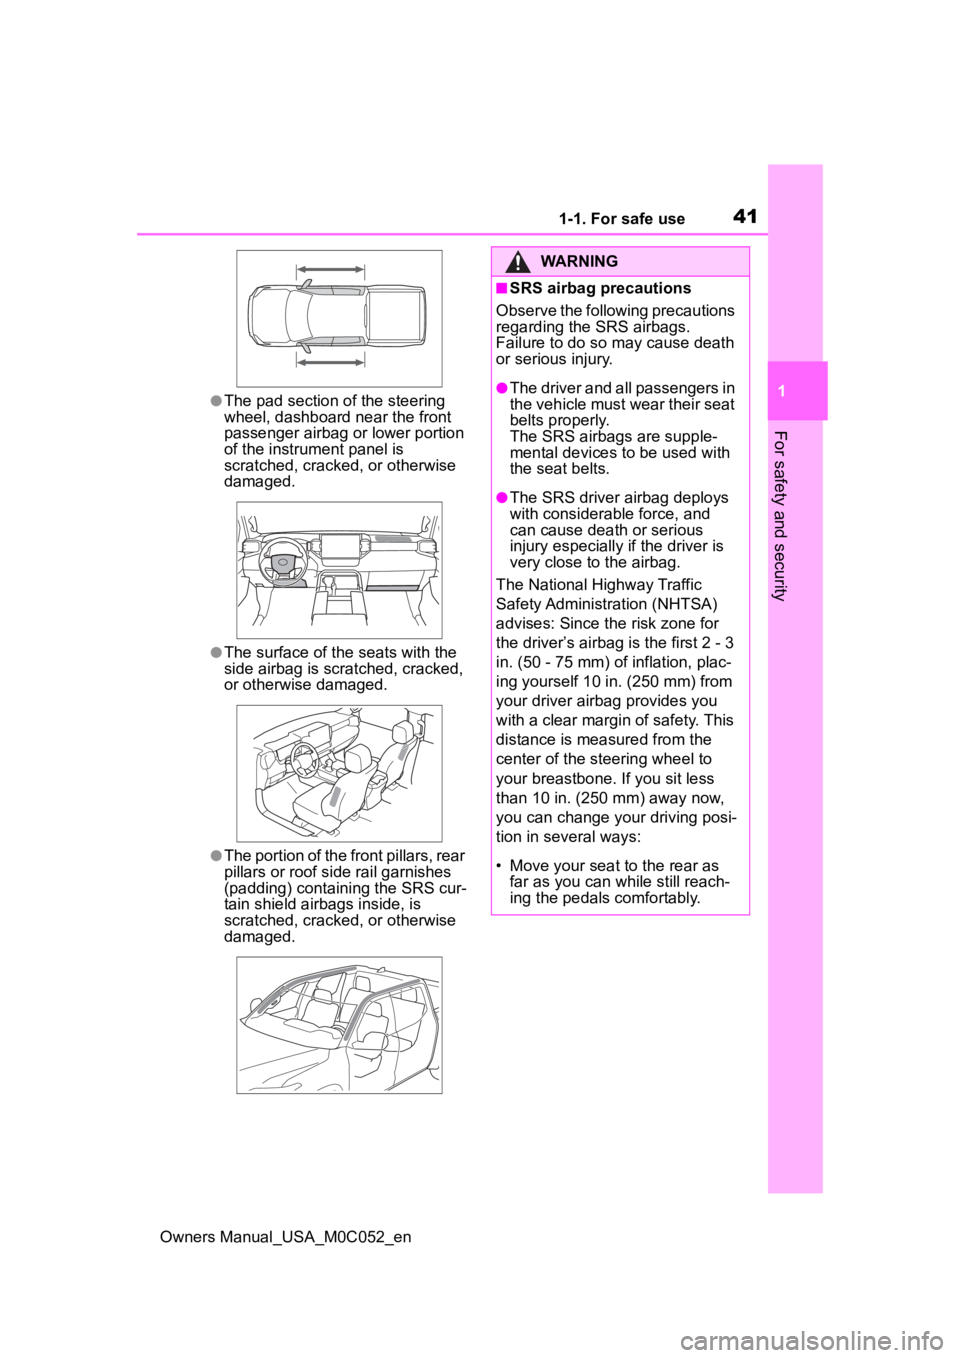
●The pad section of the steering
wheel, dashboard near the front
passenger airbag o r lower portion
of the instrument panel is
scratched, cracked, or otherwise
damaged.
●The surface of the seats with the
side airbag is scratched, cracked,
or otherwise damaged.
●The portion of the front pillars, rear
pillars or roof side rail garnishes
(padding) containing the SRS cur-
tain shield airbags inside, is
scratched, cracked, or otherwise
damaged.
WARNING
■SRS airbag precautions
Observe the following precautions
regarding the SRS airbags.
Failure to do so may cause death
or serious injury.
●The driver and all passengers in
the vehicle must wear their seat
belts properly.
The SRS airbags are supple-
mental devices to be used with
the seat belts.
●The SRS driver airbag deploys
with considerable force, and
can cause death or serious
injury especially if the driver is
very close to the airbag.
The National Highway Traffic
Safety Administr ation (NHTSA)
advises: Since the risk zone for
the driver’s airbag is the first 2 - 3
in. (50 - 75 mm) of inflation, plac-
ing yourself 10 in. (250 mm) from
your driver airbag provides you
with a clear margin of safety. This
distance is measured from the
center of the steering wheel to
your breastbone. If you sit less
than 10 in. (250 mm) away now,
you can change you r driving posi-
tion in several ways:
• Move your seat to the rear as far as you can while still reach-
ing the pedals comfortably.
Page 100 of 618
1002-1. Instrument cluster
Owners Manual_USA_M0C052_en
■Changing settings of the
trailer type
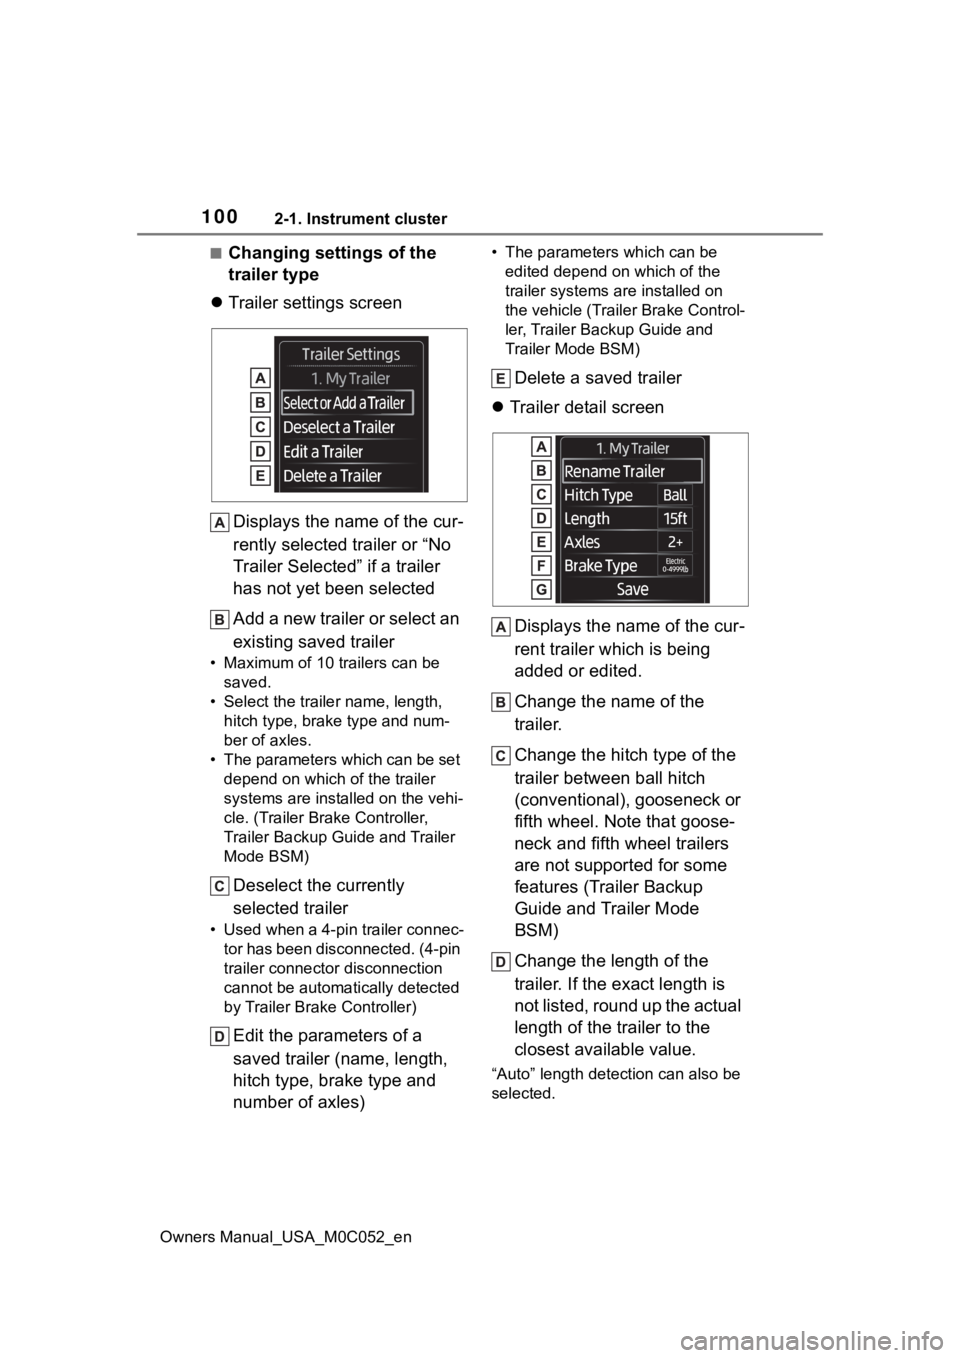
Trailer settings screen
Displays the name of the cur-
rently selected trailer or “No
Trailer Selected” if a trailer
has not yet been selected
Add a new trailer or select an
existing saved trailer
• Maximum of 10 trailers can be saved.
• Select the trailer name, length, hitch type, brake type and num-
ber of axles.
• The parameters which can be set depend on which of the trailer
systems are installed on the vehi-
cle. (Trailer Brake Controller,
Trailer Backup Guide and Trailer
Mode BSM)
Deselect the currently
selected trailer
• Used when a 4-pin trailer connec-tor has been disconnected. (4-pin
trailer connector disconnection
cannot be automatically detected
by Trailer Brake Controller)
Edit the parameters of a
saved trailer (name, length,
hitch type, brake type and
number of axles)
• The parameters which can be edited depend on which of the
trailer systems are installed on
the vehicle (Trailer Brake Control-
ler, Trailer Backup Guide and
Trailer Mode BSM)
Delete a saved trailer
Trailer detail screen
Displays the name of the cur-
rent trailer which is being
added or edited.
Change the name of the
trailer.
Change the hitch type of the
trailer between ball hitch
(conventional), gooseneck or
fifth wheel. Note that goose-
neck and fifth wheel trailers
are not supported for some
features (Trailer Backup
Guide and Trailer Mode
BSM)
Change the length of the
trailer. If the exact length is
not listed, round up the actual
length of the trailer to the
closest available value.
“Auto” length dete ction can also be
selected.
Page 146 of 618
1463-4. Adjusting the steering wheel and mirrors
Owners Manual_USA_M0C052_en
*: If equipped
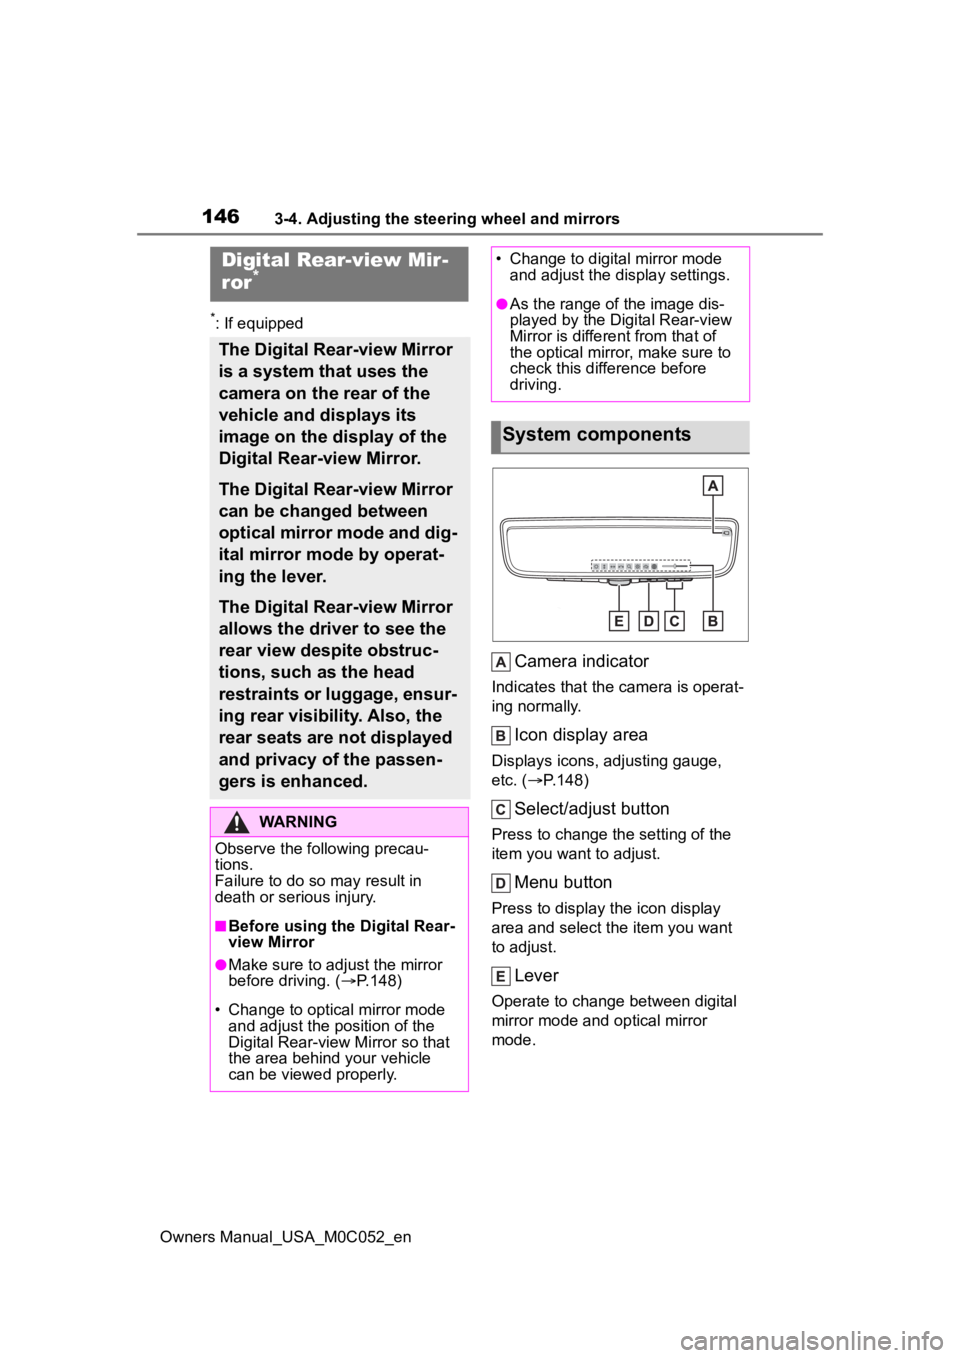
Camera indicator
Indicates that the camera is operat-
ing normally.
Icon display area
Displays icons, adjusting gauge,
etc. (P.148)
Select/adjust button
Press to change the setting of the
item you want to adjust.
Menu button
Press to display the icon display
area and select the item you want
to adjust.
Lever
Operate to change between digital
mirror mode and optical mirror
mode.
Digital Rear-view Mir-
ror*
The Digital Rear-view Mirror
is a system that uses the
camera on the rear of the
vehicle and displays its
image on the display of the
Digital Rear-view Mirror.
The Digital Rear-view Mirror
can be changed between
optical mirror mode and dig-
ital mirror mode by operat-
ing the lever.
The Digital Rear-view Mirror
allows the driver to see the
rear view despite obstruc-
tions, such as the head
restraints or luggage, ensur-
ing rear visibility. Also, the
rear seats are not displayed
and privacy of the passen-
gers is enhanced.
WARNING
Observe the following precau-
tions.
Failure to do so m ay result in
death or serious injury.
■Before using the Digital Rear-
view Mirror
●Make sure to adjust the mirror
before driving. ( P.148)
• Change to optical mirror mode and adjust the position of the
Digital Rear-view Mirror so that
the area behind your vehicle
can be viewed properly.
• Change to digital mirror mode and adjust the display settings.
●As the range of the image dis-
played by the Digital Rear-view
Mirror is different from that of
the optical mirror, make sure to
check this difference before
driving.
System components
Page 147 of 618
1473-4. Adjusting the steering wheel and mirrors
Owners Manual_USA_M0C052_en
3
Before driving
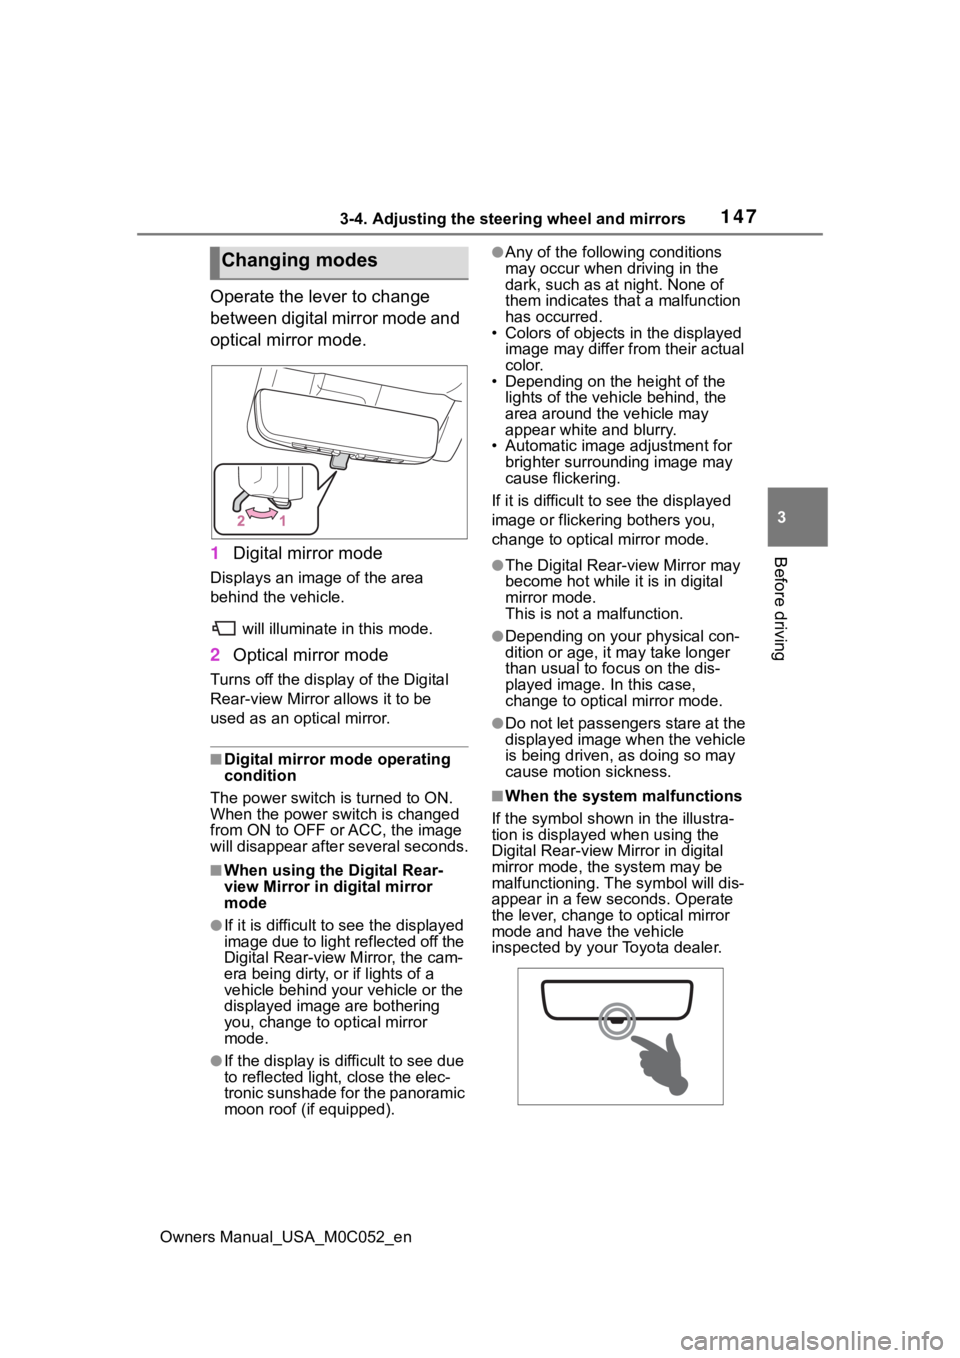
Operate the lever to change
between digital mirror mode and
optical mirror mode.
1 Digital mirror mode
Displays an image of the area
behind the vehicle.
will illuminate in this mode.
2Optical mirror mode
Turns off the display of the Digital
Rear-view Mirror allows it to be
used as an optical mirror.
■Digital mirror mode operating
condition
The power switch is turned to ON.
When the power switch is changed
from ON to OFF or ACC, the image
will disappear afte r several seconds.
■When using the Digital Rear-
view Mirror in digital mirror
mode
●If it is difficult to see the displayed
image due to light reflected off the
Digital Rear-view M irror, the cam-
era being dirty, or if lights of a
vehicle behind your vehicle or the
displayed image are bothering
you, change to optical mirror
mode.
●If the display is difficult to see due
to reflected light, close the elec-
tronic sunshade for the panoramic
moon roof (if equipped).
●Any of the following conditions
may occur when driving in the
dark, such as at night. None of
them indicates that a malfunction
has occurred.
• Colors of objects in the displayed
image may differ from their actual
color.
• Depending on the height of the
lights of the vehicle behind, the
area around the vehicle may
appear white and blurry.
• Automatic image adjustment for brighter surrounding image may
cause flickering.
If it is difficult to see the displayed
image or flickering bothers you,
change to optical mirror mode.
●The Digital Rear-view Mirror may
become hot while it is in digital
mirror mode.
This is not a malfunction.
●Depending on your physical con-
dition or age, it may take longer
than usual to fo cus on the dis-
played image. In this case,
change to optical mirror mode.
●Do not let passengers stare at the
displayed image when the vehicle
is being driven, as doing so may
cause motion sickness.
■When the system malfunctions
If the symbol shown in the illustra-
tion is displayed when using the
Digital Rear-view Mirror in digital
mirror mode, the system may be
malfunctioning. The symbol will dis-
appear in a few seconds. Operate
the lever, change to optical mirror
mode and have the vehicle
inspected by your Toyota dealer.
Changing modes
Page 148 of 618
1483-4. Adjusting the steering wheel and mirrors
Owners Manual_USA_M0C052_en
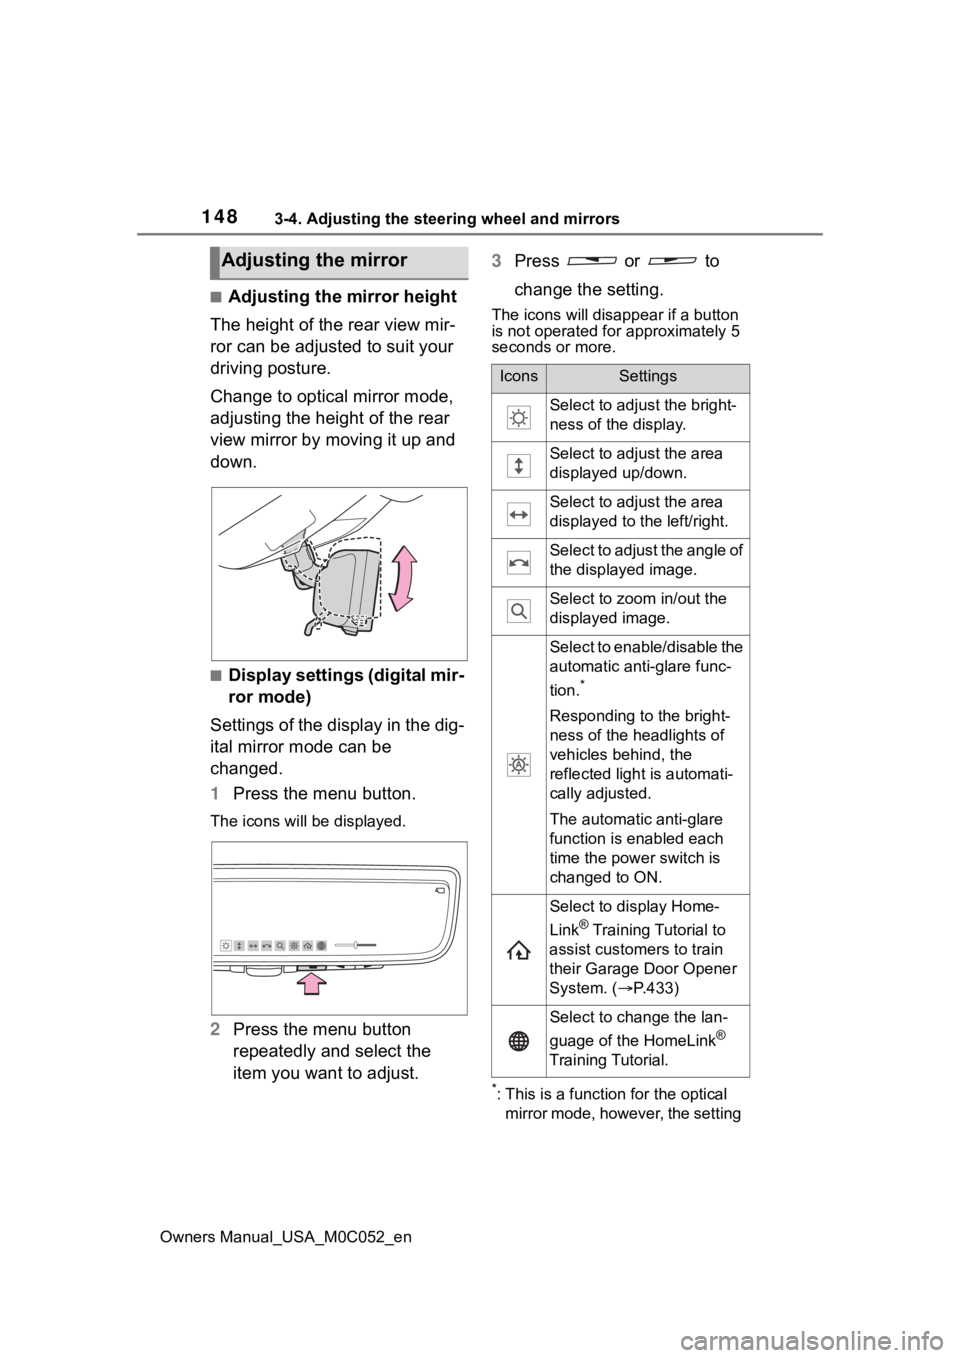
■Adjusting the mirror height
The height of the rear view mir-
ror can be adjusted to suit your
driving posture.
Change to optical mirror mode,
adjusting the height of the rear
view mirror by moving it up and
down.
■Display settings (digital mir-
ror mode)
Settings of the display in the dig-
ital mirror mode can be
changed.
1 Press the menu button.
The icons will be displayed.
2Press the menu button
repeatedly and select the
item you want to adjust. 3
Press or to
change the setting.
The icons will disappear if a button
is not operated fo r approximately 5
seconds or more.
*: This is a functi on for the optical
mirror mode, however, the setting
Adjusting the mirror
IconsSettings
Select to adjust the bright-
ness of the display.
Select to adjust the area
displayed up/down.
Select to adjust the area
displayed to the left/right.
Select to adjust the angle of
the displayed image.
Select to zoom in/out the
displayed image.
Select to enable/disable the
automatic anti-glare func-
tion.
*
Responding to the bright-
ness of the headlights of
vehicles behind, the
reflected light is automati-
cally adjusted.
The automatic anti-glare
function is enabled each
time the power switch is
changed to ON.
Select to display Home-
Link
® Training Tutorial to
assist customers to train
their Garage Door Opener
System. ( P.433)
Select to change the lan-
guage of the HomeLink
®
Training Tutorial.
Page 149 of 618

1493-4. Adjusting the steering wheel and mirrors
Owners Manual_USA_M0C052_en
3
Before driving
can also be changed while using
the digital mirror mode.
■Enabling/disabling the
automatic anti-glare func-
tion (optical mirror mode)
The automatic anti-glare func-
tion in the optical mirror mode
can be enabled/disabled. The
setting can be changed in both
the digital mirror mode and the
optical mirror mode.
When using the digital mirror
mode
P.148
When using the optical mirror
mode
1 Press the menu button.
The icons will be displayed.
2Press the menu button
repeatedly and select .
The setting display will be dis-
played.
3Press or to
enable (“ON”)/disable
(“OFF”) the automatic anti-
glare function.
The icons will disappear if a button
is not operated fo r approximately 5 seconds or more.
■Adjusting the display (digital
mirror mode)
●If the displayed image is adjusted,
it may appear distorted. This is not
a malfunction.
●If the brightness of the Digital
Rear-view Mirror is set too high, it
may cause eye strain. Adjust the
Digital Rear-view Mirror to an
appropriate brightness. If your
eyes become tired, change to
optical mirror mode.
●The brightness of the Digital Rear-
view Mirror will change automati-
cally according to
the brightness
of the area in front of your vehicle.
■To prevent the light sensors
from malfunctioning
To prevent the light sensors from
malfunctioning, do not touch or
cover them.
WARNING
Observe the following precau-
tions.
Failure to do so may result in
death or serious injury.
Page 151 of 618
1513-4. Adjusting the steering wheel and mirrors
Owners Manual_USA_M0C052_en
3
Before driving
NOTICE
■To prevent the camera from
malfunctioning
●Observe the following precau-
tions, otherwise the Digital
Rear-view Mirror may not oper-
ate properly.
• Do not strike or hit the camera
or subject it to a strong impact,
as the camera installation posi-
tion and angle may be changed.
• Do not remove, disassemble or modify the camera.
• When washing the camera, rinse it with a la rge quantity of
water and then wipe it clean
with a soft cloth dampened with
water.
Do not strongly rub the camera
lens, as it may be scratched and
will not be able to transmit a
clear image.
• Do not allow organic solvent, car wax, window cleaner or
glass coat to adhere to the cam-
era cover. If this happens, wipe
it off as soon as possible.
• Do not apply hot water to the camera in cold weather, as the
sudden change of temperature
may cause the camera to not
operate properly.
• When using a high pressure washer to wash the vehicle, do
not directly spra y the camera
and its surrounding area, as
doing so may cause the camera
to not operate properly.
●Do not subject t he camera to a
strong impact as this could
cause a malfunction.
If this happens, have the vehicle
inspected by your Toyota dealer
as soon as possible.
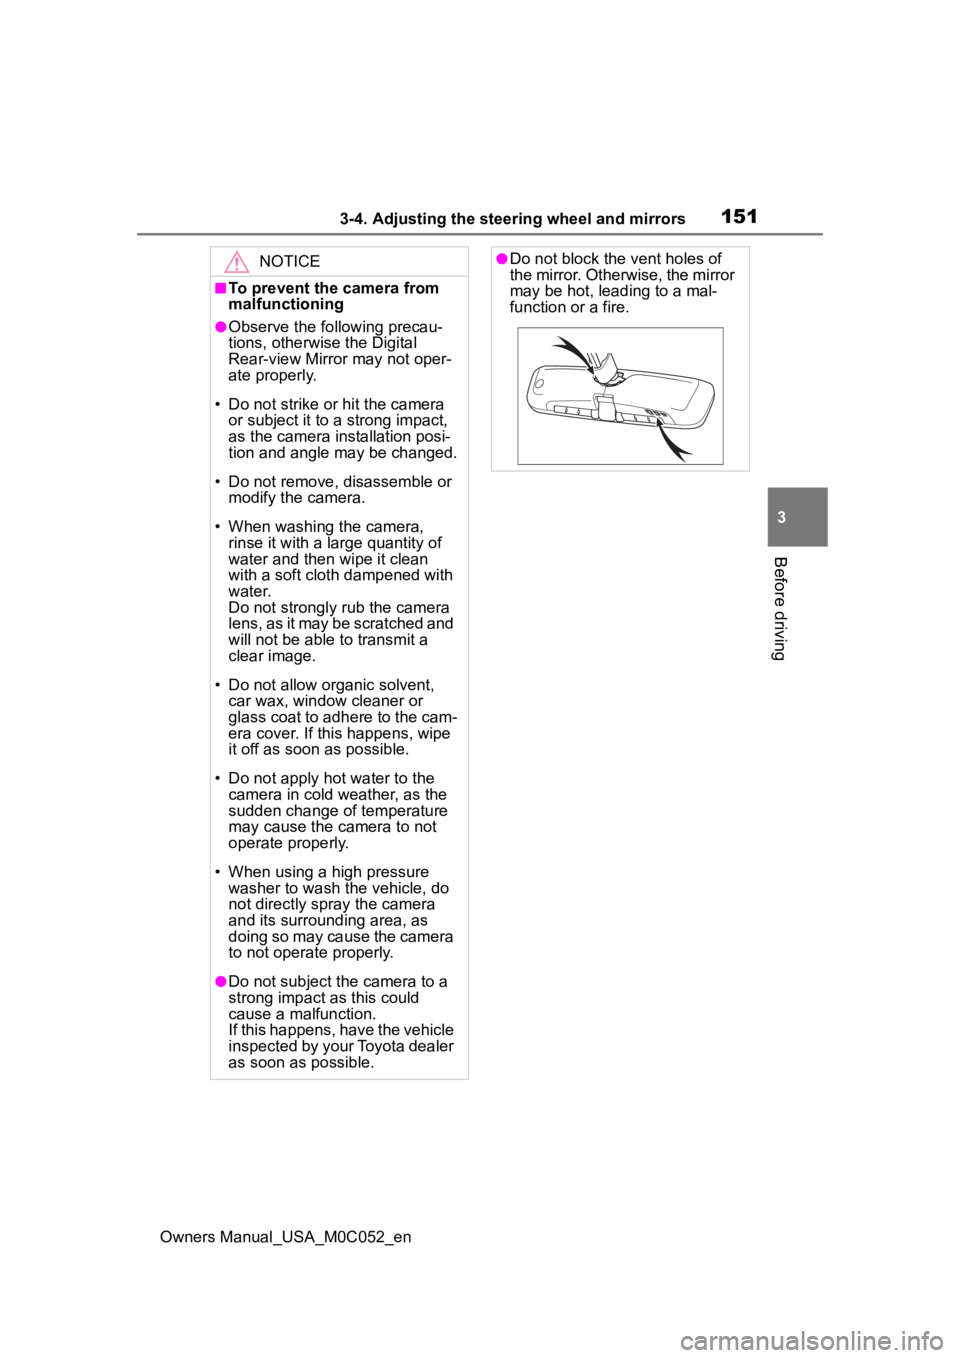
●Do not block the vent holes of
the mirror. Otherwise, the mirror
may be hot, leading to a mal-
function or a fire.
Page 152 of 618
1523-4. Adjusting the steering wheel and mirrors
Owners Manual_USA_M0C052_en
If you notice any of the following symptoms, refer to the following
table for the likely cause and the solution.
If the symptom is not resolved by the solution, have the vehicl e
inspected by your Toyota dealer.
If you notice any symptoms
SymptomLikely causeSolution
The image is diffi-
cult to see.
The mirror surface is dirty.
Clean the mirror surface
gently, using a soft dry
cloth.
Sunlight or headlights are
shining directly into the Digi-
tal Rear-view Mirror.
Change to optical mirror
mode.
(If the light is coming
through the electronic
sunshade for panoramic
moon roof [if equipped],
close the electronic
sunshade.)