2023 TOYOTA TUNDRA HYBRID weight
[x] Cancel search: weightPage 194 of 618
1944-1. Before driving
Owners Manual_USA_M0C052_enapproximately 600 miles (1000
km) of trailer towing.
■If trailer sway occurs
One or more factors (crosswinds,
passing vehicles, rough roads, etc.)
can adversely affect handling of
your vehicle and trailer, causing
instability.
●If trailer swaying occurs:
• Firmly grip the steering wheel. Steer straight ahead. Do not try to
control trailer swaying by turning
the steering wheel.
• Begin releasing the accelerator
pedal immediately but very gradu-
ally to reduce speed. Do not
increase speed. Do not apply
vehicle brakes.
If you make no ext reme correction
with the steering or brakes, your
vehicle and trailer should stabilize.
(if enabled, Trailer Sway Control can
also help to stabilize the vehicle and
trailer.)
●After the trailer swaying has
stopped:
• Stop in a safe place. Get all occu-
pants out of the vehicle.
• Check the tires of the vehicle and the trailer.
• Check the load in the trailer. Make sure the load has not shifted.
Make sure the tongue weight is
appropriate, if possible.
• Check the load in the vehicle. Make sure the vehicle is not over-
loaded after occupants get in.
If you cannot find any problems, the
speed at which trailer swaying
occurred is beyond the limit of your
particular vehicle- trailer combina-
tion. Drive at a lower speed to pre-
vent instability. Remember that
swaying of the towing vehicle-trailer
increases as speed increases.
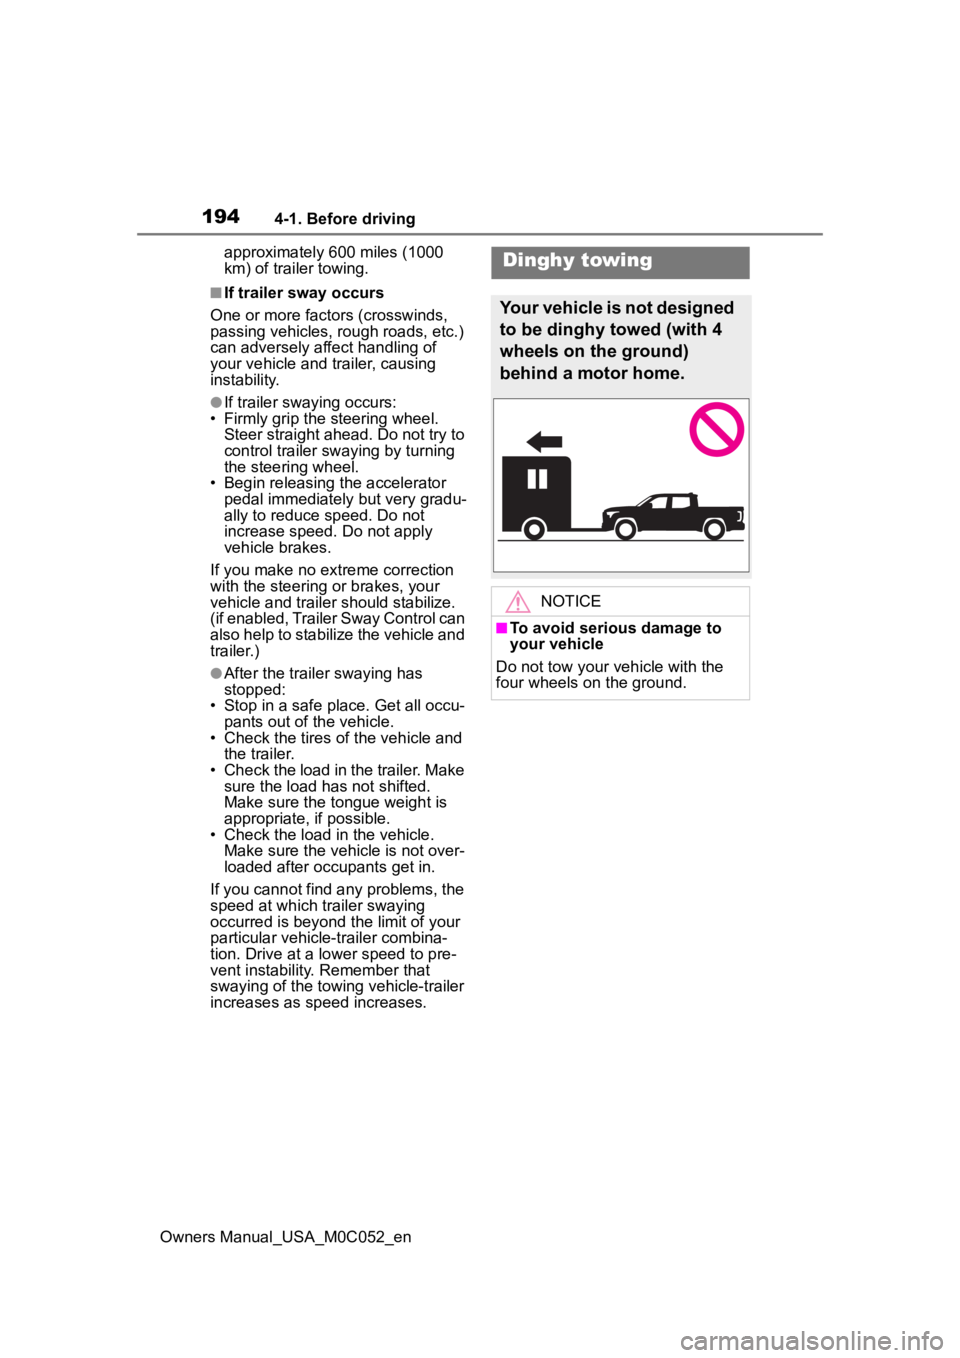
Dinghy towing
Your vehicle is not designed
to be dinghy towed (with 4
wheels on the ground)
behind a motor home.
NOTICE
■To avoid serious damage to
your vehicle
Do not tow your vehicle with the
four wheels on the ground.
Page 204 of 618
2044-2. Driving procedures
Owners Manual_USA_M0C052_enselected
■Differences with “TOW HAUL”
mode and “TOW+” mode
It is recommend ed to use each
mode according to the weight of the
trailer to be towed.
●“TOW HAUL” mode is used when
towing trailers that weigh less than
5000 lb. (2268 kg).
●“TOW+” mode is used when tow-
ing trailers that weigh more than
5000 lb. (2268 kg).
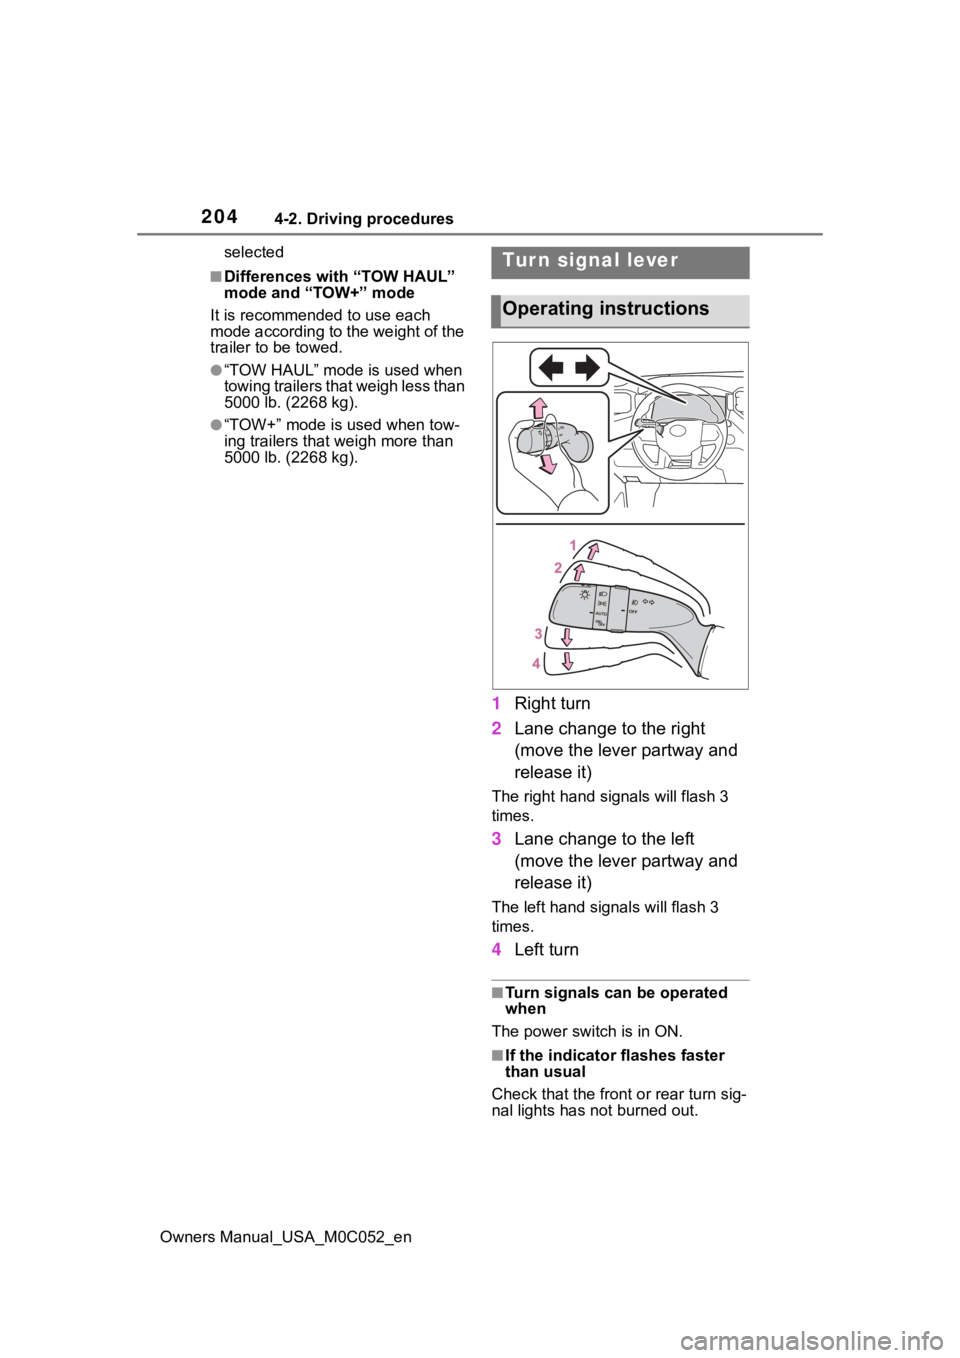
1 Right turn
2 Lane change to the right
(move the lever partway and
release it)
The right hand s ignals will flash 3
times.
3 Lane change to the left
(move the lever partway and
release it)
The left hand signals will flash 3
times.
4Left turn
■Turn signals can be operated
when
The power switch is in ON.
■If the indicator flashes faster
than usual
Check that the front or rear turn sig-
nal lights has not burned out.
Tur n signal lever
Operating instructions
Page 351 of 618

3514-5. Using the driving support systems
Owners Manual_USA_M0C052_en
4
Driving
Show distance in front of the vehicle.
• Display points approximately 1.5 ft. (0.5 m) fr om the edge of the bumper.
Front tire contact line (blue)
Shows guide lines of where the f ront tire touches the ground.
Vehicle width lines (blue)
Shows guide lines of the vehicle’ s width including the outside rear view mir-
rors.
Rear tire contact line (blue)
Shows guide lines of where the rear tire touches the ground.
Intuitive parking assist
When a sensor detects an obstacle, the direction of and the app roximate
distance to the obsta cle are displayed and the buzzer sounds.
●The screen can be displayed when the shift lever is in a positi on other
than R.
●While the under vehicle terrain view is displayed, if the vehicle speed
reaches or exceeds approximately 3 mph (5 km/h), the screen automati-
cally returns to the front view display.
●In the following situations, the under vehicle terrain view sel ection button
cannot be operated.
• The vehicle is not completely stopped
• After the hybrid system starts, a fixed distance or more has not been
driven
• After the front-wheel drive cont rol switch is shifted to “4L”, a fixed distance
or more has not been driven
●In the following situations, the system may not operate normall y, or it may
not be possible to switch to the under vehicle terrain view.
• The road is covered with snow
• It is nighttime and the road has no illumination
• Dirt or foreign matter is adhering to the camera lens
• There is water in front of the vehicle (a river, puddle, sea water, etc.)
WARNING
●The tire position indicator lines and vehicle pos ition indicator lines may
differ from actual vehicle positions depending on the number of passen-
gers, cargo weight, road grade, r oad surface conditions, brightness of
the surrounding environment, etc. Always drive the vehicle whil e con-
firming the safety of your surroundings.
●The image displayed is one that was previously taken at a point approx-
imately 32 ft. (10m) behind the current vehicle position. In cases such
as when objects move after the im age is taken, the image displayed on
the screen may differ from the actual state.
Page 353 of 618
3534-5. Using the driving support systems
Owners Manual_USA_M0C052_en
4
Driving
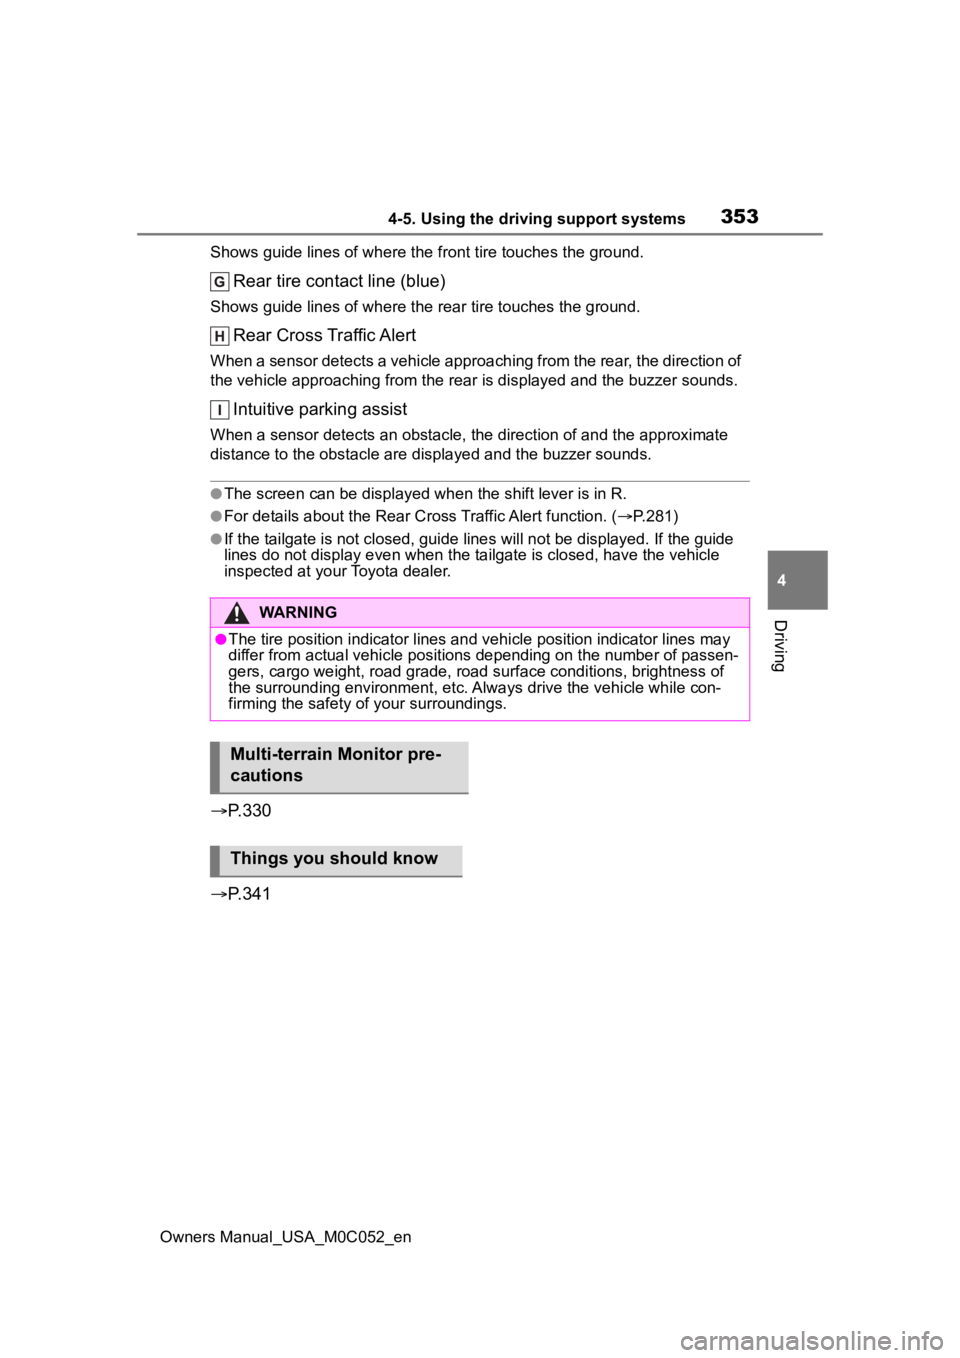
Shows guide lines of where the f ront tire touches the ground.
Rear tire contact line (blue)
Shows guide lines of where the rear tire touches the ground.
Rear Cross Traffic Alert
When a sensor detects a vehicle approaching from the rear, the direction of
the vehicle approaching from the r ear is displayed and the buzzer sounds.
Intuitive parking assist
When a sensor detects an obstacle, the direction of and the app roximate
distance to the obsta cle are displayed and the buzzer sounds.
●The screen can be displayed when the shift lever is in R.
●For details about the Rear C ross Traffic Alert function. (P.281)
●If the tailgate is not closed, guide lines will not be displayed. If the guide
lines do not display e ven when the tailgate is closed, have the vehicle
inspected at you r Toyota dealer.
P.330
P.341
WARNING
●The tire position indicator lines and vehicle pos ition indicator lines may
differ from actual vehicle positions depending on the number of passen-
gers, cargo weight, road grade, r oad surface conditions, brightness of
the surrounding environment, etc. Always drive the vehicle whil e con-
firming the safety of your surroundings.
Multi-terrain Monitor pre-
cautions
Things you should know
Page 464 of 618
4666-3. Do-it-yourself maintenance
Owners Manual_USA_M0C052_en
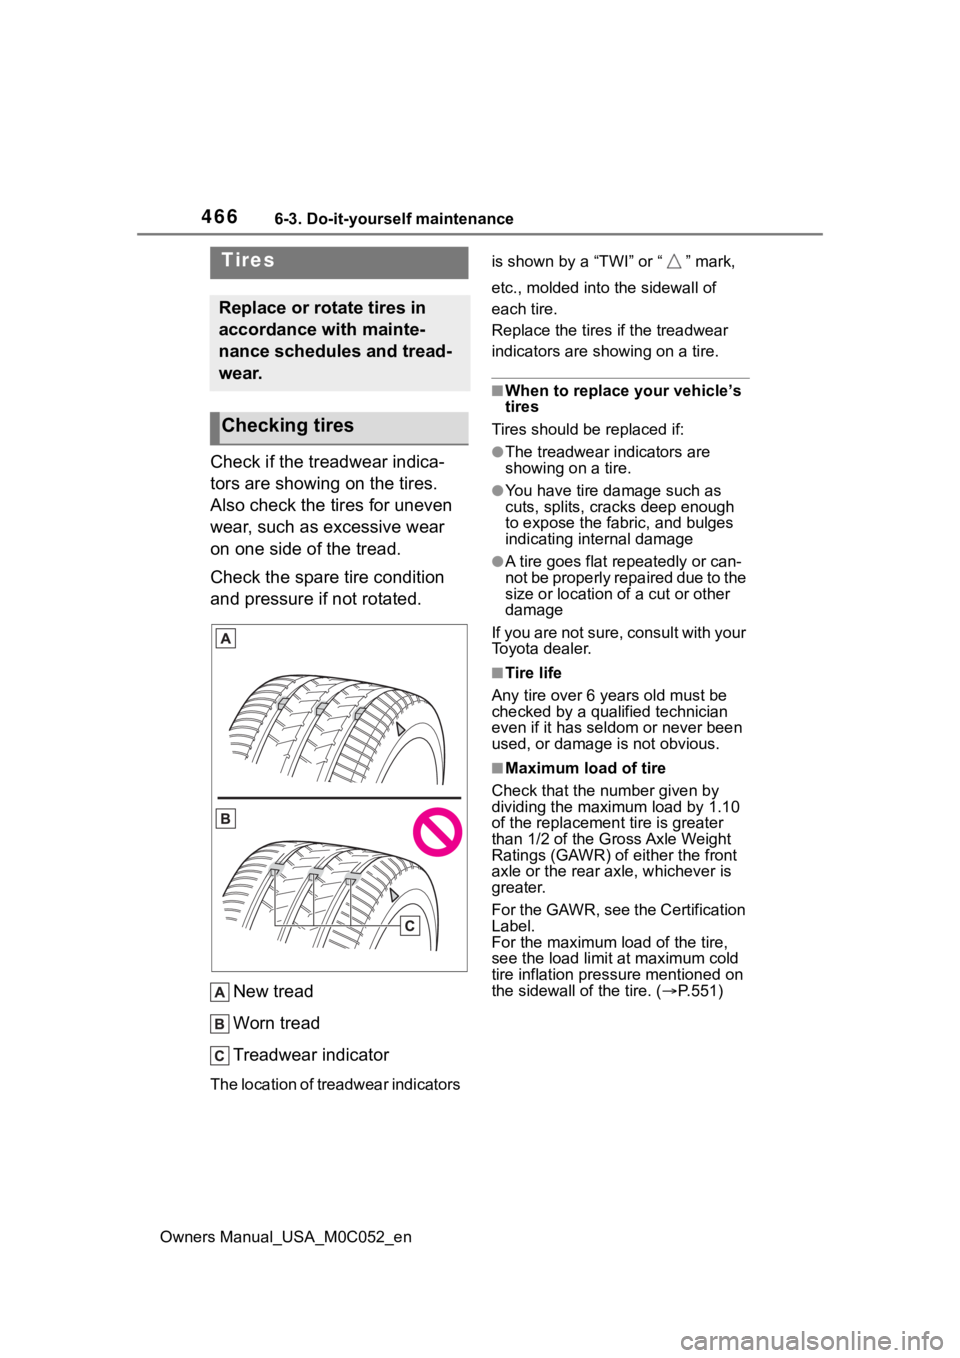
Check if the treadwear indica-
tors are showing on the tires.
Also check the tires for uneven
wear, such as excessive wear
on one side of the tread.
Check the spare tire condition
and pressure if not rotated.
New tread
Worn tread
Treadwear indicator
The location of treadwear indicators is shown by a “TWI” or “ ” mark,
etc., molded into the sidewall of
each tire.
Replace the tires if the treadwear
indicators are s
howing on a tire.
■When to replace your vehicle’s
tires
Tires should be replaced if:
●The treadwear indicators are
showing on a tire.
●You have tire damage such as
cuts, splits, cracks deep enough
to expose the fabric, and bulges
indicating internal damage
●A tire goes flat repeatedly or can-
not be properly repaired due to the
size or location of a cut or other
damage
If you are not sure, consult with your
Toyota dealer.
■Tire life
Any tire over 6 years old must be
checked by a qualified technician
even if it has seldom or never been
used, or damage is not obvious.
■Maximum load of tire
Check that the n umber given by
dividing the maximum load by 1.10
of the replacement tire is greater
than 1/2 of the Gross Axle Weight
Ratings (GAWR) of either the front
axle or the rear axle, whichever is
greater.
For the GAWR, see the Certification
Label.
For the maximum load of the tire,
see the load limit at maximum cold
tire inflation pressure mentioned on
the sidewall of the tire. ( P.551)
Tires
Replace or rotate tires in
accordance with mainte-
nance schedules and tread-
wear.
Checking tires
Page 475 of 618
4776-3. Do-it-yourself maintenance
Owners Manual_USA_M0C052_en
6
Maintenance and care
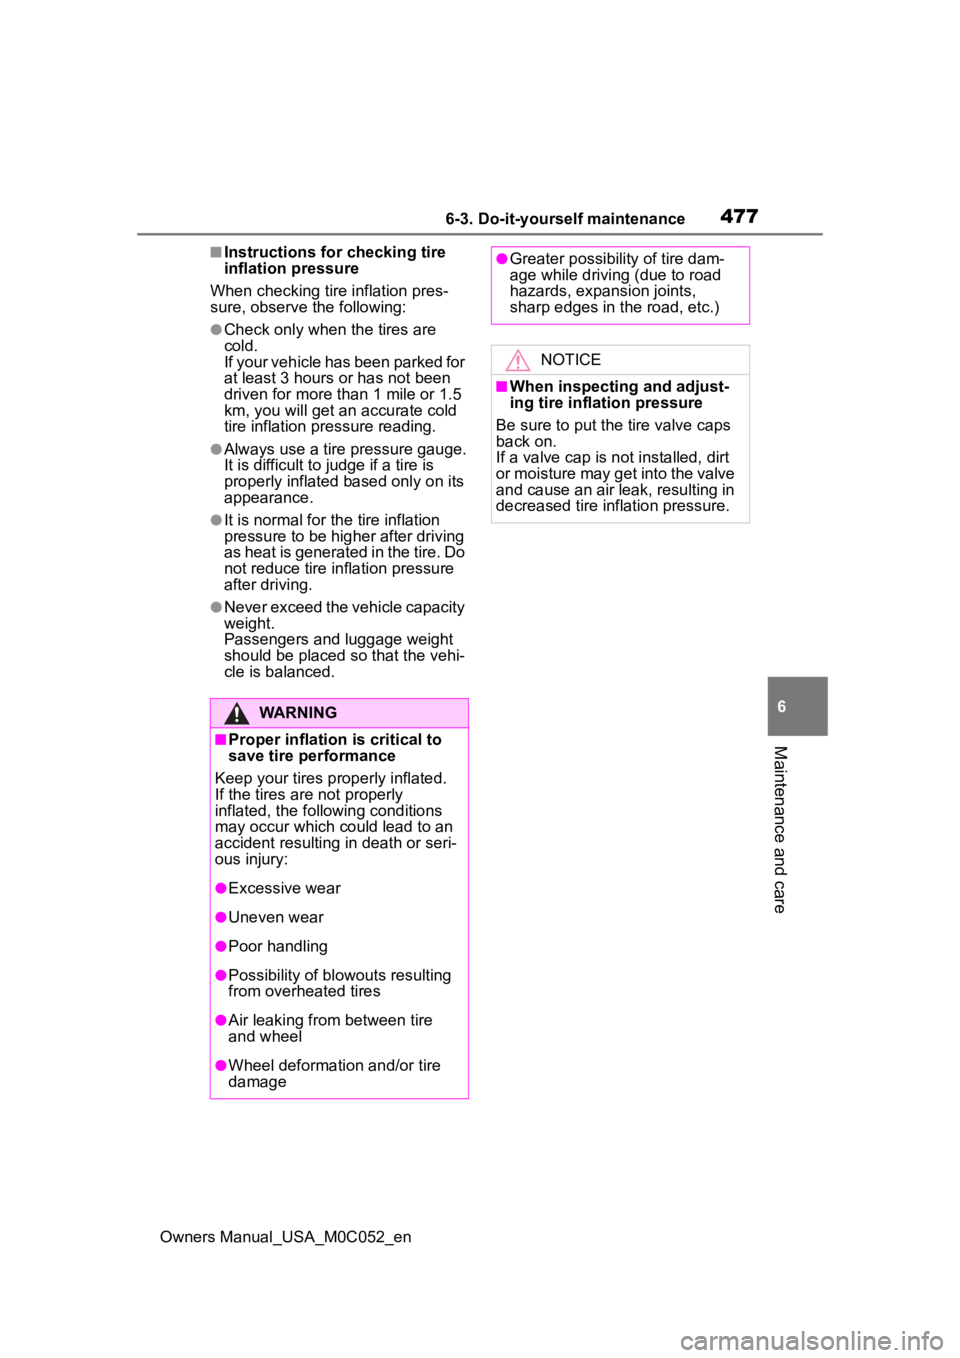
■Instructions for checking tire
inflation pressure
When checking tire inflation pres-
sure, observe the following:
●Check only when the tires are
cold.
If your vehicle has been parked for
at least 3 hours or has not been
driven for more tha n 1 mile or 1.5
km, you will get an accurate cold
tire inflation pressure reading.
●Always use a tire pressure gauge.
It is difficult to judge if a tire is
properly inflated based only on its
appearance.
●It is normal for the tire inflation
pressure to be higher after driving
as heat is generated in the tire. Do
not reduce tire inflation pressure
after driving.
●Never exceed the vehicle capacity
weight.
Passengers and luggage weight
should be placed so that the vehi-
cle is balanced.
WARNING
■Proper inflation is critical to
save tire performance
Keep your tires properly inflated.
If the tires are not properly
inflated, the following conditions
may occur which could lead to an
accident resulting in death or seri-
ous injury:
●Excessive wear
●Uneven wear
●Poor handling
●Possibility of blowouts resulting
from overheated tires
●Air leaking from between tire
and wheel
●Wheel deformation and/or tire
damage
●Greater possibi lity of tire dam-
age while driving (due to road
hazards, expansion joints,
sharp edges in the road, etc.)
NOTICE
■When inspecting and adjust-
ing tire inflation pressure
Be sure to put the tire valve caps
back on.
If a valve cap is no t installed, dirt
or moisture may get into the valve
and cause an air leak, resulting in
decreased tire inflation pressure.
Page 477 of 618
4796-3. Do-it-yourself maintenance
Owners Manual_USA_M0C052_en
6
Maintenance and care
Use only Toyota wheel nuts
and wheel nut wrenches
designed for use with your
aluminum wheels.
When rotating, repairing or
changing your tires, check
that the wheel nuts are still
tight after driving 1000 miles
(1600 km).
Be careful not to damage the
aluminum wheels when using
tire chains.
Use only Toyota genuine bal-
ance weights or equivalent
and a plastic or rubber ham-
mer when balancing your
wheels. 1
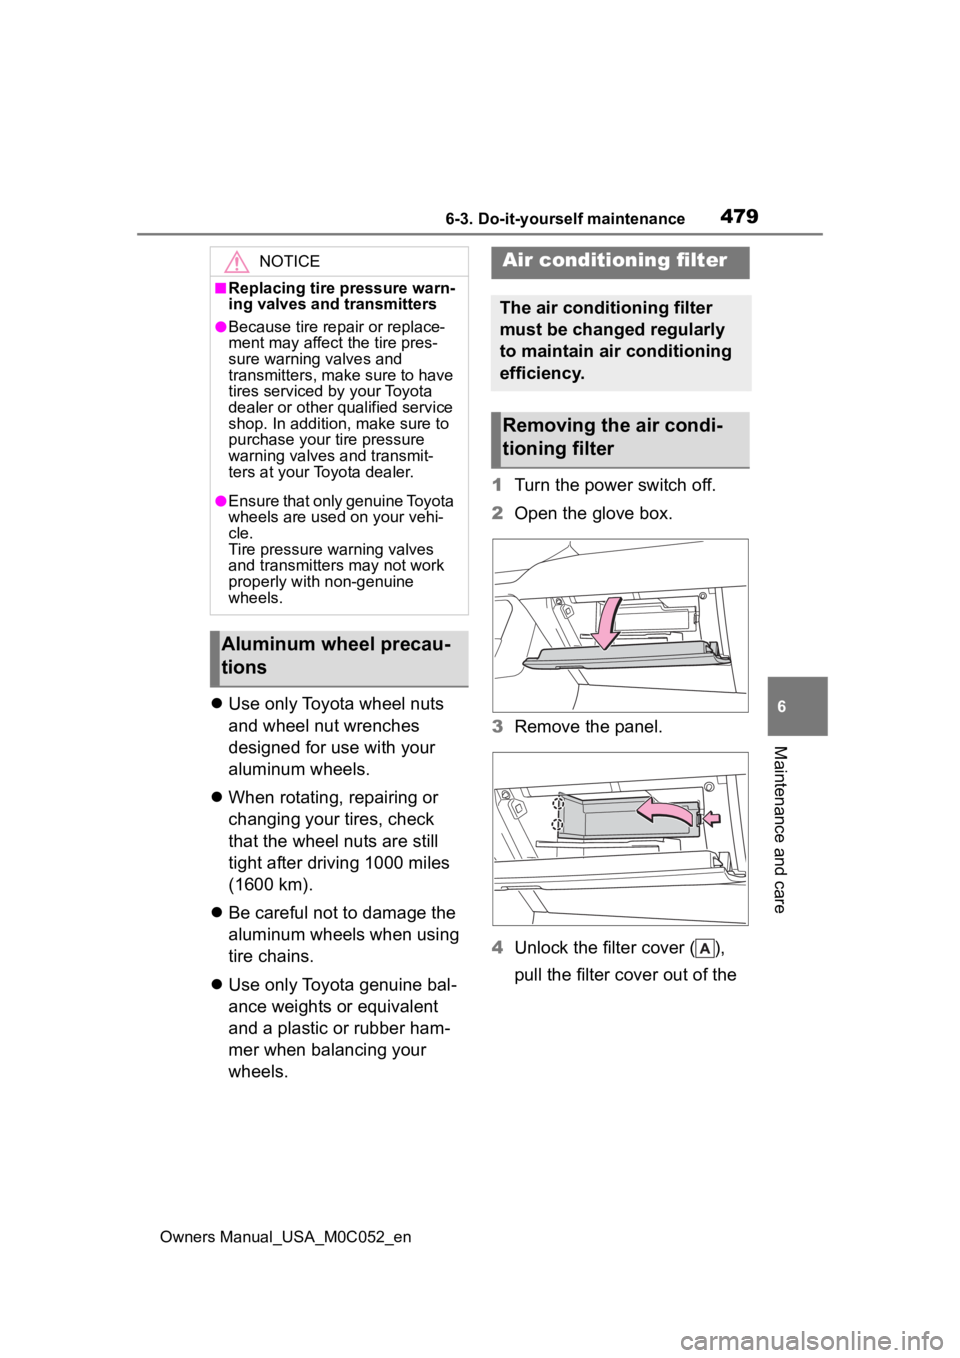
Turn the power switch off.
2 Open the glove box.
3 Remove the panel.
4 Unlock the filter cover ( ),
pull the filter cover out of the
NOTICE
■Replacing tire pressure warn-
ing valves and transmitters
●Because tire repair or replace-
ment may affect the tire pres-
sure warning valves and
transmitters, make sure to have
tires serviced by your Toyota
dealer or other qualified service
shop. In addition, make sure to
purchase your tire pressure
warning valves and transmit-
ters at your Toyota dealer.
●Ensure that only genuine Toyota
wheels are used on your vehi-
cle.
Tire pressure warning valves
and transmitters may not work
properly with non-genuine
wheels.
Aluminum wheel precau-
tions
Air conditioning filter
The air conditioning filter
must be changed regularly
to maintain air conditioning
efficiency.
Removing the air condi-
tioning filter
Page 538 of 618
5408-1. Specifications
Owners Manual_USA_M0C052_en
8-1.Specifications
*1: Unladen vehicles
*2: Short Bed type
*3: Standard Bed type
*4: 265/70R18 tires
*5: 265/60R20 tires
*6: 285/65R18 tires
*7: 265/50R22 tires
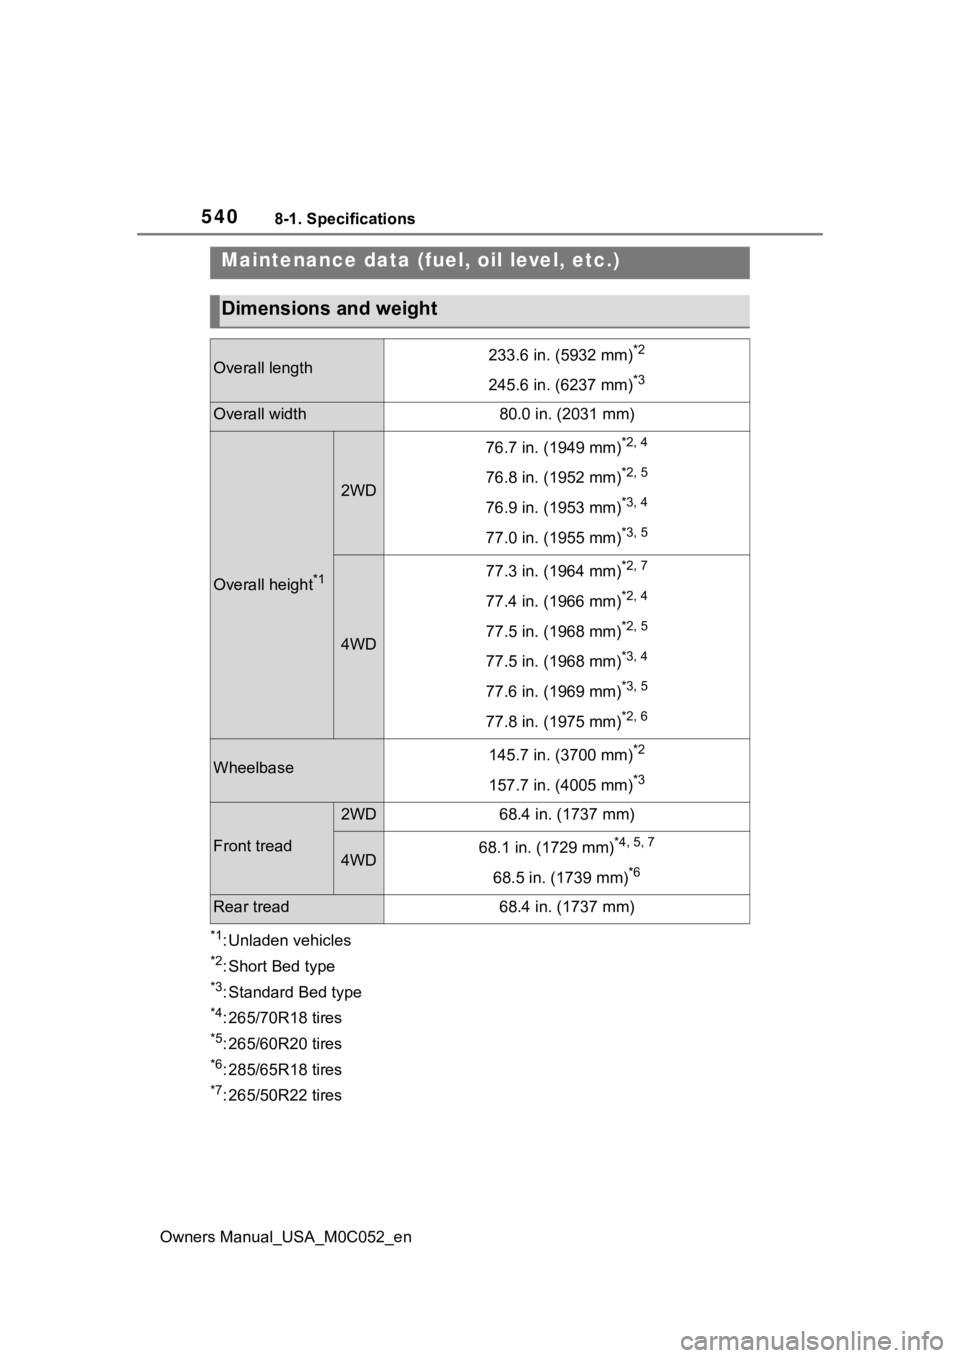
Maintenance data (fuel, oil level, etc.)
Dimensions and weight
Overall length233.6 in. (5932 mm)*2
245.6 in. (6237 mm)*3
Overall width80.0 in. (2031 mm)
Overall height*1
2WD
76.7 in. (1949 mm)*2, 4
76.8 in. (1952 mm)*2, 5
76.9 in. (1953 mm)*3, 4
77.0 in. (1955 mm)*3, 5
4WD
77.3 in. (1964 mm)*2, 7
77.4 in. (1966 mm)*2, 4
77.5 in. (1968 mm)*2, 5
77.5 in. (1968 mm)*3, 4
77.6 in. (1969 mm)*3, 5
77.8 in. (1975 mm)*2, 6
Wheelbase145.7 in. (3700 mm)*2
157.7 in. (4005 mm)*3
Front tread
2WD68.4 in. (1737 mm)
4WD68.1 in. (1729 mm)*4, 5, 7
68.5 in. (1739 mm)*6
Rear tread68.4 in. (1737 mm)