Page 327 of 618
3274-5. Using the driving support systems
Owners Manual_USA_M0C052_en
4
Driving
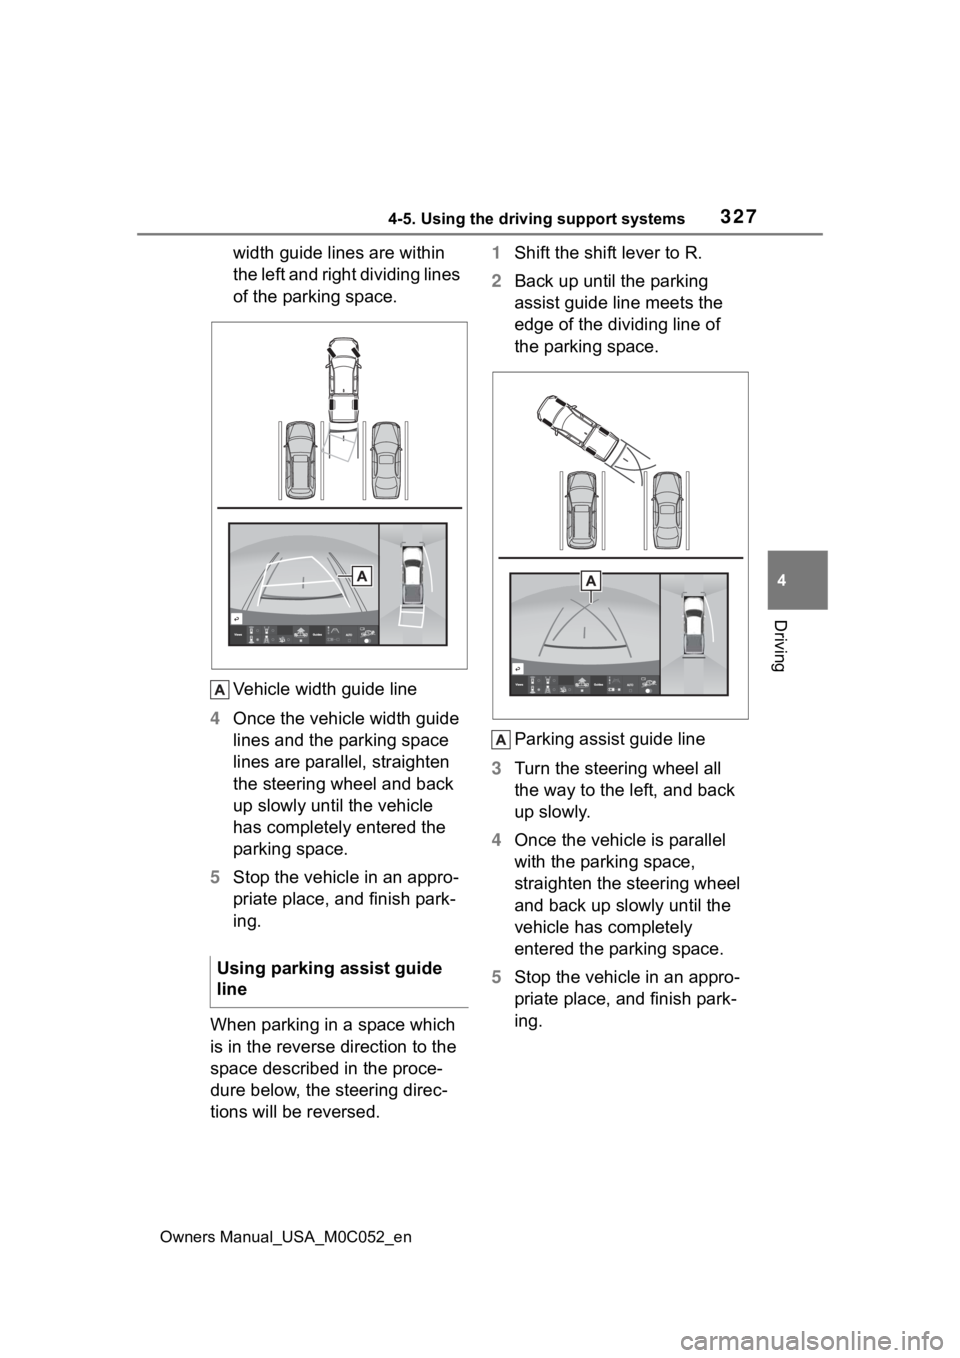
width guide lines are within
the left and right dividing lines
of the parking space.
Vehicle width guide line
4 Once the vehicle width guide
lines and the parking space
lines are parallel, straighten
the steering wheel and back
up slowly until the vehicle
has completely entered the
parking space.
5 Stop the vehicle in an appro-
priate place, and finish park-
ing.
When parking in a space which
is in the reverse direction to the
space described in the proce-
dure below, the steering direc-
tions will be reversed. 1
Shift the shift lever to R.
2 Back up until the parking
assist guide line meets the
edge of the dividing line of
the parking space.
Parking assist guide line
3 Turn the steering wheel all
the way to the left, and back
up slowly.
4 Once the vehicle is parallel
with the parking space,
straighten the steering wheel
and back up slowly until the
vehicle has completely
entered the parking space.
5 Stop the vehicle in an appro-
priate place, and finish park-
ing.
Using parking assist guide
line
Page 342 of 618
3424-5. Using the driving support systems
Owners Manual_USA_M0C052_en
The estimated course
lines move even though
the steering wheel is
straightThere is a malfunction
in the signals being out-
put by the steering sen-
sor.Have the vehicle
inspected by your Toy-
ota dealer.
Guide lines are not dis-
playedThe tailgate is open.
Close the tailgate.
If this does not resolve
the symptom, have the
vehicle inspected by
your Toyota dealer.
is displayed
12-volt battery has
been reinstalled.
The steering wheel
has been moved while
the 12-volt battery
was being reinstalled.
12-volt battery power
is low.
The steering sensor
has been reinstalled.
There is a malfunction
in the signals being
output by the steering
sensor.
Have the vehicle
inspected by your Toy-
ota dealer.
The panoramic view dis-
play cannot be magni-
fied
The intuitive parking
assist may be malfunc-
tioning or dirty.Follow the correction
procedures for malfunc-
tions of the intuitive
parking assist. ( P.274)
The see-through
view/moving view can-
not be displayed
SymptomLikely causeSolution
Page 346 of 618
3464-5. Using the driving support systems
Owners Manual_USA_M0C052_en
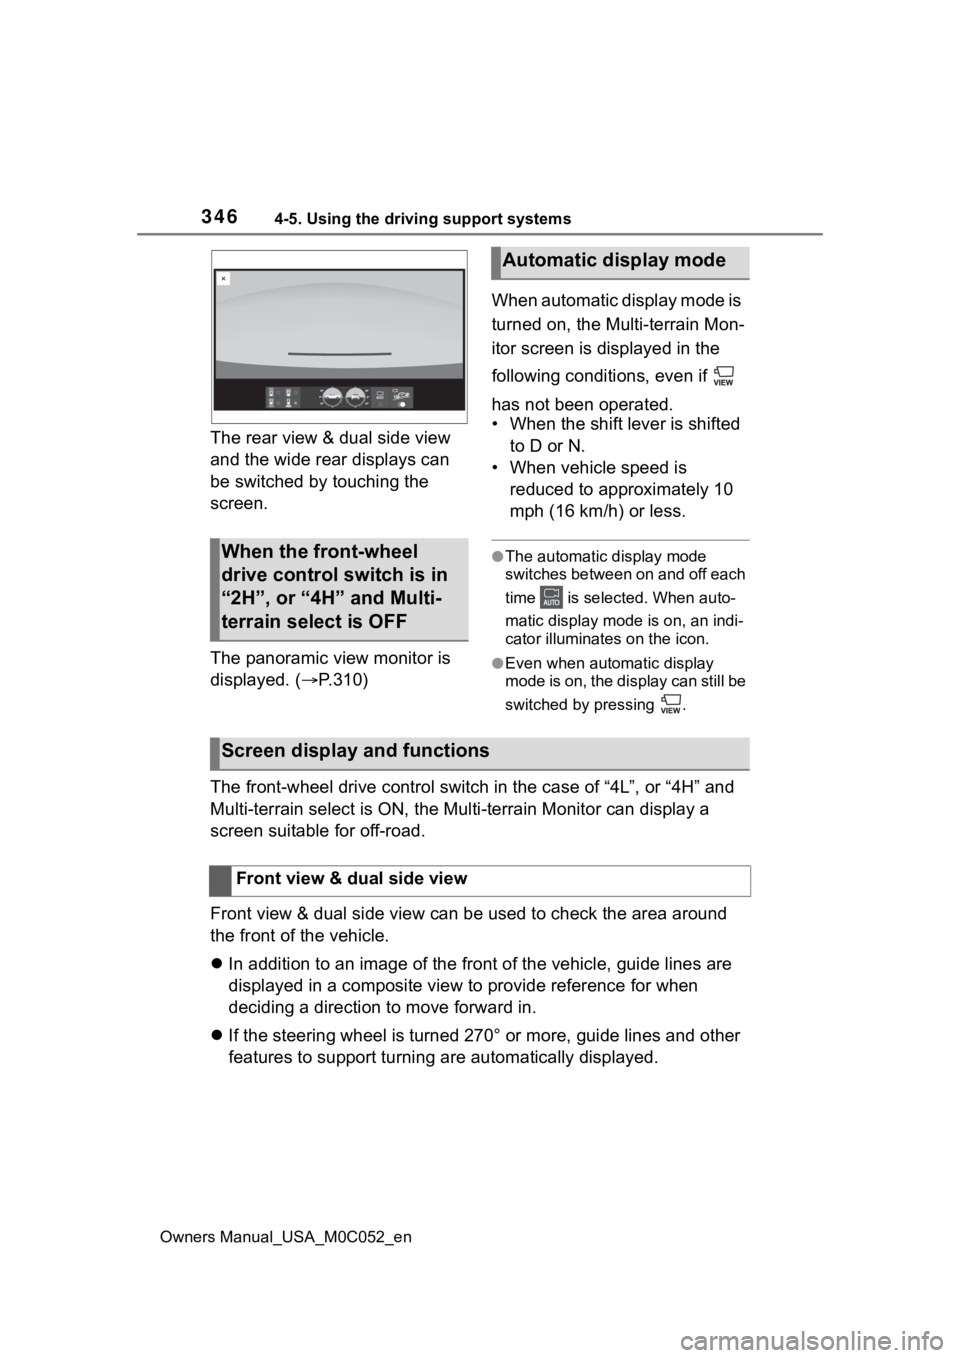
The rear view & dual side view
and the wide rear displays can
be switched by touching the
screen.
The panoramic view monitor is
displayed. (P.310) When automatic display mode is
turned on, the Multi-terrain Mon-
itor screen is displayed in the
following conditions, even if
has not been operated.
• When the shift lever is shifted
to D or N.
• When vehicle speed is reduced to approximately 10
mph (16 km/h) or less.
●The automatic display mode
switches between on and off each
time is selected. When auto-
matic display mode is on, an indi-
cator illuminate s on the icon.
●Even when automatic display
mode is on, the display can still be
switched by pressing .
The front-wheel drive control switch in the case of “4L”, or “4 H” and
Multi-terrain select is ON, the Mu lti-terrain Monitor can display a
screen suitable for off-road.
Front view & dual side view can be used to check the area around
the front of the vehicle.
In addition to an image of the front of the vehicle, guide line s are
displayed in a composite view to provide reference for when
deciding a direction to move forward in.
If the steering wheel is turned 270° or more, guide lines and o ther
features to support turning are automatically displayed.
When the front-wheel
drive control switch is in
“2H”, or “4H” and Multi-
terrain select is OFF
Automatic display mode
Screen display and functions
Front view & dual side view
Page 347 of 618
3474-5. Using the driving support systems
Owners Manual_USA_M0C052_en
4
Driving
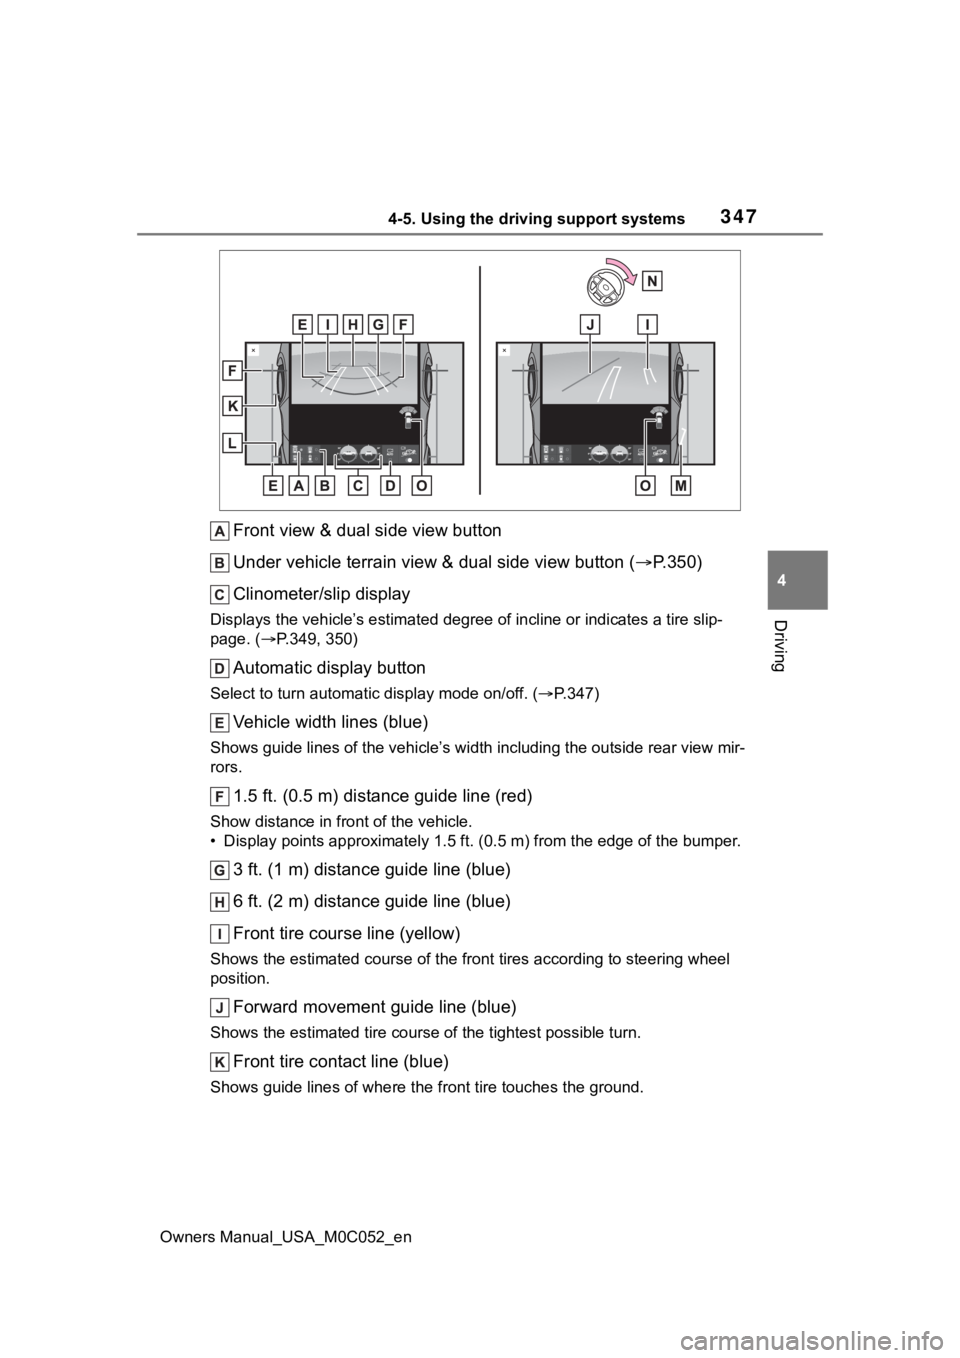
Front view & dual side view button
Under vehicle terrain view & dual side view button ( P.350)
Clinometer/slip display
Displays the vehicle’s estimate d degree of incline or indicates a tire slip-
page. ( P.349, 350)
Automatic display button
Select to turn automatic display mode on/off. (P.347)
Vehicle width lines (blue)
Shows guide lines of the vehicle’ s width including the outside rear view mir-
rors.
1.5 ft. (0.5 m) distance guide line (red)
Show distance in front of the vehicle.
• Display points approximately 1 .5 ft. (0.5 m) from the edge of the bumper.
3 ft. (1 m) distance guide line (blue)
6 ft. (2 m) distance guide line (blue)
Front tire course line (yellow)
Shows the estimated course of the front tires according to steering wheel
position.
Forward movement guide line (blue)
Shows the estimated tire cours e of the tightest possible turn.
Front tire contact line (blue)
Shows guide lines of where the f ront tire touches the ground.
Page 348 of 618
3484-5. Using the driving support systems
Owners Manual_USA_M0C052_en
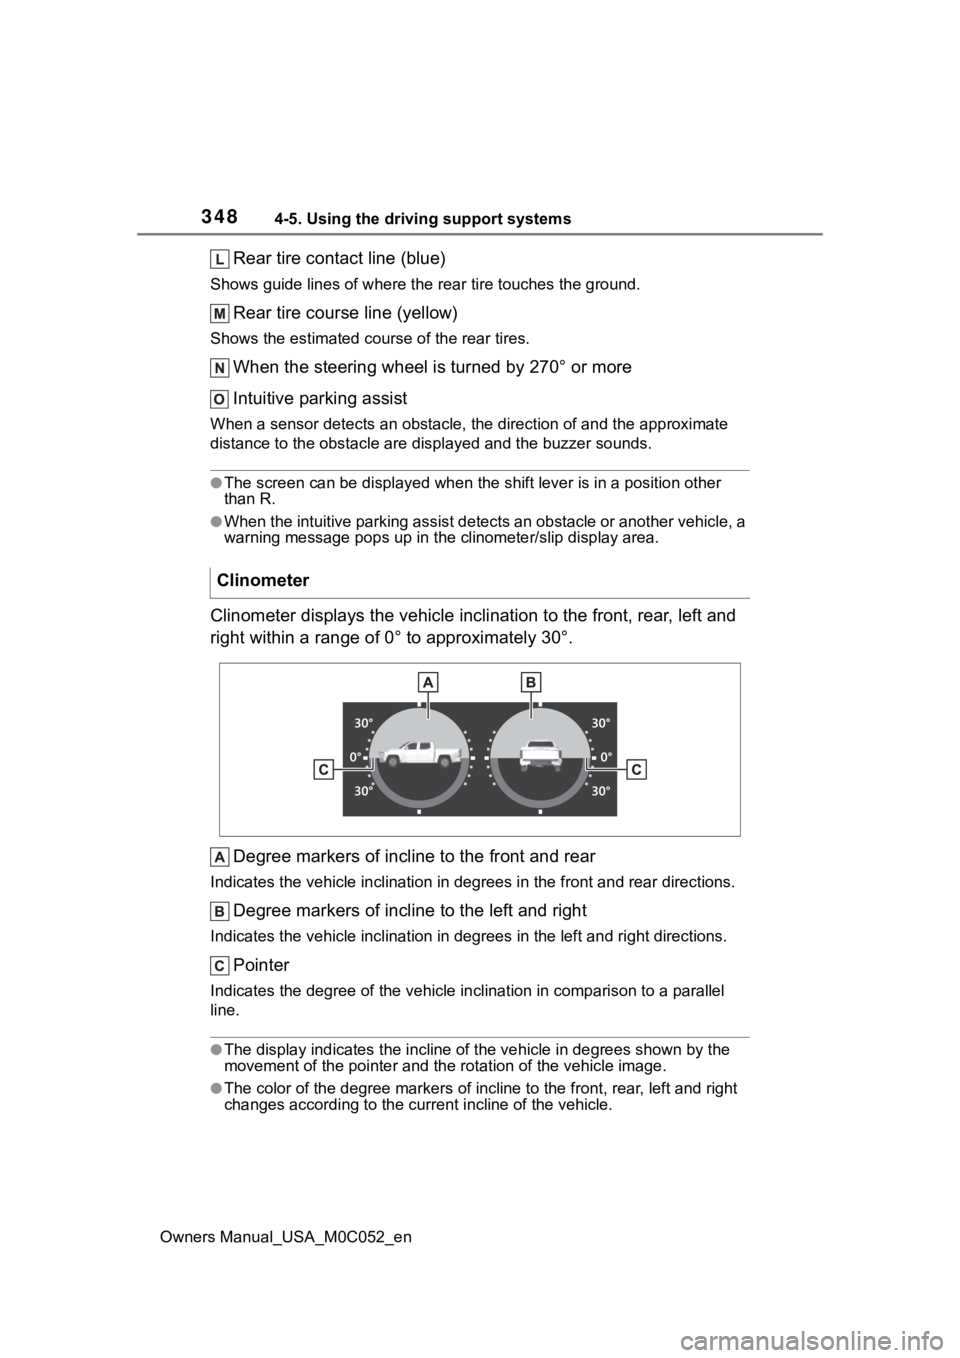
Rear tire contact line (blue)
Shows guide lines of where the rear tire touches the ground.
Rear tire course line (yellow)
Shows the estimated course of the rear tires.
When the steering wheel is turned by 270° or more
Intuitive parking assist
When a sensor detects an obstacle, the direction of and the app roximate
distance to the obsta cle are displayed and the buzzer sounds.
●The screen can be displayed when the shift lever is in a positi on other
than R.
●When the intuitive parking assist detects an obstacle or anothe r vehicle, a
warning message pops up in the clinometer/slip display area.
Clinometer displays the vehicle inclination to the front, rear, left and
right within a range of 0° to approximately 30°.
Degree markers of incline to the front and rear
Indicates the vehicle inclination in degrees in the front and r ear directions.
Degree markers of incline to the left and right
Indicates the vehicle inclination in degrees in the left and ri ght directions.
Pointer
Indicates the degree of the veh icle inclination in comparison to a parallel
line.
●The display indicates the incline of the veh icle in degrees shown by the
movement of the pointer and the rotation o f the vehicle image.
●The color of the degree markers of incline to the front, rear, left and right
changes according to the current incline of the vehicle.
Clinometer
Page 358 of 618
3584-5. Using the driving support systems
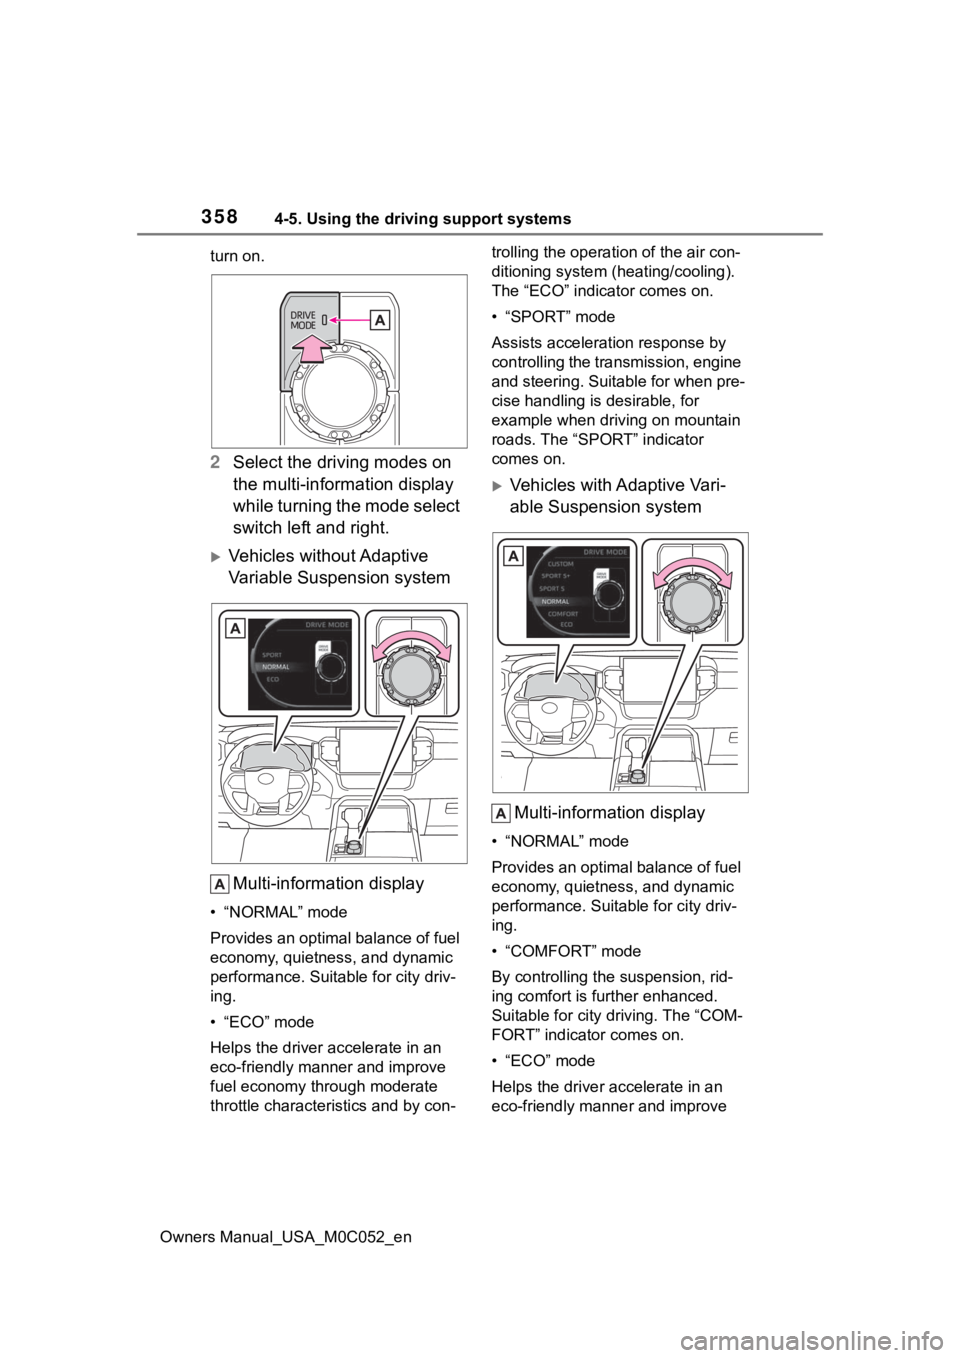
Owners Manual_USA_M0C052_enturn on.
2
Select the driving modes on
the multi-information display
while turning the mode select
switch left and right.
Vehicles without Adaptive
Variable Suspension system
Multi-information display
• “NORMAL” mode
Provides an optimal balance of fuel
economy, quietness, and dynamic
performance. Suitable for city driv-
ing.
•“ECO” mode
Helps the driver a ccelerate in an
eco-friendly manner and improve
fuel economy through moderate
throttle characteri stics and by con- trolling the operation of the air con-
ditioning system (heating/cooling).
The “ECO” indicator comes on.
• “SPORT” mode
Assists acceleration response by
controlling the transmission, engine
and steering. Suitable for when pre-
cise handling is desirable, for
example when driving on mountain
roads. The “SPORT” indicator
comes on.
Vehicles with Adaptive Vari-
able Suspension system
Multi-information display
• “NORMAL” mode
Provides an optimal balance of fuel
economy, quietness, and dynamic
performance. Suitable for city driv-
ing.
• “COMFORT” mode
By controlling the suspension, rid-
ing comfort is further enhanced.
Suitable for city driving. The “COM-
FORT” indicator comes on.
• “ECO” mode
Helps the driver accelerate in an
eco-friendly manner and improve
Page 359 of 618

3594-5. Using the driving support systems
Owners Manual_USA_M0C052_en
4
Driving
fuel economy through moderate
throttle characteri stics and by con-
trolling the operation of the air con-
ditioning system (heating/cooling).
The “ECO” indicator comes on.
• “SPORT S” mode
Assists accelerati on response by
controlling the transmission, engine
and steering. Suitable for when pre-
cise handling is desirable, for
example when driving on mountain
roads. The “SPORT S” indicator
comes on.
• “SPORT S+” mode
Helps to ensure th e controllability
and stability of the vehicle by inte-
grally controlling the steering wheel
and suspensions as well as the
transmission and engine, making it
suitable for sporty driving. The
“SPORT S+” indicator comes on.
• “CUSTOM” mode
Allows you to drive with the power
train, chassis and air conditioning
system functions set to your pre-
ferred settings. Custom mode set-
tings can only be changed on the
drive mode customization display of
multimedia system. The “CUSTOM”
indicator comes on.
■The driving mode select switch
can be operated when
The front-wheel dri ve control switch
is in “2H” and “4H”.
■Operation of the air condition-
ing system in Eco mode
Eco mode controls the heating/cool-
ing operations and fan speed of the
air conditioning system to enhance
fuel efficiency. To improve air condi-
tioning performance, perform the
following operations:
●Adjust the fan speed ( P.400)
●Turn off Eco drive mode ( P.358)
■Automatic deactivation of driv-
ing modes:
Driving mode is deactivated or the
driving mode will be changed to nor-
mal mode in the following condi-
tions:
●After turning the power switch off
and then turning it to on
●When the front-wheel drive control
switch is in “4L” (4WD models
only)
●When the Multi-terrain Select is
turned on (if equipped)
●When the Downhill assist control
system is turned on (if equipped)
●When the “TOW HAUL” mode or
“TOW+” mode is turned on (if
equipped)
■Customization
The Custom mode can be changed.
(Customizable features: P.570)
Page 362 of 618
3624-5. Using the driving support systems
Owners Manual_USA_M0C052_en
*: If equipped
The system can be used only on
2WD models. The system is
activated when driving at a
speed under 62 mph (100
km/h). The AUTO LSD system
will be activated with the follow-
ing two procedures.
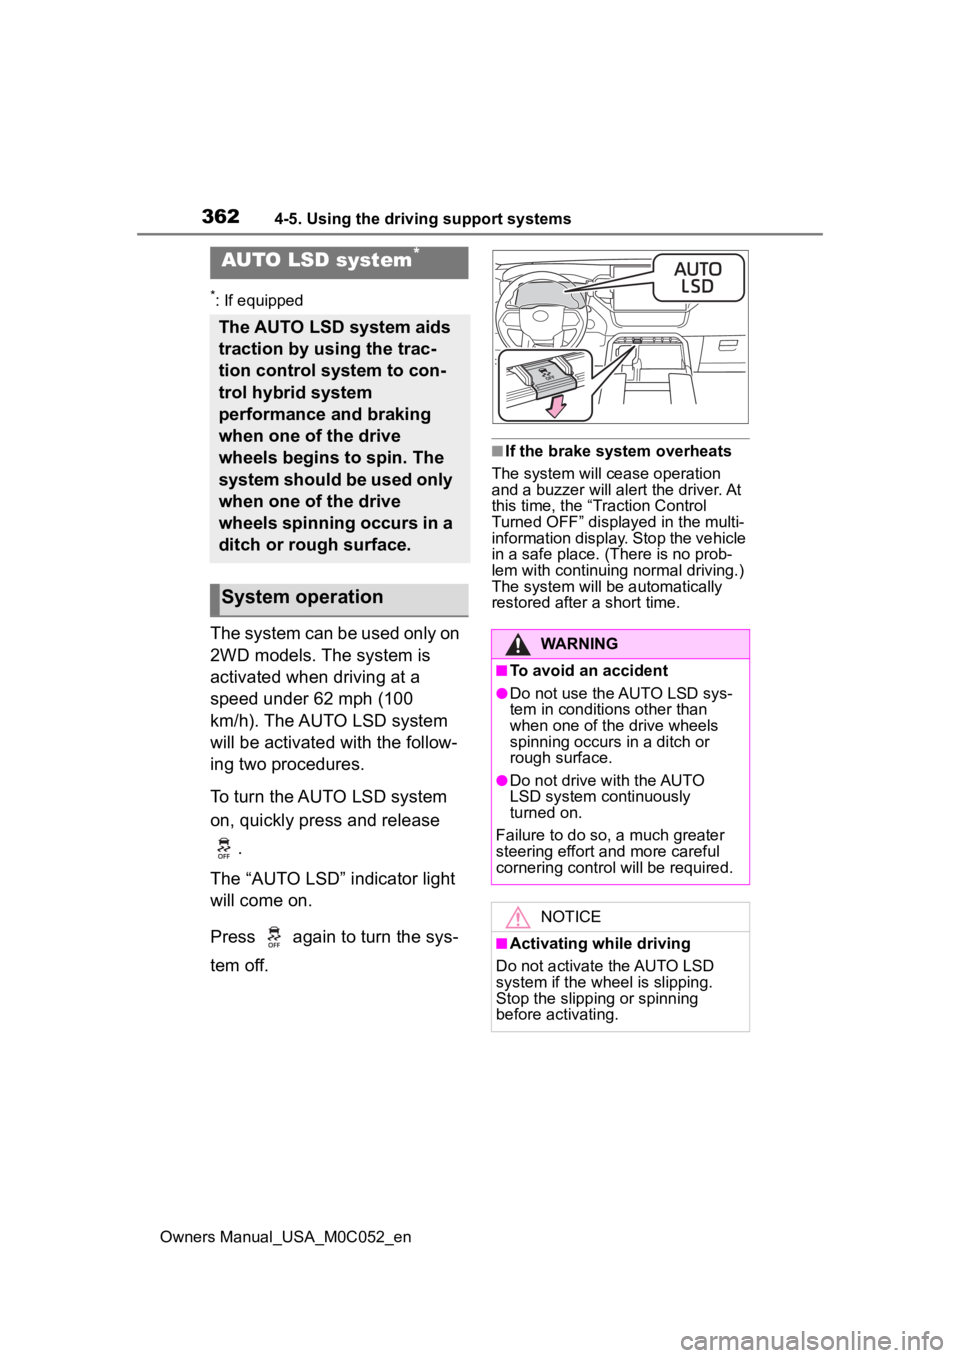
To turn the AUTO LSD system
on, quickly press and release .
The “AUTO LSD” indicator light
will come on.
Press again to turn the sys-
tem off.
■If the brake system overheats
The system will cease operation
and a buzzer will alert the driver. At
this time, the “T raction Control
Turned OFF” displayed in the multi-
information display. Stop the vehicle
in a safe place. (There is no prob-
lem with continuing normal driving.)
The system will be automatically
restored after a short time.
AUTO LSD system*
The AUTO LSD system aids
traction by using the trac-
tion control system to con-
trol hybrid system
performance and braking
when one of the drive
wheels begins to spin. The
system should be used only
when one of the drive
wheels spinning occurs in a
ditch or rough surface.
System operation
WARNING
■To avoid an accident
●Do not use the AUTO LSD sys-
tem in conditions other than
when one of the drive wheels
spinning occurs in a ditch or
rough surface.
●Do not drive with the AUTO
LSD system continuously
turned on.
Failure to do so, a much greater
steering effort an d more careful
cornering control will be required.
NOTICE
■Activating while driving
Do not activate the AUTO LSD
system if the wh eel is slipping.
Stop the slipping or spinning
before activating.