2023 TOYOTA SUPRA lights
[x] Cancel search: lightsPage 43 of 372

433-1. CONTROLS
3
CONTROLS
depressions or in tight curves.
• When the camera field of view is covered, for instance by a
fogged up windshield or
labels.
• When the camera lens is dirty or damaged.
• When driving toward bright lights or strong reflections,
e.g., because of a setting sun.
• When it is dark outside.
• Camera behind the wind- shield: if the camera has over-
heated and been temporarily
switched off due to exces-
sively high temperatures.
• Camera behind the wind- shield: during calibration of
the camera immediately after
vehicle delivery.
If applicable, a Check Control
message is displayed if the sys-
tem fails.
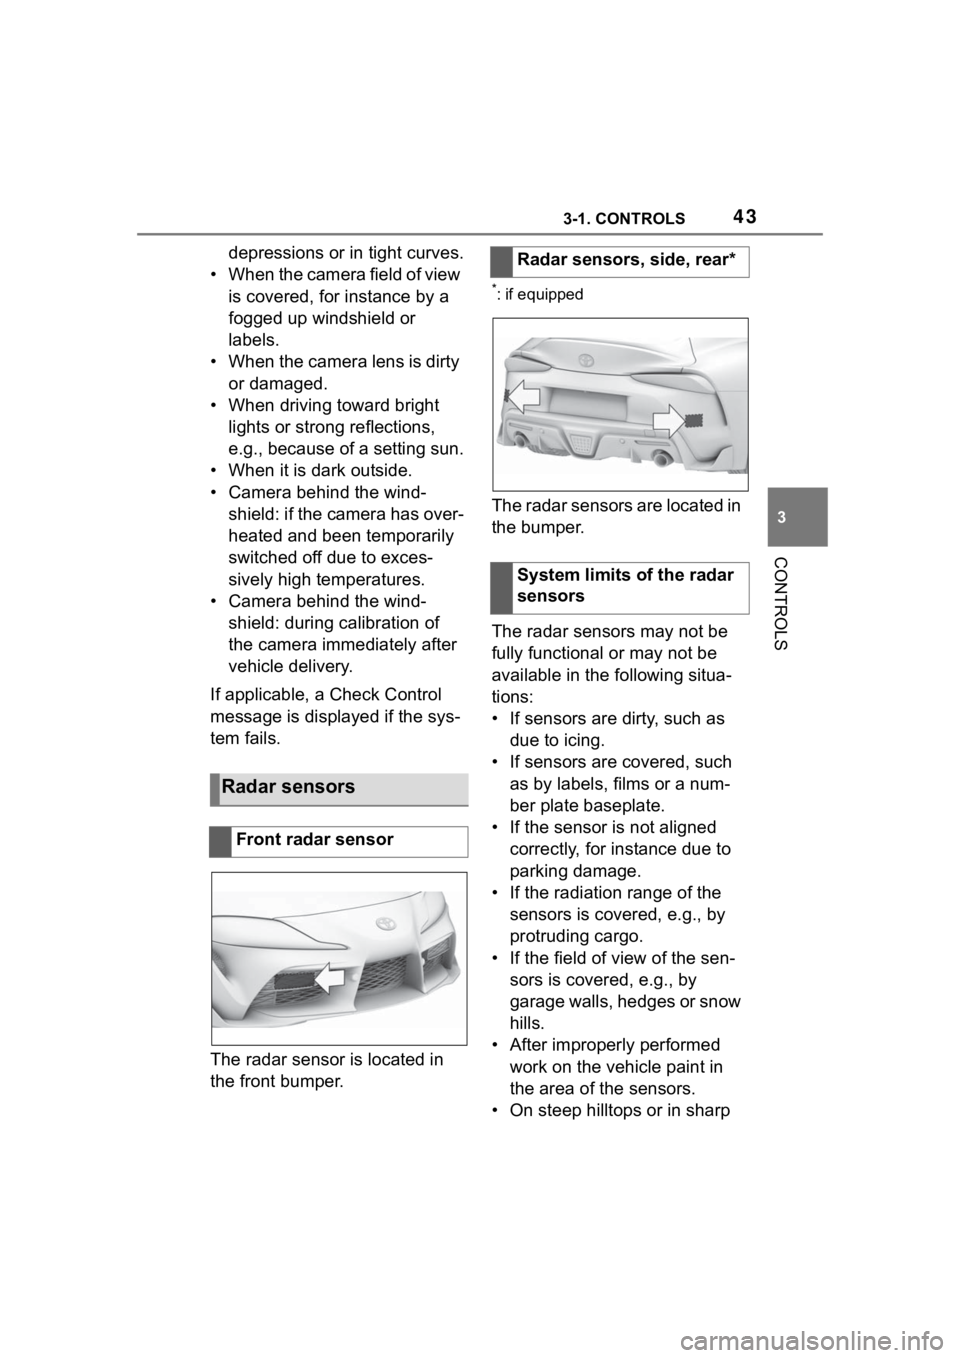
The radar sensor is located in
the front bumper.
*: if equipped
The radar sensors are located in
the bumper.
The radar sensors may not be
fully functional or may not be
available in the following situa-
tions:
• If sensors are dirty, such as due to icing.
• If sensors are covered, such as by labels, films or a num-
ber plate baseplate.
• If the sensor is not aligned correctly, for instance due to
parking damage.
• If the radiation range of the sensors is covered, e.g., by
protruding cargo.
• If the field of view of the sen- sors is covered, e.g., by
garage walls, hedges or snow
hills.
• After improperly performed work on the vehicle paint in
the area of the sensors.
• On steep hilltops or in sharp
Radar sensors
Front radar sensor
Radar sensors, side, rear*
System limits of the radar
sensors
Page 47 of 372

473-1. CONTROLS
3
CONTROLS
drive-ready state switched on.1Depress the brake pedal.
2 Press on the clutch pedal
and shift to Neutral.
3 Press the Start/Stop button.
The ignition is activated auto-
matically for a brief time and is
stopped as soon as the engine
starts.
Most of the indicator/warning
lights in the instrument cluster
light up for a varied length of
time.
1 Depress the brake pedal.
2 Press the Start/Stop button.
The ignition is activated auto-
matically for a brief time and is
stopped as soon as the engine
starts.
Most of the indicator/warning
lights in the instrument cluster
light up for a varied length of
time.
Safety information
WARNING
If the exhaust pipe is blocked or
ventilation is insufficient, harmful
exhaust gases can enter into the
vehicle. The exhaust gases con-
tain pollutants which are colorless
and odorless. In enclosed areas,
exhaust gases can also accumu-
late outside of the vehicle. There
is danger to life. Keep the exhaust
pipe free and ensure sufficient
ventilation.
WARNING
An unsecured vehicle can begin
to move and possibly roll away.
There is a risk of an accident.
Before exiting, secure the vehicle
against rolling.
In order to ensure that the vehicle
is secured against rolling away,
follow the following:
�
Page 68 of 372

683-1. CONTROLS
is currently in use.
There is an additional guest pro-
file available that is not assigned
to any vehicle key. It can be
used to apply settings in the
vehicle without changing the
personal driver profiles.
For the system to be able to
identify the driver profile associ-
ated to a particular driver, the
detected remote control must be
clearly allocated to the driver.
This is the case when:
• The driver is only carrying his or her own remote control.
• The driver unlocks the vehi- cle.
• The driver gets into the vehi- cle through the driver's door.
After switching on the Control
Display, the name of the active
driver profile is displayed.
Select driver profile, refer to
page 69.
As soon as the engine is started
or any key is pressed, the last
selected display is shown on the
Control Display.
To exit the welcome screen via
Toyota Supra Command: "OK" The settings for the following
systems and functions are
stored in the active driver profile.
The scope of storable settings
depends on country and equip-
ment.
• Unlocking and locking.
•Lights.
• Climate control.
• Radio.
• Instrument cluster.
• Programmable memory but-
tons.
• Volumes, tone.
• Control Display.
•TV.
• Parking Sensors.
• Rearview camera.
• Head-up Display.
• Sport mode switch.
• Seat position, exterior mirror position.
Both the positions saved via the
seat memory and th e last position
set are saved.
• Toyota Supra Safety.
Regardless of the remote con-
trol in use, a different driver pro-
file may be activated. This
allows you to call up personal
vehicle settings, even if you did
not unlock the vehicle with your
own remote control.
Functional requirements
Active driver profile
Adjusting
Profile management
Selecting a driver profile
Page 81 of 372

813-1. CONTROLS
3
CONTROLS
when unlocking with the remote
control depends on the following
settings, refer to page 93, for
unlocking and locking:
• If only the driver's door and the fuel filler flap or all access
to the vehicle will be
unlocked.
• If the unlocking of the vehicle is confirmed with a light signal
or a sound signal.
• If the welcome light, refer to page 159, is switched on
when the vehicle is being
unlocked.
• If the exterior mirrors are automatically folded out and
in when the vehicle is
unlocked and locked.
• If the driver's seat is set to the last position saved in the
driver's profile. P.68
If, due to the settings, only the
driver's door and fuel filler flap
were unlocked, press the button
on the remote control again to
unlock the other vehicle access
points.
In addition, the following func-
tions are executed:
• If a driver profile, refer to page 68, was assigned to the
remote control, this driver pro-
file will be activated and the
settings that are stored in it will be applied.
• The interior lights are switched on, unless they were
manually switched off. For
switching the interior lights
on/off manually, refer to page
162.
• Folded in exterior mirrors are folded out.
If the exterior mirrors were folded in
via the button in th e car’s interior,
they will not be folded out when
unlocking.
• With alarm system: The alarm
system, refer to page , will be
switched off.
After opening one of the front
doors, the vehicle is ready for
operation, refer to page 46.
The light functions may depend
on the ambient brightness.
The windows are opened, as
long as the button on the remote
control is pressed.
The behavior of the vehicle
during locking with the remote
control depends on the following
Unlocking the vehicle
Press the button on the
remote control.
Convenient opening
Opening
Press and hold the button
on the remote control.
Locking
General information
Page 82 of 372

823-1. CONTROLS
settings, refer to page 93:
• If the locking of the vehicle is confirmed with a light signal
or a sound signal.
• If the exterior mirrors are automatically folded in when
the vehicle is locked. The
exterior mirrors are not folded
in when the hazard warning
flashers are switched on.
• If the headlight courtesy delay feature is activated during
locking.
1 Close the driver's door.
2 Press the button on the
remote control.
The following functions are exe-
cuted:
• All doors, the trunk lid, and the fuel filler flap are locked.
• With alarm system: The alarm system will be switched on.
If the drive-ready state is still
switched on when you lock the
vehicle, the vehicle horn honks
twice. In this case, the
drive-ready state must be
switched off by means of the
Start/Stop button. The windows are closed in the
area close to the vehicle, as
long as the button on the remote
control is pressed.
The function is not available for
the first 10 seconds after lock-
ing.
• The interior lights are
switched on, unless they were
manually switched off. For
switching the interior lights
on/off manually, refer to page
162.
• Depending on the settings, the exterior lighting, refer to
page 159, will be switched on.
Locking the vehicleWith Smart Key System:
convenient closing
Safety information
WARNING
With convenient closing, body
parts can be jammed. There is a
risk of injury. Make sure that the
area of movement of the doors is
clear during convenient closing.
Closing
Press and hold the button
on the remote control after
locking.
Switching on the interior
and exterior lights
Press the button on the
remote control with the
vehicle locked.
Page 87 of 372

873-1. CONTROLS
3
CONTROLS
under the cover and push the
cover out.
Use the thumb for counter support
to prevent the cover from falling out
of the door handle.
3 Remove the cover.
4 Unlock or lock the door lock
using the integrated key.
The other doors must be
unlocked or locked from the
inside.
The activated alarm system is
triggered when the door is
opened, if the vehicle has been
unlocked via the door lock.
The alarm system is not
switched on if the vehicle is
locked with the integrated key. In the event of a severe acci-
dent, the vehicle is automatically
unlocked. The hazard warning
system and interior lights come
on.
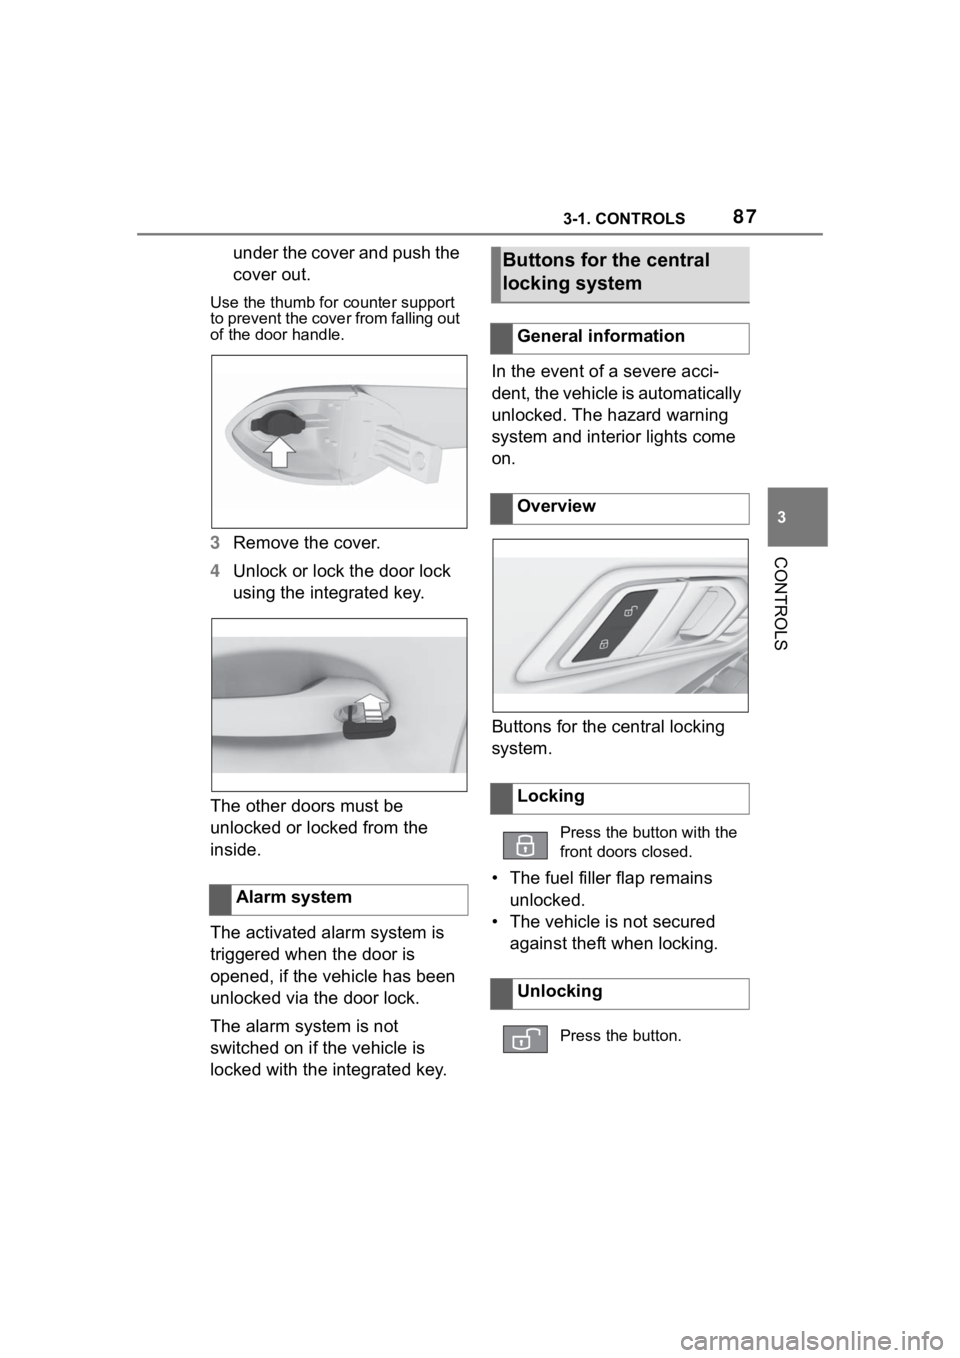
Buttons for the central locking
system.
• The fuel filler flap remains
unlocked.
• The vehicle is not secured against theft when locking.
Alarm system
Buttons for the central
locking system
General information
Overview
Locking
Press the button with the
front doors closed.
Unlocking
Press the button.
Page 91 of 372

913-1. CONTROLS
3
CONTROLS
Grasp the handle of a vehicle
door completely.
In addition, the following func-
tions are executed:
• If a driver profile was assigned to the vehicle key,
this driver profile will be acti-
vated and the settings that
are stored in it will be applied.
• The interior lights are switched on, unless they were
manually switched off.
• Folded in exterior mirrors are folded out.
If the exterior mirrors were folded in
via the button in the car’s interior,
they will not be f olded out when
unlocking.
• With alarm system: The alarm
system will be switched off.
The behavior of the vehicle
during locking via the Smart Key
System depends on the follow-
ing settings, refer to page 93: • If the locking of the vehicle is
confirmed with a light signal
or a sound signal.
• If the exterior mirrors are automatically folded in when
the vehicle is locked. The
exterior mirrors are not folded
in when the hazard warning
flashers are switched on.
• If the headlight courtesy delay feature is activated during
locking.
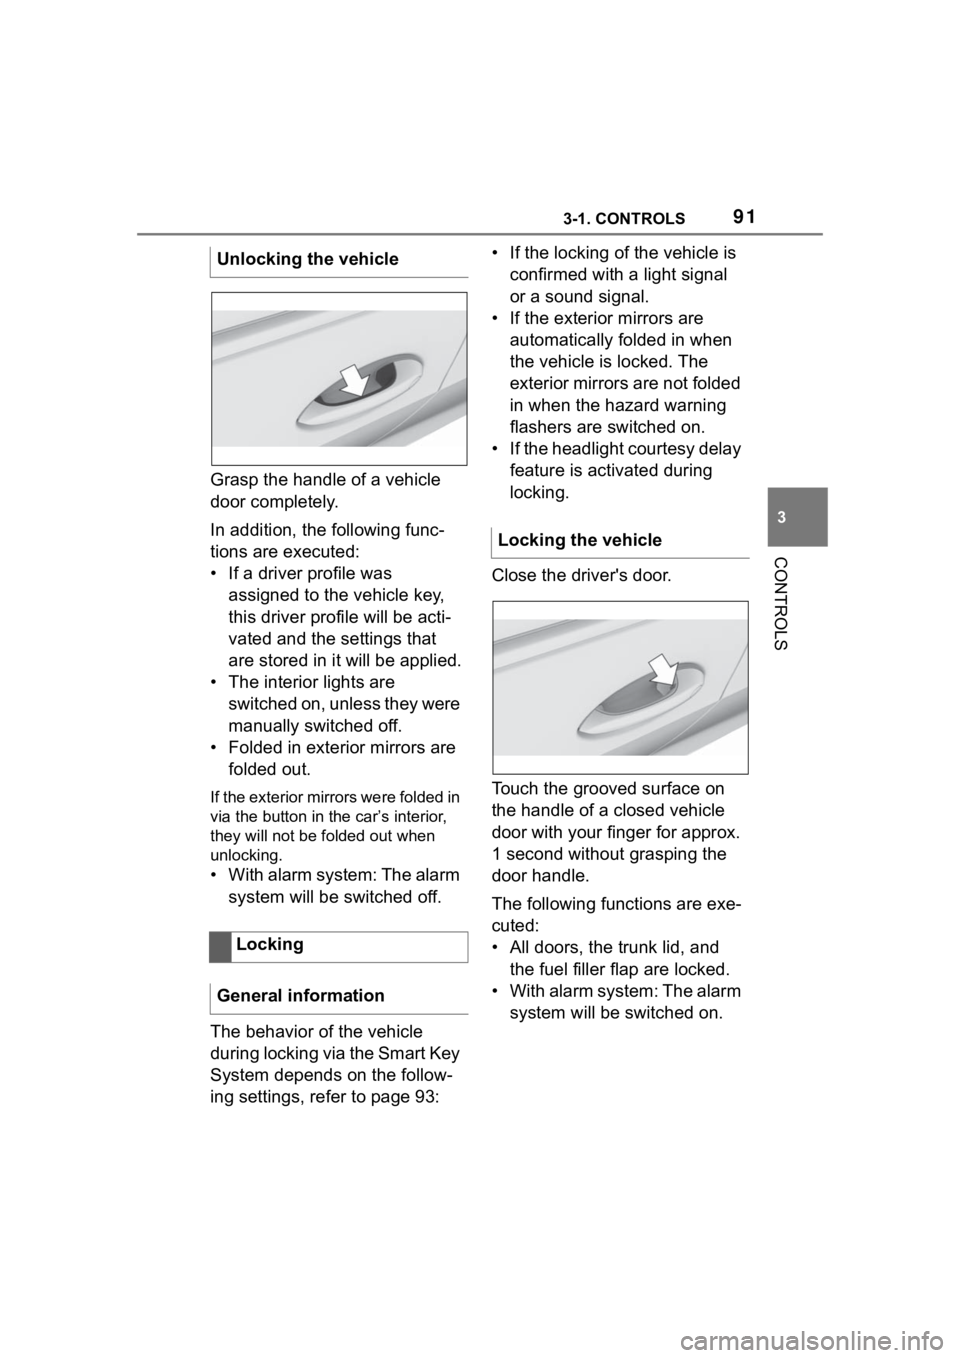
Close the driver's door.
Touch the grooved surface on
the handle of a closed vehicle
door with your finger for approx.
1 second without grasping the
door handle.
The following functions are exe-
cuted:
• All doors, the trunk lid, and the fuel filler flap are locked.
• With alarm system: The alarm system will be switched on.
Unlocking the vehicle
Locking
General information
Locking the vehicle
Page 95 of 372

953-1. CONTROLS
3
CONTROLS
3"Doors/Key"
4 "Turn off after door opening"
Opening the front doors establishes
the idle state, refer to page 45.
The alarm system issues a
visual and acoustic signal when
someone attempts to open the
locked vehicle incorrectly.
When the vehicle is locked, the
vehicle alarm system reacts to
the following changes:
• Opening a door, the hood or
the trunk lid.
• Movements in the car's inte- rior.
• Changes in the vehicle tilt, e. g., during attempts at stealing
a wheel or when towing the
vehicle.
• Disconnected battery voltage.
• Improper use of the socket for OBD Onboard Diagnosis.
• Locking the vehicle while a device is connected to the
socket for the OBD Onboard-
Diagnosis. For socket for the
OBD Onboard Diagnosis,
refer to page 309.
The alarm system signals the
following changes visually and
acoustically:
• Acoustic alarm: Depending on local regulations, the acoustic
alarm may be suppressed.
• Visual alarm: By flashing of the hazard warning system
and headlights, where
required.
Do not modify the system to
ensure function of the alarm
system.
When you unlock and lock the
vehicle, either with the remote
control or with Comfort entry, the
alarm system is switched off and
on at the same time.
The alarm system is triggered
when a door is opened if the
door was unlocked using the
integrated key in the door lock.
Switching off the alarm, refer to
page 97.
The trunk lid can be opened
even when the alarm system is
switched on.
After the trunk lid is closed, it is
locked and monitored again pro-
vided the doors are locked. The
hazard warning system flashes
Alarm system
Concept
General information
Switching on/off
Opening the doors with
the alarm system switched
on
Opening the trunk lid with
the alarm system switched
on