2023 TOYOTA PROACE VERSO EV change wheel
[x] Cancel search: change wheelPage 177 of 360
177
Driving
6
To modify the limit speed setting based on the vehicle’s current speed:► Briefly press button 2 or 3 to change the value in steps of + or - 1 mph (1.6 km/h).► Press and hold button 2 or 3 to change the value in steps of + or - 5 mph (8 km/h).To change the limit speed setting using memorised speeds, via the touch screen:► Press button 5 to display the memorised
speed settings.► Press the touch screen button for the desired speed setting.The selection screen closes after a few moments.This setting becomes the new limit speed.To modify the cruise speed setting based on the speed suggested by the Speed Limit Recognition and Recommendation, as shown on the instrument panel:► Press button 5 once; a message is displayed to confirm the memorisation request.► Press button 5 again to save the suggested speed.The speed is immediately shown on the instrument panel as the new speed setting.
Temporarily exceeding the
programmed speed
► To temporarily exceed the programmed speed threshold, fully depress the accelerator pedal.
The speed limiter is deactivated temporarily and the displayed programmed speed flashes.If it is exceeded for a prolonged period of time, an audible warning is triggered.Simply release the accelerator pedal to return to below the programmed speed.When the limit speed is exceeded but this is not due to action by the driver (in case of a steep slope, for example), an audible signal triggers
immediately.Once the speed of the vehicle returns to the programmed setting, the speed limiter functions again: the display of the programmed speed setting becomes fixed again.
Switching off
► Turn the thumbwheel 1 to the "0" position: the display of information on the speed limiter disappears.
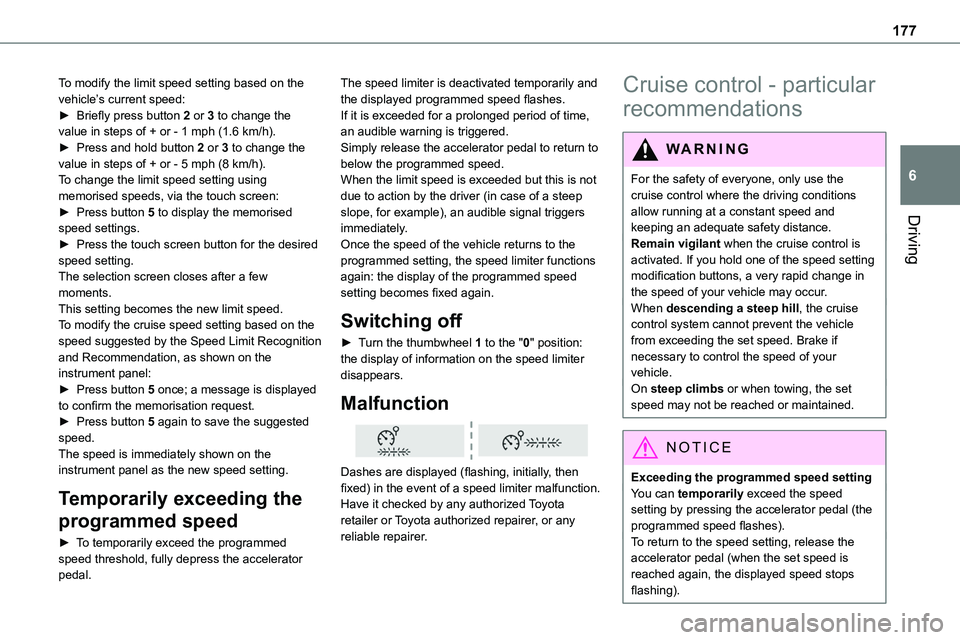
Malfunction
Dashes are displayed (flashing, initially, then fixed) in the event of a speed limiter malfunction.Have it checked by any authorized Toyota retailer or Toyota authorized repairer, or any
reliable repairer.
Cruise control - particular
recommendations
WARNI NG
For the safety of everyone, only use the cruise control where the driving conditions allow running at a constant speed and keeping an adequate safety distance.Remain vigilant when the cruise control is activated. If you hold one of the speed setting modification buttons, a very rapid change in the speed of your vehicle may occur.When descending a steep hill, the cruise control system cannot prevent the vehicle from exceeding the set speed. Brake if necessary to control the speed of your vehicle.On steep climbs or when towing, the set speed may not be reached or maintained.
NOTIC E
Exceeding the programmed speed settingYou can temporarily exceed the speed setting by pressing the accelerator pedal (the programmed speed flashes).
To return to the speed setting, release the accelerator pedal (when the set speed is reached again, the displayed speed stops flashing).
Page 179 of 360
179
Driving
6
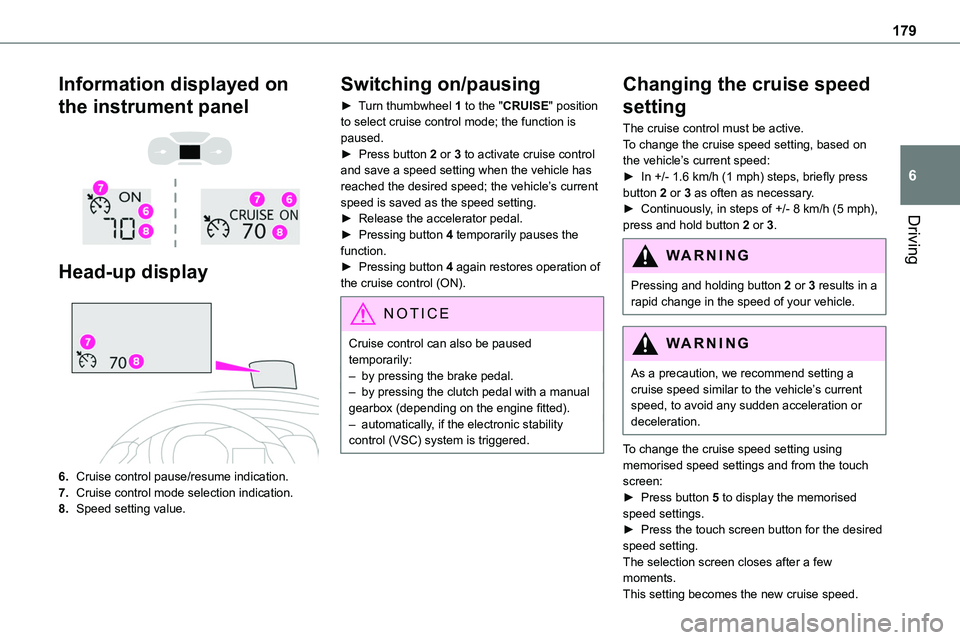
Information displayed on
the instrument panel
Head-up display
6.Cruise control pause/resume indication.
7.Cruise control mode selection indication.
8.Speed setting value.
Switching on/pausing
► Turn thumbwheel 1 to the "CRUISE" position to select cruise control mode; the function is paused.► Press button 2 or 3 to activate cruise control and save a speed setting when the vehicle has reached the desired speed; the vehicle’s current speed is saved as the speed setting.► Release the accelerator pedal.
► Pressing button 4 temporarily pauses the function.► Pressing button 4 again restores operation of the cruise control (ON).
NOTIC E
Cruise control can also be paused temporarily:– by pressing the brake pedal.– by pressing the clutch pedal with a manual gearbox (depending on the engine fitted).– automatically, if the electronic stability control (VSC) system is triggered.
Changing the cruise speed
setting
The cruise control must be active.To change the cruise speed setting, based on the vehicle’s current speed:► In +/- 1.6 km/h (1 mph) steps, briefly press button 2 or 3 as often as necessary.► Continuously, in steps of +/- 8 km/h (5 mph),
press and hold button 2 or 3.
WARNI NG
Pressing and holding button 2 or 3 results in a rapid change in the speed of your vehicle.
WARNI NG
As a precaution, we recommend setting a cruise speed similar to the vehicle’s current speed, to avoid any sudden acceleration or deceleration.
To change the cruise speed setting using memorised speed settings and from the touch screen:► Press button 5 to display the memorised speed settings.► Press the touch screen button for the desired speed setting.The selection screen closes after a few moments.
This setting becomes the new cruise speed.
Page 187 of 360
187
Driving
6
Detection - Alert
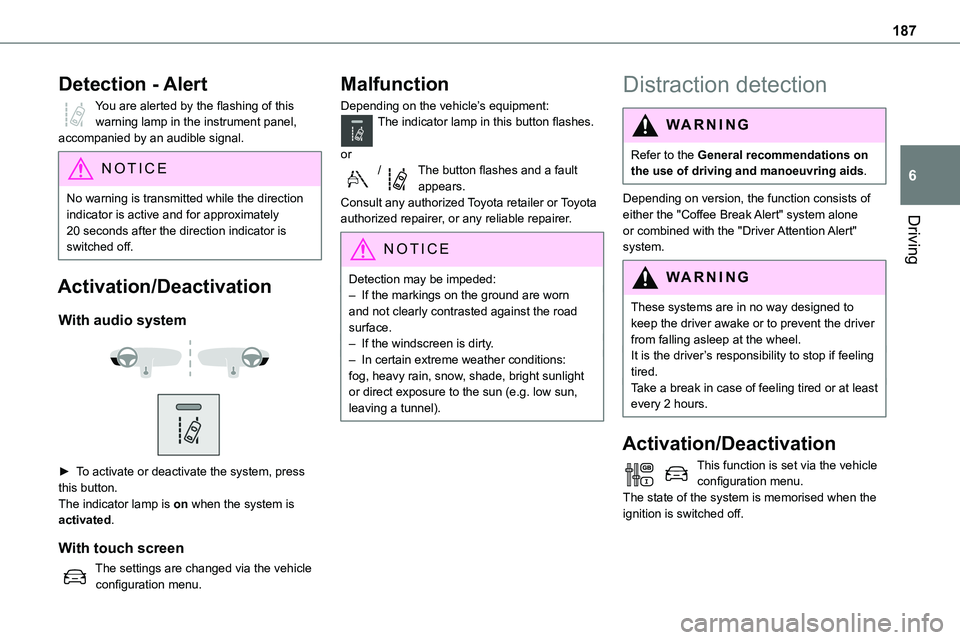
You are alerted by the flashing of this warning lamp in the instrument panel, accompanied by an audible signal.
NOTIC E
No warning is transmitted while the direction indicator is active and for approximately 20 seconds after the direction indicator is switched off.
Activation/Deactivation
With audio system
► To activate or deactivate the system, press this button.The indicator lamp is on when the system is activated.
With touch screen
The settings are changed via the vehicle configuration menu.
Malfunction
Depending on the vehicle’s equipment:The indicator lamp in this button flashes.
or/The button flashes and a fault appears.Consult any authorized Toyota retailer or Toyota authorized repairer, or any reliable repairer.
NOTIC E
Detection may be impeded:– If the markings on the ground are worn and not clearly contrasted against the road surface.– If the windscreen is dirty.– In certain extreme weather conditions: fog, heavy rain, snow, shade, bright sunlight or direct exposure to the sun (e.g. low sun, leaving a tunnel).
Distraction detection
WARNI NG
Refer to the General recommendations on the use of driving and manoeuvring aids.
Depending on version, the function consists of either the "Coffee Break Alert" system alone or combined with the "Driver Attention Alert" system.
WARNI NG
These systems are in no way designed to keep the driver awake or to prevent the driver from falling asleep at the wheel. It is the driver’s responsibility to stop if feeling tired.Take a break in case of feeling tired or at least every 2 hours.
Activation/Deactivation
This function is set via the vehicle configuration menu.The state of the system is memorised when the ignition is switched off.
Page 194 of 360

194
NOTIC E
The function will be deactivated:– If a trailer is attached or a bicycle carrier is fitted on a towing device (vehicle fitted with a towing device installed in line with the manufacturer's recommendations).– Above about 6 mph (10 km/h).– When the boot is opened.
– Upon changing out of reverse gear (the image remains displayed for 7 seconds).– By pressing the white arrow in the upper-left corner of the touch screen.
AUTO mode
This mode is activated by default.Using sensors in the rear bumper, the automatic view changes from the rear view (standard) to the view from above (zoom) as an obstacle is approached at the level of the red line (less than 30 cm) during a manoeuvre.
Standard view
The area behind the vehicle is displayed on the screen.The blue lines 1 represent the width of your vehicle, with the mirrors unfolded; their direction changes depending on the position of the steering wheel.The red line 2 represents a distance of 30 cm (0 ft 11") from the rear bumper; the two blue lines 3 and 4 represent 1 m and 2 m (3 ft 3" and 6 ft 6"), respectively.This view is available with AUTO mode or in the view selection menu.
Page 219 of 360
219
Practical information
7
NOTIC E
New vehicleDuring the first few particle filter regeneration operations, you may notice a "burning" smell. This is perfectly normal.
Manual gearbox
The gearbox does not require any maintenance (no oil change).
Automatic gearbox
The gearbox does not require any maintenance (no oil change).
Drive selector (Electric)
The drive selector does not require any maintenance.
Manual parking brake
If you notice excessive brake lever travel or decreased effectiveness, the parking brake must be adjusted, even between two services.This system must be checked by any authorized Toyota retailer or Toyota authorized repairer, or any reliable repairer.
Electric parking brake
This system does not require any routine servicing. However, in the event of a
problem, do not hesitate to have the system checked by a TOYOTA dealer or a qualified workshop.
NOTIC E
For more information on the Electric parking brake, refer to the corresponding section.
Brake pads
Brake wear depends on the style of driving, particularly in the case of vehicles used in town, over short distances. It may be necessary to have the condition of the brakes checked, even between vehicle services.Unless there is a leak in the circuit, a drop in the brake fluid level indicates that the brake pads are worn.
NOTIC E
After washing the vehicle, moisture, or in wintry conditions, ice can form on the brake discs and pads: braking efficiency may be reduced. Gently dab the brakes to dry and defrost them.
Brake disc/drum wear
For any information on checking brake disc/drum wear, contact any authorized Toyota retailer or Toyota authorized repairer, or any reliable repairer.
Wheels and tyres
The inflation pressure of all tyres, including the spare wheel, must be checked on "cold” tyres.The pressures indicated on the tyre pressure label are valid for "cold" tyres. If you have driven for more than 10 minutes or more than 10 km (6 miles) at over 50 km/h (31 mph), add 0.3 bar (30 kPa) to the values indicated on the label.
WARNI NG
Under-inflation increases fuel consumption. Non-compliant tyre pressure causes premature wear on tyres and has an adverse effect on the vehicle's road holding - risk of an accident!
Driving with worn or damaged tyres reduces the braking and road holding performance of the vehicle. It is recommended to regularly check the condition of the tyres (tread and sidewalls) and wheel rims as well as the presence of the valves.When the wear indicators no longer appear set back from the tread, the depth of the grooves is less than 1.6 mm; it is imperative to replace the tyres.Using different size wheels and tyres from those specified can affect the lifetime of tyres, wheel
rotation, ground clearance, the speedometer reading and have an adverse effect on road holding.
Page 233 of 360
233
In the event of a breakdown
8
► Remove the pipe assembly 2.► Hold the compressor up vertically.► Unscrew the cartridge 4 from the bottom.To fit the new cartridge and new pipe, carry out these operations in reverse order.
WARNI NG
Beware of fluid discharge.The expiry date of the fluid is indicated on the cartridge.The sealant cartridge is designed for single use; it must be replaced even if only partly used.After use, do not discard the cartridge in standard waste, take it to any authorized Toyota retailer or Toyota authorized repairer, or any reliable repairer waste disposal site.Do not forget to obtain a new cartridge, available from any authorized Toyota retailer or Toyota authorized repairer, or any reliable repairer.
Spare wheel
Access to the tools
The tools are stowed in a tool box.
NOTIC E
For more information on the Tool box, refer to the corresponding section.
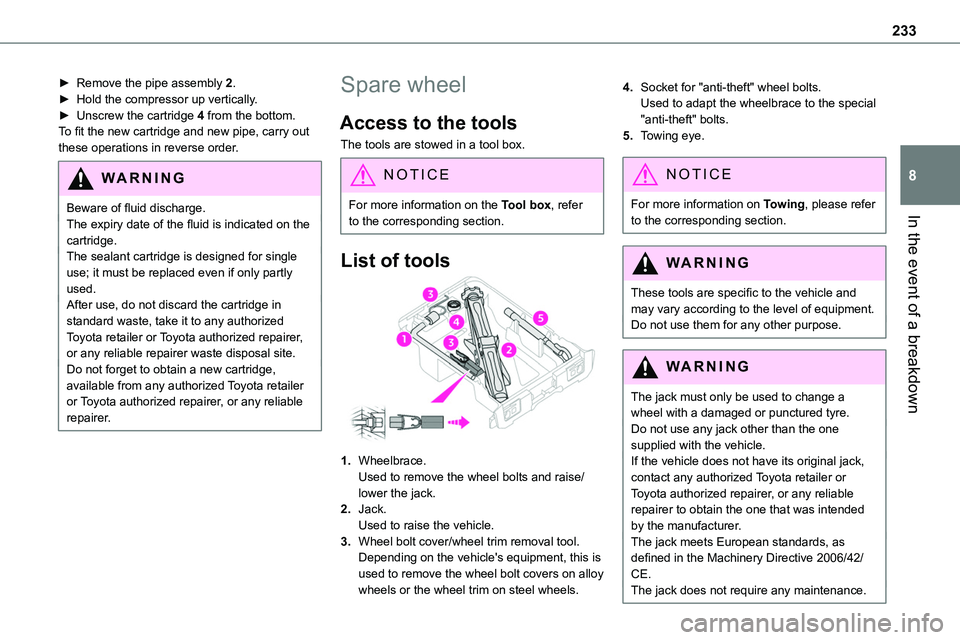
List of tools
1.Wheelbrace.Used to remove the wheel bolts and raise/lower the jack.
2.Jack.Used to raise the vehicle.
3.Wheel bolt cover/wheel trim removal tool.Depending on the vehicle's equipment, this is used to remove the wheel bolt covers on alloy wheels or the wheel trim on steel wheels.
4.Socket for "anti-theft" wheel bolts.Used to adapt the wheelbrace to the special "anti-theft" bolts.
5.Towing eye.
NOTIC E
For more information on Towing, please refer to the corresponding section.
WARNI NG
These tools are specific to the vehicle and may vary according to the level of equipment.Do not use them for any other purpose.
WARNI NG
The jack must only be used to change a wheel with a damaged or punctured tyre.Do not use any jack other than the one supplied with the vehicle.If the vehicle does not have its original jack, contact any authorized Toyota retailer or Toyota authorized repairer, or any reliable repairer to obtain the one that was intended by the manufacturer.
The jack meets European standards, as defined in the Machinery Directive 2006/42/CE.The jack does not require any maintenance.
Page 234 of 360
234
Access to the spare wheel
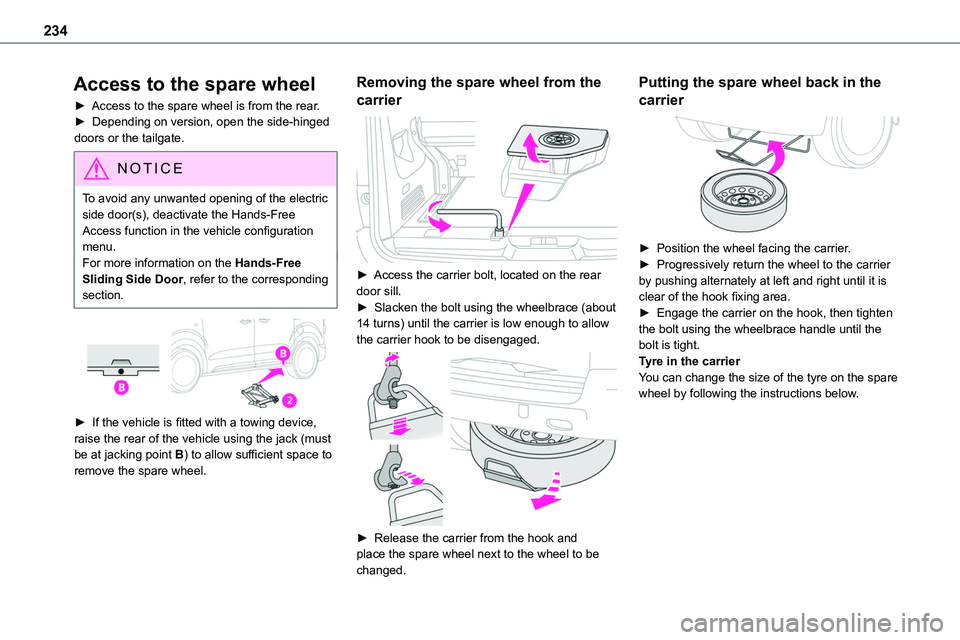
► Access to the spare wheel is from the rear.► Depending on version, open the side-hinged doors or the tailgate.
NOTIC E
To avoid any unwanted opening of the electric side door(s), deactivate the Hands-Free Access function in the vehicle configuration menu.For more information on the Hands-Free Sliding Side Door, refer to the corresponding section.
► If the vehicle is fitted with a towing device,
raise the rear of the vehicle using the jack (must be at jacking point B) to allow sufficient space to remove the spare wheel.
Removing the spare wheel from the
carrier
► Access the carrier bolt, located on the rear door sill.► Slacken the bolt using the wheelbrace (about 14 turns) until the carrier is low enough to allow the carrier hook to be disengaged.
► Release the carrier from the hook and place the spare wheel next to the wheel to be changed.
Putting the spare wheel back in the
carrier
► Position the wheel facing the carrier.► Progressively return the wheel to the carrier by pushing alternately at left and right until it is clear of the hook fixing area.► Engage the carrier on the hook, then tighten the bolt using the wheelbrace handle until the bolt is tight.Tyre in the carrierYou can change the size of the tyre on the spare wheel by following the instructions below.
Page 235 of 360
235
In the event of a breakdown
8
Original tyre sizeMediumLong
215/65 R16Placing a 225 wheel in the carrier is prohibited.
There is no 215/60 R17
215/60 R17 M&S
225/55 R17Placing a 215 wheel in the carrier is not recommended (risk of noise).
NOTIC E
A punctured tyre of size 215 or 225 can be placed in the carrier.
Removing a wheel
WARNI NG
Parking the vehicleImmobilise the vehicle where it does not obstruct traffic: the ground must be level, stable and non-slippery.With a manual gearbox, engage first gear
then switch off the ignition to block the wheels.With an automatic gearbox, place the gear selector in position P then switch off the ignition to block the wheels. With a drive selector, place the gear selector in position P then switch off the ignition to block the wheels.Apply the parking brake, unless it is programmed to automatic mode (for an electric parking brake), and check that the indicator lamp lights up on the instrument panel.Ensure that the occupants have left the vehicle and are located in a safe place.Never go underneath a vehicle raised using a jack; use an axle stand.With an electric parking brake, place a chock against the wheel diagonally opposite to the one being replaced.
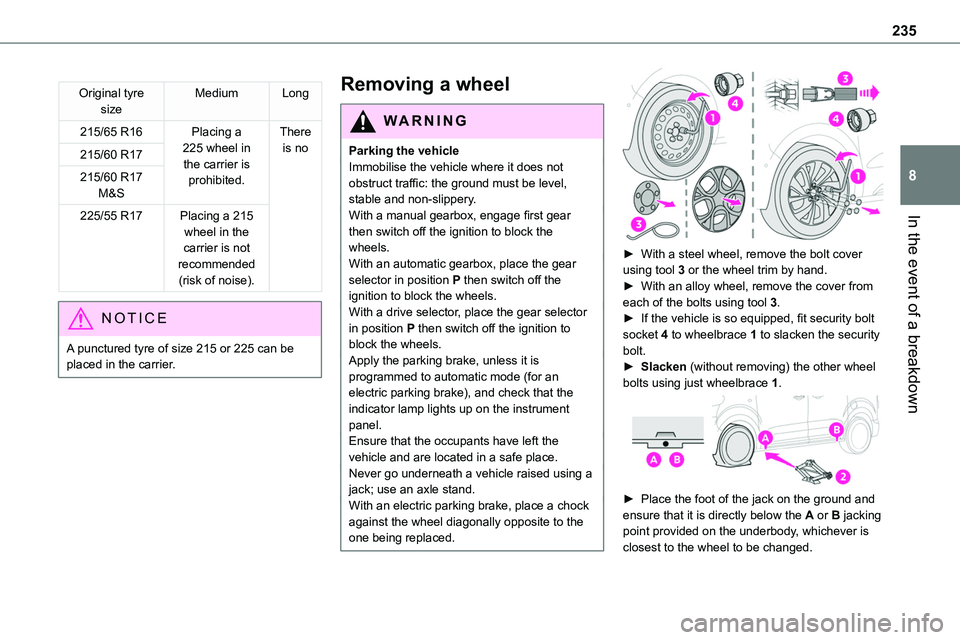
► With a steel wheel, remove the bolt cover using tool 3 or the wheel trim by hand.► With an alloy wheel, remove the cover from each of the bolts using tool 3.► If the vehicle is so equipped, fit security bolt socket 4 to wheelbrace 1 to slacken the security bolt.► Slacken (without removing) the other wheel bolts using just wheelbrace 1.
► Place the foot of the jack on the ground and ensure that it is directly below the A or B jacking point provided on the underbody, whichever is closest to the wheel to be changed.