2023 TOYOTA PROACE ECO mode
[x] Cancel search: ECO modePage 202 of 360

202
Standard charging, mode 2
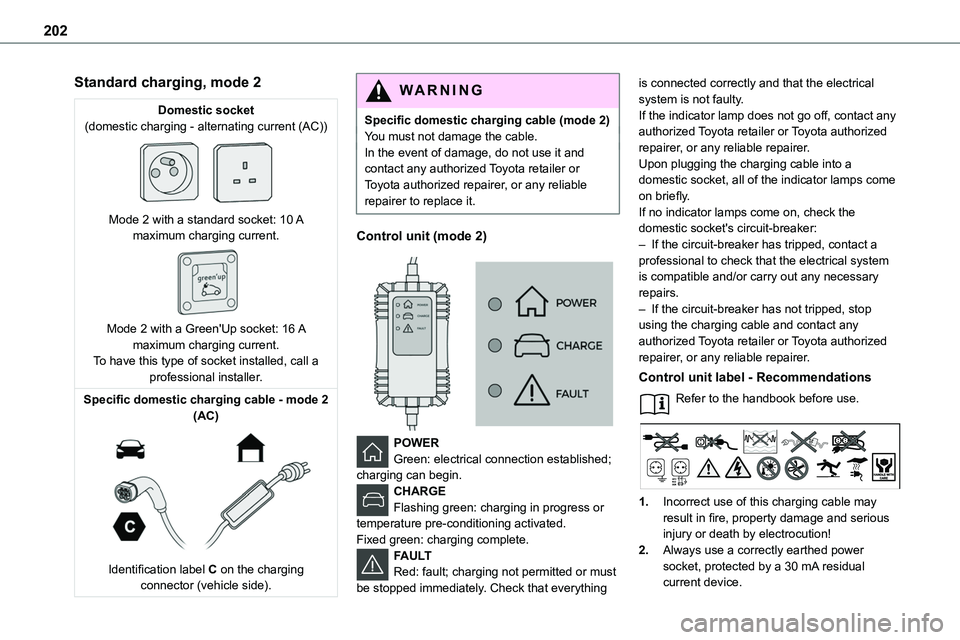
Domestic socket(domestic charging - alternating current (AC))
Mode 2 with a standard socket: 10 A maximum charging current.
Mode 2 with a Green'Up socket: 16 A maximum charging current.To have this type of socket installed, call a professional installer.
Specific domestic charging cable - mode 2 (AC)
Identification label C on the charging connector (vehicle side).
WARNI NG
Specific domestic charging cable (mode 2)You must not damage the cable.In the event of damage, do not use it and contact any authorized Toyota retailer or Toyota authorized repairer, or any reliable repairer to replace it.
Control unit (mode 2)
POWERGreen: electrical connection established; charging can begin.CHARGEFlashing green: charging in progress or temperature pre-conditioning activated.
Fixed green: charging complete.FAULTRed: fault; charging not permitted or must be stopped immediately. Check that everything
is connected correctly and that the electrical system is not faulty.If the indicator lamp does not go off, contact any authorized Toyota retailer or Toyota authorized repairer, or any reliable repairer.Upon plugging the charging cable into a domestic socket, all of the indicator lamps come on briefly.If no indicator lamps come on, check the
domestic socket's circuit-breaker:– If the circuit-breaker has tripped, contact a professional to check that the electrical system is compatible and/or carry out any necessary repairs.– If the circuit-breaker has not tripped, stop using the charging cable and contact any authorized Toyota retailer or Toyota authorized repairer, or any reliable repairer.
Control unit label - Recommendations
Refer to the handbook before use.
1.Incorrect use of this charging cable may result in fire, property damage and serious injury or death by electrocution!
2.Always use a correctly earthed power socket, protected by a 30 mA residual current device.
Page 205 of 360

205
Practical information
7
Manual reset procedureThe control unit can be reset by simultaneously disconnecting the chargi\
ng connector and the wall socket.Then, reconnect the wall socket first. For more information, refer to the handbook.
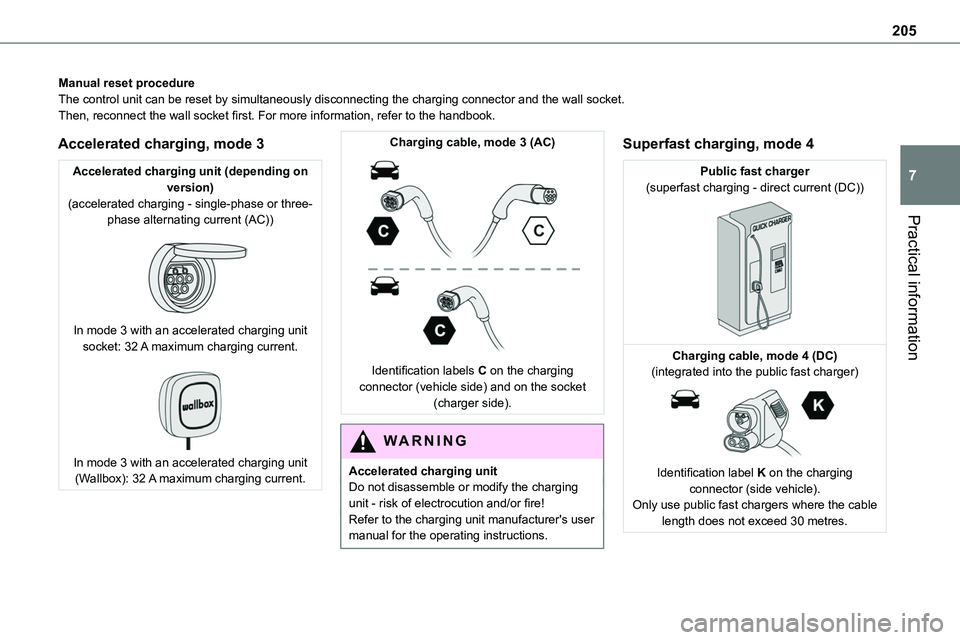
Accelerated charging, mode 3
Accelerated charging unit (depending on version)(accelerated charging - single-phase or three-phase alternating current (AC))
In mode 3 with an accelerated charging unit socket: 32 A maximum charging current.
In mode 3 with an accelerated charging unit (Wallbox): 32 A maximum charging current.
Charging cable, mode 3 (AC)
Identification labels C on the charging connector (vehicle side) and on the socket (charger side).
WARNI NG
Accelerated charging unitDo not disassemble or modify the charging unit - risk of electrocution and/or fire!Refer to the charging unit manufacturer's user
manual for the operating instructions.
Superfast charging, mode 4
Public fast charger(superfast charging - direct current (DC))
Charging cable, mode 4 (DC)(integrated into the public fast charger)
Identification label K on the charging connector (side vehicle).Only use public fast chargers where the cable length does not exceed 30 metres.
Page 207 of 360

207
Practical information
7
WARNI NG
If in doubtDomestic or accelerated charging: do not remain inside or near the vehicle, or near the charging cable or charging unit, even for a short time.Superfast charging: do not use the system yourself and avoid approaching public fast
charging points. Leave the area and ask a third party to recharge the vehicle.
For domestic or accelerated charging
WARNI NG
Before chargingDepending on the context:► Have a professional check that the electrical system to be used complies with applicable standards and is compatible with the vehicle.► Have a professional electrician install a dedicated domestic power socket or accelerated charging unit (Wallbox) compatible with the vehicle.You should preferably use the charging cable available as an accessory.For more information, contact a any authorized Toyota retailer or Toyota authorized repairer, or any reliable repairer.
WARNI NG
(During charging)While charging is in progress, unlocking the vehicle will cause the charging to stop.If no action is taken on one of the openings (door or boot) or on the charging nozzle, the vehicle will lock again after 30 seconds and charging will resume automatically.
Never work under the bonnet:– Some areas remain very hot, even an hour after charging ends - risk of burns!– The fan may start at any time - risk of cuts or strangulation!
WARNI NG
After chargingCheck that the charging flap is closed.Do not leave the cable connected to the domestic power socket - risk of short-circuit or electrocution in the event of contact with or immersion in water!
For superfast charging
NOTIC E
Before chargingCheck that the fast public charging station and its charging cable are compatible with the vehicle.
If the exterior temperature is below:– 0°C, charging times may be extended.– -20°C, charging is still possible, but charging times may be extended even further (the battery has to be heated first).
WARNI NG
After charging
Check that the charging flap is closed.
Connection
► Before charging, check that the drive selector is in mode P, otherwise charging is not possible.► Open the charging flap by pressing the push-button, and check that there are no foreign bodies on the charging connector.
Domestic charging, mode 2
Page 208 of 360

208
► Connect the charging cable from the control unit to the domestic socket.When the connection is made, all of the indicator lamps on the control unit light up, then only the POWER indicator lamp remains on in green.► Remove the protective cover from the charging nozzle.► Insert the nozzle into the charging connector.The start of charging is confirmed by the flashing
green CHARGE indicator lamps in the flap, then those on the control unit.If this is not the case, charging has not started; restart the procedure, ensuring that all connections are properly established.The red indicator lamp in the flap comes on to indicate that the nozzle is locked.
NOTIC E
When charging is complete and while the charging cable is still connected, opening the driver's door will display the charge level on the instrument panel for about 20 seconds.
Accelerated charging, mode 3
► Follow the accelerated charging unit (Wallbox) user instructions.► Remove the protective cover from the charging nozzle.► Insert the nozzle into the charging connector.The start of charging is confirmed when the charging indicator lamp in the flap flashes green.If this is not the case, charging has not started; restart the procedure, ensuring that the
connection has been properly established.The red indicator lamp in the flap comes on to indicate that the nozzle is locked.
Superfast charging, mode 4
► Depending on version, remove the protective cover from the lower part of the connector.
► Follow the instructions for use of the fast public charger and connect the cable from the fast public charger to the vehicle's connector.The start of charging is confirmed by the flashing green charging indicator lamp in the flap.If this is not the case, charging has not started; restart the procedure, ensuring that the connection is properly established.The red indicator lamp in the flap comes on to indicate that the nozzle is locked.
Deferred charging
Settings
At any authorized Toyota retailer or Toyota authorized repairer, or any reliable repairer, with Bluetooth® audio systemBy default, the deferred charging start time is set to midnight (vehicle time).You can have the deferred charging start time
modified.Go to any authorized Toyota retailer or Toyota authorized repairer, or any reliable repairer.On a smartphone or tablet (GSM), with TOYOTA Pro Touch or TOYOTA Pro Touch with navigation systemYou can programme the deferred charging function at any time via the MyToyota application (Available soon).For more information on Remote functions, refer to the corresponding section.In the vehicle, with TOYOTA Pro Touch with navigation system► In the Energy touch screen menu, select the Charge page.► Set the charging start time.► Press OK.The setting is saved in the system.
Page 209 of 360

209
Practical information
7
Activation
NOTIC E
Deferred charging is only possible with modes 2 and 3.
► After programming the deferred charging, connect your vehicle to the desired charging equipment.
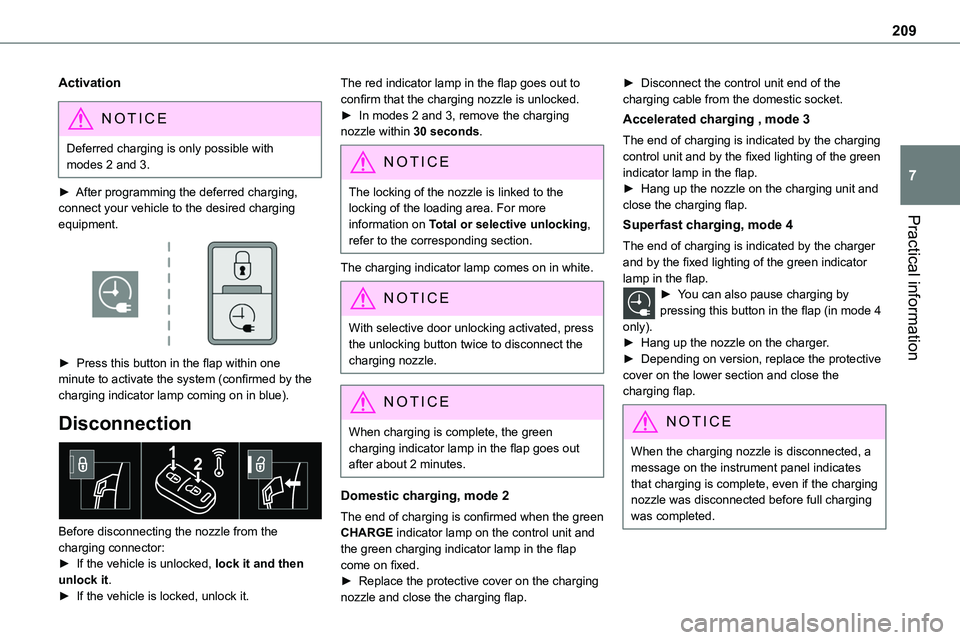
► Press this button in the flap within one minute to activate the system (confirmed by the charging indicator lamp coming on in blue).
Disconnection
Before disconnecting the nozzle from the charging connector:► If the vehicle is unlocked, lock it and then unlock it.
► If the vehicle is locked, unlock it.
The red indicator lamp in the flap goes out to confirm that the charging nozzle is unlocked.► In modes 2 and 3, remove the charging nozzle within 30 seconds.
NOTIC E
The locking of the nozzle is linked to the locking of the loading area. For more information on Total or selective unlocking, refer to the corresponding section.
The charging indicator lamp comes on in white.
NOTIC E
With selective door unlocking activated, press the unlocking button twice to disconnect the charging nozzle.
NOTIC E
When charging is complete, the green charging indicator lamp in the flap goes out after about 2 minutes.
Domestic charging, mode 2
The end of charging is confirmed when the green CHARGE indicator lamp on the control unit and the green charging indicator lamp in the flap come on fixed.► Replace the protective cover on the charging nozzle and close the charging flap.
► Disconnect the control unit end of the charging cable from the domestic socket.
Accelerated charging , mode 3
The end of charging is indicated by the charging control unit and by the fixed lighting of the green indicator lamp in the flap.► Hang up the nozzle on the charging unit and close the charging flap.
Superfast charging, mode 4
The end of charging is indicated by the charger and by the fixed lighting of the green indicator lamp in the flap.► You can also pause charging by pressing this button in the flap (in mode 4 only).► Hang up the nozzle on the charger.► Depending on version, replace the protective cover on the lower section and close the charging flap.
NOTIC E
When the charging nozzle is disconnected, a message on the instrument panel indicates that charging is complete, even if the charging nozzle was disconnected before full charging was completed.
Page 210 of 360

210
Energy economy mode
System which manages the duration of use of certain functions to conserve a sufficient level of charge in the battery.After switching off the engine and for a maximum cumulative period of around 40 minutes, you can continue to use functions such as the audio and telematics system, the wipers, the dipped beam
headlamps, the courtesy lamps, etc.
Switching to the mode
A message indicating that the vehicle has switched to economy mode is displayed on the instrument panel screen and the active functions are put on standby.
NOTIC E
If a telephone call is in progress at the time, it will be maintained for around 10 minutes using your audio system’s hands-free system.
Exiting the mode
These functions will be automatically reactivated the next time the vehicle is used.In order to restore the use of these functions immediately, start the engine and let it run:– for less than 10 minutes, to use the equipment for approximately 5 minutes,– for more than 10 minutes, to use the equipment for approximately 30 minutes.
Let the engine run for the duration specified to ensure that the battery charge is sufficient.Do not repeatedly and continuously restart the engine in order to charge the battery.
WARNI NG
A flat battery prevents the engine from starting.For more information on the 12 V battery, refer to the corresponding section.
Load reduction mode
System that manages the use of certain functions according to the level of charge remaining in the battery.When the vehicle is being driven, the load reduction function temporarily deactivates certain
functions, such as the air conditioning and the heated rear screen.The deactivated functions are reactivated automatically as soon as conditions permit.
Snow chains
In wintry conditions, snow chains improve traction as well as the behaviour of the vehicle when braking.
WARNI NG
The snow chains must be fitted only to the front wheels. They must never be fitted to "space-saver" type spare wheels.
NOTIC E
Take account of the legislation specific to each country on the use of snow chains and the maximum authorised speed.
Only use chains that have been designed for the type of wheel fitted to your vehicle.
Original tyre sizeType of chain
215/65 R1612 mm link
215/60 R17
225/55 R17
You can also use snow socks.For more information, contact a any authorized Toyota retailer or Toyota authorized repairer, or
any reliable repairer..
Page 224 of 360

224
With drive selector (Electric)
and electric parking brake /
Release procedure
► With the vehicle stationary and the engine running, depress the brake pedal and select mode N.
Within 5 seconds:► Depress and hold the brake pedal, then observe this order: switch off the engine (if start with START/STOP, press and hold the button for 2 seconds) and move the push selector forwards or backwards.► Release the brake pedal, then switch on the ignition.► Place your foot on the brake and press the electric parking brake control to release it.► Release the brake pedal, then switch off the ignition.
NOTIC E
Smart Entry & StartYou must not depress the brake pedal while switching the ignition on again, then switching it off. If you do, the engine will start, requiring you to restart the procedure.
WARNI NG
A message is displayed on the instrument panel to confirm the unlocking of the wheels for 15 minutes.When the vehicle is free-wheeling, the audio system cannot be updated (message displayed on the instrument panel).
Reverting to normal operation
► While depressing the brake pedal, restart the engine, then set the gear selector to P.
Advice on care and
maintenance
General recommendations
Observe the following recommendations to avoid damaging the vehicle.
Exterior
WARNI NG
Never use a high-pressure jet wash in the engine compartment - risk of damaging the electrical components!Do not wash the vehicle in bright sunshine or extremely cold conditions.
NOTIC E
When washing the vehicle in an automatic roller-brush car wash, be sure to lock the doors and, depending on version, move the electronic key away and deactivate the “hands-free” function (Hands-Free Access).When using a pressure washer, hold the lance at least 30 cm from the vehicle (particularly when cleaning areas containing chipped paint, sensors or seals).Promptly clean up any stains containing chemicals liable to damage the vehicle's paint (including tree resin, bird droppings, insect
secretions, pollen and tar).
Page 235 of 360

235
In the event of a breakdown
8
Original tyre sizeMediumLong
215/65 R16Placing a 225 wheel in the carrier is prohibited.
There is no 215/60 R17
215/60 R17 M&S
225/55 R17Placing a 215 wheel in the carrier is not recommended (risk of noise).
NOTIC E
A punctured tyre of size 215 or 225 can be placed in the carrier.
Removing a wheel
WARNI NG
Parking the vehicleImmobilise the vehicle where it does not obstruct traffic: the ground must be level, stable and non-slippery.With a manual gearbox, engage first gear
then switch off the ignition to block the wheels.With an automatic gearbox, place the gear selector in position P then switch off the ignition to block the wheels. With a drive selector, place the gear selector in position P then switch off the ignition to block the wheels.Apply the parking brake, unless it is programmed to automatic mode (for an electric parking brake), and check that the indicator lamp lights up on the instrument panel.Ensure that the occupants have left the vehicle and are located in a safe place.Never go underneath a vehicle raised using a jack; use an axle stand.With an electric parking brake, place a chock against the wheel diagonally opposite to the one being replaced.
► With a steel wheel, remove the bolt cover using tool 3 or the wheel trim by hand.► With an alloy wheel, remove the cover from each of the bolts using tool 3.► If the vehicle is so equipped, fit security bolt socket 4 to wheelbrace 1 to slacken the security bolt.► Slacken (without removing) the other wheel bolts using just wheelbrace 1.
► Place the foot of the jack on the ground and ensure that it is directly below the A or B jacking point provided on the underbody, whichever is closest to the wheel to be changed.