Page 514 of 770
5126-3. Do-it-yourself maintenance
PRIUS_OM_OM47F32E_(EE)
WARNING
■Pre-driving check
Check that the hood is fully closed and locked.
If the hood is not locked properly, it may open while the vehicle is in motion
and cause an accident, which may result in death or serious injury.
■ After installing the support rod into the slot
Make sure the rod supports the hood securely from falling down on to your
head or body.
■ When closing the hood
NOTICE
■When closing the hood
Be sure to return the supporting rod to its clip before closing the hood. Clos-
ing the hood without returning the support rod properly could cause the
hood to bend.
When closing the hood, take extra care
to prevent your fingers etc. from being
caught.
Page 524 of 770
5226-3. Do-it-yourself maintenance
PRIUS_OM_OM47F32E_(EE)■
Adding distilled water
Remove the vent plug.
Add distilled water.
If the upper line cannot be seen,
check the fluid level by looking
directly at the cell.
Put the vent plug back on and close it securely.
1
LOWO.K.2
3
Page 552 of 770
5506-3. Do-it-yourself maintenance
PRIUS_OM_OM47F32E_(EE)
Wiper insert replacement
■Windshield wiper blade removal and installation
While securely supporting
the wiper blade connection
by hand, press the lock knob
to release the lock, and then
pull out the wiper blade.
Align the wiper blade with the
connecting portion of the
wiper arm, and then slide it in
the direction it was removed
from.
After installing the wiper blade,
check that the connection is
locked.
■
Wiper insert replacement
Pull the wiper insert until it
protrudes from the slit on the
back of the wiper blade.
When replacing the wiper insert, perform the following proce-
dure to operate each wiper.
Windshield wipers
1
2
1
Page 566 of 770
5646-3. Do-it-yourself maintenance
PRIUS_OM_OM47F32E_(EE)
Align the grooves on the light
unit with the claws, and insert
the light unit straight so that
the 2 pins on the light unit fit
into the holes. Confirm that
the light unit is completely
secured.
Install the 2 screws.
Install the cover.
7
8
9
Page 568 of 770

5666-3. Do-it-yourself maintenance
PRIUS_OM_OM47F32E_(EE)
WARNING
■Replacing light bulbs
● Be sure to stop the hybrid system and turn off the lights. Do not attempt to
replace the bulb immediately after turning off the lights.
The bulbs become very hot and may cause burns.
● Do not touch the glass portion of the light bulb with bare hands. When it is
unavoidable to hold the glass portion, use and hold with a clean dry cloth
to avoid getting moisture and oils on the bulb.
Also, if the bulb is scratched or dropped, it may blow out or crack.
● Fully install light bulbs and any parts used to secure them. Failure to do so
may result in heat damage, fire, or water entering the headlight unit. This
may damage the headlights or cause condensation to build up on the lens.
● Do not attempt to repair or disassemble light bulbs, connectors, electric
circuits or component parts.
Doing so may result in death or serious injury due to electric shock.
■ To prevent damage or fire
● Make sure bulbs are fully seated and locked.
● Check the wattage of the bulb before installing to prevent heat damage.
Page 571 of 770

5697-1. Essential information
PRIUS_OM_OM47F32E_(EE)
7
When trouble arises
If your vehicle has to be stopped in an
emergency
Steadily step on the brake pedal with both feet and firmly depress it.
Do not pump the brake pedal repeatedly as this will increase the effort
required to slow the vehicle.
Shift the shift position to N.
If the shift position is shifted to N
After slowing down, stop the vehicle in a safe place by the road.
Stop the hybrid system.
If the shift position cannot be shifted to N
Keep depressing the brake pedal with both feet to reduce vehicle
speed as much as possible.
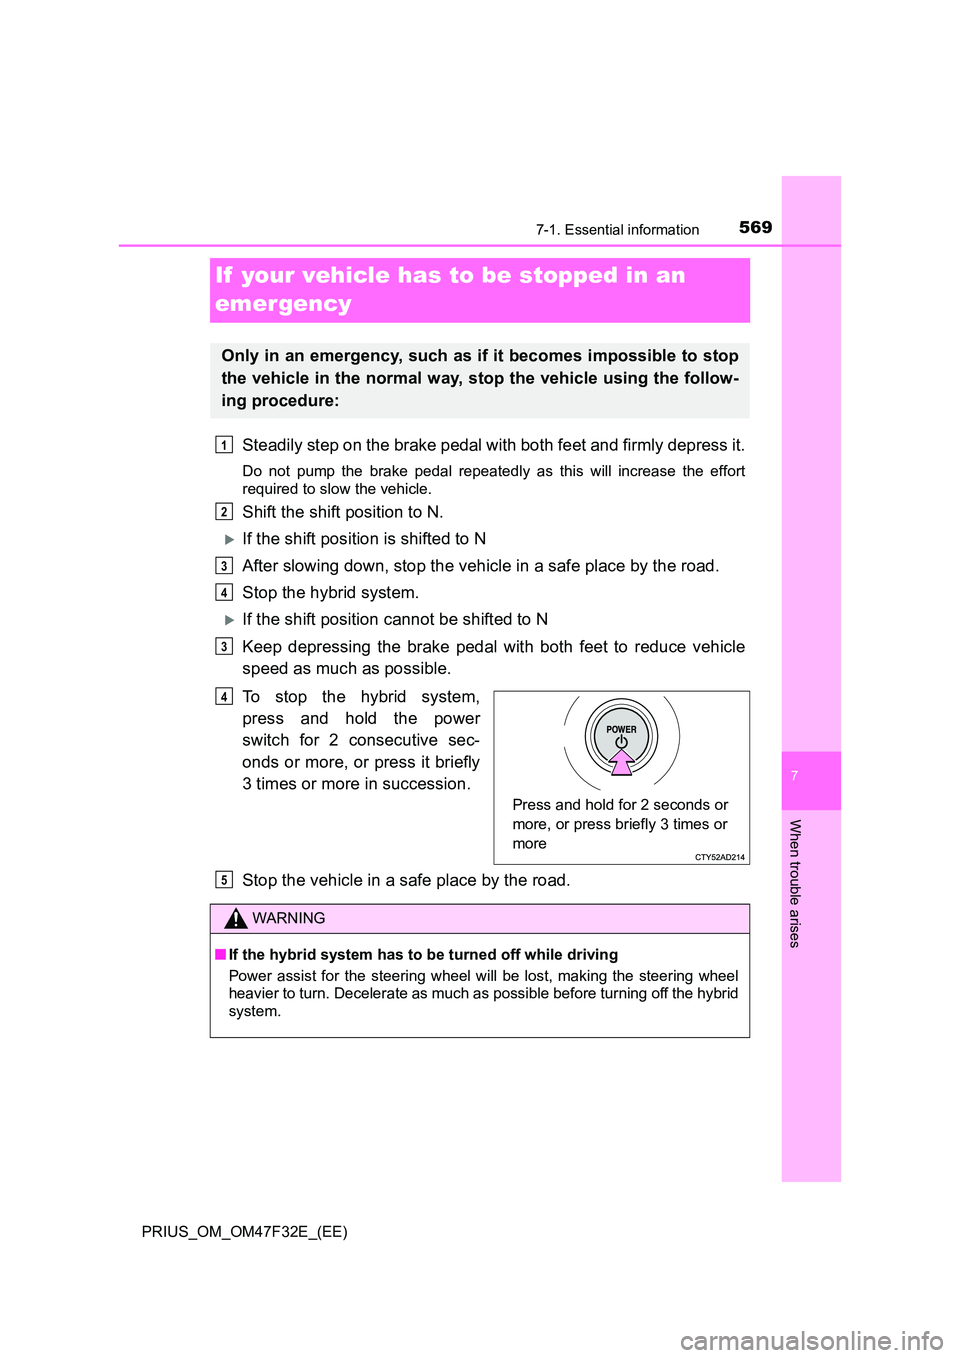
To stop the hybrid system,
press and hold the power
switch for 2 consecutive sec-
onds or more, or press it briefly
3 times or more in succession.
Stop the vehicle in a safe place by the road.
Only in an emergency, such as if it becomes impossible to stop
the vehicle in the normal way, stop the vehicle using the follow-
ing procedure:
1
2
3
4
3
Press and hold for 2 seconds or
more, or press briefly 3 times or
more
4
WARNING
■ If the hybrid system has to be turned off while driving
Power assist for the steering wheel will be lost, making the steering wheel
heavier to turn. Decelerate as much as possible before turning off the hybrid
system.
5
Page 576 of 770
5747-2. Steps to take in an emergency
PRIUS_OM_OM47F32E_(EE)
When using a flatbed truck to transport the vehicle, use tire strapping
belts. Refer to the owner’s manual of the flatbed truck for the tire
strapping method.
In order to suppress vehicle movement during transportation, set the
parking brake and turn the power switch off.
If a tow truck is not available in an emergency, your vehicle may be
temporarily towed using cables or chains secured to the emergency
towing eyelets. This should only be attempted on hard surfaced roads
for short distances at under 30 km/h (18 mph).
A driver must be in the vehicle to steer and operate the brakes. The
vehicle’s wheels, drive train, axles, steering and brakes must be in
good condition.
Using a flatbed truck
Emergency towing
Page 577 of 770

5757-2. Steps to take in an emergency
PRIUS_OM_OM47F32E_(EE)
7
When trouble arises
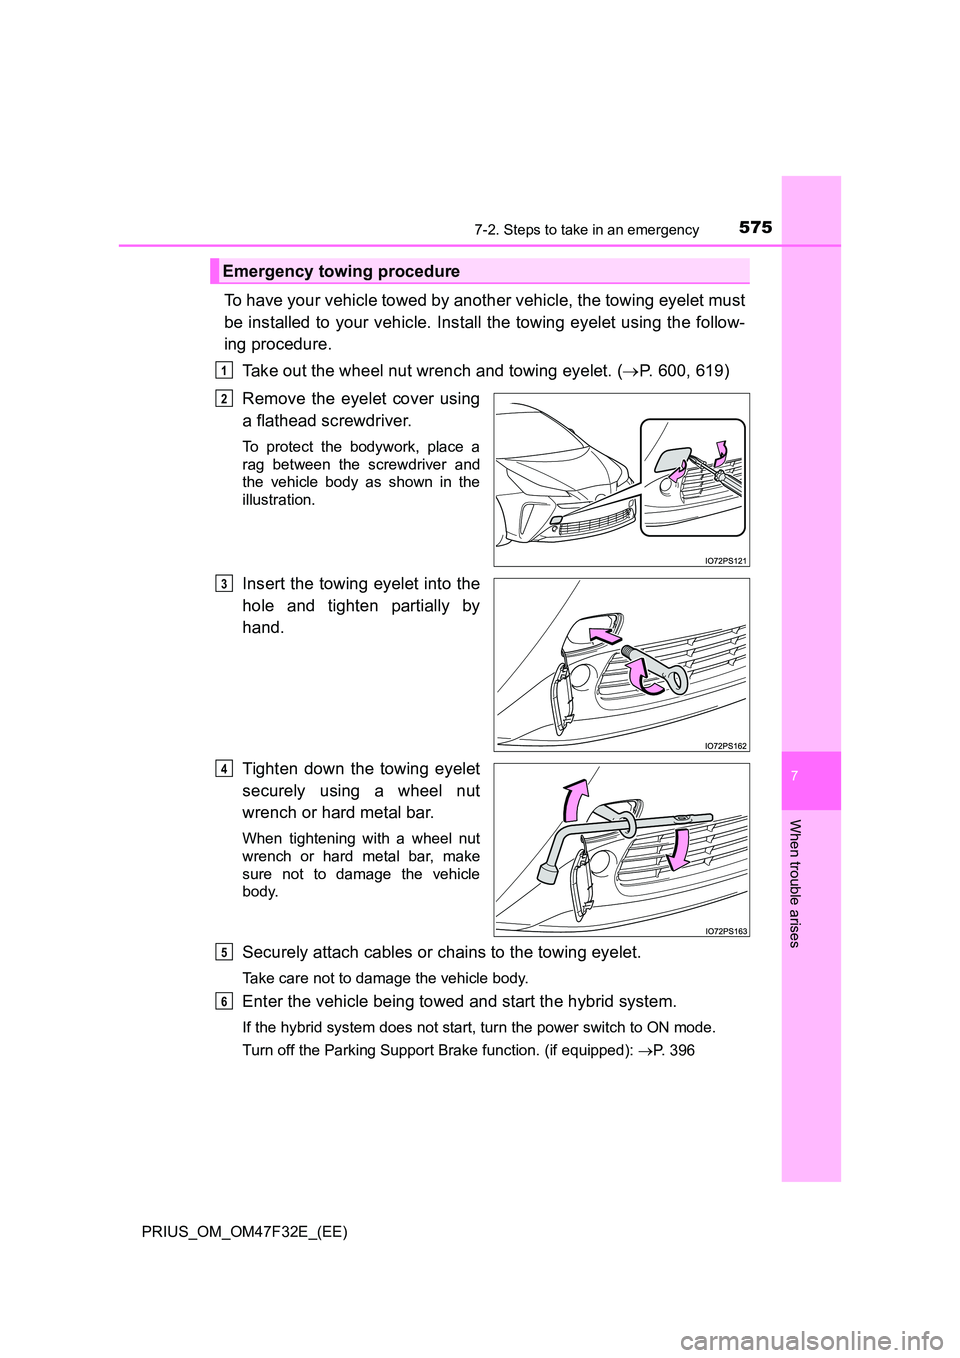
To have your vehicle towed by another vehicle, the towing eyelet must
be installed to your vehicle. Install the towing eyelet using the follow-
ing procedure.
Take out the wheel nut wrench and towing eyelet. ( P. 600, 619)
Remove the eyelet cover using
a flathead screwdriver.
To protect the bodywork, place a
rag between the screwdriver and
the vehicle body as shown in the
illustration.
Insert the towing eyelet into the
hole and tighten partially by
hand.
Tighten down the towing eyelet
securely using a wheel nut
wrench or hard metal bar.
When tightening with a wheel nut
wrench or hard metal bar, make
sure not to damage the vehicle
body.
Securely attach cables or chains to the towing eyelet.
Take care not to damage the vehicle body.
Enter the vehicle being towed and start the hybrid system.
If the hybrid system does not start, turn the power switch to ON mode.
Turn off the Parking Support Brake function. (if equipped): P. 396
Emergency towing procedure
1
2
3
4
5
6