2023 TOYOTA COROLLA trip A
[x] Cancel search: trip APage 86 of 468
862-1. Instrument cluster
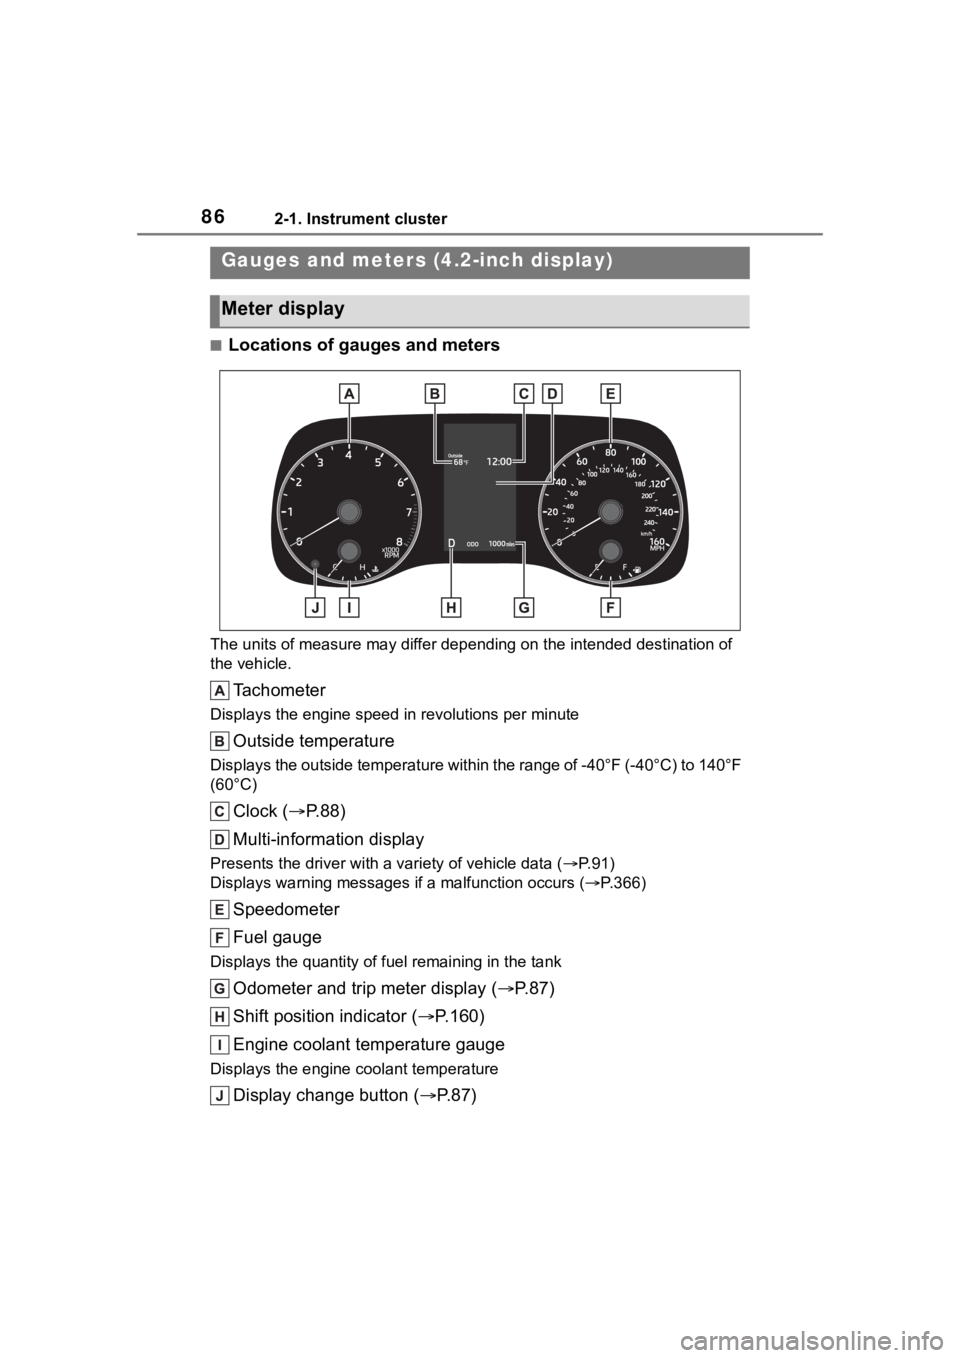
■Locations of gauges and meters
The units of measure may differ depending on the intended destination of
the vehicle.
Tachometer
Displays the engine speed in revolutions per minute
Outside temperature
Displays the outside temperature within the range of -40°F (-40 °C) to 140°F
(60°C)
Clock ( P. 8 8 )
Multi-information display
Presents the driver with a variety of vehicle data (P.91)
Displays warning messages if a malfunction occurs (P.366)
Speedometer
Fuel gauge
Displays the quantity of fu el remaining in the tank
Odometer and trip meter display ( P.87)
Shift position indicator ( P.160)
Engine coolant temperature gauge
Displays the engine c oolant temperature
Display change button ( P.87)
Gauges and meters (4.2-inch display)
Meter display
Page 87 of 468
872-1. Instrument cluster
2
Vehicle status information and indicators
■Outside temperature display
●In the following situations, the cor-
rect outside tempe rature may not
be displayed, or the display may
take longer than normal to
change:
• When stopped, or driving at low
speeds (less than 12 mph [20
km/h])
• When the outside temperature
has changed suddenly (at the
entrance/exit of a garage, tunnel,
etc.)
●When “--” or “E” is displayed, the
system may be malfunctioning.
Take your vehicle to your Toyota
dealer.
■Liquid crystal display
P. 9 2
■Customization
The gauges and meters can be cus-
tomized in of the multi-informa-
tion display. ( P.412)■Changing the display
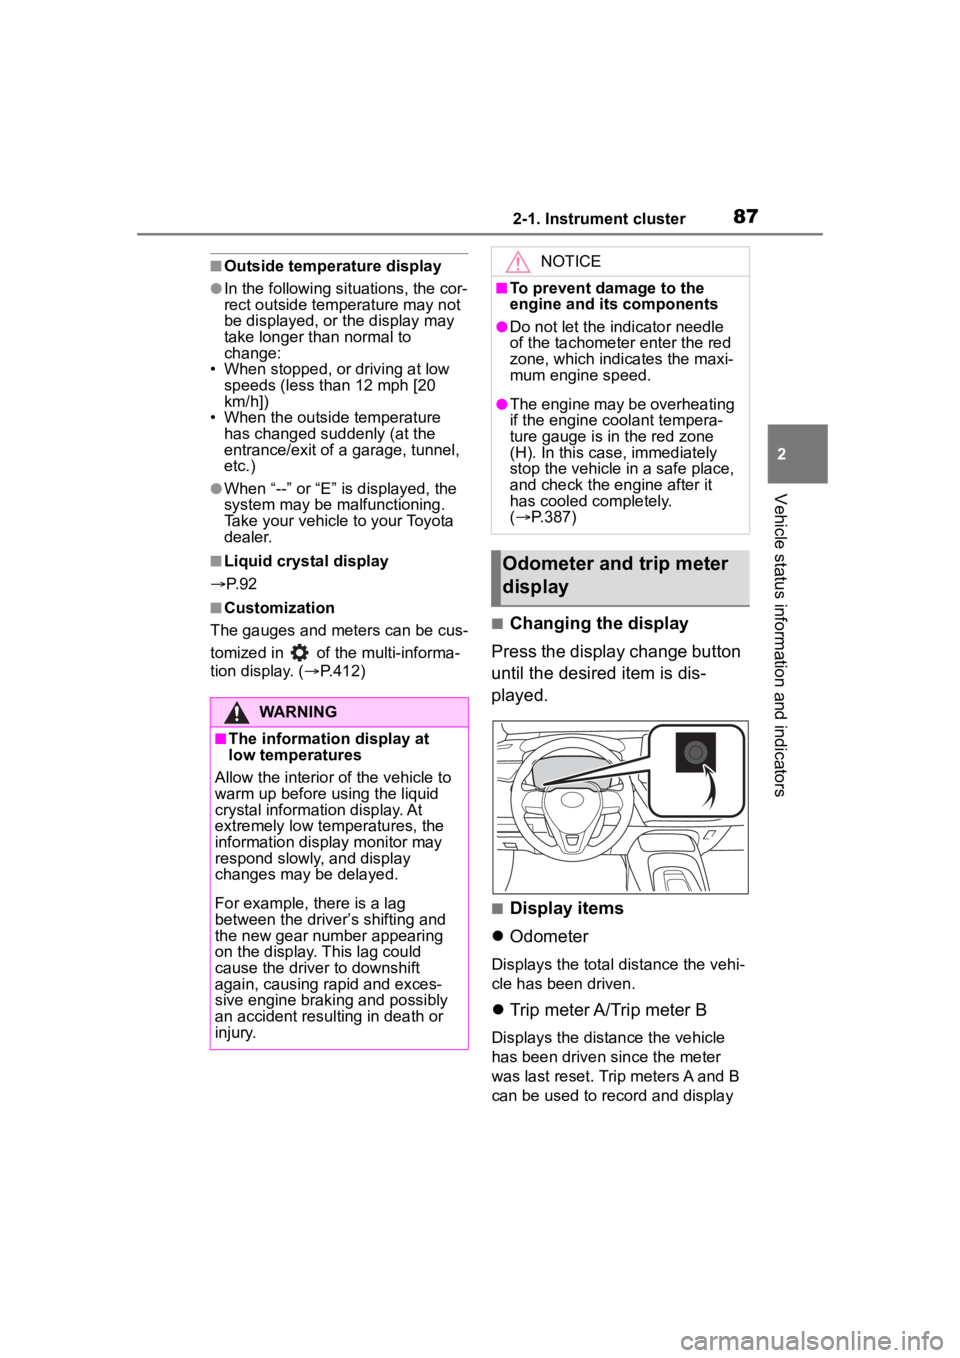
Press the display change button
until the desired item is dis-
played.
■Display items
Odometer
Displays the total distance the vehi-
cle has been driven.
Trip meter A/Trip meter B
Displays the distance the vehicle
has been driven since the meter
was last reset. Trip meters A and B
can be used to record and display
WARNING
■The information display at
low temperatures
Allow the interior of the vehicle to
warm up before u sing the liquid
crystal informat ion display. At
extremely low temperatures, the
information display monitor may
respond slowly, and display
changes may be delayed.
For example, there is a lag
between the driver’s shifting and
the new gear number appearing
on the display. This lag could
cause the driver to downshift
again, causing rapid and exces-
sive engine braking and possibly
an accident resulting in death or
injury.
NOTICE
■To prevent damage to the
engine and its components
●Do not let the indicator needle
of the tachometer enter the red
zone, which indicates the maxi-
mum engine speed.
●The engine may be overheating
if the engine coolant tempera-
ture gauge is in the red zone
(H). In this case, immediately
stop the vehicle in a safe place,
and check the engine after it
has cooled completely.
( P.387)
Odometer and trip meter
display
Page 88 of 468

882-1. Instrument cluster
different distances independently.
To reset, display the desired trip
meter and press and hold the dis-
play change button.
The brightness of the instrument
panel lights can be adjusted.
1Brighter
2 Darker
■Instrument panel light bright-
ness adjustment
The brightness of the instrument
panel lights can be adjusted sepa-
rately for when the tail lights are on
and off.
■The clocks can be adjusted
on the audio system
screen.
Refer to “MULTIMEDIA
OWNER’S MANUAL”.
Changing the instrument
panel light brightness
Adjusting the clock
Page 89 of 468

892-1. Instrument cluster
2
Vehicle status information and indicators
■Locations of gauges and metersEngine coolant temperature gauge
Displays the engine c oolant temperature
Outside temperature
Displays the outside temperature within the range of -40°F (-40 °C) to 140°F
(60°C)
Analog speedometer/Tachometer
This setting can be changed on the setting screen. ( P.412)
Clock ( P. 9 1 )
Fuel gauge
Displays the quantity of fu el remaining in the tank
Odometer and trip meter display ( P.90)
Shift position indicator ( P.160, P.162)
Multi-information display
Presents the driver with a variety of vehicle data (P.97)
Displays warning messages if a malfunction occurs (P.366)
Digital speedometer
Gauges and meters (7-inch display)
Meter display
Page 90 of 468
902-1. Instrument cluster
Display change button (P.90)
■Outside temperature display
●In the following situations, the cor-
rect outside tempe rature may not
be displayed, or the display may
take longer than normal to
change:
• When stopped, or driving at low
speeds (less than 12 mph [20
km/h])
• When the outside temperature
has changed suddenly (at the
entrance/exit of a garage, tunnel,
etc.)
●When “--” or “E” is displayed, the
system may be malfunctioning.
Take your vehicle to your Toyota
dealer.
■Liquid crystal display
P. 9 7
■Customization
The gauges and meters can be cus-
tomized in of the multi-informa-
tion display. ( P.412)■Changing the display
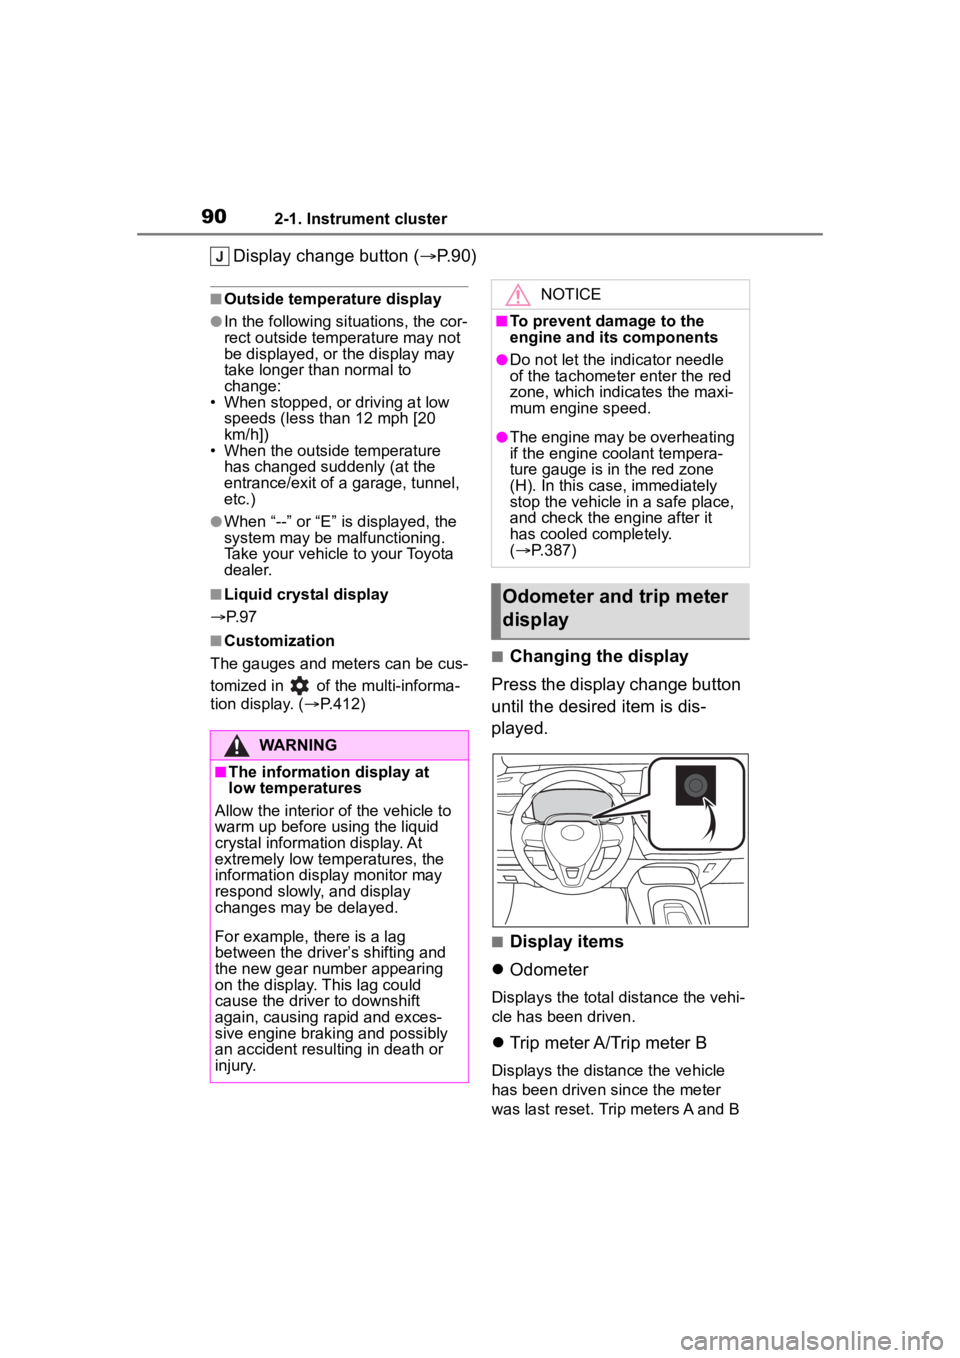
Press the display change button
until the desired item is dis-
played.
■Display items
Odometer
Displays the total distance the vehi-
cle has been driven.
Trip meter A/Trip meter B
Displays the distance the vehicle
has been driven since the meter
was last reset. Trip meters A and B
WARNING
■The information display at
low temperatures
Allow the interior of the vehicle to
warm up before u sing the liquid
crystal informat ion display. At
extremely low temperatures, the
information display monitor may
respond slowly, and display
changes may be delayed.
For example, there is a lag
between the driver’s shifting and
the new gear number appearing
on the display. This lag could
cause the driver to downshift
again, causing rapid and exces-
sive engine braking and possibly
an accident resulting in death or
injury.
NOTICE
■To prevent damage to the
engine and its components
●Do not let the indicator needle
of the tachometer enter the red
zone, which indicates the maxi-
mum engine speed.
●The engine may be overheating
if the engine coolant tempera-
ture gauge is in the red zone
(H). In this case, immediately
stop the vehicle in a safe place,
and check the engine after it
has cooled completely.
( P.387)
Odometer and trip meter
display
Page 91 of 468

912-1. Instrument cluster
2
Vehicle status information and indicators
can be used to record and display
different distances independently.
To reset, display the desired trip
meter and press and hold the dis-
play change button.
The brightness of the instrument
panel lights can be adjusted.
1Brighter
2 Darker
■Instrument panel light bright-
ness adjustment
The brightness of the instrument
panel lights can be adjusted sepa-
rately for when the tail lights are on
and off.
■The clocks can be adjusted
on the audio system
screen.
Refer to “MULTIMEDIA
OWNER’S MANUAL”.
■Display
Driving support system status
display area
Displays an image when the follow-
ing systems are operating and a
menu icon other than is
selected:
• LTA (Lane Tracing Assist)
• LDA (Lane Departure Alert)
• Dynamic radar cruise control
• RSA (Road Sign Assist) (if equipped) ( P.217)
Content display area
By selecting menu icons on the
multi-information di splay, a variety
of driving-related information can
be displayed. The multi-information
display can also be used to change
display settings and other vehicle
settings.
Warning or advice pop-up displays
are also displayed in certain situa-
tions.
■Menu icons
The menu icons will be dis-
played by pressing the or
Changing the instrument
panel light brightness
Adjusting the clock
Multi-infor mation dis-
play (4.2-inch display)
Display and menu icons
Page 101 of 468
1012-1. Instrument cluster
2
Vehicle status information and indicators
Driving Indicator Light.
Fuel economy display
Select to change the average fuel
consumption display to any of the
following: trip average/total aver-
age/tank average. ( P. 9 8 )
Select to display/not display the
audio system linked display.
Select to change the displayed con-
tent of the following:
• Drive information type
Select to change the drive informa-
tion type display between trip infor-
mation/total information.
• Drive information items
Select to set the first and second
items of the drive information dis-
play to any of the following: aver-
age vehicle
speed/distance/elapsed time.
Pop-up display
Select to enable/disable pop-up
displays for each relevant system.
Multi-information display off
Select to turn the m ulti-information
display off.
To turn the multi-in formation display
on again, press any of the following
meter control switches
//// /.
Default setting
Select to reset the meter display
settings to the default setting.
■Vehicle functions and set-
tings that can be changed
P.412
■Suspension of the settings dis-
play
●Some settings cannot be changed
while driving. When changing set-
tings, park the vehicle in a safe
place.
●If a warning message is displayed,
operation of the settings display
will be suspended.
WARNING
■Cautions during setting up
the display
If the engine is running when
changing the dis play settings,
ensure that the vehicle is parked
in a place with adequate ventila-
tion. In a closed area such as a
garage, exhaust gases including
harmful carbon monoxide (CO)
may collect and enter the vehicle.
This may lead to death or a seri-
ous health hazard.
NOTICE
■During setting up the display
To prevent batte ry discharge,
ensure that the engine is running
while setting up the display fea-
tures.
Page 102 of 468
1022-1. Instrument cluster
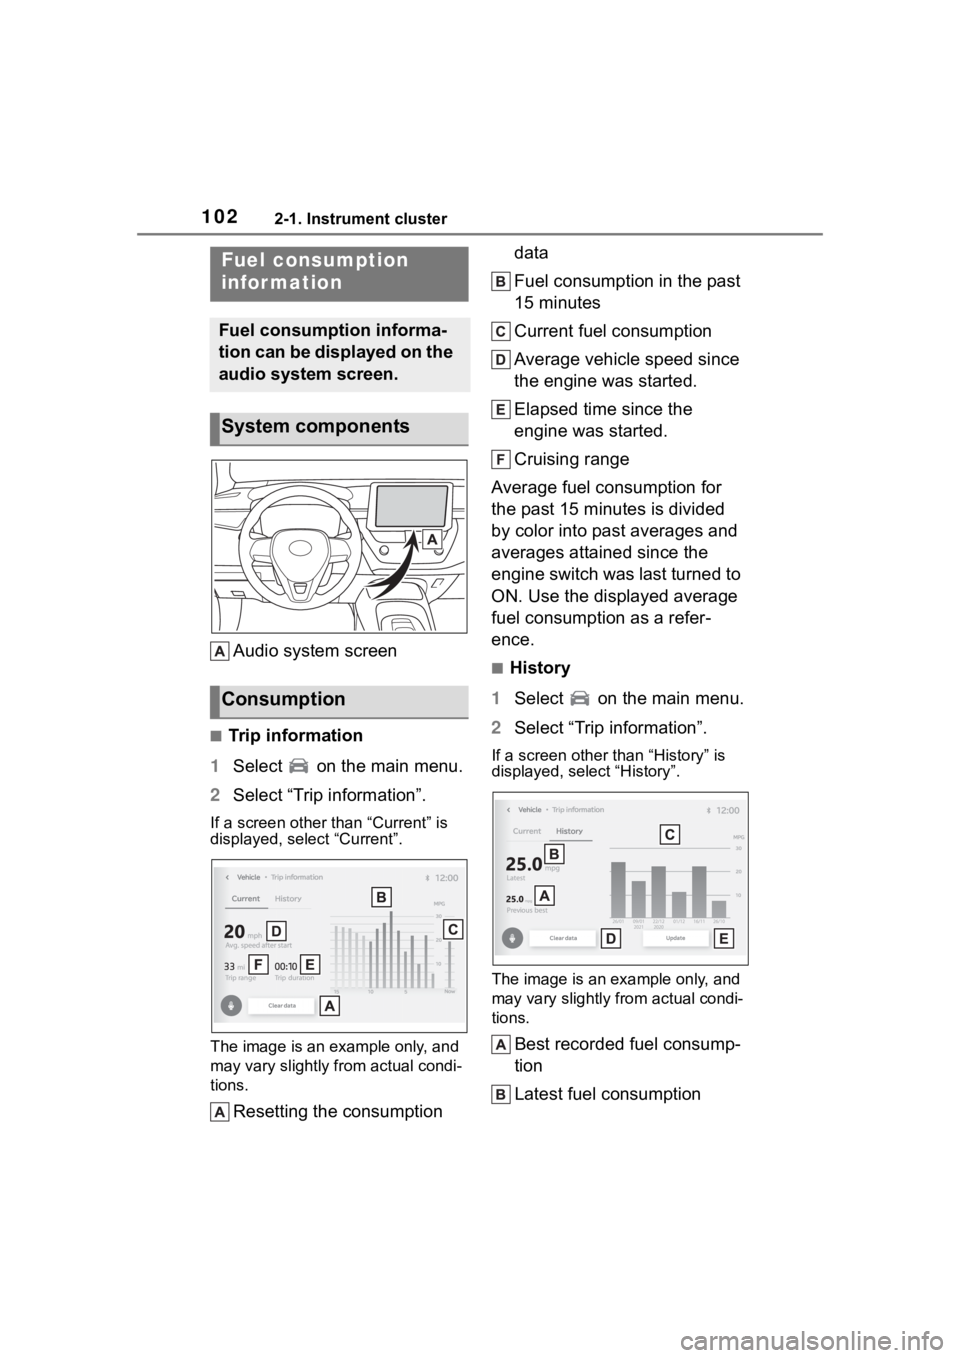
Audio system screen
■Trip information
1 Select on the main menu.
2 Select “Trip information”.
If a screen other than “Current” is
displayed, select “Current”.
The image is an example only, and
may vary slightly f rom actual condi-
tions.
Resetting the consumption data
Fuel consumption in the past
15 minutes
Current fuel consumption
Average vehicle speed since
the engine was started.
Elapsed time since the
engine was started.
Cruising range
Average fuel consumption for
the past 15 minutes is divided
by color into past averages and
averages attained since the
engine switch was last turned to
ON. Use the displayed average
fuel consumption as a refer-
ence.
■History
1 Select on the main menu.
2 Select “Trip information”.
If a screen other than “History” is
displayed, select “History”.
The image is an example only, and
may vary slightly from actual condi-
tions.
Best recorded fuel consump-
tion
Latest fuel consumption
Fuel consumption
infor mation
Fuel consumption informa-
tion can be displayed on the
audio system screen.
System components
Consumption