2023 TOYOTA COROLLA HYBRID wheel
[x] Cancel search: wheelPage 148 of 496
1483-4. Adjusting the steering wheel and mirrors
■When using the outside rear
view mirrors in a cold weather
When it is cold and the outside rear
view mirrors are frozen, it may not
be possible to fold /extend them or
adjust the mirror surface. Remove
the ice, snow, etc. covering the out-
side rear view mirrors.
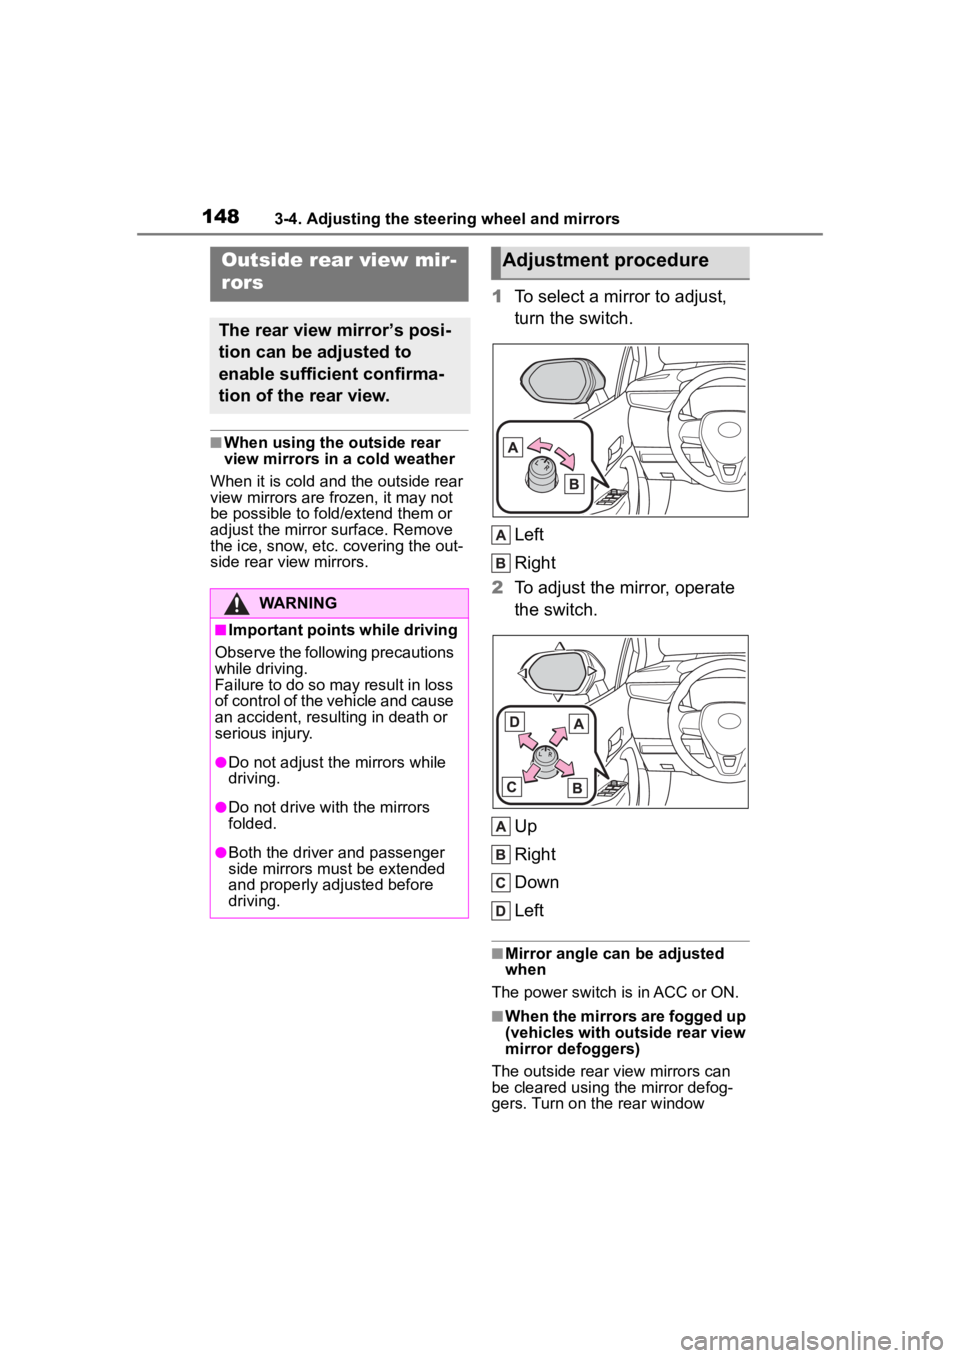
1 To select a mirror to adjust,
turn the switch.
Left
Right
2 To adjust the mirror, operate
the switch.
Up
Right
Down
Left
■Mirror angle can be adjusted
when
The power switch is in ACC or ON.
■When the mirrors are fogged up
(vehicles with outside rear view
mirror defoggers)
The outside rear view mirrors can
be cleared using the mirror defog-
gers. Turn on the rear window
Outside rear view mir-
rors
The rear view mirror’s posi-
tion can be adjusted to
enable sufficient confirma-
tion of the rear view.
WARNING
■Important points while driving
Observe the following precautions
while driving.
Failure to do so may result in loss
of control of the vehicle and cause
an accident, resul ting in death or
serious injury.
●Do not adjust the mirrors while
driving.
●Do not drive with the mirrors
folded.
●Both the driver and passenger
side mirrors must be extended
and properly adjusted before
driving.
Adjustment procedure
Page 149 of 496
1493-4. Adjusting the steering wheel and mirrors
3
Before driving
defogger to turn on the outside rear
view mirror defoggers. (P.280)
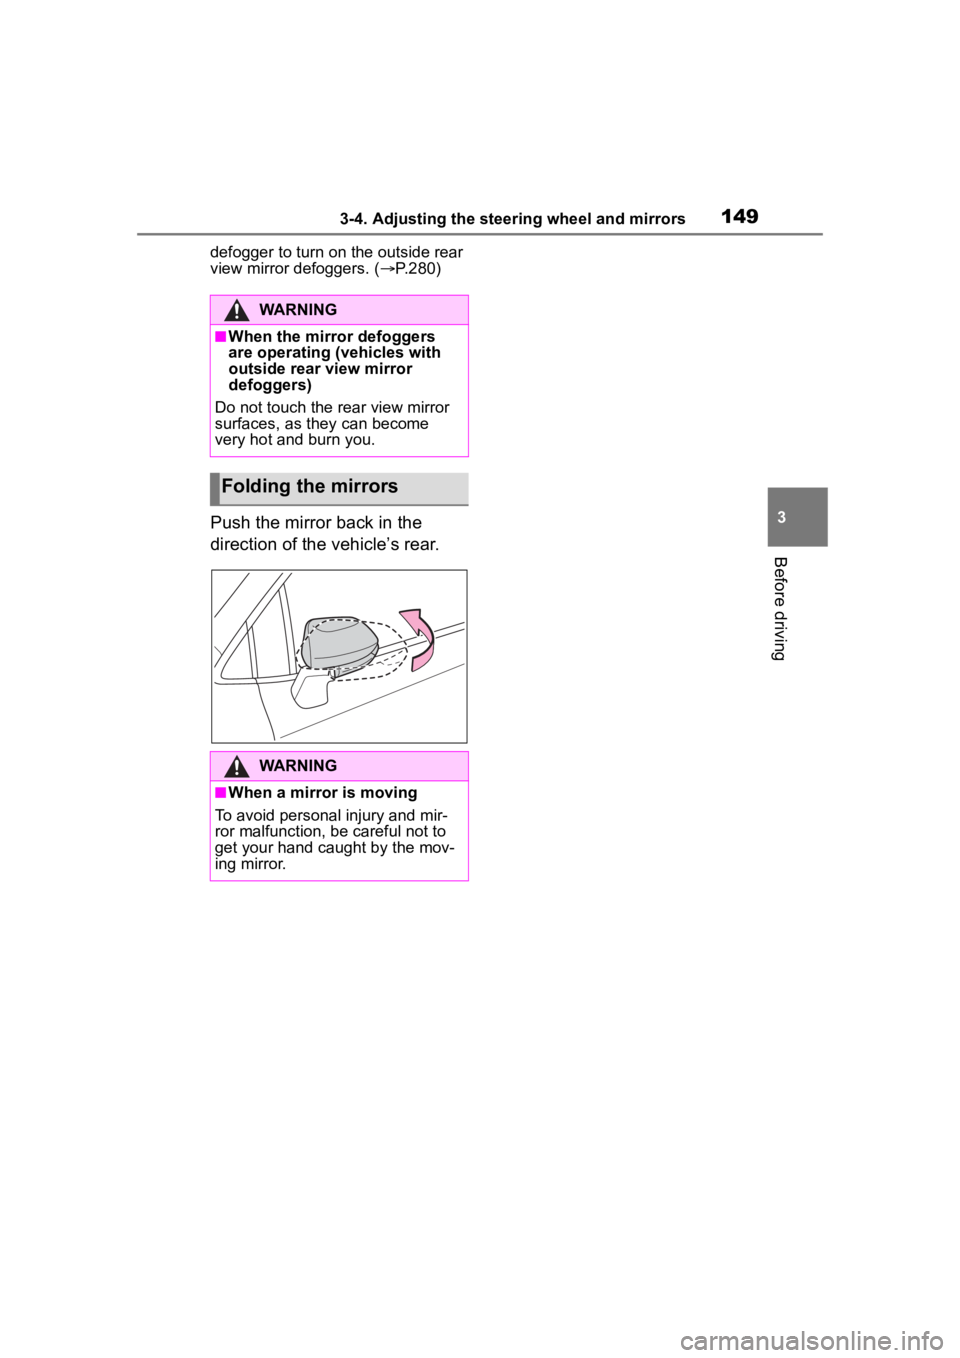
Push the mirror back in the
direction of the vehicle’s rear.
WARNING
■When the mirror defoggers
are operating (vehicles with
outside rear view mirror
defoggers)
Do not touch the rear view mirror
surfaces, as they can become
very hot and burn you.
Folding the mirrors
WARNING
■When a mirror is moving
To avoid personal injury and mir-
ror malfunction, be careful not to
get your hand caught by the mov-
ing mirror.
Page 159 of 496

1594-1. Before driving
4
Driving
4-1.Before driving
■Starting the hybrid system
P.170, 172
■Driving
1 With the brake pedal
depressed, shift the shift
lever to D. ( P.180)
2 Release the parking brake.
( P.183)
If the parking brake is in automatic
mode, the parkin g brake will be
released automatically. ( P.184)
3 Gradually release the brake
pedal and gently depress the
accelerator pedal to acceler-
ate the vehicle.
■Stopping
1 With the shift lever in D,
depress the brake pedal.
2 If necessary, set the parking
brake. ( P.183)
If the vehicle is to be stopped for an
extended period of time, shift the
shift lever to P. ( P.180)
■Parking the vehicle
1 With the shift lever in D,
depress the brake pedal to
stop the vehicle completely.
2 Set the parking brake
( P.183), and shift the shift
lever to P. ( P.180)
Make sure the park ing brake indi-
cator light is on.
3 Vehicles without a smart key
system: Turn the power
switch to OFF to stop the
hybrid system.
Vehicles with a smart key
system: Press the power
switch to stop the hybrid sys-
tem.
4 Slowly release the brake
pedal.
5 Lock the door, making sure
that you have the key on your
person.
If parking on a hill, block the wheels
as needed.
■Starting off on a steep
uphill
1 Make sure that the parking
brake is set and shift the shift
lever to D.
Hill-start assist cont rol will operate.
( P.266)
2 Gently depress the accelera-
tor pedal.
3 Release the parking brake.
■For fuel-efficient driving
Keep in mind that hybrid vehicles
are similar to conventional vehicles,
and it is necessary to refrain from
activities such as sudden accelera-
tion. ( P.271)
■Driving in the rain
●Drive carefully whe n it is raining,
because visibility will be reduced,
the windows may become
fogged-up, and the road will be
slippery.
●Drive carefully whe n it starts to
Driving the vehicle
The following procedures
should be observed to
ensure safe driving:
Driving procedure
Page 164 of 496
1644-1. Before driving
WARNING
●If the electronically controlled
brake system does not operate,
do not follow other vehicles
closely and avoid hills or sharp
turns that require braking.
In this case, braking is still pos-
sible, but the brake pedal
should be depressed more
firmly than usual. Also, the brak-
ing distance will increase. Have
your brakes fixed immediately.
●The brake system consists of 2
or more individual hydraulic sys-
tems; if one of the systems fails,
the other(s) will still operate. In
this case, the brake pedal
should be depressed more
firmly than usua l and the brak-
ing distance will increase. Have
your brakes fixed immediately.
■If the vehicle becomes stuck
Do not spin the wheels exces-
sively when a driven wheel is up
in the air, or the vehicle is stuck in
sand, mud, etc. This may damage
the driveline components or pro-
pel the vehicle forward or back-
ward, causing an accident.
NOTICE
■When driving the vehicle
●Do not depress t he accelerator
and brake pedals at the same
time during drivin g, as this may
restrain the hybrid system out-
put.
●Do not use the accelerator
pedal or depress the accelera-
tor and brake pedals at the
same time to hold the vehicle on
a hill.
■When parking the vehicle
Always set the parking brake and
shift the shift lever to P. Failure to
do so may cause the vehicle to
move or the vehicle may acceler-
ate suddenly if t he accelerator
pedal is accidentally depressed.
■Avoiding damage to vehicle
parts
●Do not turn the steering wheel
fully in either direction and hold
it there for an extended period
of time.
Doing so may damage the
power steering.
●When driving over bumps in the
road, drive as slowly as possible
to avoid damaging the wheels,
underside of the vehicle, etc.
■If you get a flat tire while driv-
ing
A flat or damaged tire may cause
the following situations. Hold the
steering wheel firmly and gradu-
ally depress the brake pedal to
slow down the vehicle.
●It may be difficult to control your
vehicle.
●The vehicle will make abnormal
sounds or vibrations.
●The vehicle will lean abnor-
mally.
Information on what to do in case
of a flat tire (
P.398)
■When encountering flooded
roads
Do not drive on a road that has
flooded after h eavy rain etc.
Doing so may cause the following
serious damage to the vehicle:
●Engine stalling
●Short in electrical components
Page 169 of 496
1694-1. Before driving
4
Driving
Trailer towing
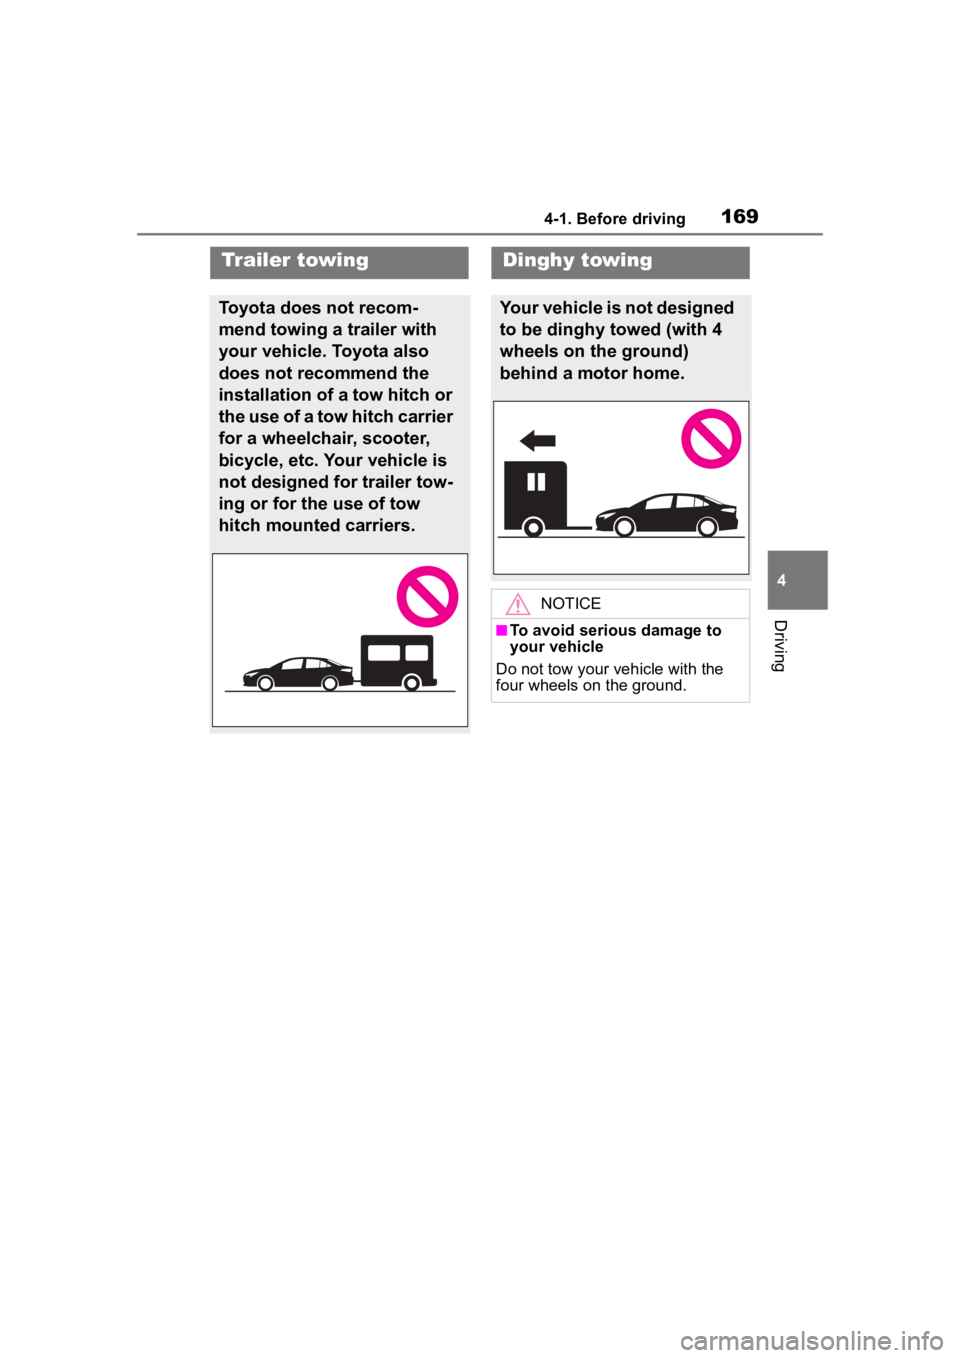
Toyota does not recom-
mend towing a trailer with
your vehicle. Toyota also
does not recommend the
installation of a tow hitch or
the use of a tow hitch carrier
for a wheelchair, scooter,
bicycle, etc. Your vehicle is
not designed for trailer tow-
ing or for the use of tow
hitch mounted carriers.
Dinghy towing
Your vehicle is not designed
to be dinghy towed (with 4
wheels on the ground)
behind a motor home.
NOTICE
■To avoid serious damage to
your vehicle
Do not tow your vehicle with the
four wheels on the ground.
Page 170 of 496
1704-2. Driving procedures
4-2.Driving procedures
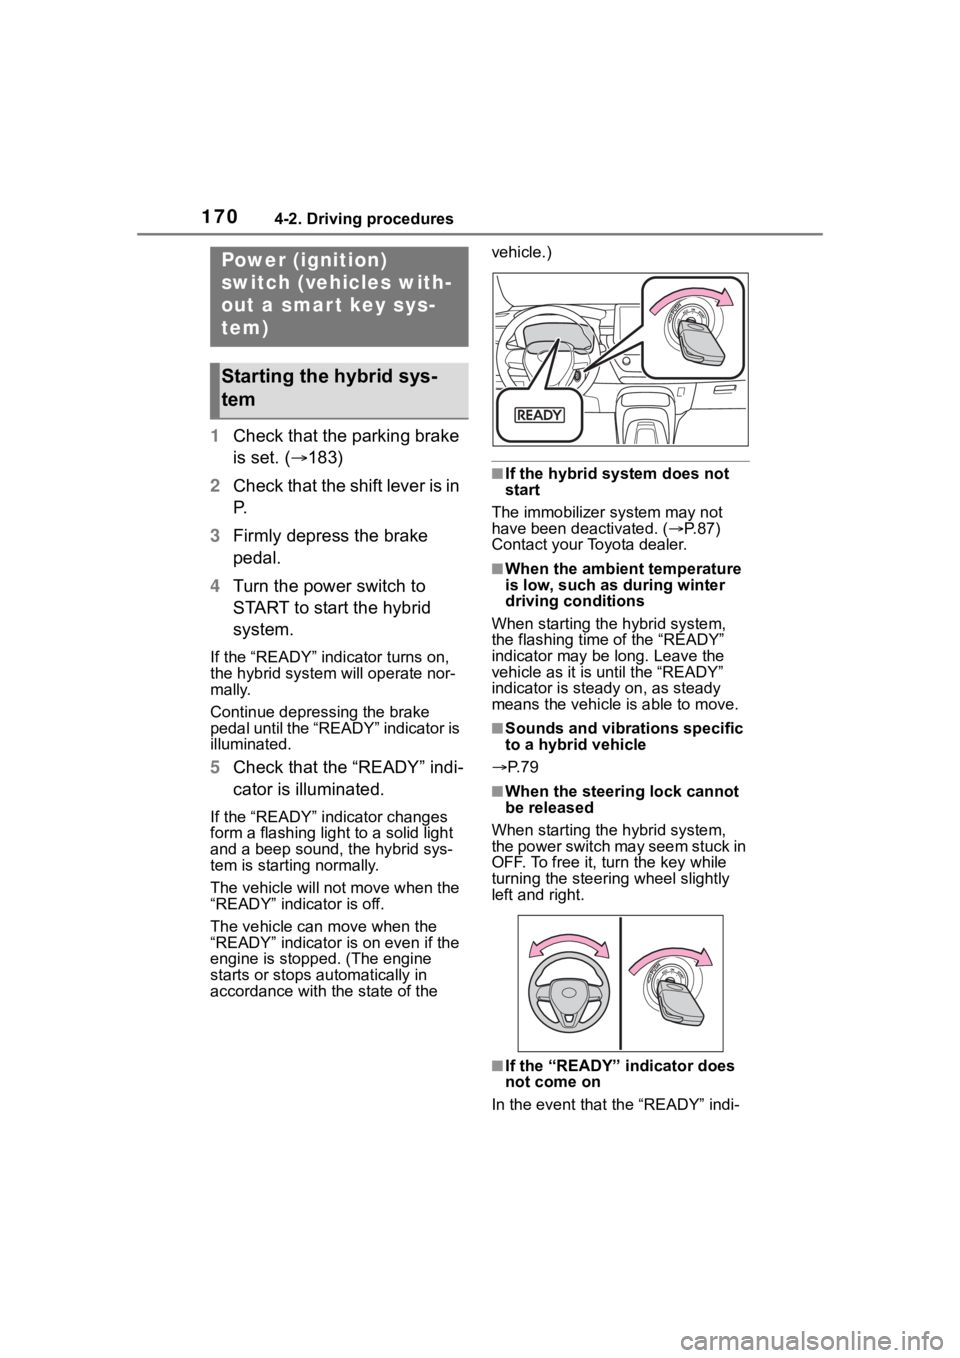
1Check that the parking brake
is set. ( 183)
2 Check that the shift lever is in
P.
3 Firmly depress the brake
pedal.
4 Turn the power switch to
START to start the hybrid
system.
If the “READY” indicator turns on,
the hybrid system will operate nor-
mally.
Continue depressing the brake
pedal until the “READY” indicator is
illuminated.
5Check that the “READY” indi-
cator is illuminated.
If the “READY” indicator changes
form a flashing light to a solid light
and a beep sound, the hybrid sys-
tem is starting normally.
The vehicle will not move when the
“READY” indicator is off.
The vehicle can move when the
“READY” indicator i s on even if the
engine is stopped. (The engine
starts or stops automatically in
accordance with the state of the vehicle.)
■If the hybrid system does not
start
The immobilizer system may not
have been deactivated. ( P. 8 7 )
Contact your Toyota dealer.
■When the ambient temperature
is low, such as during winter
driving conditions
When starting the hybrid system,
the flashing time of the “READY”
indicator may be long. Leave the
vehicle as it is until the “READY”
indicator is steady on, as steady
means the vehicle is able to move.
■Sounds and vibrations specific
to a hybrid vehicle
P. 7 9
■When the steering lock cannot
be released
When starting the hybrid system,
the power switch may seem stuck in
OFF. To free it, turn the key while
turning the steering wheel slightly
left and right.
■If the “READY” indicator does
not come on
In the event that the “READY” indi-
Power (ignition)
switch (vehicles with-
out a smart key sys-
tem)
Starting the hybrid sys-
tem
Page 171 of 496
1714-2. Driving procedures
4
Driving
cator does not come on even after
performing the proper procedures
for starting the vehicle, contact your
Toyota dealer immediately.
■If the hybrid system is malfunc-
tioning
P. 8 6
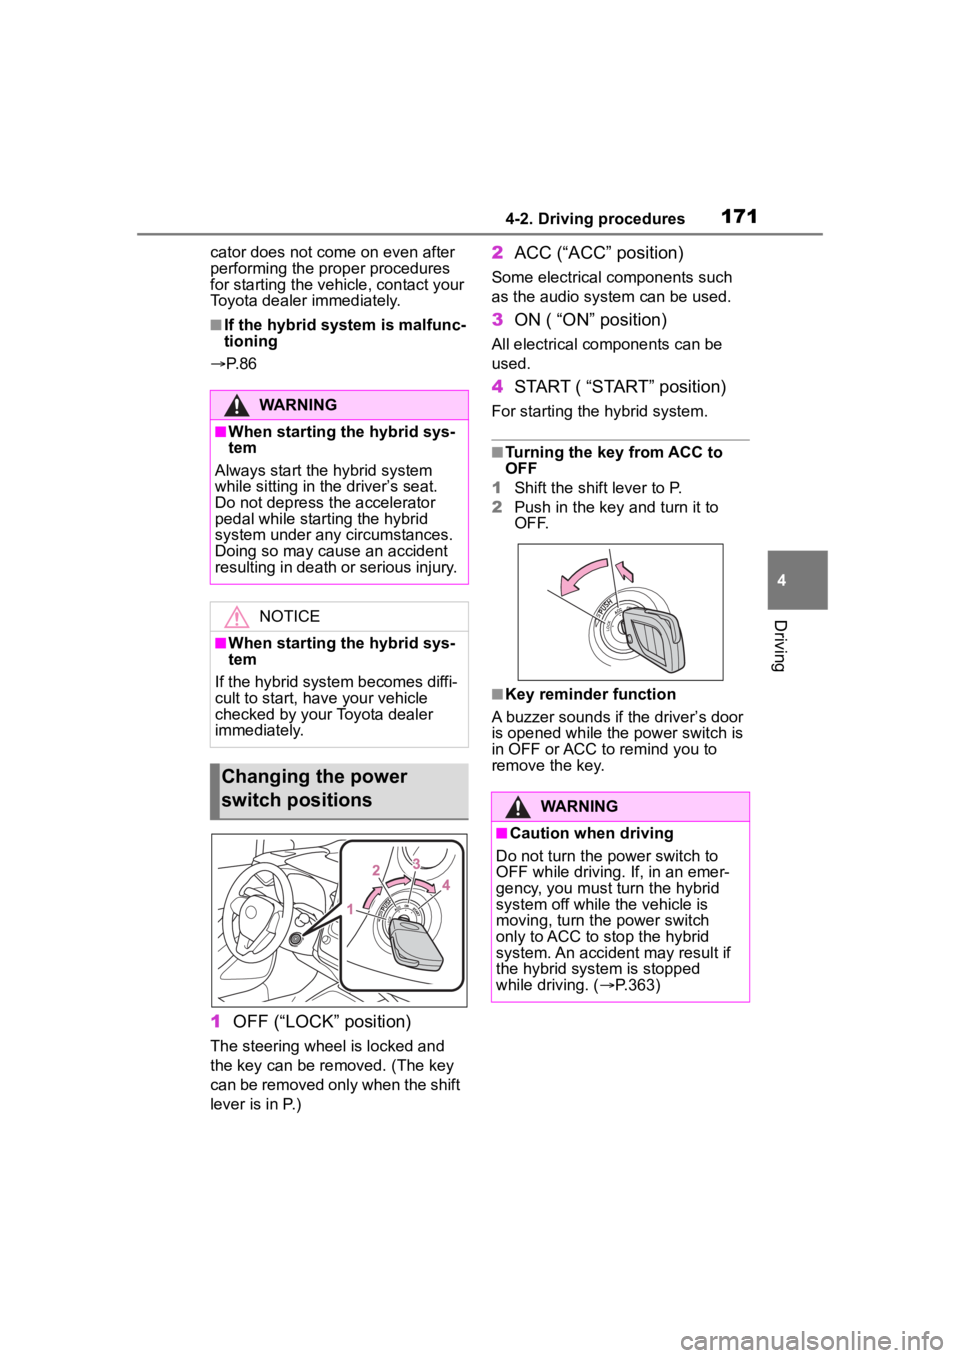
1 OFF (“LOCK” position)
The steering wheel is locked and
the key can be rem oved. (The key
can be removed only when the shift
lever is in P.)
2 ACC (“ACC” position)
Some electrical components such
as the audio sys tem can be used.
3ON ( “ON” position)
All electrical components can be
used.
4START ( “START” position)
For starting the hybrid system.
■Turning the key from ACC to
OFF
1 Shift the shift lever to P.
2 Push in the key and turn it to
OFF.
■Key reminder function
A buzzer sounds if the driver’s door
is opened while the power switch is
in OFF or ACC to remind you to
remove the key.
WARNING
■When starting the hybrid sys-
tem
Always start the hybrid system
while sitting in the driver’s seat.
Do not depress the accelerator
pedal while starting the hybrid
system under any circumstances.
Doing so may cause an accident
resulting in death or serious injury.
NOTICE
■When starting the hybrid sys-
tem
If the hybrid system becomes diffi-
cult to start, have your vehicle
checked by your Toyota dealer
immediately.
Changing the power
switch positions
WARNING
■Caution when driving
Do not turn the power switch to
OFF while driving. If, in an emer-
gency, you must turn the hybrid
system off while the vehicle is
moving, turn the power switch
only to ACC to stop the hybrid
system. An accident may result if
the hybrid system is stopped
while driving. ( P.363)
Page 192 of 496

1924-3. Operating the lights and wipers
2Turn the headlight switch to
the or position.
When the headlight switch lever is
in the low beam position, the AHB
system will be enabled and the
AHB indicator will illuminate.
■Automatic operating condi-
tions of the high beams
●When all of the following condi-
tions are met, the high beams will
illuminate automatically:
• The vehicle speed is approxi-
mately 21 mph (34 km/h) or more.
• The area ahead of the vehicle is dark.
• There are no vehicles ahead with lights on.
• There are few streetlights or other
lights on the road ahead.
●If any of the following conditions
are met, the headlights will
change to the low beams:
• Vehicle speed drops below
approximately 17 mph (27 km/h).
• The area ahead of the vehicle is not dark.
• There is a vehi cle ahead with
lights on.
• There are many streetlights or
other lights on the road ahead.
■Front camera detection
●In the following situations, the high
beams may not be automatically
changed to the low beams:
• When a vehicle cuts in front of your vehicle
• When another vehicle crosses in front of the vehicle • When vehicles ahead are repeat-
edly detected and then hidden
due to repeated curves, road
dividers or roadside trees
• When a vehicle ahead approaches from a far lane
• When a vehicle ahead is far away
• When a vehicle ahead has no lights
• When the lights of a vehicle ahead are dim
• When a vehicle ahead is reflecting
strong light, such as own head-
lights
• Situations in which the sensors
may not operate properly: P. 2 0 5
●The headlights may change to the
low beams if a vehicle ahead that
is using fog lights without its head-
lights turned on is detected.
●House lights, street lights, traffic
signals, and illuminated billboards
or signs may cause the high
beams to change to the low
beams, or the low beams to
remain on.
●The following may change the tim-
ing at which the headlights
change to the low beams:
• The brightness o f lights of vehi-
cles ahead
• The movement and direction of vehicles ahead
• The distance between the vehicle and a vehicle ahead
• When a vehicle ahead only has
lights illuminate d on one side
• When a vehicle ahead is a two-wheeled vehicle
• The condition of the road (gradi- ent, curve, condition of the road
surface, etc.)
• The number of passengers and amount of luggage
●The headlights may change
between the high beams and low
beams unexpectedly.
●Bicycles and other small vehicles
may not be detected.
●In the following situations, the sys-
tem may not be able to correctly
detect the brightness of the sur-