2023 SUBARU SOLTERRA warning
[x] Cancel search: warningPage 522 of 628

5228-2. Steps to take in an emergency
Owners Manual_USA_M42C01_en
■Warning messages
The warning messages explained
below may differ from the actual
messages according to operation
conditions and vehicle specifica-
tions.
■Warning buzzer
In some cases, the buzzer may not
be heard due to being in a noisy
location or audio sound.
■If “EV system stopped Steering
power low” is displayed
This message is displayed if the EV
system is stopped while driving. When steering wheel operations are
heavier than usual, grip the steering
wheel firmly and
operate it using
more force than usual.
■If “EV system overheated Out-
put power reduced” is dis-
played
This message may be displayed
when driving under severe operat-
ing conditions. (For example, when
driving up a l ong steep hill.)
Handling method: P. 5 4 5
■If “Shift System Malfunction
Shifting Unavailable Drive to a
Safe Place and Stop” or “Shift
System Malfunction Driving
Unavailable” is displayed
There is a malfunc tion in the shift
control system. Have the vehicle
inspected by your Toyota dealer
immediately.
■If “Shift is in N Release acceler-
ator before shifting” is dis-
played
The accelerator pedal has been
depressed when the shift position is
in N.
Release the accelerator pedal and
shift the shift position to D or R.
■If “Press brake when vehicle is
stopped EV system may over-
heat” is displayed
The message may be displayed
when the accelerator pedal is
depressed to hold the vehicle while
the vehicle is stopped on an incline,
etc. The EV system may overheat.
Release the accelerator pedal and
depress the brake pedal.
■If “Auto Power Off To Conserve
Battery” is displayed
Power was turned off due to the
automatic power off function. Next
time when starting the EV system,
operate the EV system for approxi-
mately 5 minutes t o recharge the
12-volt battery.
If a war ning message
is displayed
The multi-information dis-
play shows warnings of
system malfunctions, incor-
rectly performed opera-
tions, and messages that
indicate a need for mainte-
nance. When a message is
shown, perform the correc-
tion procedure appropriate
to the message.
If a warning message is dis-
played again after the
appropriate actions have
been performed, contact
your Toyota dealer.
Additionally, if a warning
light comes on or flashes at
the same time that a warn-
ing message is displayed,
take the appropriate correc-
tive action for the warning
light. ( P.513)
Page 527 of 628

5278-2. Steps to take in an emergency
Owners Manual_USA_M42C01_en
8
When trouble arises
Stop the vehicle in a safe
place on a hard, flat surface.
Set the parking brake.
Shift the shift position to P.
Stop the EV system.
Turn on the emergency flash-
ers.
Check the degree of the tire
damage.
A tire should only be repaired with
the emergency tire puncture repair
kit if the damage is caused by a nail
or screw passing through the tire
tread.
• Do not remove the nail or screw
from the tire. Removing the object
may widen the opening and make
emergency repair with the repair
kit impossible.
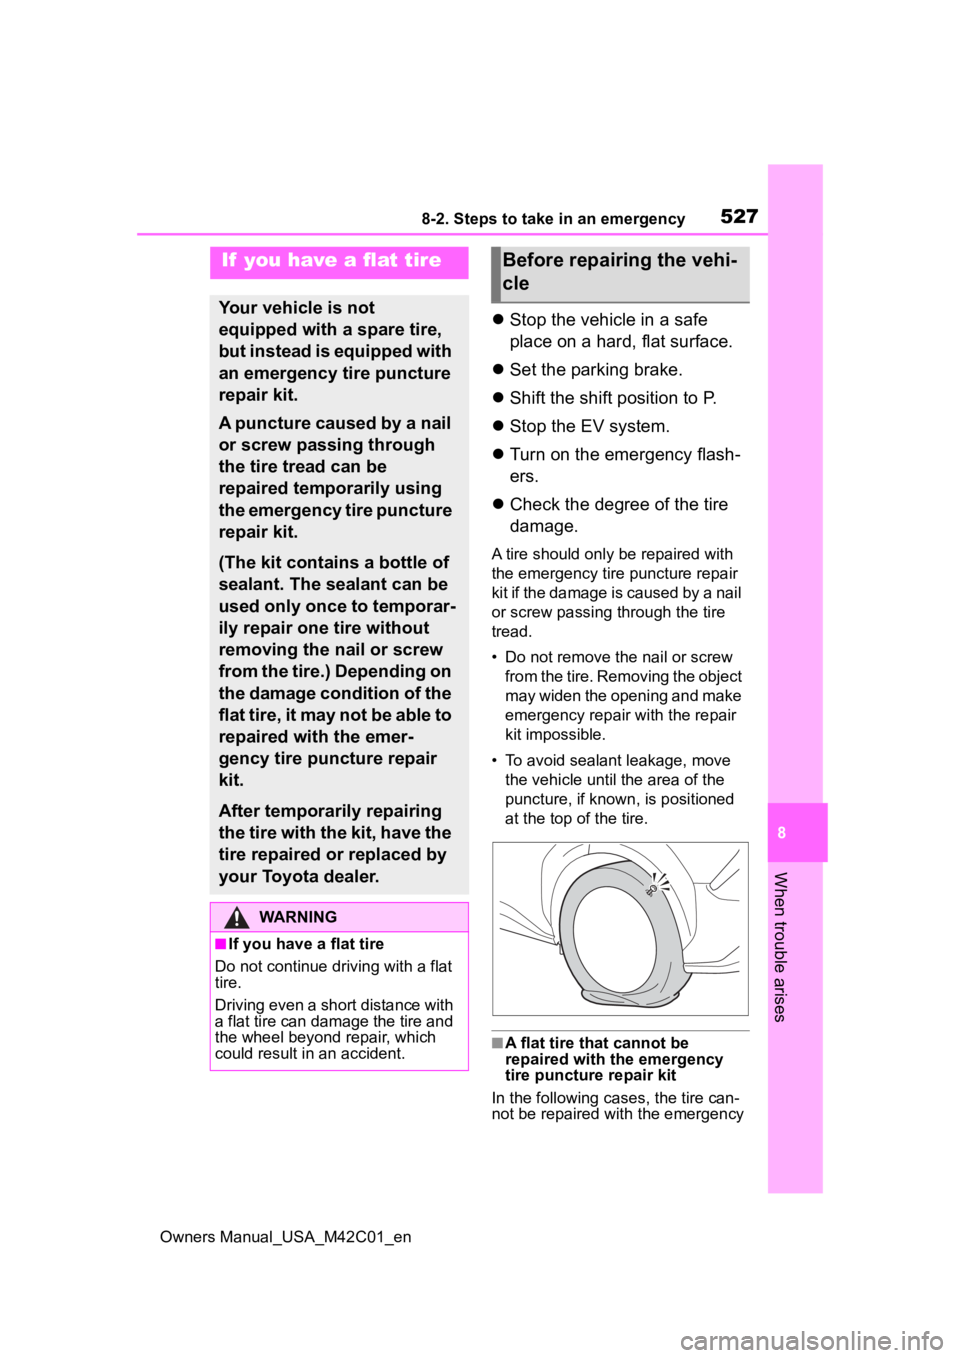
• To avoid sealant leakage, move the vehicle until the area of the
puncture, if known, is positioned
at the top of the tire.
■A flat tire that cannot be
repaired with the emergency
tire puncture repair kit
In the following cases, the tire can-
not be repaired with the emergency
If you have a flat tire
Your vehicle is not
equipped with a spare tire,
but instead is equipped with
an emergency tire puncture
repair kit.
A puncture caused by a nail
or screw passing through
the tire tread can be
repaired temporarily using
the emergency tire puncture
repair kit.
(The kit contains a bottle of
sealant. The sealant can be
used only once to temporar-
ily repair one tire without
removing the nail or screw
from the tire.) Depending on
the damage condition of the
flat tire, it may not be able to
repaired with the emer-
gency tire puncture repair
kit.
After temporarily repairing
the tire with the kit, have the
tire repaired or replaced by
your Toyota dealer.
WARNING
■If you have a flat tire
Do not continue driving with a flat
tire.
Driving even a short distance with
a flat tire can damage the tire and
the wheel beyond repair, which
could result in an accident.
Before repairing the vehi-
cle
Page 530 of 628

5308-2. Steps to take in an emergency
Owners Manual_USA_M42C01_enbe replaced before the expiry
date. Contact your Toyota dealer
for replacement.
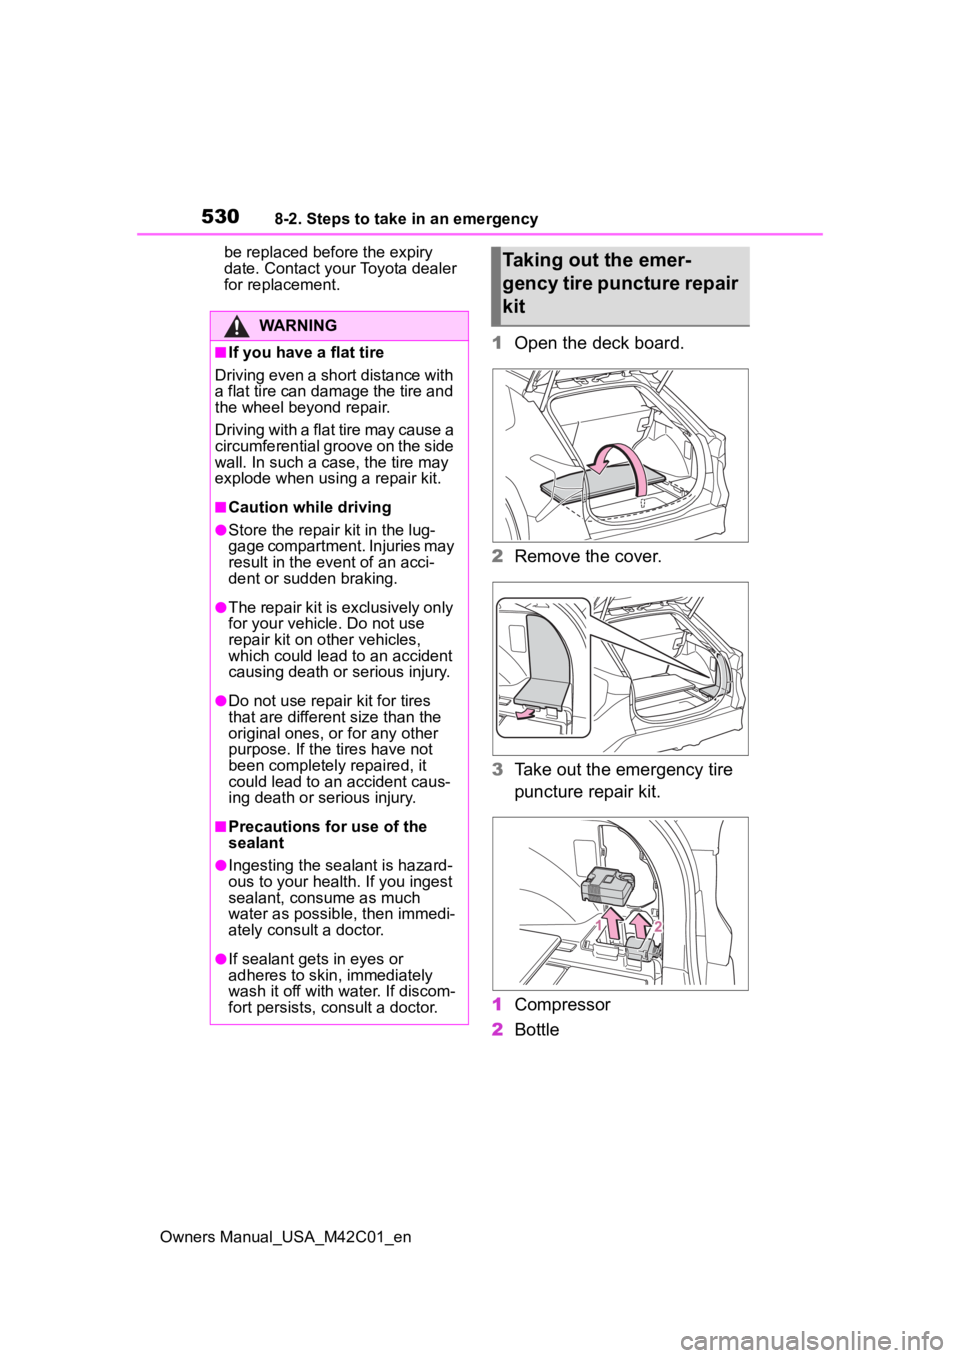
1
Open the deck board.
2 Remove the cover.
3 Take out the emergency tire
puncture repair kit.
1 Compressor
2 Bottle
WARNING
■If you have a flat tire
Driving even a short distance with
a flat tire can damage the tire and
the wheel beyond repair.
Driving with a flat tire may cause a
circumferential groove on the side
wall. In such a case, the tire may
explode when using a repair kit.
■Caution while driving
●Store the repair kit in the lug-
gage compartment. Injuries may
result in the event of an acci-
dent or sudden braking.
●The repair kit is exclusively only
for your vehicle. Do not use
repair kit on other vehicles,
which could lead to an accident
causing death or serious injury.
●Do not use repair kit for tires
that are different size than the
original ones, or for any other
purpose. If the tires have not
been completely repaired, it
could lead to an accident caus-
ing death or serious injury.
■Precautions for use of the
sealant
●Ingesting the sealant is hazard-
ous to your health. If you ingest
sealant, consume as much
water as possible, then immedi-
ately consult a doctor.
●If sealant gets in eyes or
adheres to skin, immediately
wash it off with water. If discom-
fort persists, consult a doctor.
Taking out the emer-
gency tire puncture repair
kit
Page 535 of 628

5358-2. Steps to take in an emergency
Owners Manual_USA_M42C01_en
8
When trouble arises
the vehicle ma y get dirty.
24Store the bottle in the lug-
gage compartment while it is
connected to the compres-
sor.
25 Taking precautions to avoid
sudden braking, sudden
acceleration and sharp turns,
drive carefully at under 50
mph (80 km/h) to the nearest
Toyota dealer that is less
than 62 miles (100 km) away
for tire repair or replacement.
For repair and replacement of a tire
or disposal of the tire puncture
repair kit, contact your Toyota
dealer.
When having the tire repaired or
replaced, make sure to tell the Toy-
ota dealer that the sealant is
injected.
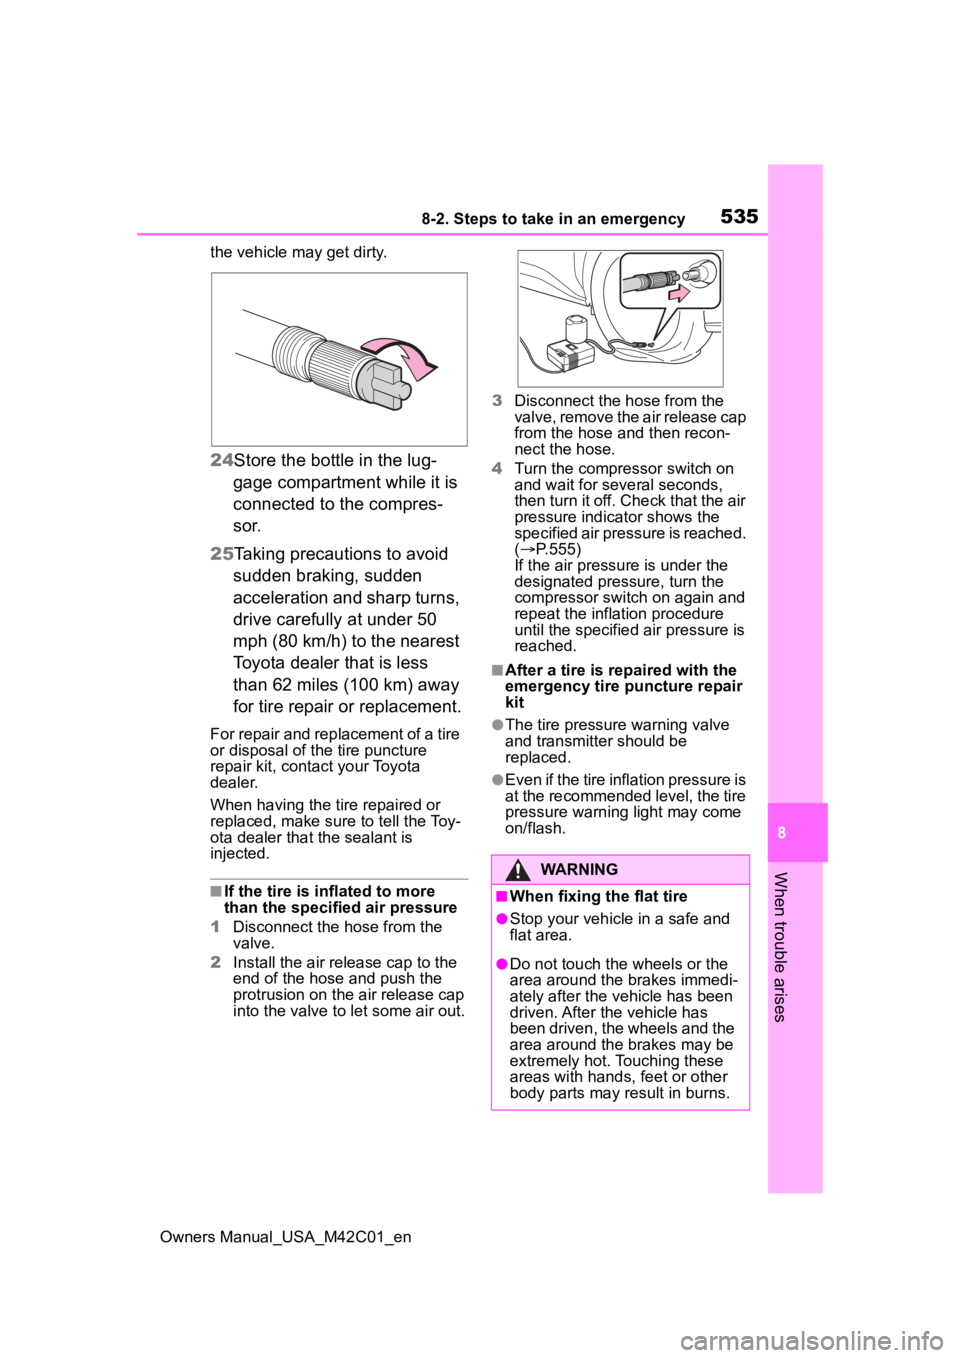
■If the tire is i nflated to more
than the specified air pressure
1 Disconnect the hose from the
valve.
2 Install the air release cap to the
end of the hose and push the
protrusion on the air release cap
into the valve to let some air out. 3
Disconnect the hose from the
valve, remove the air release cap
from the hose and then recon-
nect the hose.
4 Turn the compressor switch on
and wait for seve ral seconds,
then turn it off. Check that the air
pressure indicator shows the
specified air pressure is reached.
( P.555)
If the air pressure is under the
designated pressure, turn the
compressor switch on again and
repeat the inflation procedure
until the specified air pressure is
reached.
■After a tire is re paired with the
emergency tire puncture repair
kit
●The tire pressure warning valve
and transmitter should be
replaced.
●Even if the tire inflation pressure is
at the recommended level, the tire
pressure warning light may come
on/flash.
WARNING
■When fixing the flat tire
●Stop your vehicle in a safe and
flat area.
●Do not touch the wheels or the
area around the brakes immedi-
ately after the vehicle has been
driven. After the vehicle has
been driven, the wheels and the
area around the brakes may be
extremely hot. Touching these
areas with hands, feet or other
body parts may result in burns.
Page 536 of 628

5368-2. Steps to take in an emergency
Owners Manual_USA_M42C01_en
WARNING
●Connect the valve and hose
securely with the tire installed
on the vehicle.
If the hose is not properly con-
nected to the valve, air leakage
may occur as sealant may be
sprayed out.
●If the hose comes off the valve
while inflating the tire, there is a
risk that the hose will move
abruptly due to air pressure.
●After inflation of the tire has
completed, the sealant may
splatter when the hose is dis-
connected or some air is let out
of the tire.
●Follow the operation procedure
to repair the tire. If the proce-
dure is not followed, the sealant
may spray out.
●Keep back from the tire while it
is being repaired, as there is a
chance of it bursting while the
repair operation is being per-
formed. If you notice any cracks
or deformation of the tire, turn
off the compressor switch and
stop the repair operation imme-
diately.
●The repair kit may overheat if
operated for a long period of
time. Do not operate the com-
pressor continuously for more
than 40 minutes.
●Parts of the repair kit become
hot during operation. Be careful
handling the repair kit during
and after operation. Do not
touch the metal part connecting
the bottle and the compressor. It
will be extremely hot.
●Do not attach the vehicle speed
warning sticker to an area other
than the one indicated. If the
sticker is attached to an area
where an SRS airbag is located,
such as the pad of the steering
wheel, it may prevent the SRS
air bag from operating properly.
■Driving to spread the liquid
sealant evenly
Observe the following precautions
to reduce the risk of accidents.
Failing to do so may result in a
loss of vehicle control and cause
death or serious injury.
●Drive the vehicle carefully at a
low speed. Be especially careful
when turning and cornering.
●If the vehicle does not drive
straight or you feel a pull
through the steering wheel, stop
the vehicle and check the fol-
lowing:
• Tire condition. The tire may have separated from the wheel.
• Tire inflation pressure. If the tire inflation pressure is 19 psi (130
kPa, 1.3 kgf/cm
2 or bar) or less,
the tire may be severely dam-
aged.
NOTICE
■When performing an emer-
gency repair
●Perform the emergency repair
without removing the nail or
screw that has punctured the
tread of the tire. If the object
that has punctur ed the tire is
removed, repair by the emer-
gency tire puncture repair kit
may not be possible.
●The repair kit is not waterproof.
Make sure that the repair kit is
not exposed to water, such as
when it is being used in the rain.
Page 537 of 628

5378-2. Steps to take in an emergency
Owners Manual_USA_M42C01_en
8
When trouble arises
One of the following may be the
cause of the problem:
The charging cable may be
connected to the vehicle.
( P.102)
The electronic key may not be
functioning properly.
*
( P.539)
The traction battery may be
completely discharged.
Charge the traction battery.
( P.98)
There may be a malfunction
in the immobilizer system.
*
( P.68)
There may be a malfunction
in the shift control system.
*
( P.233, 525)
The EV system may be mal-
functioning due to an electri-
cal problem such as
electronic key battery deple-
tion or a blown fuse. However,
NOTICE
●Do not put the repair kit directly
onto dusty ground such as sand
at the side of the road. If the
repair kit vacuums up dust, etc.,
a malfunction may occur.
●Make sure the sealant bottle of
the repair kit is in a vertical posi-
tion. The repair kit does not
operate properly when it is laid.
■Precautions for the emer-
gency tire puncture repair kit
●The repair kit power source
should be 12 V DC suitable for
vehicle use. Do not connect the
repair kit to any other source.
●Place the repair kit in a storage
to prevent it from being exposed
to dirt or water.
●Store the repair kit in the lug-
gage compartment out of reach
of children.
●Do not disassemble or modify
the repair kit. Do not subject
parts such as the air pressure
indicator to impacts. This may
cause a malfunction.
■To avoid damage to the tire
pressure warning valves and
transmitters
When a tire is repaired with liquid
sealants, the tire pressure warn-
ing valve and transmitter may not
operate properly. If a liquid seal-
ant is used, contact your Toyota
dealer or other qualified service
shop as soon as possible. After
use of liquid sealant, make sure to
replace the tire pressure warning
valve and transmitter when repair-
ing or replacing the tire. ( P.476)
If the EV system will
not star t
Reasons for the EV system
not starting vary depending
on the situation. Check the
following and perform the
appropriate procedure:
The EV system will not
start even though the cor-
rect starting procedure is
being followed ( P.231)
Page 540 of 628

5408-2. Steps to take in an emergency
Owners Manual_USA_M42C01_en
1Locks all the doors
2 Unlocks the door
Turning the key rearward unlocks
the driver’s door. Turning the key
once again within 5 seconds
unlocks the other doors.
■Key linked functions
1 Closes the windo ws (turn and
hold)
*
2 Opens the windows (turn and
hold)
*
*
: These settings must be custom- ized at your Toyota dealer.
1 Depress the brake pedal.
2 Touch the electronic key to
the power switch.
When the electronic key is
detected, a buzzer sounds and the
power switch will turn to ON.
When the smart key system is
deactivated in customization set-
ting, the power switch will turn to
ACC.
3Firmly depress the brake
pedal and check that is
displayed on the multi-infor-
mation display.
4 Press the power switch
shortly and firmly.
In the event that the EV system still
WARNING
■When using the mechanical
key and operating the power
windows
Operate the power window after
checking to make sure that there
is no possibility of any passenger
having any of their body parts
caught in the window. Also, do not
allow children to operate the
mechanical key. It is possible for
children and other passengers to
get caught in the power window.
Starting the EV system
Page 544 of 628

5448-2. Steps to take in an emergency
Owners Manual_USA_M42C01_enmust be initialized. (
P.181)
■When replacing the 12-volt bat-
tery
●Use a 12-volt battery that con-
forms to European regulations.
●Use a 12-volt battery that the case
size is same as the previous one
(LN1), 20 hour rate capacity
(20HR) is equiva lent (45Ah) or
greater, and performance rating
(CCA) is equivalent (286A) or
greater.
• If the sizes differ, the 12-volt bat- tery cannot be properly secured.
• If an improper 12- volt battery is
used, battery performance may
decrease and the EV system may
not be able to restart.
• If the 20 hour rate capacity is low,
even if the time period where the
vehicle is not used is a short time,
the 12-volt battery may discharge
and EV system may not be able to
start.
For details, consult your Toyota
dealer.
WARNING
■When removing the 12-volt
battery terminals
Always remove the negative (-)
terminal first. If the positive (+) ter-
minal contacts any metal in the
surrounding area when the posi-
tive (+) terminal is removed, a
spark may occur, l eading to a fire
in addition to electrical shocks
and death or serious injury.
■Avoiding 12-volt battery fires
or explosions
Observe the following precautions
to prevent accidentally igniting the
flammable gas that may be emit-
ted from the 12-volt battery:
●Make sure each jumper cable is
connected to the correct termi-
nal and that it is not unintention-
ally in contact with any other
than the intended terminal.
●Do not allow the other end of
the jumper cable connected to
the “+” terminal to come into
contact with any other parts or
metal surfaces in the area, such
as brackets or unpainted metal.
●Do not allow the + and - clamps
of the jumper cables to come
into contact with each other.
●Do not smoke, use matches,
cigarette lighter s or allow open
flame near the 1 2-volt battery.
■12-volt battery precautions
The 12-volt battery contains poi-
sonous and corrosive acidic elec-
trolyte, while related parts contain
lead and lead compounds.
Observe the following precautions
when handling the 12-volt battery:
●When working with the 12-volt
battery, always wear safety
glasses and take care not to
allow any battery fluids (acid) to
come into contact with skin,
clothing or the vehicle body.
●Do not lean over the 12-volt bat-
tery.
●In the event that battery fluid
(acid) comes into contact with
the skin or eyes, immediately
wash the affected area with
water and seek medical atten-
tion.
Place a wet sponge or cloth
over the affected area until
medical attention can be
received.
●Always wash your hands after
handling the 12-volt battery and
other battery-related parts.
●Do not allow children near the
12-volt battery.