2023 PEUGEOT LANDTREK child lock
[x] Cancel search: child lockPage 4 of 164
2
Contents
■
Overview
■
Eco-driving
1Dashboard instrumentsInstrument panels 8
Warning and indicator lamps 9
Total distance recorder 16
Lighting dimmer 16
Trip computer 16
Monochrome screen 17
Touch screen 18
2AccessElectronic key with remote control function
and built-in key 20
Keyless Entry and Start 22
Central locking 23
Back-up procedures 24
Doors 25
Tailgate 26
Alarm 27
Electric windows 28
3Ease of use and comfortFront seats 30
2-seat front bench seat 31
Steering wheel adjustment 32
Mirrors 33
Rear bench seat 34
Heating and Ventilation 36
Heating 37
Manual air conditioning 37
Dual-zone automatic air conditioning 38
Front demisting/defrosting 40
Rear screen demisting/defrosting 40
Front fittings 40
Courtesy lamps 42
Rear fittings 43
Tipper body fittings 44
4Lighting and visibilityExterior lighting control stalk 47
Cornering lighting 48
Direction indicators 49
Headlamp beam height adjustment 49
Automatic illumination of headlamps 49
Guide-me-home and welcome lighting 50
Wiper control stalk 50
Changing a wiper blade 51
Automatic wipers 52
5SafetyGeneral safety recommendations 53
Hazard warning lamps 53
Horn 54
Electronic stability control (ESC) 54
Hill Assist Descent Control 56
Seat belts 57
Airbags 59
Child seats 62
Deactivating the front passenger airbag 63
ISOFIX child seats 64
Child lock 65
6DrivingDriving recommendations 66
Starting / Switching off the engine with the key 68
Starting/Switching off the engine
with Keyless Entry and Start
70
Manual parking brake 72
Locking the rear differential 72
4-wheel drive transmission selector 73
6-speed manual gearbox 74
6-speed automatic gearbox 75
Driving mode 77
Hill start assist 77
Gear shift indicator 78
Tyre under-inflation detection 78
Driving and manoeuvring aids -
General recommendations
80
Speed limiter 81
Overspeed alert at 75 mph (120
km/h) 82
Cruise control - Specific recommendations 82
Cruise control 82
Lane departure warning 84
Parking sensors 86
Reversing camera 87
"Off-Road" camera 88
360° camera 89
7Practical informationRecommended fuel 94
Refuelling 94
Towing device 95
Snow chains 95
Roof bars 96
Bonnet 96
Engine compartment 97
Checking levels 98 CarM an uals 2 .c o m
Page 14 of 164
12
Dashboard instruments
Rear differential lockingFlashing.
The system is activated but the differential
locking is not yet active.
Fixed.
The rear differential is locked.
To unlock the rear differential, press the button
again.
4x4 transmission self-diagnosticsFixed.
The wheels do not receive any drive
power.
The vehicle must be switched off.
Wait for the warning lamp to go out before
restarting the vehicle.
If the warning lamp remains on, carry out (2).
Dynamic stability control (DSC)/Anti-slip
regulation (ASR)
Fixed.
The system is deactivated.
The DSC/ASR system is activated automatically
when the vehicle is started.
Flashing.
DSC/ASR system regulation is activated
in the event of a loss of grip or trajectory.
Fixed.
The DSC/ASR system has a fault.
Carry out (3).
Hill start assistFixed, accompanied by the
message "Anti roll-back system
fault".
The system has a fault.
Carry out (3).
75 mph (120 km/h) overspeed alertFixed, accompanied by an audible signal.
The vehicle’s speed has exceeded 75
mph (120 km/h) (depending on country of sale).
Slow down the vehicle.
Front passenger airbag (ON)Fixed.
The front passenger airbag is activated.
The control is set to the “ON” position.
In this case, do NOT install a "rearward
facing" child seat on the front passenger seat
- risk of serious injury!
Front passenger airbag (OFF)Fixed.
The front passenger airbag is deactivated.
The control is set to the “OFF ” position.
A "rearward facing" child seat can be installed,
unless there is a fault with the airbags (Airbags
warning lamp on).
Under-inflationFixed, accompanied by an audible signal
and a message.
The pressure in one or more tyres is too low.
Check the pressure of the tyres as soon as
possible. The detection system automatically reinitialises
itself
after adjusting the pressure.
Under-inflation warning lamp
flashing then fixed and Service
warning lamp fixed.
The tyre pressure monitoring system is faulty.
Under-inflation detection is no longer monitored.
Check the tyre pressures as soon as possible
and carry out (3).
Rear foglampsFixed.
The lamps are on.
Green warning/indicator lamps
Hill Assist Descent Control
Fixed.
The system has been activated, but the
conditions for regulation are not met (gradient,
speed too high, gear engaged).
Flashing.
The function is regulating the speed of
the vehicle.
The vehicle is being braked; the brake lamps
come on during the descent.
Cruise controlFixed.
Cruise control is selected.
Manual selection. CarM an uals 2 .c o m
Page 26 of 164
24
Access
Back-up procedures
Lost keys, remote control,
electronic key
Go to a PEUGEOT dealer with the vehicle's
registration certificate, your personal
identification documents and if possible, the label
bearing the key code.
The PEUGEOT dealer will be able to retrieve the
key code and the transponder code, enabling a
new key to be ordered.
Complete unlocking/locking
of the vehicle with the key
Use this procedure in the following situations:
– Remote control battery discharged.
–
Remote control malfunction.
–
V
ehicle battery discharged.
–
V
ehicle in an area subject to strong
electromagnetic interference.
In the first case, change the remote control
battery.
In the second case, reinitialise
the remote
control.
Refer to the corresponding sections.
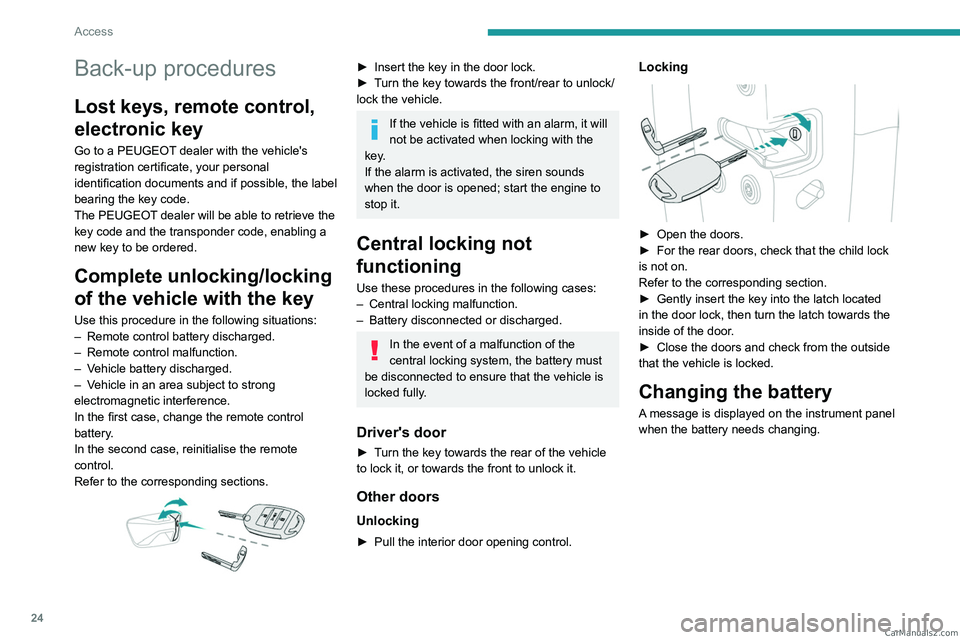
► Insert the key in the door lock.
► T urn the key towards the front/rear to unlock/
lock the vehicle.
If the vehicle is fitted with an alarm, it will
not be activated when locking with the
key.
If the alarm is activated, the siren sounds
when the door is opened; start the engine to
stop it.
Central locking not
functioning
Use these procedures in the following cases:
– Central locking malfunction.
–
Battery disconnected or discharged.
In the event of a malfunction of the
central locking system, the battery must
be disconnected to ensure that the vehicle is
locked fully.
Driver's door
► Turn the key towards the rear of the vehicle
to lock it, or towards the front to unlock it.
Other doors
Unlocking
► Pull the interior door opening control.
Locking
► Open the doors.
► For the rear doors, check that the child lock
is not on.
Refer to the corresponding section.
►
Gently insert the key into the latch located
in the door lock, then turn the latch towards the
inside of the door
.
►
Close the doors and check from the outside
that the vehicle is locked.
Changing the battery
A message is displayed on the instrument panel
when the battery needs changing. CarM an uals 2 .c o m
Page 27 of 164
25
Access
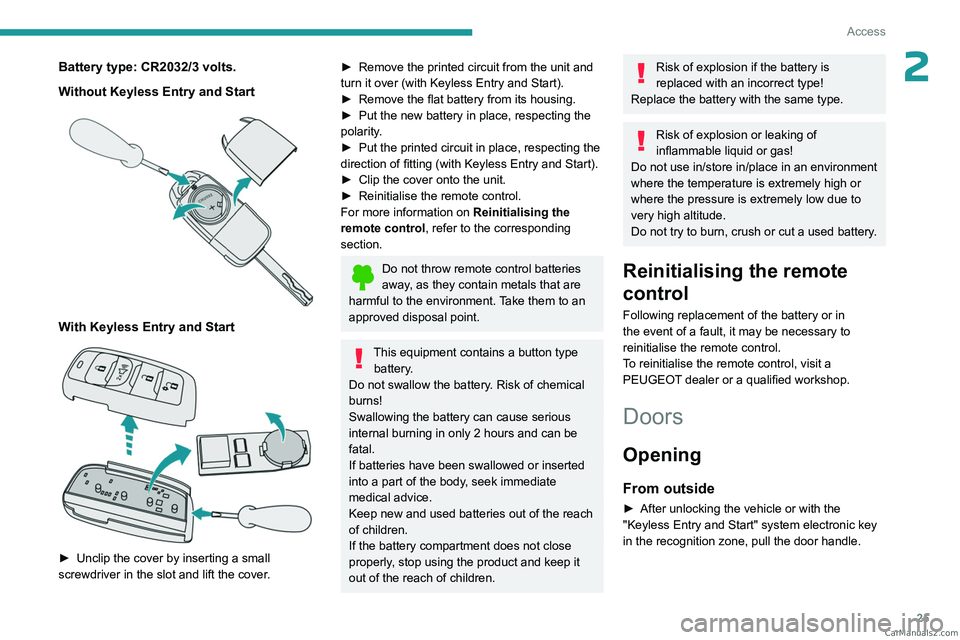
2Battery type: CR2032/3 volts.
Without Keyless Entry and Start
With Keyless Entry and Start
► Unclip the cover by inserting a small
screwdriver in the slot and lift the cover .
► Remove the printed circuit from the unit and
turn it over (with Keyless Entry and Start).
►
Remove the flat battery from its housing.
►
Put the new battery in place, respecting the
polarity
.
►
Put the printed circuit in place, respecting the
direction of fitting (with Keyless Entry and Start).
►
Clip the cover onto the unit.
►
Reinitialise the remote control.
For more information on Reinitialising the
remote control
, refer to the corresponding
section.
Do not throw remote control batteries
away, as they contain metals that are
harmful to the environment. Take them to an
approved disposal point.
This equipment contains a button type battery.
Do not swallow the battery. Risk of chemical
burns!
Swallowing the battery can cause serious
internal burning in only 2 hours and can be
fatal.
If batteries have been swallowed or inserted
into a part of the body, seek immediate
medical advice.
Keep new and used batteries out of the reach
of children.
If the battery compartment does not close
properly, stop using the product and keep it
out of the reach of children.
Risk of explosion if the battery is
replaced with an incorrect type!
Replace the battery with the same type.
Risk of explosion or leaking of
inflammable liquid or gas!
Do not use in/store in/place in an environment
where the temperature is extremely high or
where the pressure is extremely low due to
very high altitude.
Do not try to burn, crush or cut a used battery.
Reinitialising the remote
control
Following replacement of the battery or in
the event of a fault, it may be necessary to
reinitialise the remote control.
To reinitialise the remote control, visit a
PEUGEOT dealer or a qualified workshop.
Doors
Opening
From outside
► After unlocking the vehicle or with the
"Keyless Entry and Start" system electronic key
in the recognition zone, pull the door handle. CarM an uals 2 .c o m
Page 30 of 164
28
Access
remote control or unlock the vehicle using the
"Keyless Entry and Start" system.
Deactivating the alarm
► Press the remote control unlocking
button for about 4 seconds. An audible
signal is triggered and the direction indicators
flash 4 times to indicate that the alarm is
deactivated (the indicator lamp on the instrument
panel is deactivated).
►
Reactivate the alarm by pressing the
unlocking button.
Electric windows
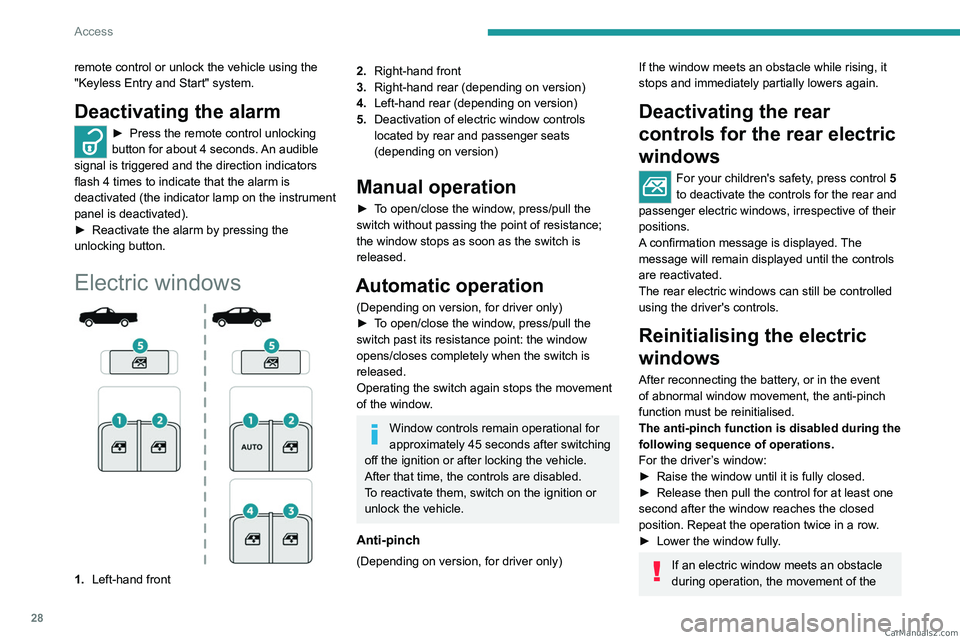
1. Left-hand front
2.Right-hand front
3. Right-hand rear (depending on version)
4. Left-hand rear (depending on version)
5. Deactivation of electric window controls
located by rear and passenger seats
(depending on version)
Manual operation
► To open/close the window, press/pull the
switch without passing the point of resistance;
the window stops as soon as the switch is
released.
Automatic operation
(Depending on version, for driver only)
►
T o open/close the window, press/pull the
switch past its resistance point: the window
opens/closes completely when the switch is
released.
Operating the switch again stops the movement
of the window.
Window controls remain operational for
approximately 45 seconds after switching
off the ignition or after locking the vehicle.
After that time, the controls are disabled.
To reactivate them, switch on the ignition or
unlock the vehicle.
Anti-pinch
(Depending on version, for driver only)
If the window meets an obstacle while rising, it
stops and immediately partially lowers again.
Deactivating the rear
controls for the rear electric
windows
For your children's safety, press control 5
to deactivate the controls for the rear and
passenger electric windows, irrespective of their
positions.
A confirmation message is displayed. The
message will remain displayed until the controls
are reactivated.
The rear electric windows can still be controlled
using the driver's controls.
Reinitialising the electric
windows
After reconnecting the battery, or in the event
of abnormal window movement, the anti-pinch
function must be reinitialised.
The anti-pinch function is disabled during the
following sequence of operations.
For the driver’s window:
►
Raise the window until it is fully closed.
►
Release then pull the control for at least one
second after the window reaches the closed
position. Repeat the operation twice in a row
.
►
Lower the window fully
.
If an electric window meets an obstacle
during operation, the movement of the CarM an uals 2 .c o m
Page 64 of 164
62
Safety
Child seats
The regulations on carrying children are specific to each country. Refer to the
legislation in force in your country.
For maximum safety, please observe the
following recommendations:
–
All children under the age of 12 or less
than 1.5 metres tall must travel in approved
child seats suited to their weight , on seats
fitted with a seat belt or ISOFIX mountings.
–
Statistically
, the safest seats in your
vehicle for carrying children are the rear
seats.
–
Children weighing less than 9 kg must
travel in the "rearward facing" position,
whether in the front or rear of the vehicle.
It is recommended that children travel
on the rear seats of the vehicle:
–
"rearward facing" up to the age of 3.
–
"forward facing" over the age of 3.
Make sure that the seat belt is correctly
positioned and tightened.
For child seats with a support leg, ensure that
the support leg is in firm and steady contact
with the floor.
Recommended child seats and
installation possibilities
For the recommended child seats and
installation possibilities in the vehicle, refer to
the seat manufacturer's instructions or contact
a PEUGEOT dealer.
An incorrectly installed child seat in a vehicle compromises the child's safety in
the event of an accident.
Ensure that there is no seat belt or seat belt
buckle under the child seat, as this could
destabilise it.
Remember to fasten the seat belts or the
child seat harness keeping the slack relative
to the child's body to a minimum, even for
short journeys.
When installing a child seat using the seat
belt, ensure that the seat belt is tightened
correctly on the child seat and that it secures
the child seat firmly on the vehicle seat. If
the passenger seat is adjustable, move it
forwards if necessary.
Remove the head restraint before
installing a child seat with a backrest on a
passenger seat.
Ensure that the head restraint is stored or
attached securely to prevent it from being
thrown around the vehicle in the event of
sharp braking. Refit the head restraint once
the child seat has been removed.
Installing a booster seat
The chest part of the seat belt must be
positioned on the child's shoulder without
touching the neck.
Ensure that the lap part of the seat belt
passes correctly over the child's thighs.
Use a booster seat with a backrest, equipped
with a belt guide at shoulder level.
Additional protections
To prevent accidental opening of the
doors and rear windows, use the "Child lock".
Take care not to open the rear windows by
more than one third.
To protect young children from the sun's rays,
fit side blinds on the rear windows.
As a safety measure, do not leave:
–
A
child alone and unsupervised inside a
vehicle.
–
A
child or an animal in a vehicle which is
exposed to the sun, with the windows closed.
–
The keys within reach of children inside the
vehicle.
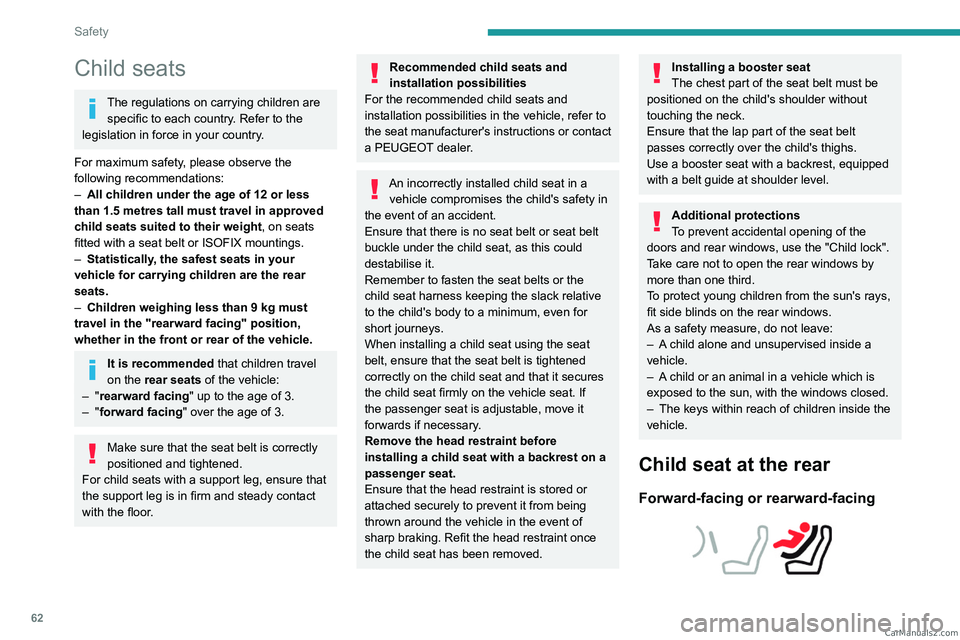
Child seat at the rear
Forward-facing or rearward-facing
CarM an uals 2 .c o m
Page 67 of 164
65
Safety
5An incorrectly installed child seat in a vehicle compromises the child's safety in
the event of an accident.
Strictly observe the fitting instructions
provided in the user guide supplied with the
child seat.
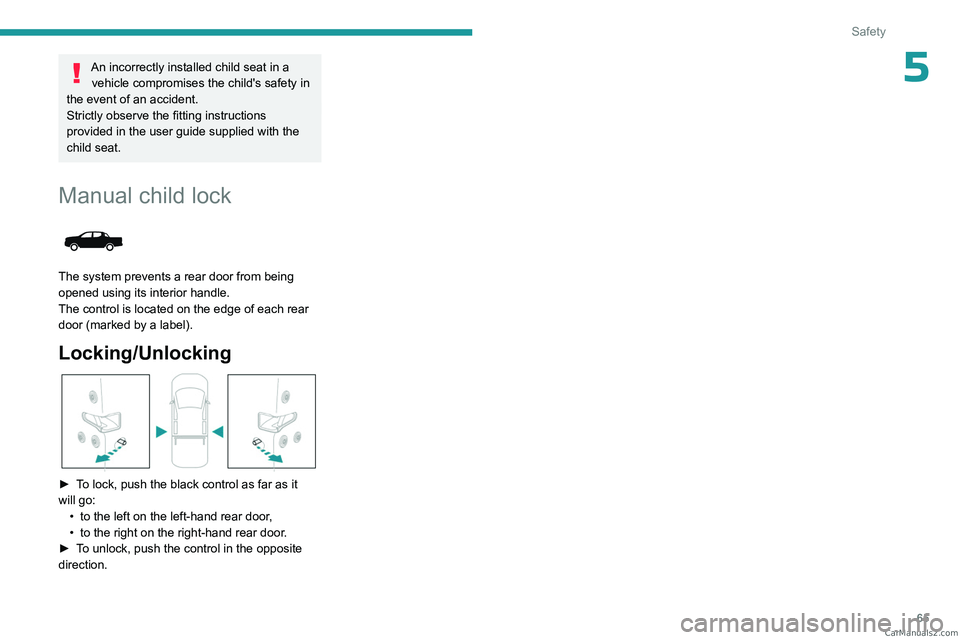
Manual child lock
The system prevents a rear door from being
opened using its interior handle.
The control is located on the edge of each rear
door (marked by a label).
Locking/Unlocking
► To lock, push the black control as far as it
will go: •
to the left on the left-hand rear door
,
•
to the right on the right-hand rear door
.
►
T
o unlock, push the control in the opposite
direction. CarM an uals 2 .c o m
Page 78 of 164
76
Driving
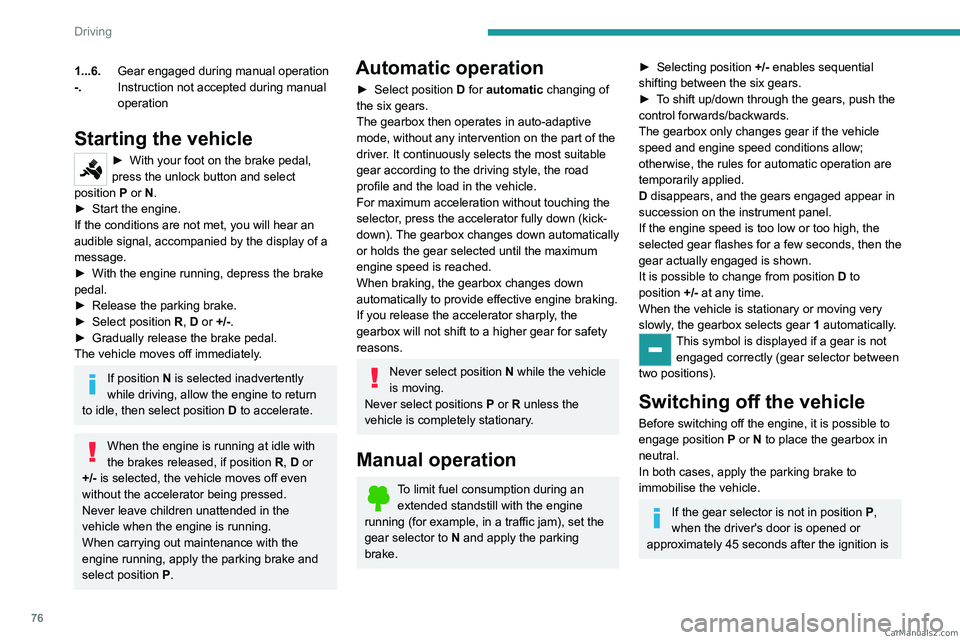
1...6.Gear engaged during manual operation
-. Instruction not accepted during manual
operation
Starting the vehicle
► With your foot on the brake pedal,
press the unlock button and select
position P
or N.
►
Start the engine.
If the conditions are not met, you will hear an
audible signal, accompanied by the display of a
message.
►
With the engine running, depress the brake
pedal.
►
Release the parking brake.
►
Select position R
, D or +/-.
►
Gradually release the brake pedal.
The vehicle moves off immediately
.
If position N is selected inadvertently
while driving, allow the engine to return
to idle, then select position D to accelerate.
When the engine is running at idle with
the brakes released, if position R, D or
+/- is selected, the vehicle moves off even
without the accelerator being pressed.
Never leave children unattended in the
vehicle when the engine is running.
When carrying out maintenance with the
engine running, apply the parking brake and
select position P.
Automatic operation
► Select position D for automatic changing of
the six gears.
The gearbox then operates in auto-adaptive
mode, without any intervention on the part of the
driver. It continuously selects the most suitable
gear according to the driving style, the road
profile and the load in the vehicle.
For maximum acceleration without touching the
selector, press the accelerator fully down (kick-
down). The gearbox changes down automatically
or holds the gear selected until the maximum
engine speed is reached.
When braking, the gearbox changes down
automatically to provide effective engine braking.
If you release the accelerator sharply, the
gearbox will not shift to a higher gear for safety
reasons.
Never select position N while the vehicle
is moving.
Never select positions P or R unless the
vehicle is completely stationary.
Manual operation
To limit fuel consumption during an extended standstill with the engine
running (for example, in a traffic jam), set the
gear selector to N and apply the parking
brake.
► Selecting position +/- enables sequential
shifting between the six gears.
►
T
o shift up/down through the gears, push the
control forwards/backwards.
The gearbox only changes gear if the vehicle
speed and engine speed conditions allow;
otherwise, the rules for automatic operation are
temporarily applied.
D disappears, and the gears engaged appear in
succession on the instrument panel.
If the engine speed is too low or too high, the
selected gear flashes for a few seconds, then the
gear actually engaged is shown.
It is possible to change from position D to
position +/-
at any time.
When the vehicle is stationary or moving very
slowly, the gearbox selects gear 1 automatically.
This symbol is displayed if a gear is not
engaged correctly (gear selector between
two positions).
Switching off the vehicle
Before switching off the engine, it is possible to
engage position P or N to place the gearbox in
neutral.
In both cases, apply the parking brake to
immobilise the vehicle.
If the gear selector is not in position P,
when the driver's door is opened or
approximately 45 seconds after the ignition is CarM an uals 2 .c o m