2023 PEUGEOT 308 warning
[x] Cancel search: warningPage 173 of 260
171
Practical information
7Reduction) with a Diesel Particle Filter (DPF) for
the treatment of exhaust gases.
SCR system
Using a liquid called AdBlue® that contains
urea, a catalytic converter turns up to 85% of
the nitrogen oxides (NOx) into nitrogen and
water, which are harmless to health and the
environment.
The AdBlue® is contained in a special
tank holding about 15 litres.
Its capacity allows a driving range of
approximately 3,900
miles (6,500 km),
which
may vary considerably depending on your
driving style.
An alert system is triggered once the reserve
level is reached: it is then possible to drive for a
further 1,500 miles (2,400
km) before the tank is
empty and the vehicle is immobilised.
For more information on the Warning
and indicator lamps and the associated
alerts, or the Indicators, please refer to the
corresponding sections.
Once the AdBlue® tank is empty, a device
required by law prevents the engine from
being restarted.
If the SCR system is faulty, the level of
emissions from the vehicle will no longer meet
the Euro 6 standard and the vehicle starts
polluting the environment.
In the event of a confirmed SCR system
malfunction, it is essential to visit a
PEUGEOT dealer or a qualified workshop.
After 685 miles (1,100 km), a device is
automatically activated to prevent the engine
from starting.
In both cases, a range indicator indicates
the distance that can be travelled before the
vehicle is stopped.
Freezing of the AdBlue®
AdBlue® freezes at temperatures below
around -11°C.
The SCR system includes a heater for the
AdBlue
® tank, allowing you to continue driving
in very cold conditions.
Supply of AdBlue®
It is recommended that the AdBlue® be topped
up as soon as the first alert is issued indicating
that the reserve level has been reached.
For the correct operation of the SCR
system:
–
Use
only AdBlue
® fluid that meets the ISO
22241 standard.
–
Never
transfer AdBlue
® to another container
as it would lose its purity.
–
Never
dilute AdBlue
® with water.
You can obtain AdBlue
® from a PEUGEOT
dealer or a qualified workshop, as well as service
stations equipped with AdBlue® pumps specially
designed for passenger vehicles.
Recommendations on storage
AdBlue® freezes at about -11°C and deteriorates
above +25°C. Containers should be stored in a
cool area and protected from direct sunlight.
Under these conditions, the fluid can be kept for
at least a year.
If the fluid has frozen, it can be used once it has
completely thawed out at room temperature.
Never store AdBlue® containers in your
vehicle.
Precautions for use
AdBlue® is a urea-based solution. This fluid is
non-flammable, colourless and odourless (when
kept in a cool place).
In the event of contact with the skin, wash the
affected area with soap and running water. In the
event of contact with the eyes, immediately rinse
the eyes with large amounts of water or with an
eye wash solution for at least 15 minutes. Seek
medical attention if you feel a persistent burning
sensation or irritation.
If swallowed, immediately wash out the mouth
with clean water and then drink plenty of water.
In certain conditions (high temperature, for
example), the risk of release of ammonia cannot
be excluded: do not inhale the fluid. Ammonia
vapours have an irritant effect on mucous
membranes (eyes, nose and throat). CarM an uals 2 .c o m
Page 178 of 260
176
In the event of a breakdown
Warning triangle
This reflective and dismantlable device is to be
installed on the side of the road when a vehicle
is broken down or damaged.
Before getting out of the vehicle
Turn on the hazard warning lamps, then
put on the safety vest to assemble and install
the triangle.
Storage
Hatchback
A compartment is provided in the storage box,
located under the boot carpet.
SW
A compartment is provided in the interior trim of
the tailgate.
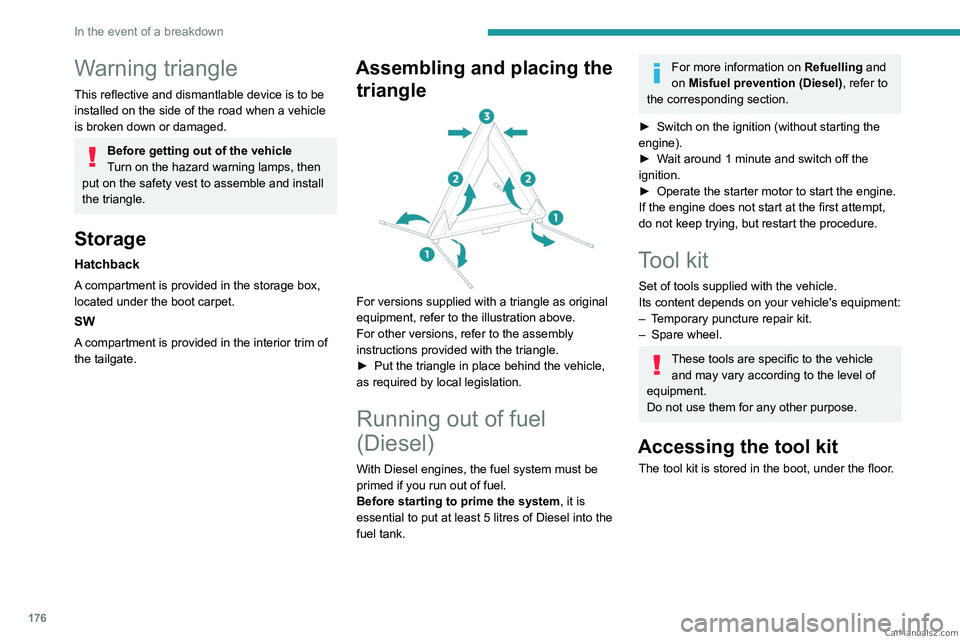
Assembling and placing the triangle
For versions supplied with a triangle as original
equipment, refer to the illustration above.
For other versions, refer to the assembly
instructions provided with the triangle.
►
Put the triangle in place behind the vehicle,
as required by local legislation.
Running out of fuel
(Diesel)
With Diesel engines, the fuel system must be
primed if you run out of fuel.
Before starting to prime the system, it is
essential to put at least 5 litres of Diesel into the
fuel tank.
For more information on Refuelling and
on Misfuel prevention (Diesel), refer to
the corresponding section.
►
Switch on the ignition (without starting the
engine).
►
W
ait around 1 minute and switch off the
ignition.
►
Operate the starter motor to start the engine.
If the engine does not start at the first attempt,
do not keep trying, but restart the procedure.
Tool kit
Set of tools supplied with the vehicle.
Its content depends on your vehicle's equipment:
–
T
emporary puncture repair kit.
–
Spare wheel.
These tools are specific to the vehicle and may vary according to the level of
equipment.
Do not use them for any other purpose.
Accessing the tool kit
The tool kit is stored in the boot, under the floor. CarM an uals 2 .c o m
Page 181 of 260
179
In the event of a breakdown
8Only the 12 V socket located at the front
of the vehicle can be used to power the
compressor.
For more information on the Tool kit,
refer to the corresponding section.
Tyre inflation pressures are indicated on this label.
For more information on Identification
markings, particularly this label, refer to the
corresponding section.
Should the pressure of one or more tyres
be adjusted, it is necessary to reinitialise
the under-inflation detection system.
For more information on Tyre under-inflation
detection, refer to the corresponding section.
Repair procedure
Do not remove any foreign body
(e.g. nail, screw) which has penetrated
the tyre.
►
Park the vehicle without obstructing traffic
and apply the parking brake.
►
Follow the safety instructions (hazard
warning lamps, warning triangle, high visibility jacket, etc.) according to the legislation in force
in the country in which you are driving.
►
Switch the ignition off.
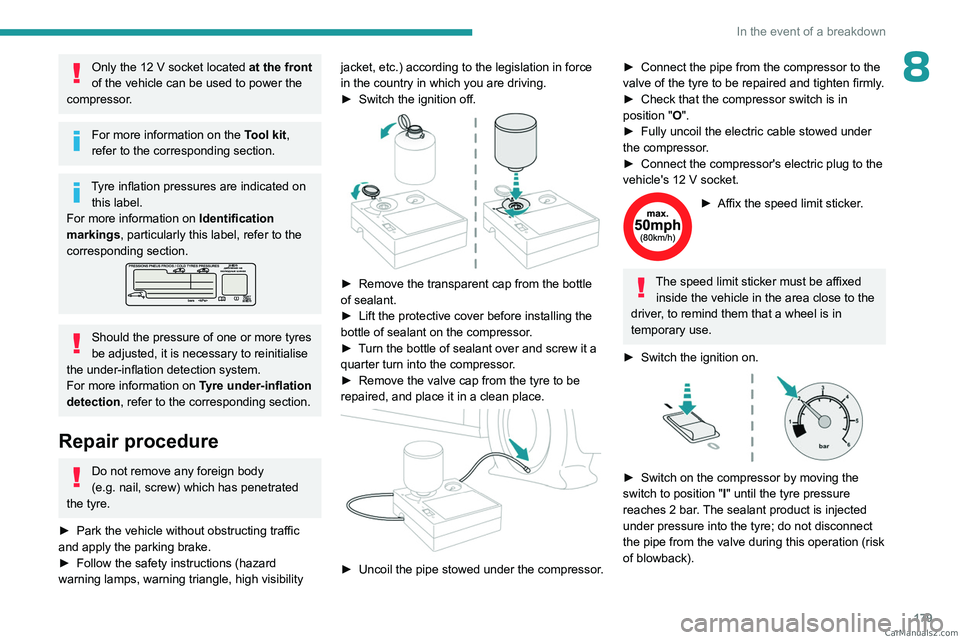
► Remove the transparent cap from the bottle
of sealant.
►
Lift the protective cover before installing the
bottle of sealant on the compressor
.
►
T
urn the bottle of sealant over and screw it a
quarter turn into the compressor.
►
Remove the valve cap from the tyre to be
repaired, and place it in a clean place.
► Uncoil the pipe stowed under the compressor.
► Connect the pipe from the compressor to the
valve of the tyre to be repaired and tighten firmly .
►
Check that the compressor switch is in
position
"O".
►
Fully uncoil the electric cable stowed under
the compressor
.
►
Connect the compressor's electric plug to the
vehicle's 12
V socket.
► Affix the speed limit sticker .
The speed limit sticker must be affixed
inside the vehicle in the area close to the
driver, to remind them that a wheel is in
temporary use.
►
Switch the ignition on.
► Switch on the compressor by moving the
switch to position "I" until the tyre pressure
reaches 2
bar. The sealant product is injected
under pressure into the tyre; do not disconnect
the pipe from the valve during this operation (risk
of blowback). CarM an uals 2 .c o m
Page 195 of 260
193
In the event of a breakdown
8Accessing the tools
For more information on accessing the Tool kit,
refer to the corresponding section.
Towing your vehicle
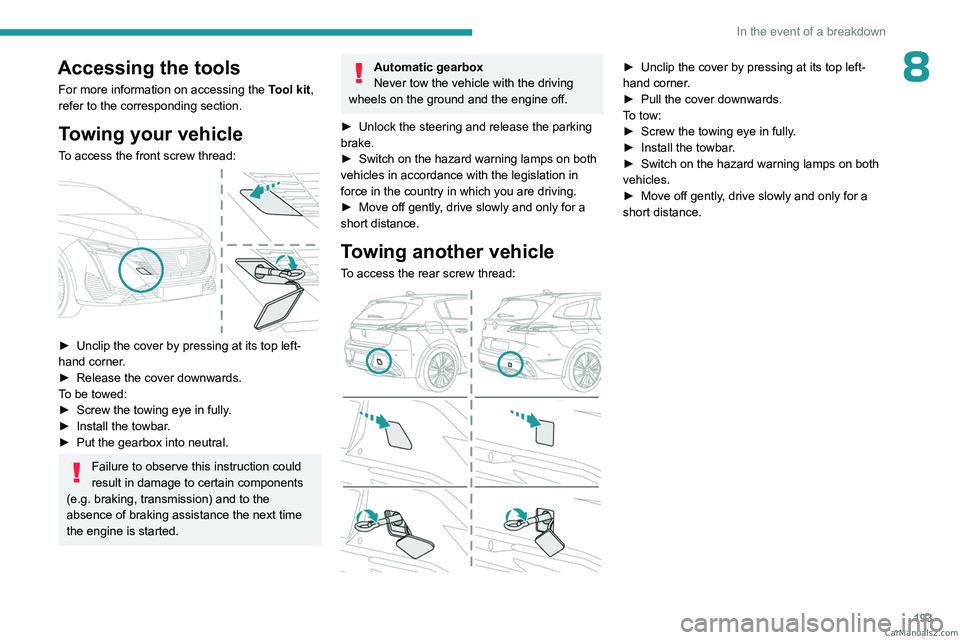
To access the front screw thread:
► Unclip the cover by pressing at its top left-
hand corner .
►
Release the cover downwards.
T
o be towed:
►
Screw the towing eye in fully
.
►
Install the towbar
.
►
Put the gearbox into neutral.
Failure to observe this instruction could
result in damage to certain components
(e.g. braking, transmission) and to the
absence of braking assistance the next time
the engine is started.
Automatic gearbox
Never tow the vehicle with the driving
wheels on the ground and the engine off.
►
Unlock the steering and release the parking
brake.
►
Switch on the hazard warning lamps on both
vehicles in accordance with the legislation in
force in the country in which you are driving.
►
Move off gently
, drive slowly and only for a
short distance.
Towing another vehicle
To access the rear screw thread:
► Unclip the cover by pressing at its top left-
hand corner .
►
Pull the cover downwards.
T
o tow:
►
Screw the towing eye in fully
.
►
Install the towbar
.
►
Switch on the hazard warning lamps on both
vehicles.
►
Move off gently
, drive slowly and only for a
short distance. CarM an uals 2 .c o m
Page 203 of 260

201
PEUGEOT i-Connect Advanced - PEUGEOT i-Connect
10PEUGEOT i-Connect
Advanced - PEUGEOT
i-Connect
GPS navigation -
Applications - Multimedia
audio system - Bluetooth
®
telephone
The functions and settings described
vary according to the version and
configuration of the vehicle, and according to
the country of sale.
For safety reasons and because they
require continued attention on the part of
the driver, the following operations must be
carried out with the vehicle stationary and
the ignition on:
–
Pairing the smartphone with the system via
Bluetooth®.
–
Using the smartphone.
–
Connecting to Mirror Screen
(Apple®CarPlay® or Android Auto).
–
Changing the system settings and
configuration.
The message Energy economy mode is displayed when the system is about to go
into standby.
For more information on Energy economy
mode, refer to the "Practical information"
section.
Warning
Navigation is a driving aid. It cannot
replace the driver. All guidance instructions
should be carefully checked by the user.
By using the navigation, you accept the
following terms and conditions:
https://www.tomtom.com/en_gb/legal/
eula-automotive/?388448
First steps
The system starts when the ignition is switched on.
Short press, ignition off: system on/off.
Short press, ignition on: mute/restore sound.
Long press, ignition on: start standby mode
(mute sound, screens and clock display off).
Rotation: volume adjustment.
Information
This system gives access to the following
elements:
–
Audio equipment and telephone controls with
display of associated information. –
Connected services and display of associated
information.
–
Navigation system controls and display
of associated information (depending on
equipment).
–
V
oice recognition (depending on equipment).
–
T
ime and outside temperature.
–
Heating/air conditioning system controls and
reminders of settings.
–
Settings for driving aid functions, comfort
and safety functions, extended head-up display
(depending on equipment and version), audio
equipment and digital instrument panel.
–
Settings for functions specific to rechargeable
hybrid vehicles.
–
Display of visual manoeuvring aid functions.
–
Interactive handbook.
–
V
ideo tutorials (e.g. screen management,
driving aids, voice recognition).
Upper banner
Certain information is displayed permanently in
the upper banner of the touch screen:
–
Outside temperature from the vehicle's
sensors (associated with a blue symbol if there is
a risk of ice).
–
T
emperature setting reminder for the air
conditioning on the driver's and passenger sides.
–
Charge level of the connected smartphone.
–
System connection status (Bluetooth®, Wi-Fi,
mobile telephone network).
–
Time. CarM an uals 2 .c o m
Page 217 of 260
215
PEUGEOT i-Connect Advanced - PEUGEOT i-Connect
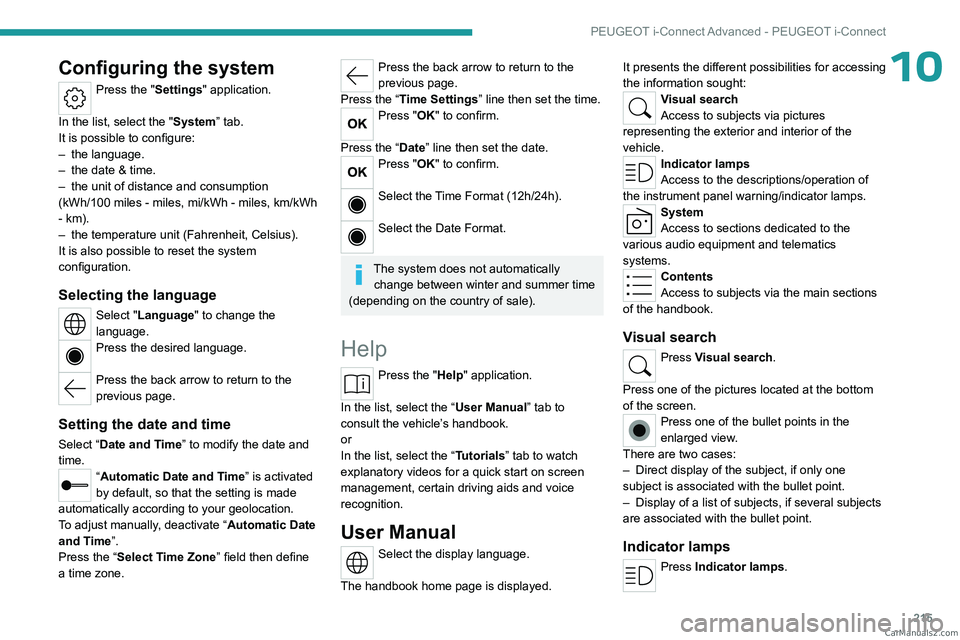
10Configuring the system
Press the "Settings" application.
In the list, select the "System” tab.
It is possible to configure:
–
the language.
–
the date & time.
–
the unit of distance and consumption
(kWh/100 miles - miles, mi/kWh - miles, km/kWh
- km).
–
the temperature unit (Fahrenheit, Celsius).
It is also possible to reset the system
configuration.
Selecting the language
Select "Language" to change the
language.
Press the desired language.
Press the back arrow to return to the
previous page.
Setting the date and time
Select “Date and Time” to modify the date and
time.
“Automatic Date and Time” is activated
by default, so that the setting is made
automatically according to your geolocation.
To adjust manually, deactivate “Automatic Date
and Time”.
Press the “Select Time Zone” field then define
a time zone.
Press the back arrow to return to the
previous page.
Press the “Time Settings” line then set the time.
Press "OK" to confirm.
Press the “Date” line then set the date.
Press "OK" to confirm.
Select the Time Format (12h/24h).
Select the Date Format.
The system does not automatically change between winter and summer time
(depending on the country of sale).
Help
Press the "Help" application.
In the list, select the “User Manual” tab to
consult the vehicle’s handbook.
or
In the list, select the “Tutorials” tab to watch
explanatory videos for a quick start on screen
management, certain driving aids and voice
recognition.
User Manual
Select the display language.
The handbook home page is displayed. It presents the different possibilities for accessing
the information sought:
Visual search
Access to subjects via pictures
representing the exterior and interior of the
vehicle.
Indicator lamps
Access to the descriptions/operation of
the instrument panel warning/indicator lamps.
System
Access to sections dedicated to the
various audio equipment and telematics
systems.
Contents
Access to subjects via the main sections
of the handbook.
Visual search
Press Visual search.
Press one of the pictures located at the bottom
of the screen.
Press one of the bullet points in the
enlarged view.
There are two cases:
–
Direct display of the subject, if only one
subject is associated with the bullet point.
–
Display of a list of subjects, if several subjects
are associated with the bullet point.
Indicator lamps
Press Indicator lamps. CarM an uals 2 .c o m
Page 218 of 260
216
PEUGEOT i-Connect Advanced - PEUGEOT i-Connect
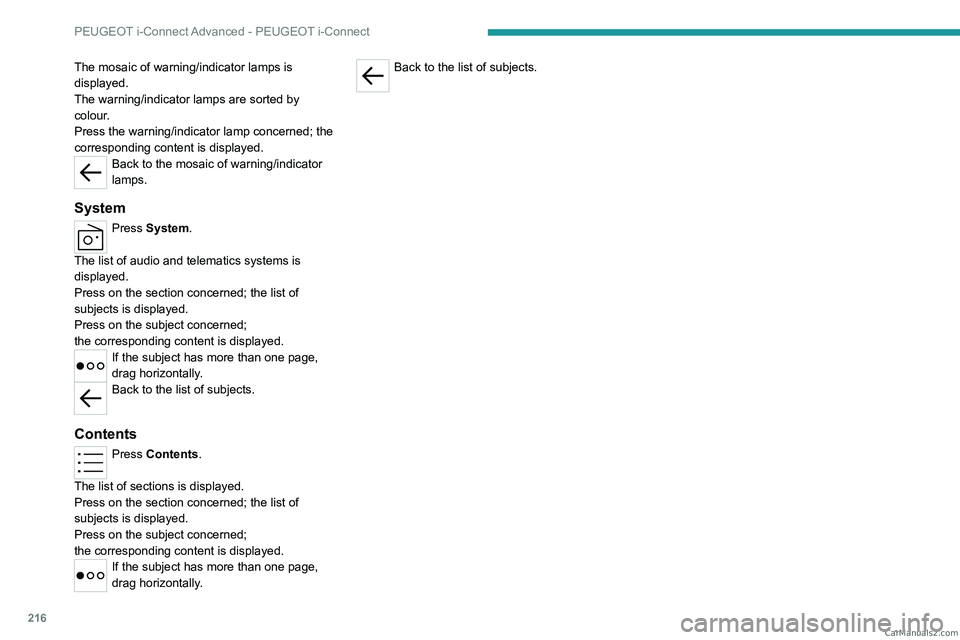
The mosaic of warning/indicator lamps is
displayed.
The warning/indicator lamps are sorted by
colour.
Press the warning/indicator lamp concerned; the
corresponding content is displayed.
Back to the mosaic of warning/indicator
lamps.
System
Press System.
The list of audio and telematics systems is
displayed.
Press on the section concerned; the list of
subjects is displayed.
Press on the subject concerned;
the
corresponding content is displayed.
If the subject has more than one page,
drag horizontally.
Back to the list of subjects.
Contents
Press Contents.
The list of sections is displayed.
Press on the section concerned;
the list of
subjects is displayed.
Press on the subject concerned;
the
corresponding content is displayed.
If the subject has more than one page,
drag horizontally.
Back to the list of subjects. CarM an uals 2 .c o m
Page 223 of 260
221
Alphabetical index
Checking tyre pressures
(using the kit)
178, 180
Checks
167, 168–170
Checks, routine
168–170
Child lock
93
Children
83, 89–90
Children (safety)
93
Child seats
83, 86–88
Child seats, conventional
88, 91–92
Child seats, i-Size
90–92
Child seats, ISOFIX
89–92
Cleaning (advice)
149, 173–175
Closing the boot
29, 33
Closing the doors
29, 33
Collision Risk Alert
130–132
Configuration, vehicle
10, 23
Connection, Bluetooth
209–210
Connectivity
214
Consumptions
23
Container, AdBlue®
171
Control, emergency boot release
33
Control, emergency door
31
Control, heated seats
45–46
Controls, steering mounted
101–102
Control stalk, lighting
65–66
Control stalk, wipers
71–73
Control unit
151–153, 157
Courtesy lamps
60–61
Cruise control
113–114, 116–117
Cruise control, adaptive
113–114, 118–119
Cruise control by
speed limit recognition
113–114Cup holder 56
D
Date (setting) 215
Daytime running lamps
66
Deactivating the passenger airbag
84, 88–89
Deadlocking
27, 29
Deferred charging
24, 158
Deferred charging
(Rechargeable hybrid)
23–24, 150, 155
Defrosting
47, 55
Defrosting, front
55
Defrosting, rear screen
55
Demisting
47, 55
Demisting, front
55
Demisting, rear
55
Diagnosis, vehicle
20
Dials and gauges
10
Digital instrument panel
10
Dimensions
199
Dipstick
18, 167
Direction indicators (turn signals)
66, 185
Display screen, instrument panel
10
Domestic charging
153
Domestic charging (Rechargeable hybrid)
157
Door pockets
56
Doors
33
Drive Assist Plus
11 8
Driver’s attention warning
134–135
Driving
42–43, 94–95, 110
Driving abroad 70
Driving aids camera (warnings)
109
Driving aid shortcuts
11 0
Driving aids (recommendations)
108
Driving economically
8
Driving modes
103
Driving positions (storing)
45
Dynamic stability control (DSC)
80
E
EBFD 79
Eco-driving (advice)
8
ECO mode
103
Electric automatic gearbox
(Rechargeable hybrid)
100
Electronic brake force distribution (EBFD)
79
Emergency braking assistance (EBA)
80
Emergency call
77–78
Emergency switching off
97
Emergency warning lamps
76, 176
Emissions control system, SCR
19, 170
Energy economy (mode)
165
Energy economy mode
165
Energy flows
23
Energy recovery
20, 102
Engine
170
Engine compartment
165–166
Engine, Diesel
147, 167, 176, 197
Engine, petrol
104, 166, 195
Engines
194–195, 197 CarM an uals 2 .c o m