2023 PEUGEOT 308 change time
[x] Cancel search: change timePage 109 of 260

107
Driving
6– Deselecting the Sport mode (depending on
equipment).
–
With a manual gearbox: vehicle speed
exceeds 2.5 mph (4
km/h).
–
With an automatic gearbox, in mode N
, vehicle
speed exceeds 0.6 mph (1
km/h).
In these cases, this indicator lamp flashes
for a few seconds, then goes off.
Malfunctions
In the event of a fault with the system, this
warning lamp flashes for a few moments
on the instrument panel, then remains on,
accompanied by the display of a message.
Have it checked by a PEUGEOT dealer or a
qualified workshop.
The vehicle stalls in STOP mode
All of the instrument panel warning lamps come
on if there is a fault.
►
Switch off the ignition then start the engine
again with the key or the " ST
ART/STOP" button.
12 V battery
The Stop & Start system requires a
12 V battery of specific technology and
specification.
All work must be carried out only by a
PEUGEOT
dealer or a qualified workshop
Tyre under-inflation detection
This system alerts the driver if one or more tyres
suffer a drop in pressure.
The alert is raised when the vehicle is moving,
not when stationary.
It compares the information given by the wheel
speed sensors with reference values, which
must be reinitialised every time the tyre
pressures are adjusted or a wheel changed.
It takes into account the last values stored
during the reinitialisation request. It is therefore
essential that the tyre pressure is correct during
the operation. This operation is the driver’s
responsibility.
The tyre under-inflation detection cannot, in any circumstances, replace the need
for vigilance on the part of the driver.
This system does not avoid the need to
regularly check the tyre pressures (including
the spare wheel), especially before a long
journey.
Driving with under-inflated tyres, particularly
in adverse conditions (heavy load, high
speed, long journey):
–
worsens road-holding.
–
lengthens braking distances.
–
causes premature wear of the tyres.
–
increases energy consumption.
The inflation pressures defined for the vehicle can be found on the tyre pressure
label.
For more information on the Identification
markings, refer to the corresponding section.
Checking tyre pressures
This check should be done monthly
when the tyres are "cold" (vehicle stopped for
1 hour or after a journey of less than 6 miles
(10
km) at moderate speeds).
Otherwise, add 0.3 bar to the pressures
shown on the label.
Snow chains
The system does not have to be
reinitialised after fitting or removing snow
chains.
Under-inflation alert
This is signalled by the fixed illumination of this warning lamp, accompanied by an
audible signal and, depending on equipment, the
display of a message.
►
Reduce speed immediately
, avoid excessive
steering movements and avoid sudden braking.
►
Stop the vehicle as soon as it is safe to do
so. CarM an uals 2 .c o m
Page 117 of 260
11 5
Driving
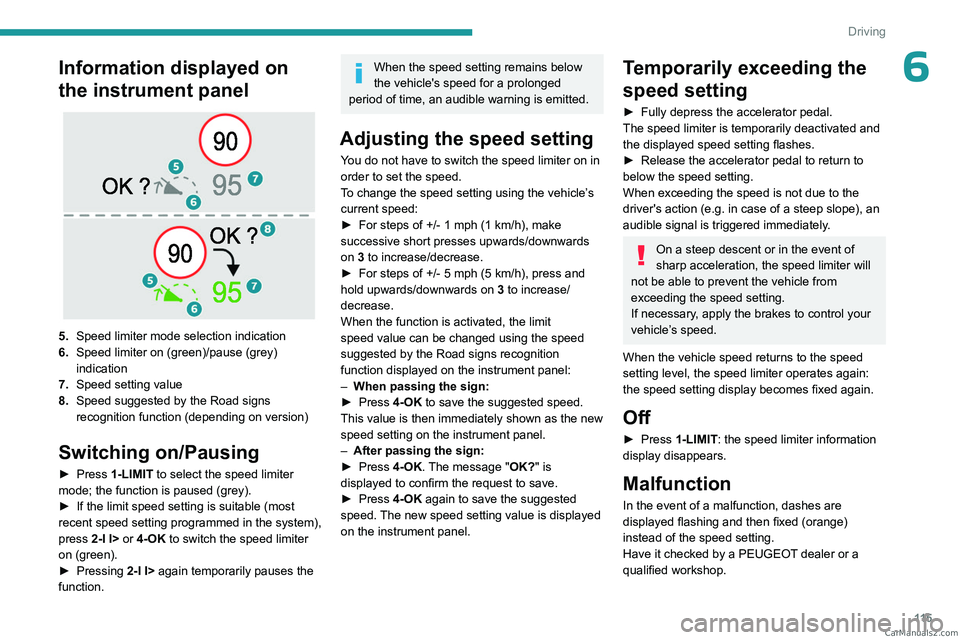
6Information displayed on
the instrument panel
5.Speed limiter mode selection indication
6. Speed limiter on (green)/pause (grey)
indication
7. Speed setting value
8. Speed suggested by the Road signs
recognition function (depending on version)
Switching on/Pausing
► Press 1-LIMIT to select the speed limiter
mode; the function is paused (grey).
►
If the limit speed setting is suitable (most
recent speed setting programmed in the system),
press
2-I I> or 4-OK to switch the speed limiter
on (green).
►
Pressing
2-I I> again temporarily pauses the
function.
When the speed setting remains below
the vehicle's speed for a prolonged
period of time, an audible warning is emitted.
Adjusting the speed setting
You do not have to switch the speed limiter on in
order to set the speed.
To change the speed setting using the vehicle’s
current speed:
►
For steps of +/- 1 mph (1 km/h), make
successive short presses upwards/downwards
on
3 to increase/decrease.
►
For steps of +/- 5 mph (5
km/h), press and
hold upwards/downwards on 3 to increase/
decrease.
When the function is activated, the limit
speed value can be changed using the speed
suggested by the Road signs recognition
function displayed on the instrument panel:
–
When passing the sign:
►
Press
4-OK to save the suggested speed.
This value is then immediately shown as the new
speed setting on the instrument panel.
–
After passing the sign:
►
Press
4-OK. The message "OK?" is
displayed to confirm the request to save.
►
Press
4-OK again to save the suggested
speed. The new speed setting value is displayed
on the instrument panel.
Temporarily exceeding the
speed setting
► Fully depress the accelerator pedal.
The speed limiter is temporarily deactivated and
the displayed speed setting flashes.
►
Release the accelerator pedal to return to
below the speed setting.
When exceeding the speed is not due to the
driver's action (e.g.
in case of a steep slope), an
audible signal is triggered immediately.
On a steep descent or in the event of
sharp acceleration, the speed limiter will
not be able to prevent the vehicle from
exceeding the speed setting.
If necessary, apply the brakes to control your
vehicle’s speed.
When the vehicle speed returns to the speed
setting level, the speed limiter operates again:
the speed setting display becomes fixed again.
Off
► Press 1-LIMIT: the speed limiter information
display disappears.
Malfunction
In the event of a malfunction, dashes are
displayed flashing and then fixed (orange)
instead of the speed setting.
Have it checked by a PEUGEOT dealer or a
qualified workshop. CarM an uals 2 .c o m
Page 126 of 260
124
Driving
– Direction indicators off upon activation of the
system.
Cruise control
The driver must hold the steering wheel properly.
When cruise control is activated, the symbols are
displayed in green: with small steering inputs,
the system steers the vehicle and keeps it in the
position chosen by the driver in the traffic lane.
This position is not necessarily the centre of the
lane.
You can feel the steering wheel moving.
At any time, the driver can change the position of
the vehicle by intervening on the steering wheel
and maintaining the position until the system has
taken it into account. If the chosen position is too
off-centre, an automatic re-centering manoeuvre
can occur. The system adjusts to the newly
defined position.
Pausing/Suspending the
system
The driver must act promptly if they believe that the traffic conditions or the
state of the road surface require their
intervention, by moving the steering wheel to
temporarily suspend system operation. Any
action on the brake pedal that causes the
Adaptive cruise control
system to be paused
will also cause the system to be paused.
If the system detects that the driver is not
holding the wheel firmly enough, it
triggers a series of gradual alerts and then
deactivates itself if there is no response from
the driver.
If the function is suspended due to the
prolonged release of the force holding
the steering wheel, the system must be
reactivated by pressing the ASSIST button
again.
Automatic suspension
Suspension of the system is accompanied by a
specific audible signal.
–
T
riggering of the ESC system.
–
Insufficient lane detection. In this case, the
Lane keeping assist function can take over
,
and the system will reactivate itself once the
operating conditions are met again.
Paused by the driver
– Travelling outside the lane limits.
– T oo tight a grip on the steering wheel or
dynamic action on the steering wheel.
–
Action on the brake pedal (resulting in a pause
until cruise control is reactivated) or accelerator
pedal (suspension for as long as the pedal is
depressed).
–
Pausing of the
Adaptive cruise control system.
–
Deactivation of the
ASR system.
Driving situations and related alerts
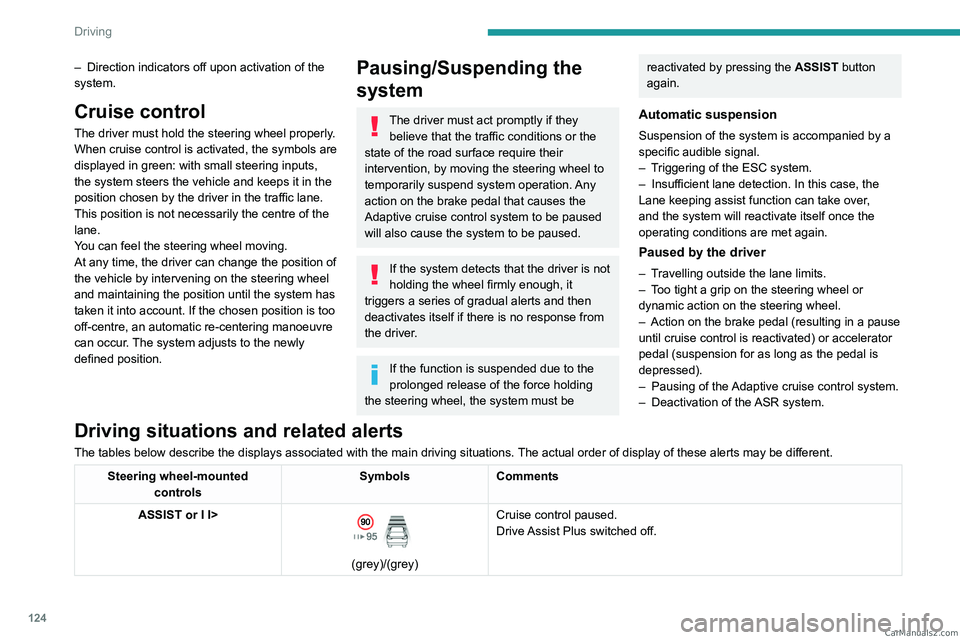
The tables below describe the displays associated with the main driving situations. The actual order of display of these alerts may be different.
Steering wheel-mounted
controls Symbols
Comments
ASSIST or I I>
(grey)/(grey) Cruise control paused.
Drive Assist Plus switched off. CarM an uals 2 .c o m
Page 129 of 260
127
Driving
6road surface require their intervention, by moving the steering wheel to temporarily
suspend system operation.
Any intervention on the brake pedal or the
accelerator pedal that causes the adaptive
cruise control to be paused or suspended will
also cause the system to deactivate.
Selecting the system
Two options:
– Either when the vehicle is already driving on
an eligible road, the driver selects the system by
activating the Drive
Assist 2.0 system.
–
Or when the driver is already using Drive
Assist Plus, the vehicle suggests selecting the
system upon arriving at an eligible road by
pressing the OK
button.
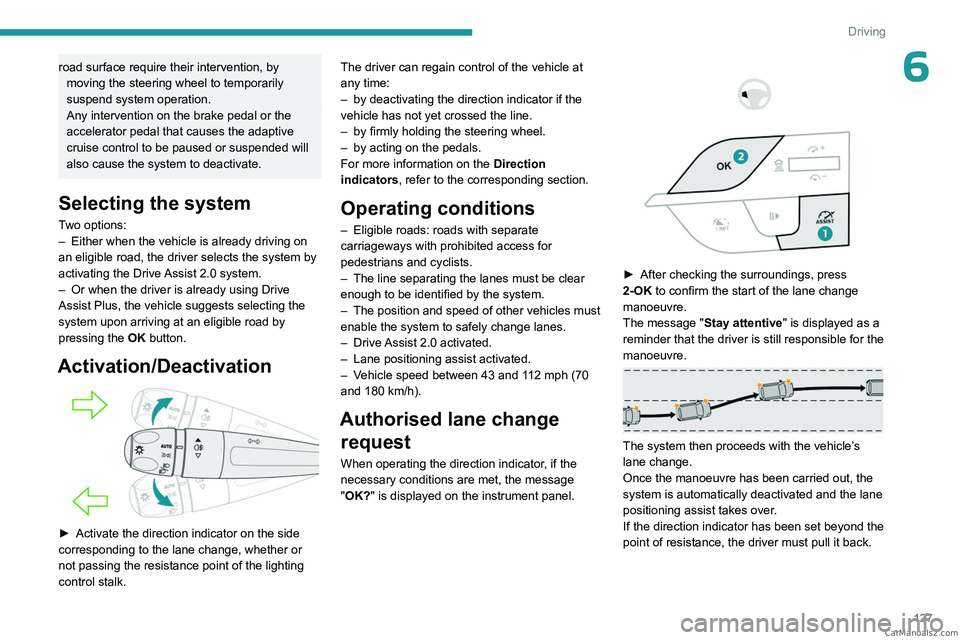
Activation/Deactivation
► Activate the direction indicator on the side
corresponding to the lane change, whether or
not passing the resistance point of the lighting
control stalk. The driver can regain control of the vehicle at
any time:
–
by deactivating the direction indicator if the
vehicle has not yet crossed the line.
–
by firmly holding the steering wheel.
–
by acting on the pedals.
For more information on the Direction
indicators
, refer to the corresponding section.
Operating conditions
– Eligible roads: roads with separate
carriageways with prohibited access for
pedestrians and cyclists.
–
The line separating the lanes must be clear
enough to be identified by the system.
–
The position and speed of other vehicles must
enable the system to safely change lanes.
–
Drive
Assist 2.0 activated.
–
Lane positioning assist activated.
–
V
ehicle speed between 43 and 112 mph (70
and 180 km/h).
Authorised lane change request
When operating the direction indicator, if the
necessary conditions are met, the message
"OK?" is displayed on the instrument panel.
► After checking the surroundings, press
2-OK to confirm the start of the lane change
manoeuvre.
The message
"Stay attentive" is displayed as a
reminder that the driver is still responsible for the
manoeuvre.
The system then proceeds with the vehicle’s
lane change.
Once the manoeuvre has been carried out, the
system is automatically deactivated and the lane
positioning assist takes over.
If the direction indicator has been set beyond the
point of resistance, the driver must pull it back. CarM an uals 2 .c o m
Page 134 of 260
132
Driving
displayed (because a driver action is not
requested).
It can be dangerous to drive if the brake
lamps are not in perfect working order.
The driver must not overload the vehicle (keep within the GVW and GTW limits
and load height limits for roof bars).
Collision Risk Alert
This function warns the driver if there is a risk
of collision with the preceding vehicle, or with a
pedestrian or cyclist.
Modifying the alert trigger threshold
The trigger threshold determines the sensitivity
with which the function warns of the risk of
collision.
► In the ADAS touch screen application,
select Functions>Automatic Braking
System .
►
Select one of the 3 preset
thresholds:
"Far", "Medium" or "Near".
The selected threshold is memorised when the
ignition is switched off.
Operation
Depending on the collision risk detected by the
system and the alert trigger threshold chosen
by the driver, different levels of alert may be
triggered and displayed on the instrument panel.
The system takes into account the vehicle
dynamics, the difference speed of the own
vehicle and the object identified for the
collision risk, and the operation of the vehicle
(e.g.
actions on the pedals, steering wheel) to
trigger the alert at the most relevant moment.
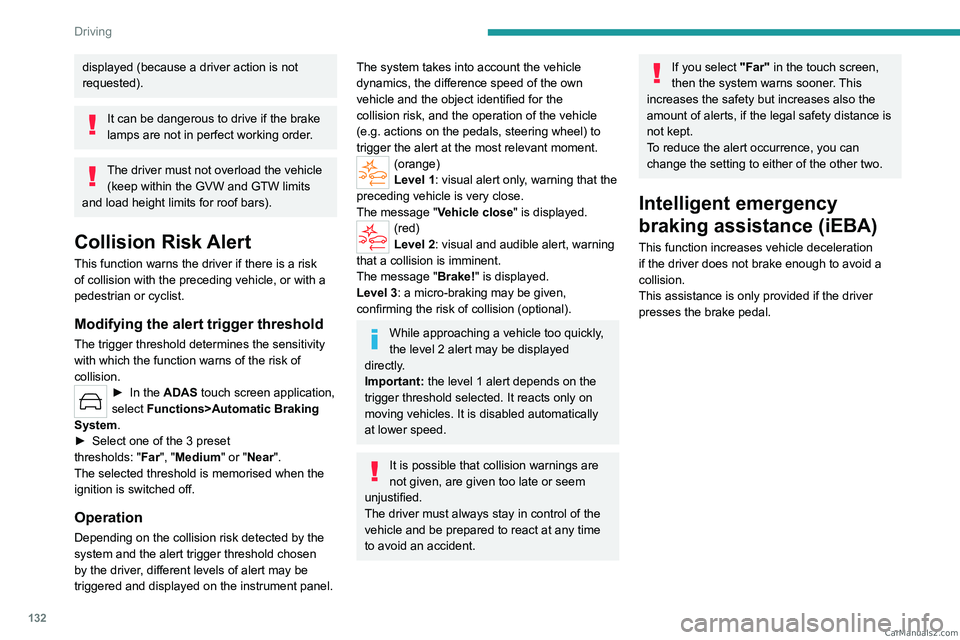
(orange)
Level 1: visual alert only, warning that the
preceding vehicle is very close.
The message "Vehicle close" is displayed.
(red)
Level 2: visual and audible alert, warning
that a collision is imminent.
The message "Brake! " is displayed.
Level 3: a micro-braking may be given,
confirming the risk of collision (optional).
While approaching a vehicle too quickly,
the level 2 alert may be displayed
directly.
Important: the level 1 alert depends on the
trigger threshold selected. It reacts only on
moving vehicles. It is disabled automatically
at lower speed.
It is possible that collision warnings are
not given, are given too late or seem
unjustified.
The driver must always stay in control of the
vehicle and be prepared to react at any time
to avoid an accident.
If you select "Far" in the touch screen,
then the system warns sooner. This
increases the safety but increases also the
amount of alerts, if the legal safety distance is
not kept.
To reduce the alert occurrence, you can
change the setting to either of the other two.
Intelligent emergency
braking assistance (iEBA)
This function increases vehicle deceleration
if the driver does not brake enough to avoid a
collision.
This assistance is only provided if the driver
presses the brake pedal. CarM an uals 2 .c o m
Page 137 of 260
135
Driving
6– The ignition has been switched off for a few
minutes.
–
The driver's seat belt is unfastened and their
door is opened.
As soon as the speed of the vehicle drops below 43 mph (70 km/h), the
system goes into standby.
Driving time starts being counted again once
the speed reaches above 43
mph (70 km/h).
Driver Attention Warning by
Camera
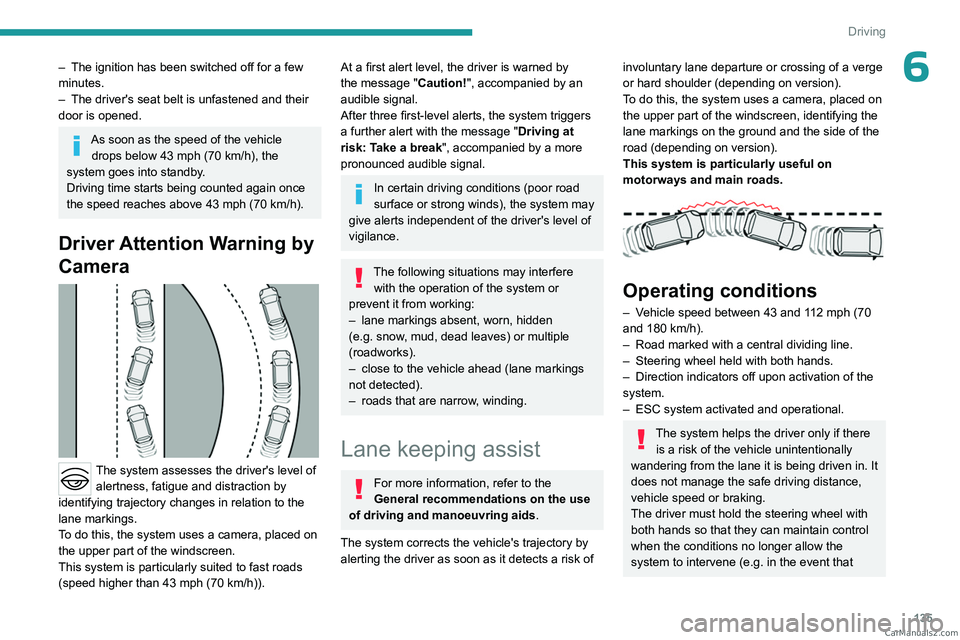
The system assesses the driver's level of alertness, fatigue and distraction by
identifying trajectory changes in relation to the
lane markings.
To do this, the system uses a camera, placed on
the upper part of the windscreen.
This system is particularly suited to fast roads
(speed higher than 43 mph (70
km/h)).
At a first alert level, the driver is warned by
the message "Caution!", accompanied by an
audible signal.
After three first-level alerts, the system triggers
a further alert with the message " Driving at
risk: Take a break", accompanied by a more
pronounced audible signal.
In certain driving conditions (poor road
surface or strong winds), the system may
give alerts independent of the driver's level of
vigilance.
The following situations may interfere with the operation of the system or
prevent it from working:
–
lane markings absent, worn, hidden
(e.g.
snow, mud, dead leaves) or multiple
(roadworks).
–
close to the vehicle ahead (lane markings
not detected).
–
roads that are narrow
, winding.
Lane keeping assist
For more information, refer to the
General recommendations on the use
of driving and manoeuvring aids .
The system corrects the vehicle's trajectory by
alerting the driver as soon as it detects a risk of
involuntary lane departure or crossing of a verge
or hard shoulder (depending on version).
To do this, the system uses a camera, placed on
the upper part of the windscreen, identifying the
lane markings on the ground and the side of the
road (depending on version).
This system is particularly useful on
motorways and main roads.
Operating conditions
– Vehicle speed between 43 and 112 mph (70
and 180 km/h).
–
Road marked with a central dividing line.
–
Steering wheel held with both hands.
–
Direction indicators off upon activation of the
system.
–
ESC system activated and operational.
The system helps the driver only if there is a risk of the vehicle unintentionally
wandering from the lane it is being driven in. It
does not manage the safe driving distance,
vehicle speed or braking.
The driver must hold the steering wheel with
both hands so that they can maintain control
when
the conditions no longer allow the
system to intervene (e.g.
in the event that CarM an uals 2 .c o m
Page 141 of 260

139
Driving
6The system may be temporarily disturbed by certain weather conditions (e.g. heavy
rain, hail or extreme temperature changes).
In particular, driving on a wet road or going
from a dry to a wet area can cause false
alerts (e.g.
presence of a cloud of water
droplets in the blind spot interpreted as a
vehicle).
In bad or wintry weather, ensure that
the
radars are not covered by mud, ice or
snow.
Take care not to cover the warning zone in
the door mirrors, or the detection zones on
the rear bumper, with adhesive labels or
other objects; they may hamper the correct
operation of the system.
Parking sensors
For more information, refer to the
General recommendations on the use
of driving and manoeuvring aids .
This system detects and signals the proximity of
obstacles (e.g.
pedestrian, vehicle, tree, barrier)
using sensors located in the bumper.
Rear parking sensors
► Engage reverse gear to start the system
(confirmed by an audible signal).
The system is switched off when reverse gear is
disengaged.
Audible assistance
The system signals the presence of obstacles
which are both within the sensors’ detection zone
and in the vehicle path defined by the direction of
the steering wheel.
Depending on version, in the example shown,
only the obstacles present in the shaded area
will be signalled by the audible assistance.
The proximity information is given by an
intermittent audible signal, the frequency of
which increases as the vehicle approaches the
obstacle.
When the distance between the vehicle and
the obstacle becomes less than about thirty
centimetres, the audible signal becomes
continuous.
The sound emitted by the speaker (right or
left) indicates the side on which the obstacle is
located.
Adjusting the audible signalPressing this button opens the
window for adjusting the volume
of the audible signal.
Visual assistance
This supplements the audible signal, without
taking account of the vehicle's trajectory, by
displaying bars on the screen whose location
represents the distance between the obstacle
and the vehicle (white: more distant, orange:
close, red: very close). CarM an uals 2 .c o m
Page 143 of 260

141
Driving
6
The screen is divided into 3 parts with a side
menu, a contextual view and a view from above
the vehicle in its close surroundings.
The parking sensors supplement the information
in the view from above the vehicle.
Different contextual views are available:
–
Automatic zoom view
.
–
Standard view
.
–
Panoramic view
.
Depending on the context, the system chooses
the best view to display (standard or automatic
zoom).
The view type can be changed at any time
during the manoeuvre.
The system status is not saved when the ignition
is switched off.
Operating principle
Using the camera, the vehicle's close
surroundings are recorded during low speed
manoeuvres.
An image from above the vehicle in its close
surroundings is created in real time (on the side
of the screen), as the vehicle progresses.
This view makes it easier to align the vehicle
when parking and to perceive nearby obstacles.
It is automatically deleted if the vehicle remains
stationary for too long.
An additional jet is fitted above the number plate to clean the reversing camera (depending on
version).
►
The washing of the reversing camera is
triggered by operating the rear screenwash.
Settings
In the side menu, this menu allows you to
carry out the following operations:
–
adjust the volume of the audible signal.
–
adjust the brightness.
–
adjust the contrast.
Activation/Deactivation
To activate the camera, engage reverse gear.
The system is deactivated:
–
when changing out of reverse gear
.
–
by pressing the cross in the top left-hand
corner of the touch screen.
Automatic zoom view
The rear camera records the vehicle's
surroundings during the manoeuvre in order to
create a view from above the rear of the vehicle
in its close surroundings, allowing the vehicle to
be manoeuvred around nearby obstacles.
Using the sensors located on the rear bumper,
the automatic zoom view is displayed when
approaching an obstacle at the red line (less
than 30 cm) during the manoeuvre.
This view is only available automatically.
Obstacles may appear further away than
they actually are.
It is important to monitor the sides of the
vehicle during the manoeuvre, using the
mirrors.
Parking sensors also provide additional
information about the area around the vehicle. CarM an uals 2 .c o m