2023 PEUGEOT 308 turn signal
[x] Cancel search: turn signalPage 100 of 260
98
Driving
Electric parking brake
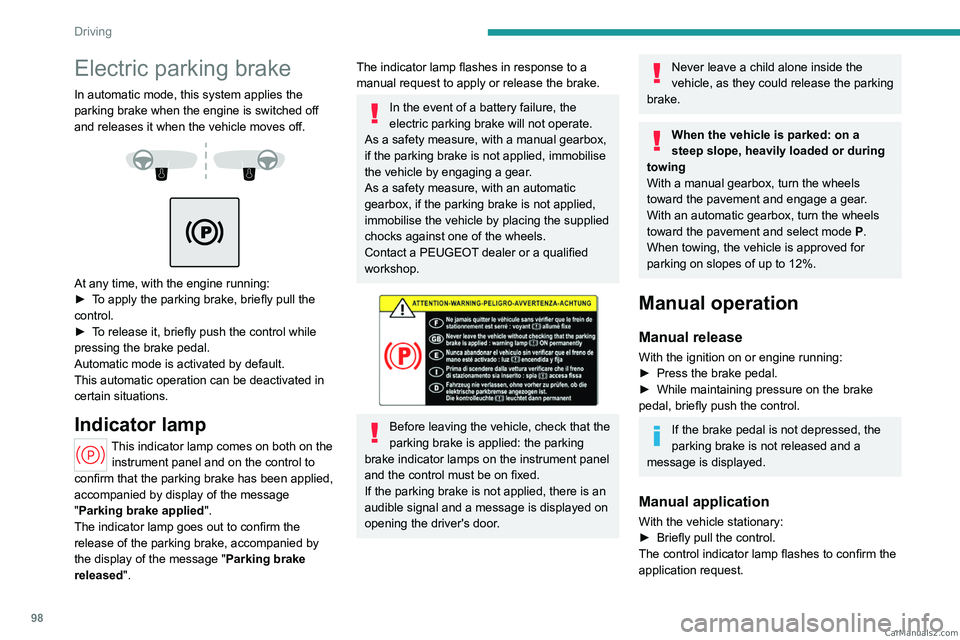
In automatic mode, this system applies the
parking brake when the engine is switched off
and releases it when the vehicle moves off.
At any time, with the engine running:
► T o apply the parking brake, briefly pull the
control.
►
T
o release it, briefly push the control while
pressing the brake pedal.
Automatic mode is activated by default.
This automatic operation can be deactivated in
certain situations.
Indicator lamp
This indicator lamp comes on both on the instrument panel and on the control to
confirm that the parking brake has been applied,
accompanied by display of the message
"Parking brake applied".
The indicator lamp goes out to confirm the
release of the parking brake, accompanied by
the display of the message " Parking brake
released ".
The indicator lamp flashes in response to a
manual request to apply or release the brake.
In the event of a battery failure, the
electric parking brake will not operate.
As a safety measure, with a manual gearbox,
if the parking brake is not applied, immobilise
the vehicle by engaging a gear.
As a safety measure, with an automatic
gearbox, if the parking brake is not applied,
immobilise the vehicle by placing the supplied
chocks against one of the wheels.
Contact a PEUGEOT dealer or a qualified
workshop.
Before leaving the vehicle, check that the
parking brake is applied: the parking
brake indicator lamps on the instrument panel
and the control must be on fixed.
If the parking brake is not applied, there is an
audible signal and a message is displayed on
opening the driver's door.
Never leave a child alone inside the
vehicle, as they could release the parking
brake.
When the vehicle is parked: on a
steep slope, heavily loaded or during
towing
With a manual gearbox, turn the wheels
toward the pavement and engage a gear.
With an automatic gearbox, turn the wheels
toward the pavement and select mode
P
.
When towing, the vehicle is approved for
parking on slopes of up to 12%.
Manual operation
Manual release
With the ignition on or engine running:
► Press the brake pedal.
►
While maintaining pressure on the brake
pedal, briefly push the control.
If the brake pedal is not depressed, the
parking brake is not released and a
message is displayed.
Manual application
With the vehicle stationary:
► Briefly pull the control.
The control indicator lamp flashes to confirm the
application request. CarM an uals 2 .c o m
Page 103 of 260
101
Driving
6D.Driving in automatic mode
The gearbox manages gear changes
according to the style of driving, the road
profile and the vehicle load.
M. Driving in manual mode (Petrol
/ Diesel)
Press this button to switch to manual mode.
The driver changes gear using the steering-
mounted controls.
B. Driving in automatic mode with regenerative
braking function (Rechargeable hybrid)
Press this button to activate the regenerative
braking function.
The gearbox also manages braking when the
accelerator pedal is released.
►
In mode
N, with your foot on the brake pedal,
push without passing the point of resistance: •
Forwards, mode
R is selected.
•
Backwards, mode D
is selected.
Release the selector fully after each push; it
will then return to its initial position.
Special cases
To avoid mode N (quick change from D to R and
back again):
►
In mode
R, push backwards past the point of
resistance, mode D is selected.
►
In mode
D, push forwards past the point of
resistance, mode R is selected.
►
T
o return to mode N, push without passing
the point of resistance.
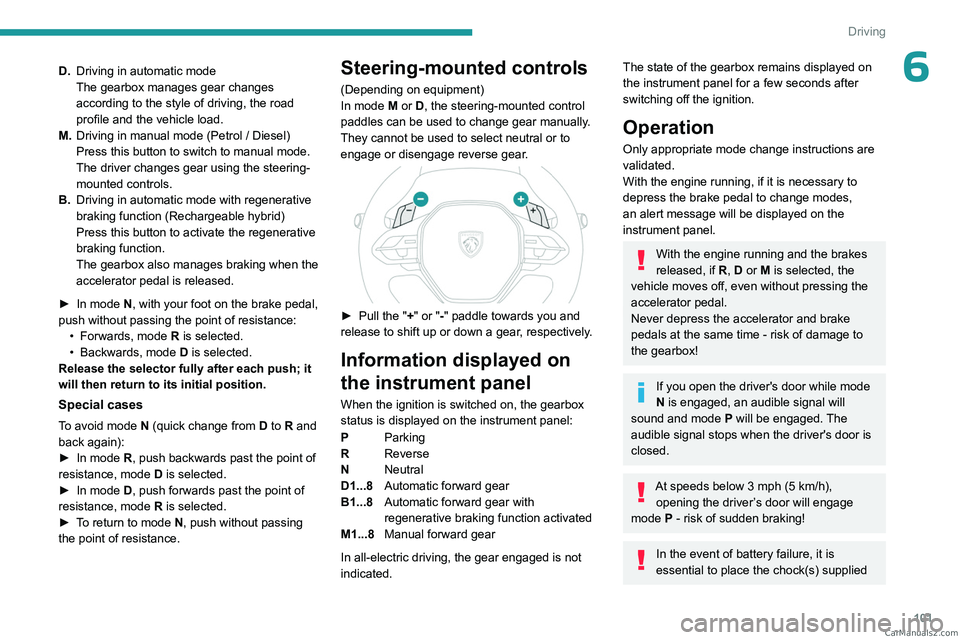
Steering-mounted controls
(Depending on equipment)
In mode M or D, the steering-mounted control
paddles can be used to change gear manually.
They cannot be used to select neutral or to
engage or disengage reverse gear.
► Pull the " +" or "-" paddle towards you and
release to shift up or down a gear, respectively.
Information displayed on
the instrument panel
When the ignition is switched on, the gearbox
status is displayed on the instrument panel:
P Parking
R Reverse
N Neutral
D1...8 Automatic forward gear
B1...8 Automatic forward gear with
regenerative braking function activated
M1...8 Manual forward gear
In all-electric driving, the gear engaged is not
indicated.
The state of the gearbox remains displayed on
the instrument panel for a few seconds after
switching off the ignition.
Operation
Only appropriate mode change instructions are
validated.
With the engine running, if it is necessary to
depress the brake pedal to change modes,
an alert message will be displayed on the
instrument panel.
With the engine running and the brakes
released, if R, D or M is selected, the
vehicle moves off, even without pressing the
accelerator pedal.
Never depress the accelerator and brake
pedals at the same time - risk of damage to
the gearbox!
If you open the driver's door while mode
N is engaged, an audible signal will
sound and mode P will be engaged. The
audible signal stops when the driver's door is
closed.
At speeds below 3 mph (5 km/h),
opening the driver ’s door will engage
mode P
- risk of sudden braking!
In the event of battery failure, it is
essential to place the chock(s) supplied CarM an uals 2 .c o m
Page 113 of 260

111
Driving
6– First of all, the selection of all the functions
that you want to deactivate.
–
Secondly
, the simultaneous deactivation of all
these functions.
Selection of functions
► Press this button on the dashboard to
display the ADAS
tabs.
►
Select the
Functions tab.
► Press this button to display the list of
available functions.
►
Select the functions to deactivate
(e.g.
Stop - Start, Lane Keeping Assist, Automatic
Braking System (Active Safety Brake)).
► Press this button to return to the
previous page.
The functions to deactivate are saved in the
system.
Deactivation of these functions
► Press and hold this bu tton on
the dashboard.
All previously selected functions are deactivated
until the vehicle is next restarted (confirmed by
an audible signal).
Road signs recognition
For more information, refer to the
General recommendations on the use
of driving and manoeuvring aids .
This system displays the maximum speed
authorised locally on the instrument panel, using:
–
Speed limit signs detected by the camera.
–
Speed limit information from the navigation
system’
s mapping.
–
Signs indicating a shared traffic zone detected
by the camera.
Sign detected Suggested speed (calculated)
Entry into a shared traffic zoneExample:
Without PEUGEOT
i-Connect
Advanced
10 mph or 20
km/h
(depending on
the units on the
instrument panel) With PEUGEOT i-Connect
Advanced
Display of the speed
in force in the country you are driving in. –
Some supplementary traffic signs detected by
the camera.
Supplementary
traffic sign detected Display of
the speed
associated with
the supplementary traffic sign
Speed limit when raining
Examples:
If the wiper control stalk is in the
"intermittent wipe"
or "automatic wipe" position (in order
to activate the rain sensor):
68 mph (110
km/h)
(for example)
Speed limit when towing
If an approved towing device is fixed to the vehicle:
56 mph (90
km/h)
(for example)
Speed limit
applicable over a certain distance Example:
43 mph (70 km/h)
(for example) CarM an uals 2 .c o m
Page 117 of 260
11 5
Driving
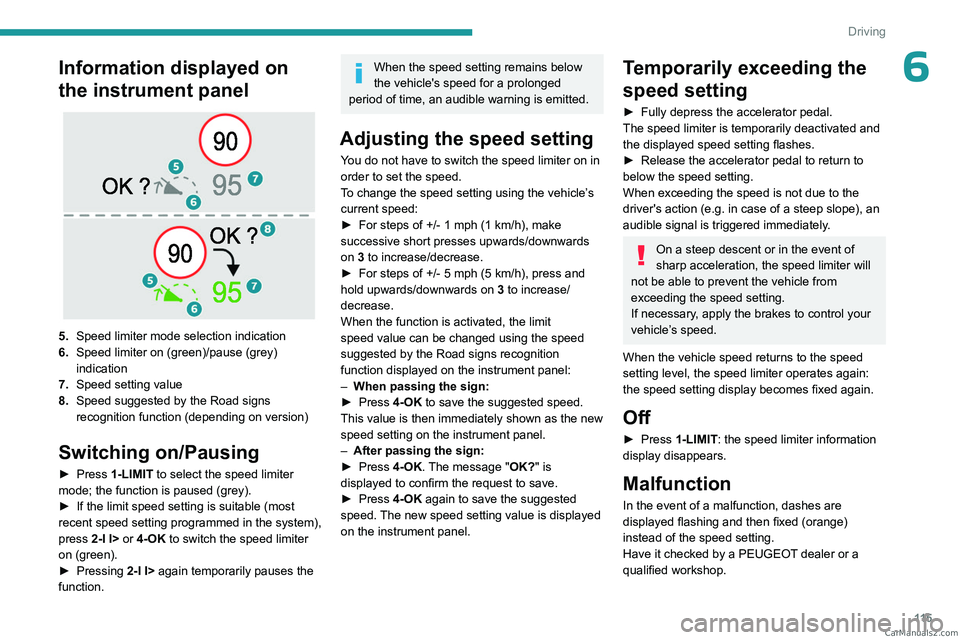
6Information displayed on
the instrument panel
5.Speed limiter mode selection indication
6. Speed limiter on (green)/pause (grey)
indication
7. Speed setting value
8. Speed suggested by the Road signs
recognition function (depending on version)
Switching on/Pausing
► Press 1-LIMIT to select the speed limiter
mode; the function is paused (grey).
►
If the limit speed setting is suitable (most
recent speed setting programmed in the system),
press
2-I I> or 4-OK to switch the speed limiter
on (green).
►
Pressing
2-I I> again temporarily pauses the
function.
When the speed setting remains below
the vehicle's speed for a prolonged
period of time, an audible warning is emitted.
Adjusting the speed setting
You do not have to switch the speed limiter on in
order to set the speed.
To change the speed setting using the vehicle’s
current speed:
►
For steps of +/- 1 mph (1 km/h), make
successive short presses upwards/downwards
on
3 to increase/decrease.
►
For steps of +/- 5 mph (5
km/h), press and
hold upwards/downwards on 3 to increase/
decrease.
When the function is activated, the limit
speed value can be changed using the speed
suggested by the Road signs recognition
function displayed on the instrument panel:
–
When passing the sign:
►
Press
4-OK to save the suggested speed.
This value is then immediately shown as the new
speed setting on the instrument panel.
–
After passing the sign:
►
Press
4-OK. The message "OK?" is
displayed to confirm the request to save.
►
Press
4-OK again to save the suggested
speed. The new speed setting value is displayed
on the instrument panel.
Temporarily exceeding the
speed setting
► Fully depress the accelerator pedal.
The speed limiter is temporarily deactivated and
the displayed speed setting flashes.
►
Release the accelerator pedal to return to
below the speed setting.
When exceeding the speed is not due to the
driver's action (e.g.
in case of a steep slope), an
audible signal is triggered immediately.
On a steep descent or in the event of
sharp acceleration, the speed limiter will
not be able to prevent the vehicle from
exceeding the speed setting.
If necessary, apply the brakes to control your
vehicle’s speed.
When the vehicle speed returns to the speed
setting level, the speed limiter operates again:
the speed setting display becomes fixed again.
Off
► Press 1-LIMIT: the speed limiter information
display disappears.
Malfunction
In the event of a malfunction, dashes are
displayed flashing and then fixed (orange)
instead of the speed setting.
Have it checked by a PEUGEOT dealer or a
qualified workshop. CarM an uals 2 .c o m
Page 130 of 260
128
Driving
The driver must hold the steering wheel correctly.
As soon as the semi-automatic lane change
begins, the system directs the vehicle to the
target lane by small actions on the steering to
position it in the destination lane.
You can feel the steering wheel moving.
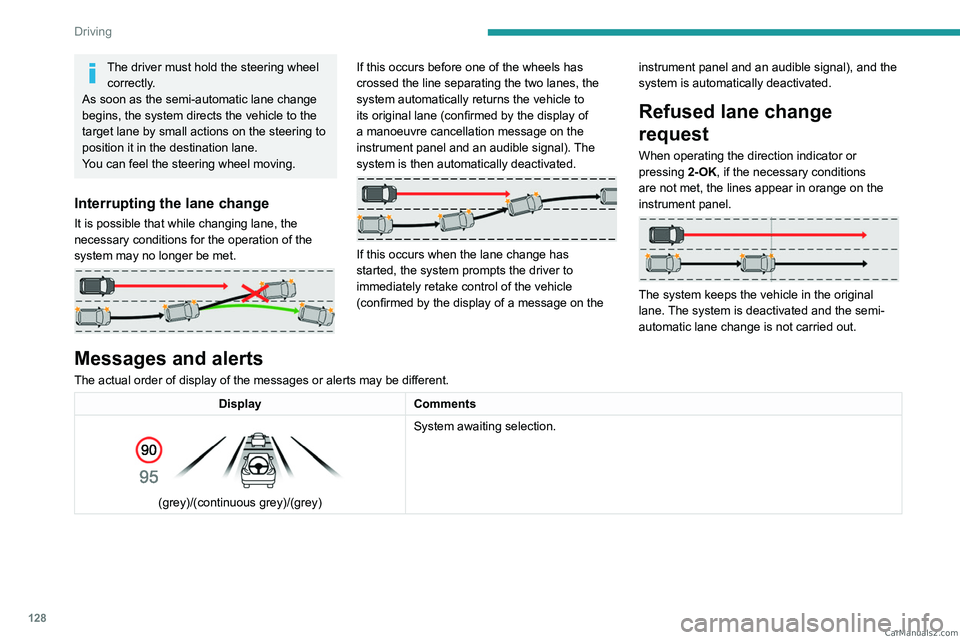
Interrupting the lane change
It is possible that while changing lane, the
necessary conditions for the operation of the
system
may no longer be met.
If this occurs before one of the wheels has
crossed the line separating the two lanes, the
system automatically returns the vehicle to
its original lane (confirmed by the display of
a manoeuvre cancellation message on the
instrument panel and an audible signal). The
system is then automatically deactivated.
If this occurs when the lane change has
started, the system prompts the driver to
immediately retake control of the vehicle
(confirmed by the display of a message on the instrument panel and an audible signal), and the
system is automatically deactivated.
Refused lane change
request
When operating the direction indicator or
pressing
2-OK, if the necessary conditions
are not met, the lines appear in orange on the
instrument panel.
The system keeps the vehicle in the original
lane. The system is deactivated and the semi-
automatic lane change is not carried out.
Messages and alerts
The actual order of display of the messages or alerts may be different.
Display Comments
(grey)/(continuous grey)/(grey) System awaiting selection. CarM an uals 2 .c o m
Page 136 of 260

134
Driving
– A collision on the side of the other vehicle is
probable.
Crossing road with a pedestrian
The system may operate when the vehicle
is turning left or right and detects a crossing
pedestrian if:
–
The pedestrian is crossing in front of the
vehicle.
–
The pedestrian can clearly be detected by the
sensors.
–
The scenery is detectable by the sensors (e.g.
brightness, contrast vs background).
–
The vehicle speed is between 3 and 15
mph
(5 and 25
km/h).
Malfunction
This warning lamp lights up on the instrument panel, if the automatic braking
system is reduced or degraded.
This is a normal behavior, which does not
request the support of a qualified workshop.
This may be caused by a reduced visibility
(e.g. rain, fog, snow, blinding by low sun) or by
a real sensor blockage. In this case, stop the
vehicle and verify if the front camera or the front
radar is covered by dirt, snow, ice or anything
preventing the sensing.
In the event of a malfunction, this warning
lamp lights up on the instrument panel,
accompanied by the display of a message and
an audible signal.
Have it checked by a PEUGEOT dealer or a
qualified workshop.
If these warning lamps come on
after the engine has been switched
off and then restarted, contact a PEUGEOT
dealer or a qualified workshop to have the
system checked.
These warning lamps light up on the instrument panel and/or in the
warning lamp display for seat belts and front
passenger airbag to indicate that the driver's
and/or front passenger's seat belt is not fastened
(depending on version). The automatic braking
system is deactivated until the seat belts are
fastened.
Distraction detection
For more information, refer to the
General recommendations on the use
of driving and manoeuvring aids .
The function comprises the "Driver Attention
Warning" system combined with the "Driver
Attention Warning by Camera" system.
These systems are in no way designed
to keep the driver awake or to prevent
the driver from falling asleep at the wheel.
It is the driver’s responsibility to stop if feeling
tired.
Take a break if you are feeling tired or at least
every 2 hours.
Activation/Deactivation
By default, the function is automatically activated
at every engine start.
The settings are changed via the ADAS
touch screen application.
Driver Attention Warning
The system triggers an alert when it detects that the driver has not taken a
break after two hours of driving at a speed above
43 mph (70
km/h).
This alert is issued via the display of a message
encouraging the driver to take a break,
accompanied by an audible signal.
If the driver does not follow this advice, the alert
is repeated hourly until the vehicle is stopped.
The system resets itself if one of the following
conditions is met:
–
With the engine running, the vehicle has been
stationary for more than 15 minutes. CarM an uals 2 .c o m
Page 146 of 260

144
Driving
The rear or front panoramic view allows you to
leave a parking space by anticipating the arrival
of vehicles, pedestrians or cyclists.
This view is not recommended for carrying out a
complete manoeuvre.
This view is only available by selection in the left-
hand side menu.
Side views
The left-hand/right-hand side view allows you to
view the surroundings of each side of the vehicle
(e.g. pavement, low wall, other vehicle parked
next to it).
► Select the relevant view in the view from
above the vehicle.
The selected area turns yellow and the side view
appears in the middle of the screen.
This view is not recommended for carrying out a
complete manoeuvre.
Rear cross traffic alert
For more information, refer to the
General recommendations on the use
of driving and manoeuvring aids .
When engaging reverse gear with the engine
running, or when reversing at up to 6 mph
(10
km/h), this system warns of approaching
obstacles (e.g.
pedestrian, cyclist, vehicle, truck,
motorcycle) in the rear blind spots of the vehicle,
using the radars installed in the bumper.
The system detects obstacles moving more than
2 mph (3
km/h) at a maximum distance of 40 m.
The system operates in addition to the Parking
sensors, Visiopark 1 or Visiopark 3 functions
(depending on version).
For more information about the Parking
sensors, Visiopark 1 or Visiopark 3 functions,
refer to the corresponding sections.
The driver must monitor their surroundings before and during the
whole manoeuvre. Drive slowly and carefully
in reverse gear in case of reduced or no
visibility.
Operating principle
When an approaching obstacle is detected, the
symbol 1 or 2 flashes on the touch screen, in the
Parking sensors view or in the various contextual
views of the Visiopark 1 or Visiopark 3 functions
(depending on version).
The symbol is complemented by an audible
signal when the vehicle is reversing.
An obstacle is approaching in the blind spot on the rear right-hand/
left-hand side or on both sides of the vehicle.
In the event of a malfunction of these visual
display functions, the touch screen, or if the
driver deactivates the views of these functions
on the touch screen, detection of an approaching
obstacle is still indicated by the audible signal
when the vehicle is reversing. CarM an uals 2 .c o m
Page 170 of 260
168
Practical information
► Wait a few minutes before checking the level
again using the dipstick.
►
T
op up the level if necessary.
►
After checking the level, carefully screw the
oil filler cap back on
and replace the dipstick in
its tube.
The oil level indication displayed on the instrument panel when the ignition is
switched on is not valid for 30 minutes
following an addition of oil.
Brake fluid
The level of this fluid should be close to
the "MAX" mark. If not, check the brake
pads for wear.
To know how often the brake fluid should be
replaced, refer to the manufacturer's servicing
schedule.
Clean the cap before removing it to refill.
Use only DOT4 brake fluid from a sealed
container.
Engine coolant
It is normal to top up this fluid between
two services.
The check and top-up must only be done with
the engine cold.
A level of coolant that is too low risks causing
major damage to the engine; the coolant level
must be close to the "MAX" mark without ever
going above it.
If the level is close to or below the " MIN" mark, it
is essential to top it up.
When the engine is hot, the temperature of the
coolant is regulated by the fan.
As the cooling system is pressurised, wait at
least one hour after switching off the engine
before carrying out any work.
In order to avoid the risk of scalding if you need
to top up in an emergency, wrap a cloth around
the cap and unscrew the cap by two turns to
allow the pressure to drop.
Once the pressure has dropped, remove the cap
and top up to the required level.
Screenwash fluid
Top up to the required level when necessary.
Fluid specification
The fluid must be topped up with a pre-mixed
product.
In winter (temperatures below zero), a fluid
containing an anti-freeze agent which is
appropriate for the temperature conditions
must be used in order to protect the system's
components (pump, tank, ducts, jets).
Filling with pure water is prohibited in all
circumstances (risk of freezing,
limescale, etc.).
Diesel fuel additive (Diesel
with particle filter)
On reaching the minimum level in the
particle filter additive tank, this warning
lamp comes on fixed, accompanied by an
audible signal and a warning message.
Topping up
The topping up of this additive must be carried
out quickly.
Go to a PEUGEOT dealer or a qualified
workshop.
AdBlue® (BlueHDi)
An alert is triggered when the reserve level is
reached.
For more information on the Indicators and in
particular the AdBlue range indicators, refer to
the corresponding section.
To avoid the vehicle being immobilised in
accordance with regulations, you must top up the
AdBlue tank.
For more information on AdBlue
® (BlueHDi),
and in particular the supply of AdBlue, refer to
the corresponding section.
Checks
Unless otherwise indicated, check these
components in accordance with the
Manufacturer's service schedule and according
to your engine. CarM an uals 2 .c o m