2023 PEUGEOT 3008 remote control
[x] Cancel search: remote controlPage 4 of 292
2
Contents
■
Overview
■
Eco-driving
1Dashboard instrumentsDriver information 9
Digital instrument panels 9
Warning and indicator lamps 11
Indicators 16
Manual test 20
Distance recorders 20
Lighting dimmer 21
Trip computer 21
Touch screen 22
Remotely operable additional functions
(Rechargeable hybrid)
24
2AccessElectronic key with remote control function
and built-in key 26
Keyless Entry and Start 28
Central locking 30
Back-up procedures 30
Doors 32
Boot 32
Hands-free tailgate 33
Alarm 37
Electric windows 38
Panoramic sunroof 39
3Ease of use and comfortDriving position 42
Front seats 43
Steering wheel adjustment 47
Mirrors 47
Rear bench seat 49
Rear seats 50
Seat modularity 55
Heating and Ventilation 56
Dual-zone automatic air conditioning 57
Front demisting - defrosting 60
Heated windscreen 60
Rear screen demisting/defrosting 61
Temperature pre-conditioning
(Rechargeable hybrid)
61
Front fittings 62
Courtesy lamps 66
Interior ambient lighting 66
Rear fittings 66
Boot fittings 68
4Lighting and visibilityLighting control stalk 74
Direction indicators 75
Headlamp beam height adjustment 76
Automatic illumination of headlamps 76
Guide-me-home and welcome lighting 77
Automatic lighting systems - General
recommendations
77
Automatic headlamp dipping 77
Static cornering lighting 78
Night Vision 79
Wiper control stalk 80
Automatic wipers 81
Changing a wiper blade 83
5SafetyGeneral safety recommendations 84
Hazard warning lamps 84
Horn 85
Pedestrian horn (Rechargeable hybrid) 85
Emergency or assistance 85
Electronic stability control (ESC) 87
Advanced Grip Control 89
Hill Assist Descent Control 90
Seat belts 91
Airbags 95
Child seats 97
Deactivating the front passenger airbag 99
ISOFIX child seats 102
i-Size child seats 108
Child lock 109
6DrivingDriving recommendations 111
Starting/Switching off the engine 11 2
Starting rechargeable hybrid vehicles 11 3
Electric parking brake 11 5
6-speed manual gearbox 11 7
Automatic gearbox (type 1) 11 7
Automatic gearbox (type 2) 120
Hill start assist 124
Driving modes 125
Gear shift indicator 126
Stop & Start 127
Tyre under-inflation detection 128
Driving and manoeuvring aids - General
recommendations
130
Memorising speeds 131
Road signs recognition 131
Speed limiter 135 CarM an uals 2 .c o m
Page 14 of 292
12
Dashboard instruments
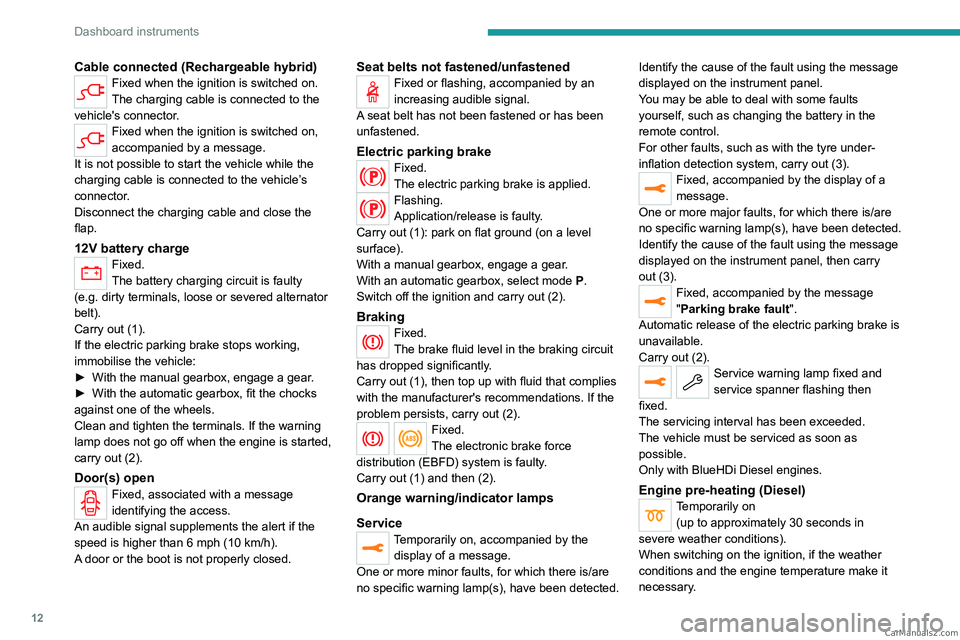
Cable connected (Rechargeable hybrid)Fixed when the ignition is switched on.
The charging cable is connected to the
vehicle's connector.
Fixed when the ignition is switched on,
accompanied by a message.
It is not possible to start the vehicle while the
charging cable is connected to the vehicle’s
connector.
Disconnect the charging cable and close the
flap.
12V battery chargeFixed.
The battery charging circuit is faulty
(e.g.
dirty terminals, loose or severed alternator
belt).
Carry out (1).
If the electric parking brake stops working,
immobilise the vehicle:
►
With the manual gearbox, engage a gear
.
►
With the automatic gearbox, fit the chocks
against one of the wheels.
Clean and tighten the terminals. If the warning
lamp does not go off when the engine is started,
carry out (2).
Door(s) openFixed, associated with a message
identifying the access.
An audible signal supplements the alert if the
speed is higher than 6 mph (10
km/h).
A door or the boot is not properly closed.
Seat belts not fastened/unfastenedFixed or flashing, accompanied by an
increasing audible signal.
A seat belt has not been fastened or has been
unfastened.
Electric parking brakeFixed.
The electric parking brake is applied.
Flashing.
Application/release is faulty.
Carry out (1): park on flat ground (on a level
surface).
With a manual gearbox, engage a gear.
With an automatic gearbox, select mode
P
.
Switch off the ignition and carry out (2).
BrakingFixed.
The brake fluid level in the braking circuit
has dropped significantly.
Carry out (1), then top up with fluid that complies
with the manufacturer's recommendations. If the
problem persists, carry out (2).
Fixed.
The electronic brake force
distribution
(EBFD) system is faulty.
Carry out (1) and then (2).
Orange warning/indicator lamps
Service
Temporarily on, accompanied by the display of a message.
One or more minor faults, for which there is/are
no specific warning lamp(s), have been detected. Identify the cause of the fault using the message
displayed on the instrument panel.
You may be able to deal with some faults
yourself, such as changing the battery in the
remote control.
For other faults, such as with the tyre under-
inflation detection system, carry out (3).
Fixed, accompanied by the display of a
message.
One or more major faults, for which there is/are
no specific warning lamp(s), have been detected.
Identify the cause of the fault using the message
displayed on the instrument panel, then carry
out (3).
Fixed, accompanied by the message
"Parking brake fault".
Automatic release of the electric parking brake is
unavailable.
Carry out (2).
Service warning lamp fixed and
service spanner flashing then
fixed.
The servicing interval has been exceeded.
The vehicle must be serviced as soon as
possible.
Only with BlueHDi Diesel engines.
Engine pre-heating (Diesel)Temporarily on (up to approximately 30 seconds in
severe weather conditions).
When switching on the ignition, if the weather
conditions and the engine temperature make it
necessary. CarM an uals 2 .c o m
Page 28 of 292
26
Access
Electronic key with
remote control function
and built-in key
Remote control function
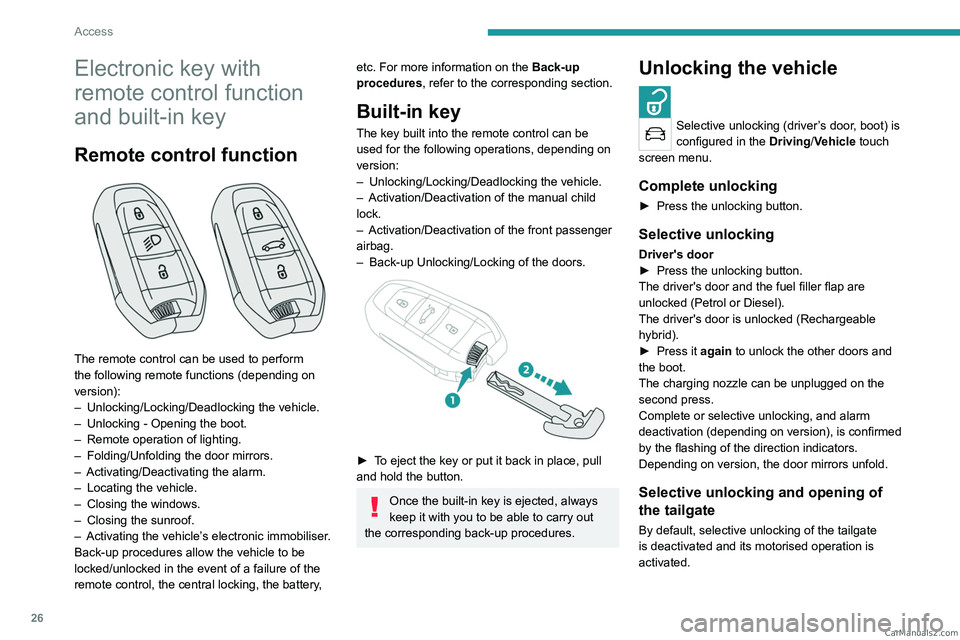
The remote control can be used to perform
the following remote functions (depending on
version):
–
Unlocking/Locking/Deadlocking the vehicle.
–
Unlocking - Opening the boot.
–
Remote operation of lighting.
–
Folding/Unfolding the door mirrors.
–
Activating/Deactivating the alarm.
–
Locating the vehicle.
–
Closing the windows.
–
Closing the sunroof.
–
Activating the vehicle’
s electronic immobiliser.
Back-up procedures allow the vehicle to be
locked/unlocked in the event of a failure of the
remote control, the central locking, the battery,
etc. For more information on the Back-up
procedures, refer to the corresponding section.
Built-in key
The key built into the remote control can be
used for the following operations, depending on
version:
–
Unlocking/Locking/Deadlocking the vehicle.
–
Activation/Deactivation of the manual child
lock.
–
Activation/Deactivation of the front passenger
airbag.
–
Back-up Unlocking/Locking of the doors.
► To eject the key or put it back in place, pull
and hold the button.
Once the built-in key is ejected, always
keep it with you to be able to carry out
the corresponding back-up procedures.
Unlocking the vehicle
Selective unlocking (driver’s door, boot) is
configured in the Driving/Vehicle touch
screen menu.
Complete unlocking
► Press the unlocking button.
Selective unlocking
Driver's door
► Press the unlocking button.
The driver's door and the fuel filler flap are
unlocked (Petrol or Diesel).
The driver's door is unlocked (Rechargeable
hybrid).
►
Press it
again to unlock the other doors and
the boot.
The charging nozzle can be unplugged on the
second press.
Complete or selective unlocking, and alarm
deactivation (depending on version), is confirmed
by the flashing of the direction indicators.
Depending on version, the door mirrors unfold.
Selective unlocking and opening of
the tailgate
By default, selective unlocking of the tailgate
is deactivated and its motorised operation is
activated. CarM an uals 2 .c o m
Page 29 of 292
27
Access
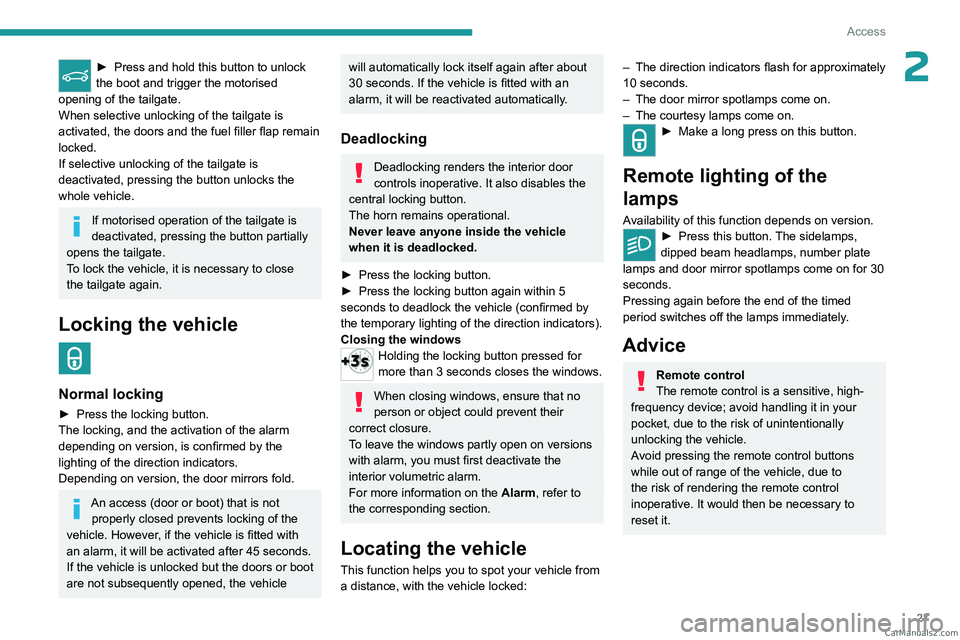
2► Press and hold this button to unlock
the boot and trigger the motorised
opening of the tailgate.
When selective unlocking of the tailgate is
activated, the doors and the fuel filler flap remain
locked.
If selective unlocking of the tailgate is
deactivated, pressing the button unlocks the
whole vehicle.
If motorised operation of the tailgate is
deactivated, pressing the button partially
opens the tailgate.
To lock the vehicle, it is necessary to close
the tailgate again.
Locking the vehicle
Normal locking
► Press the locking button.
The locking, and the activation of the alarm
depending on version, is confirmed by the
lighting of the direction indicators.
Depending on version, the door mirrors fold.
An access (door or boot) that is not properly closed prevents locking of the
vehicle. However, if the vehicle is fitted with
an alarm, it will be activated after 45
seconds.
If the vehicle is unlocked but the doors or boot
are not subsequently opened,
the vehicle
will automatically lock itself again after about
30 seconds. If the vehicle is fitted with an
alarm, it will be reactivated automatically.
Deadlocking
Deadlocking renders the interior door
controls inoperative. It also disables the
central locking button.
The horn remains operational.
Never leave anyone inside the vehicle
when it is deadlocked.
►
Press the locking button.
►
Press the locking button again within 5
seconds to deadlock the vehicle (confirmed by
the temporary lighting of the direction indicators).
Closing the windows
Holding the locking button pressed for
more than 3 seconds closes the windows.
When closing windows, ensure that no
person or object could prevent their
correct closure.
To leave the windows partly open on versions
with alarm, you must first deactivate the
interior volumetric alarm.
For more information on the Alarm, refer to
the corresponding section.
Locating the vehicle
This function helps you to spot your vehicle from
a distance, with the vehicle locked:
– The direction indicators flash for approximately
10 seconds.
–
The door mirror spotlamps come on.
–
The courtesy lamps come on.
► Make a long press on this button.
Remote lighting of the
lamps
Availability of this function depends on version.► Press this button. The sidelamps,
dipped beam headlamps, number plate
lamps and door mirror spotlamps come on for 30
seconds.
Pressing again before the end of the timed
period switches off the lamps immediately.
Advice
Remote control
The remote control is a sensitive, high-
frequency device; avoid handling it in your
pocket, due to the risk of unintentionally
unlocking the vehicle.
Avoid pressing the remote control buttons
while out of range of the vehicle, due to
the risk of rendering the remote control
inoperative. It would then be necessary to
reset it. CarM an uals 2 .c o m
Page 32 of 292
30
Access
To preserve the battery charge in the electronic key and the vehicle's battery,
the "hands-free" functions are set to
hibernation mode after 21 days without use.
To restore these functions, press one of the
remote control buttons or start the engine with
the electronic key against the back-up reader.
For more information on starting with the
Keyless Entry and Start system, refer to the
corresponding section.
Electrical interference
The electronic key may not work if it is
close to an electronic device (e.g.
mobile
telephone (switched on or on standby), laptop
computer, strong magnetic fields). If this
occurs, move the electronic key away from
the electronic device.
Central locking
Manual
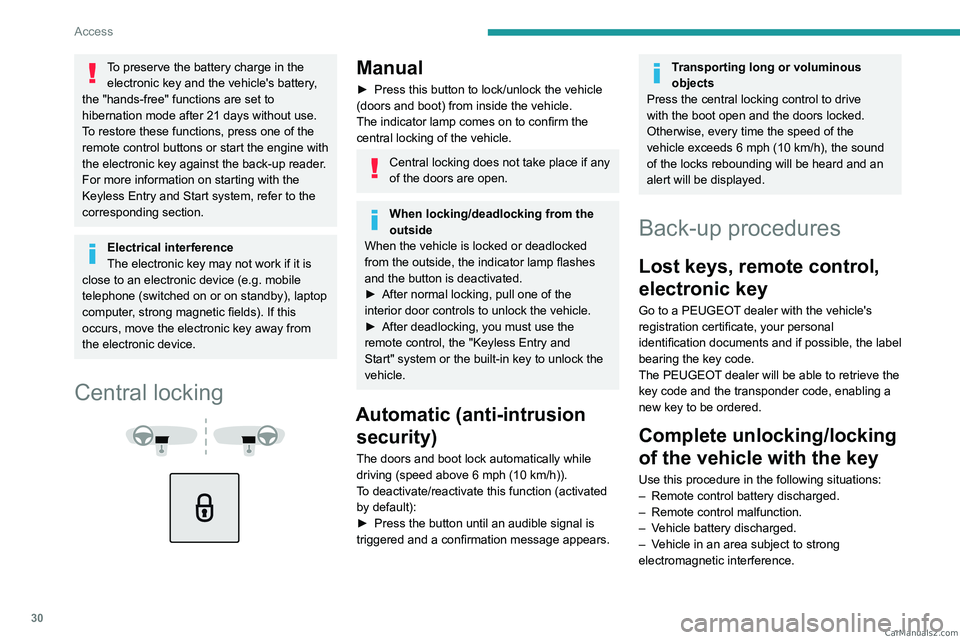
► Press this button to lock/unlock the vehicle
(doors and boot) from inside the vehicle.
The indicator lamp comes on to confirm the
central locking of the vehicle.
Central locking does not take place if any
of the doors are open.
When locking/deadlocking from the
outside
When the vehicle is locked or deadlocked
from the outside, the indicator lamp flashes
and the button is deactivated.
►
After normal locking, pull one of the
interior door controls to unlock the vehicle.
►
After deadlocking, you must use the
remote control, the "Keyless Entry and
Start" system or the built-in key to unlock the
vehicle.
Automatic (anti-intrusion security)
The doors and boot lock automatically while
driving (speed above 6 mph (10
km/h)).
To deactivate/reactivate this function (activated
by default):
►
Press the button until an audible signal is
triggered and a confirmation message appears.
Transporting long or voluminous
objects
Press the central locking control to drive
with the boot open and the doors locked.
Otherwise, every time the speed of the
vehicle exceeds 6 mph (10 km/h), the sound
of the locks rebounding will be heard and an
alert will be displayed.
Back-up procedures
Lost keys, remote control,
electronic key
Go to a PEUGEOT dealer with the vehicle's
registration certificate, your personal
identification documents and if possible, the label
bearing the key code.
The PEUGEOT dealer will be able to retrieve the
key code and the transponder code, enabling a
new key to be ordered.
Complete unlocking/locking
of the vehicle with the key
Use this procedure in the following situations:
– Remote control battery discharged.
–
Remote control malfunction.
–
V
ehicle battery discharged.
–
V
ehicle in an area subject to strong
electromagnetic interference. CarM an uals 2 .c o m
Page 33 of 292
31
Access
2In the first case, change the remote control
battery.
In the second case, reinitialise the remote
control.
Refer to the corresponding sections.
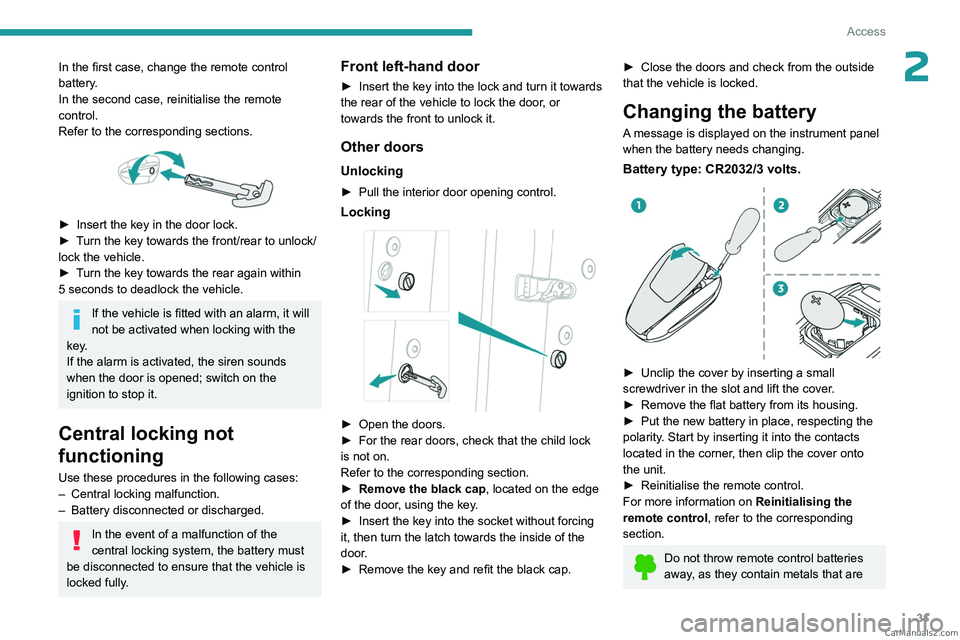
► Insert the key in the door lock.
► T urn the key towards the front/rear to unlock/
lock the vehicle.
►
T
urn the key towards the rear again within
5
seconds to deadlock the vehicle.
If the vehicle is fitted with an alarm, it will
not be activated when locking with the
key.
If the alarm is activated, the siren sounds
when the door is opened; switch on the
ignition to stop it.
Central locking not
functioning
Use these procedures in the following cases:
– Central locking malfunction.
–
Battery disconnected or discharged.
In the event of a malfunction of the
central locking system, the battery must
be disconnected to ensure that the vehicle is
locked fully.
Front left-hand door
► Insert the key into the lock and turn it towards
the rear of the vehicle to lock the door , or
towards the front to unlock it.
Other doors
Unlocking
► Pull the interior door opening control.
Locking
► Open the doors.
► For the rear doors, check that the child lock
is not on.
Refer to the corresponding section.
►
Remove the black cap
, located on the edge
of the door, using the key.
►
Insert the key into the socket without forcing
it, then turn the latch towards the inside of the
door
.
►
Remove the key and refit the black cap.
► Close the doors and check from the outside
that the vehicle is locked.
Changing the battery
A message is displayed on the instrument panel
when the battery needs changing.
Battery type: CR2032/3 volts.
► Unclip the cover by inserting a small
screwdriver in the slot and lift the cover .
►
Remove the flat battery from its housing.
►
Put the new battery in place, respecting the
polarity
. Start by inserting it into the contacts
located in the corner, then clip the cover onto
the unit.
►
Reinitialise the remote control.
For more information on Reinitialising the
remote control
, refer to the corresponding
section.
Do not throw remote control batteries
away, as they contain metals that are CarM an uals 2 .c o m
Page 34 of 292
32
Access
harmful to the environment. Take them to an
approved disposal point.
This equipment contains a button type battery.
Do not swallow the battery. Risk of chemical
burns!
Swallowing the battery can cause serious
internal burning in only 2 hours and can be
fatal.
If batteries have been swallowed or inserted
into a part of the body, seek immediate
medical advice.
Keep new and used batteries out of the reach
of children.
If the battery compartment does not close
properly, stop using the product and keep it
out of the reach of children.
Risk of explosion if the battery is
replaced with an incorrect type!
Replace the battery with the same type.
Risk of explosion or leaking of
inflammable liquid or gas!
Do not use in/store in/place in an environment
where the temperature is extremely high or
where the pressure is extremely low due to
very high altitude.
Do not try to burn, crush or cut a used battery.
Reinitialising the remote
control
Following replacement of the battery or in
the event of a fault, it may be necessary to
reinitialise the remote control.
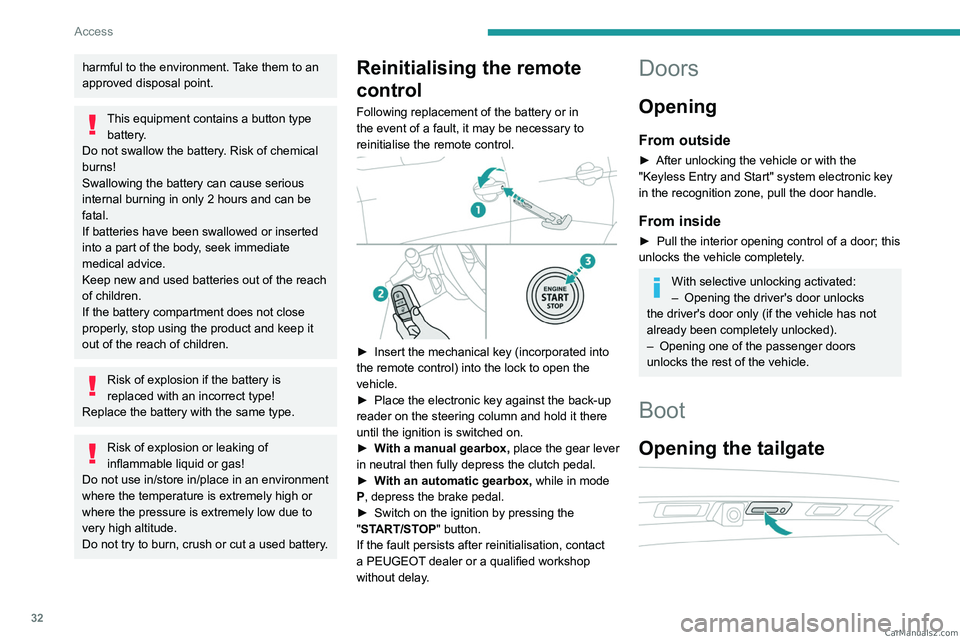
► Insert the mechanical key (incorporated into
the remote control) into the lock to open the
vehicle.
►
Place the electronic key against the back-up
reader on the steering column and hold it there
until the ignition is switched on.
►
W
ith a manual gearbox, place the gear lever
in neutral then fully depress the clutch pedal.
►
W
ith an automatic gearbox, while in mode
P, depress the brake pedal.
►
Switch on the ignition by pressing the
"
START/STOP" button.
If the fault persists after reinitialisation, contact
a PEUGEOT dealer or a qualified workshop
without delay.
Doors
Opening
From outside
► After unlocking the vehicle or with the
"Keyless Entry and Start" system electronic key
in the recognition zone, pull the door handle.
From inside
► Pull the interior opening control of a door; this
unlocks the vehicle completely .
With selective unlocking activated:
– Opening the driver's door unlocks
the driver's door only (if the vehicle has not
already been completely unlocked).
–
Opening one of the passenger doors
unlocks the rest of the vehicle.
Boot
Opening the tailgate
CarM an uals 2 .c o m
Page 39 of 292
37
Access
2Alarm
(Depending on version)
System which protects and provides a deterrent
against theft and break-ins.
Exterior perimeter monitoring
The system checks for opening of the vehicle.
The alarm is triggered if anyone tries to open a
door, the boot or the bonnet, for example.
Interior volumetric monitoring
The system checks for any variation in volume in
the passenger compartment.
The alarm is triggered if anyone breaks a
window, enters the passenger compartment or
moves inside the vehicle.
Anti-tilt monitoring
The system checks for any change in the attitude
of the vehicle.
The alarm goes off if the vehicle is lifted or
moved.
When the vehicle is parked, the alarm
will not be triggered if the vehicle is
knocked.
Self-protection function
The system checks whether any of its
components are out of service.
The alarm is triggered if the battery, the central
control or the siren wiring is put out of service or
damaged.
Work on the alarm system
Consult a PEUGEOT dealer or a
qualified workshop.
Locking the vehicle with full
alarm system
Activation
► Switch off the ignition and exit the vehicle.
► Lock or deadlock the vehicle using the
remote control or with the Keyless Entry and
Start system.
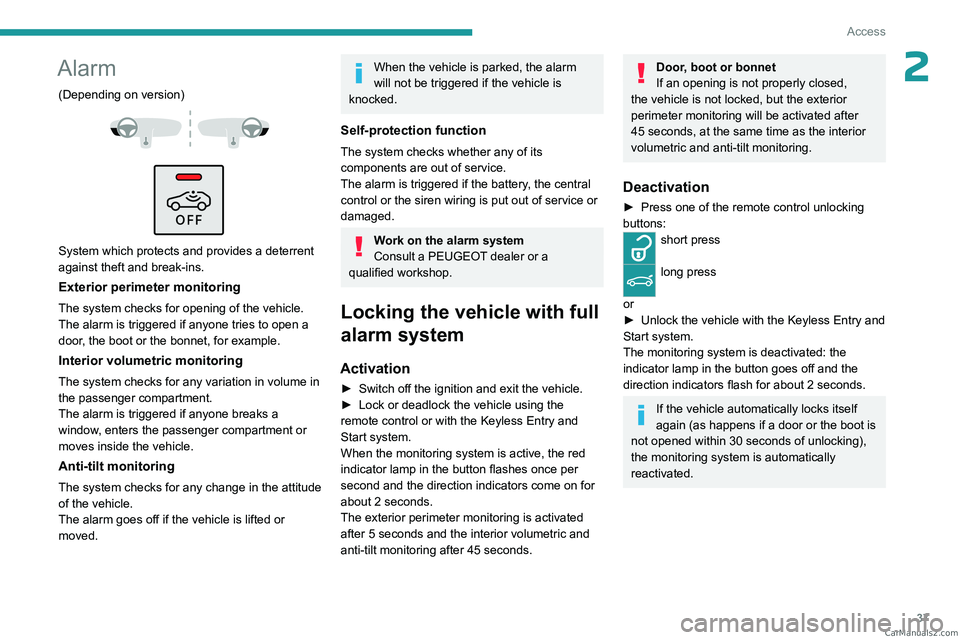
When the monitoring system is active, the red
indicator lamp in the button flashes once per
second and the direction indicators come on for
about 2 seconds.
The exterior perimeter monitoring is activated
after 5 seconds and the interior volumetric and
anti-tilt monitoring after 45 seconds.
Door, boot or bonnet
If an opening is not properly closed,
the vehicle is not locked, but the exterior
perimeter monitoring will be activated after
45 seconds, at the same time as the interior
volumetric and anti-tilt monitoring.
Deactivation
► Press one of the remote control unlocking
buttons:
short press
long press
or
►
Unlock the vehicle with the Keyless Entry and
Start system.
The monitoring system is deactivated: the
indicator lamp in the button goes off and the
direction indicators flash for about 2 seconds.
If the vehicle automatically locks itself
again (as happens if a door or the boot is
not opened within 30 seconds of unlocking),
the monitoring system is automatically
reactivated. CarM an uals 2 .c o m