2023 PEUGEOT 3008 light
[x] Cancel search: lightPage 62 of 292
60
Ease of use and comfort
When the function is deactivated, the maximum
air flow distributed by the rear air vents is limited
by the air conditioning air flow setting for the
front air vents.
The function is available on the secondary
page, which can be accessed by pressing the
“OPTIONS” button.
►
Press button
14 to activate the "REAR"
function; its status is displayed as " ON".
►
Press the “
large fan” or “small fan” button to
increase or decrease the air flow.
The corresponding indicator lamps come on.
If all of the indicator lamps are off, a slight air
flow can still be felt as a result of the vehicle's
movement.
Ventilation with the ignition
on
When the ignition is switched on, the ventilation
system and the air flow 2 and air distribution
3 settings in the passenger compartment are
activated, for a period which depends on the
battery charge.
This function does not include the air
conditioning system.
Switching the system off
► Press button 7; all the indicator lamps of the
system go out.
This action deactivates all of the functions of the
air conditioning system.
The temperature is no longer regulated. A slight
flow of air can still be felt, due to the forward
movement of the vehicle.
Interior air recirculation
The intake of exterior air prevents the formation
of mist on the windscreen and side windows.
Recirculating the interior air isolates the
passenger compartment from outside odours
and fumes and allows the desired passenger
compartment temperature to be achieved more
rapidly.
► Press this button to activate/deactivate
the function (confirmed by the
illumination/extinction of the indicator lamp).
This function is activated automatically when reverse gear is engaged.
Front demisting
- defrosting
Automatic Visibility programme
This mode allows the windscreen and side
windows to be demisted or defrosted as quickly
as possible.
► Press this button to activate/deactivate
the mode (confirmed by the illumination/
extinction of the
indicator lamp).
The programme automatically manages the air
conditioning (depending on version), air flow
and air intake, and provides optimum distribution
towards the windscreen and side windows.
It is possible to manually change the air flow
without deactivating the automatic Visibility
programme.
With Stop & Start, when demisting has
been activated, STOP mode is not
available.
In wintry conditions, before moving off,
remove all snow or ice on the windscreen
near the camera.
Otherwise, the operation of the equipment
using the camera may be affected.
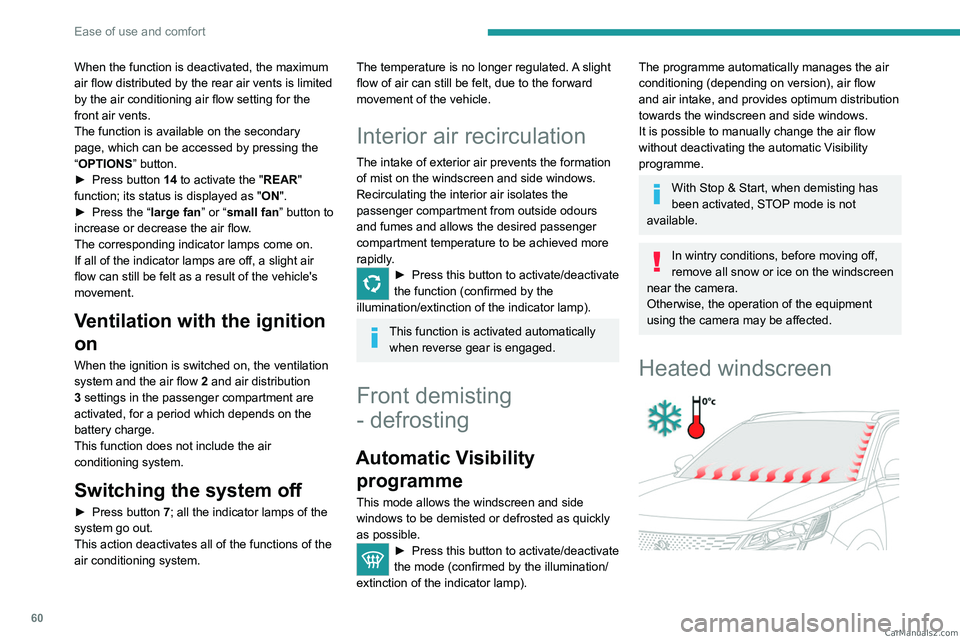
Heated windscreen
CarM an uals 2 .c o m
Page 66 of 292

64
Ease of use and comfort
– Aluminium TNF inverted dome tweeter:
optimal sound dispersion, detailed treble.
–
12 channel active amplification - 515 W
atts
Hybrid Class AB/Class D technology: breadth
and finesse in the high frequency signals, as well
as real power in the bass.
–
Subwoofer with high excursion Power
FlowerTM triple coil technology: deep and
controlled reproduction of low frequencies.
Wireless smartphone
charger
This system allows wireless charging of a
portable device such as a smartphone, using the
magnetic induction principle, in accordance with
the Qi 1.1 standard.
The portable device to be charged must be
compatible with the Qi standard, either by design
or by using a compatible holder or shell.
A mat can also be used provided that it is
approved by the Manufacturer.
The charging area is identified by the Qi symbol.
The charger works with the engine running and
with the Stop & Start system in STOP mode.
Charging is managed by the smartphone.
With the Keyless Entry and Start system, the
charger’s operation may be briefly disrupted
when a door is opened or the ignition is switched
off.
Charging
► With the charging area clear , place a device
in its centre.
When the portable device is detected, the
charger’s indicator lamp lights up green. It
remains lit for the whole time that the battery is
being charged.
The system is not designed to charge multiple devices simultaneously.
Do not leave metal objects (e.g. coins,
keys, vehicle remote control) in the
charging area while a device is being charged
- Risk of overheating or interrupting the
charging!
When using applications for a long time
in combination with wireless charging,
some smartphones may switch to thermal
safety and cause some functions to stop.
Checking operation
The state of the indicator lamp allows the
operation of the charger to be monitored.
State of the
indicator lamp Meaning
Off Engine switched off.
No compatible devices
detected.
Charging complete.
Fixed green Compatible portable device detected.
Charging.
Flashing orange Foreign object detected in the charging zone.
Portable device not well
centred in the charging
zone.
Fixed orange Malfunction of the portable device's battery
meter.
Device battery
temperature too high.
Charger malfunction.
If the indicator lamp is fixed orange:
– remove the device, then place it back in the
centre of the charging zone.
or CarM an uals 2 .c o m
Page 68 of 292
66
Ease of use and comfort
Courtesy lamps
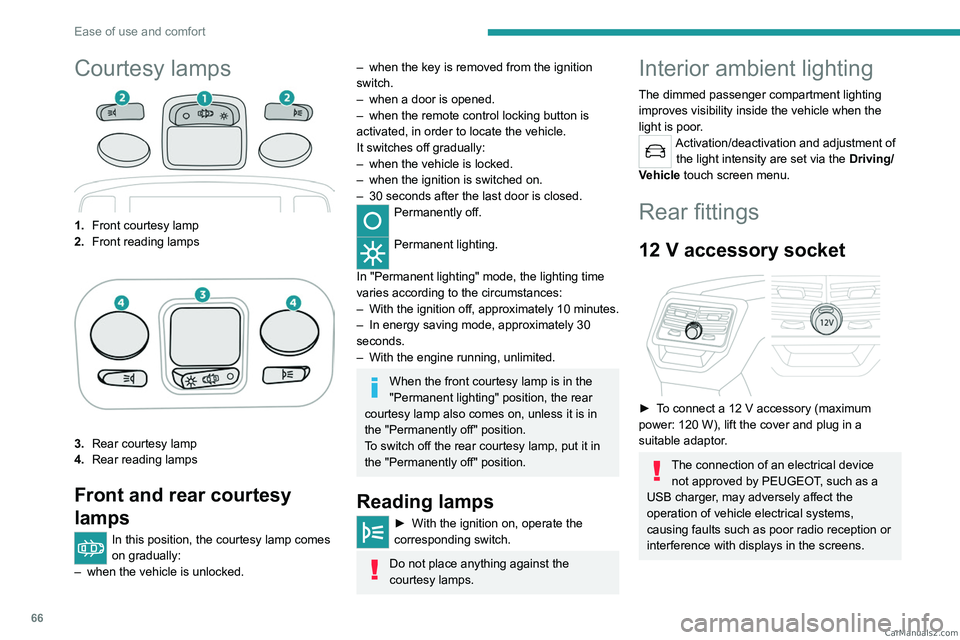
1.Front courtesy lamp
2. Front reading lamps
3.Rear courtesy lamp
4. Rear reading lamps
Front and rear courtesy
lamps
In this position, the courtesy lamp comes
on gradually:
–
when the vehicle is unlocked.
– when the key is removed from the ignition
switch.
–
when a door is opened.
–
when the remote control locking button is
activated, in order to locate the vehicle.
It switches off gradually:
–
when the vehicle is locked.
–
when the ignition is switched on.
–
30 seconds after the last door is closed.
Permanently off.
Permanent lighting.
In "Permanent lighting" mode, the lighting time
varies according to the circumstances:
–
With
the ignition off, approximately 10 minutes.
–
In energy saving mode, approximately 30
seconds.
–
With the engine running, unlimited.
When the front courtesy lamp is in the
"Permanent lighting" position, the rear
courtesy lamp also comes on, unless it is in
the "Permanently off" position.
To switch off the rear courtesy lamp, put it in
the "Permanently off" position.
Reading lamps
► With the ignition on, operate the
corresponding switch.
Do not place anything against the
courtesy lamps.
Interior ambient lighting
The dimmed passenger compartment lighting
improves visibility inside the vehicle when the
light is poor.
Activation/deactivation and adjustment of the light intensity are set via the Driving/
Vehicle touch screen menu.
Rear fittings
12 V accessory socket
► To connect a 12 V accessory (maximum
power: 120 W), lift the cover and plug in a
suitable adaptor.
The connection of an electrical device not approved by PEUGEOT, such as a
USB charger, may adversely affect the
operation of vehicle electrical systems,
causing faults such as poor radio reception or
interference with displays in the screens. CarM an uals 2 .c o m
Page 71 of 292
69
Ease of use and comfort
3For information on installing the High load
retaining net , refer to the corresponding
section.
Load space cover shelf
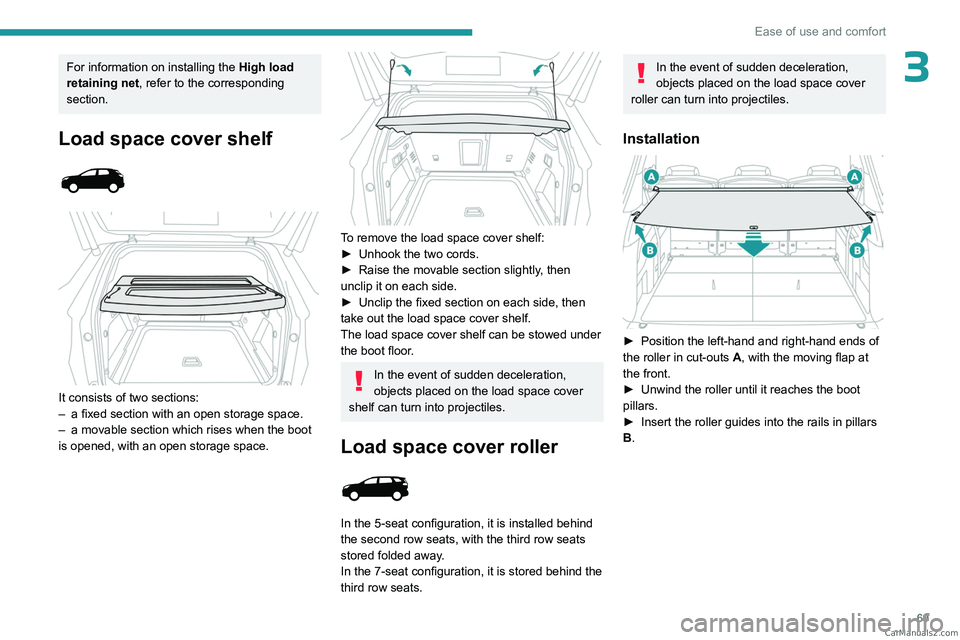
It consists of two sections:
– a fixed section with an open storage space.
–
a movable section
which rises when the boot
is opened, with an open storage space.
To remove the load space cover shelf:
► Unhook the two cords.
►
Raise the movable section slightly
, then
unclip it on each side.
►
Unclip the fixed section on each side, then
take out the load space cover shelf.
The load space cover shelf can be stowed under
the boot floor
.
In the event of sudden deceleration,
objects placed on the load space cover
shelf can turn into projectiles.
Load space cover roller
In the 5-seat configuration, it is installed behind
the second row seats, with the third row seats
stored folded away.
In the 7-seat configuration, it is stored behind the
third row seats.
In the event of sudden deceleration,
objects placed on the load space cover
roller can turn into projectiles.
Installation
► Position the left-hand and right-hand ends of
the roller in cut-outs A , with the moving flap at
the front.
►
Unwind the roller until it reaches the boot
pillars.
►
Insert the roller guides into the rails in pillars
B
. CarM an uals 2 .c o m
Page 72 of 292
70
Ease of use and comfort
Removal
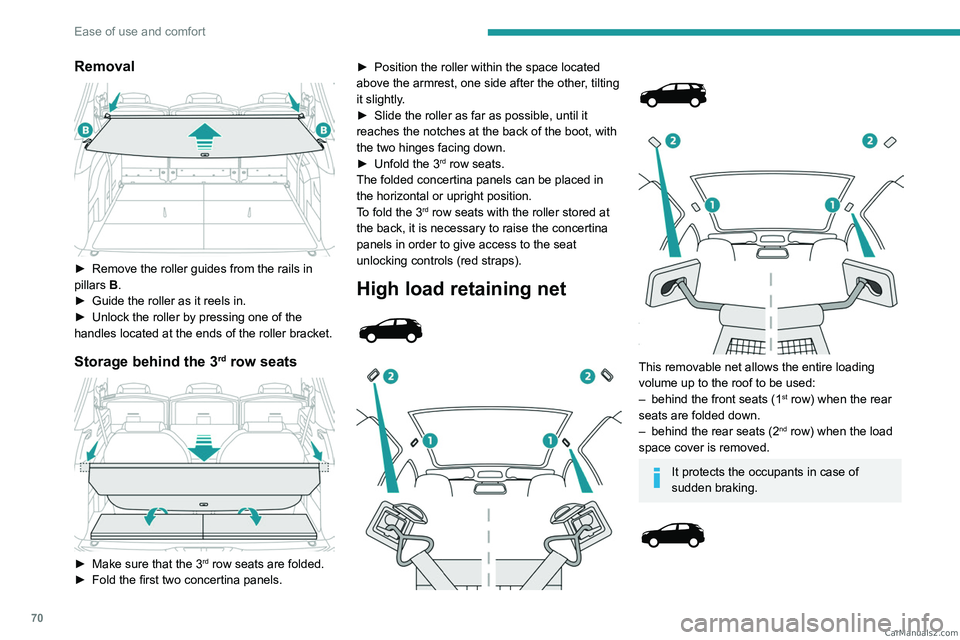
► Remove the roller guides from the rails in
pillars B
.
►
Guide the roller as it reels in.
►
Unlock the roller by pressing one of the
handles located at the ends of the roller bracket.
Storage behind the 3rd row seats
► Make sure that the 3rd row seats are folded.
►
Fold the first two concertina panels. ►
Position the roller within the space located
above the armrest, one side after the other
, tilting
it slightly.
►
Slide the roller as far as possible, until it
reaches the notches at the back of the boot, with
the two hinges facing down.
►
Unfold the 3rd row seats.
The folded concertina panels can be placed in
the horizontal or upright position.
To fold the 3
rd row seats with the roller stored at
the back, it is necessary to raise the concertina
panels in order to give access to the seat
unlocking controls (red straps).
High load retaining net
This removable net allows the entire loading
volume up to the roof to be used:
–
behind the front seats (1st row) when the rear
seats are folded down.
–
behind the rear seats (2nd row) when the load
space cover is removed.
It protects the occupants in case of
sudden braking.
CarM an uals 2 .c o m
Page 75 of 292
73
Ease of use and comfort
3The connection of an electrical device not approved by PEUGEOT, such as a
USB charger, may adversely affect the
operation of vehicle electrical systems,
causing faults such as poor radio reception or
interference with displays in the screens.
Boot lamp
It comes on automatically when the boot is
opened and goes off automatically when the
boot is closed.
The lighting time varies according to the
circumstances:
–
When the ignition is off, approximately 10
minutes.
–
In energy saving mode, approximately 30
seconds.
–
With the engine running, unlimited. CarM an uals 2 .c o m
Page 76 of 292
74
Lighting and visibility
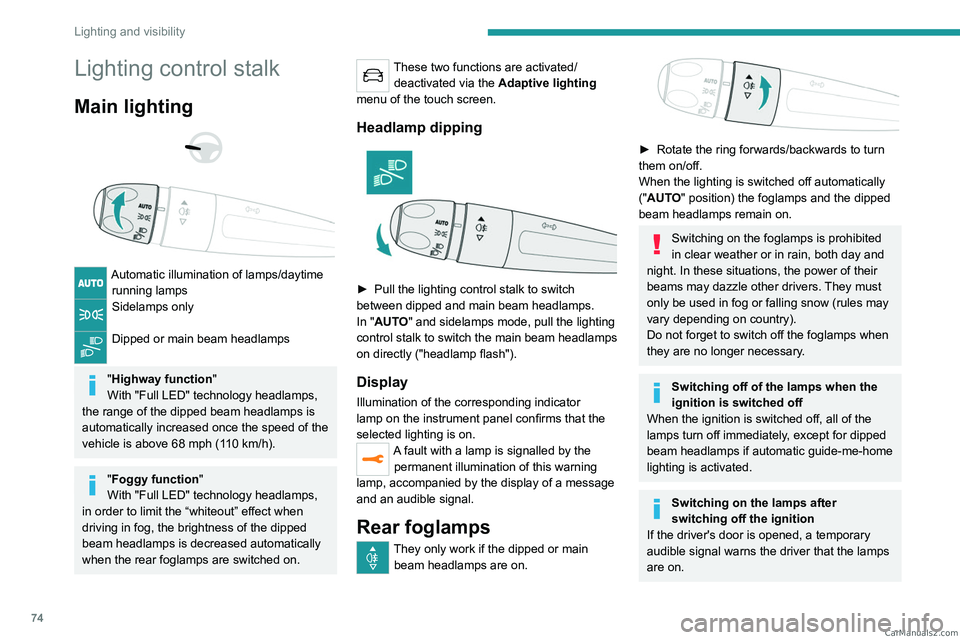
Lighting control stalk
Main lighting
Automatic illumination of lamps/daytime running lamps
Sidelamps only
Dipped or main beam headlamps
"Highway function "
With "Full LED" technology headlamps,
the range of the dipped beam headlamps is
automatically increased once the speed of the
vehicle is above 68 mph (110
km/h).
"Foggy function"
With "Full LED" technology headlamps,
in order to limit the “whiteout” effect when
driving in fog,
the brightness of the dipped
beam headlamps is decreased automatically
when the rear foglamps are switched on.
These two functions are activated/ deactivated via the Adaptive lighting
menu of the touch screen.
Headlamp dipping
► Pull the lighting control stalk to switch
between dipped and main beam headlamps.
In "
AUTO" and sidelamps mode, pull the lighting
control stalk to switch the main beam headlamps
on directly ("headlamp flash").
Display
Illumination of the corresponding indicator
lamp on the instrument panel confirms that the
selected lighting is on.
A fault with a lamp is signalled by the permanent illumination of this warning
lamp, accompanied by the display of a message
and an audible signal.
Rear foglamps
They only work if the dipped or main beam headlamps are on.
► Rotate the ring forwards/backwards to turn
them on/off.
When the lighting is switched off automatically
("AUTO" position) the foglamps and the dipped
beam headlamps remain on.
Switching on the foglamps is prohibited
in clear weather or in rain, both day and
night. In these situations, the power of their
beams may dazzle other drivers. They must
only be used in fog or falling snow (rules may
vary depending on country).
Do not forget to switch off the foglamps when
they are no longer necessary.
Switching off of the lamps when the
ignition is switched off
When the ignition is switched off, all of the
lamps turn off immediately, except for dipped
beam headlamps if automatic guide-me-home
lighting is activated.
Switching on the lamps after
switching off the ignition
If the driver's door is opened, a temporary
audible signal warns the driver that the lamps
are on. CarM an uals 2 .c o m
Page 77 of 292
75
Lighting and visibility
4They will go off automatically after a period
of time that depends on the level of charge in
the battery (entering energy economy mode).
In some weather conditions (e.g. low
temperature or humidity), misting on the
internal surface of the glass of the headlamps
and rear lamps is normal, and will disappear
after the lamps have been on for a few
minutes.
Never look too closely at the light beam
of LED technology lamps - risk of serious
eye injury!
Travelling abroad
Vehicles equipped with manual
headlamp beam height adjustment:
If planning to use your vehicle in a country
that drives on the other side of the road, the
dipped beam headlamps must be adjusted to
avoid dazzling oncoming drivers. Contact a
PEUGEOT dealer or a qualified workshop.
Daytime running lamps/
Sidelamps
These LED lamps at the front and rear of the
vehicle light up automatically when the engine
starts.
They perform the following functions:
–
Daytime running lamps (lighting control stalk
at position
"AUTO" with adequate ambient light).
–
Sidelamps (lighting control stalk at position
"
AUTO" with low ambient light or "Sidelamps
only" or "Dipped/main beam headlamps").
Direction indicators
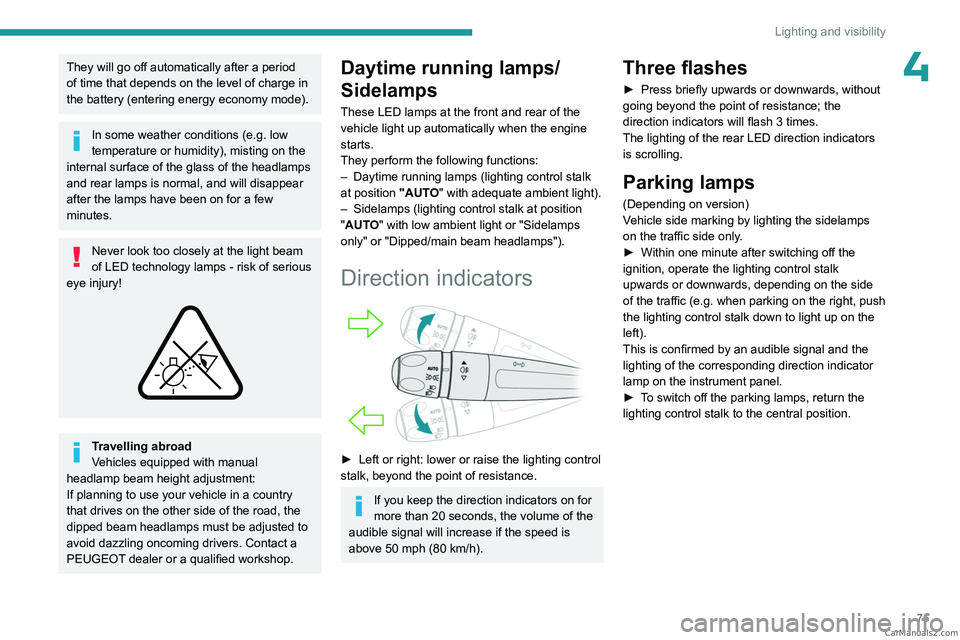
► Left or right: lower or raise the lighting control
stalk, beyond the point of resistance.
If you keep the direction indicators on for
more than 20 seconds, the volume of the
audible signal will increase if the speed is
above 50 mph (80 km/h).
Three flashes
► Press briefly upwards or downwards, without
going beyond the point of resistance; the
direction indicators will flash 3 times.
The lighting of the rear LED direction indicators is scrolling.
Parking lamps
(Depending on version)
Vehicle side marking by lighting the sidelamps
on the traffic side only.
►
Within one minute after switching off the
ignition, operate the lighting control stalk
upwards or downwards, depending on the side
of the traffic (e.g.
when parking on the right, push
the lighting control stalk down to light up on the
left).
This is confirmed by an audible signal and the
lighting of the corresponding direction indicator
lamp on the instrument panel.
►
T
o switch off the parking lamps, return the
lighting control stalk to the central position. CarM an uals 2 .c o m