2023 PEUGEOT 3008 tow
[x] Cancel search: towPage 52 of 292
50
Ease of use and comfort
Folding from the boot
► Pull the backrest release lever 2 towards you.
The backrest 3 folds fully onto the cushion.
Repositioning the backrests
First check that the outer seat belts are
lying vertically flat alongside the backrest
latching rings.
► Put the backrest 3 in the upright position and
push it firmly to latch it home.
►
Check that the red indicator is no longer
visible in the release grip 1
.
►
Ensure that the outer seat belts were not
trapped during the operation.
Please note: an incorrectly latched
backrest compromises the safety of
passengers in the event of sudden braking or
an accident.
The contents of the boot may be thrown
forward - risk of serious injury!
Second row seats
Seat adjustment
The three second row seats are independent
and of the same width. Their backrests can be
folded to adapt the boot load space.
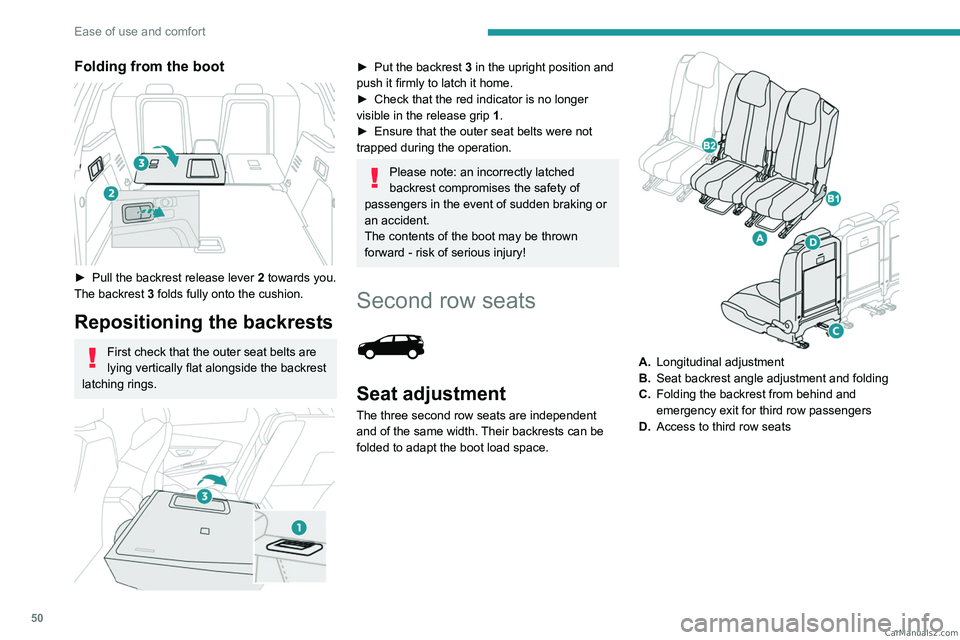
A. Longitudinal adjustment
B. Seat backrest angle adjustment and folding
C. Folding the backrest from behind and
emergency exit for third row passengers
D. Access to third row seats CarM an uals 2 .c o m
Page 57 of 292
55
Ease of use and comfort
3
► Once the rear part of the seat has been
raised, take hold of each side of the seat
cushion, at the plastic covers, then bring the seat
towards you, keeping it at the same angle.
Repositioning the seats
These operations must be performed from the
boot sill.
As long as the seat is not in the correct position, it must be held with both hands
by the sides, keeping it folded.
►
Check in advance that the seat storage well
is empty and that the removable support is
properly secured against the front wall.
► While holding it by the sides at the plastic
covers, tilt the seat forwards.
►
Simultaneously place both hooks located at
the front of the seat onto the coloured securing
lugs on the right and left
at the bottom of the seat
well.
Check that the front hooks of the seat are
positioned correctly on the two lugs.
If they are not, you must remove the seat and
start the procedure again.
► Release the rear part of the seat which will
lock in place under its own weight.
The yellow lever G
folds back automatically.
If the seat is not perfectly horizontal, do
not press on the backrest and do not try
to unfold it - risk of damaging the mechanism!
Take out the seat and start the operation
again.
Seat modularity
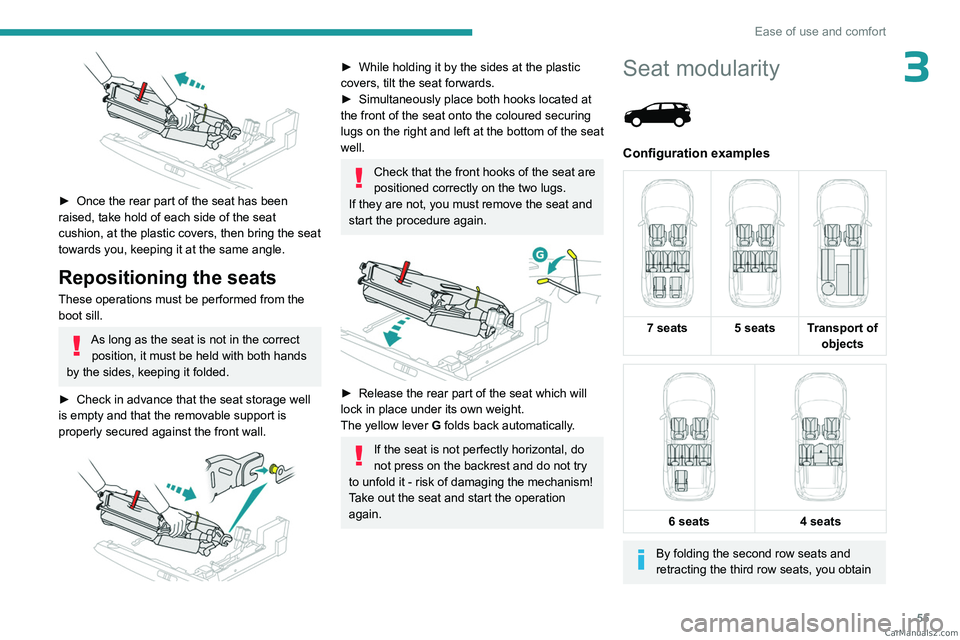
Configuration examples
7 seats 5 seats Transport of
objects
6 seats
4 seats
By folding the second row seats and
retracting the third row seats, you obtain CarM an uals 2 .c o m
Page 58 of 292
56
Ease of use and comfort
a continuous storage floor through to the back
of the front seats.
By placing the front passenger seat in the
table position, you obtain a continuous
storage floor through to the dashboard.
Operations on the seats must only be
done when the vehicle is stationary.
Heating and Ventilation
Air intake
The air circulating in the passenger compartment
is filtered and originates either from the
exterior, via the grille located at the base of the
windscreen, or from the inside in air recirculation
mode.
Controls
Depending on version, the controls are
accessible in the Climate touch screen menu
or are grouped together on the centre console
panel.
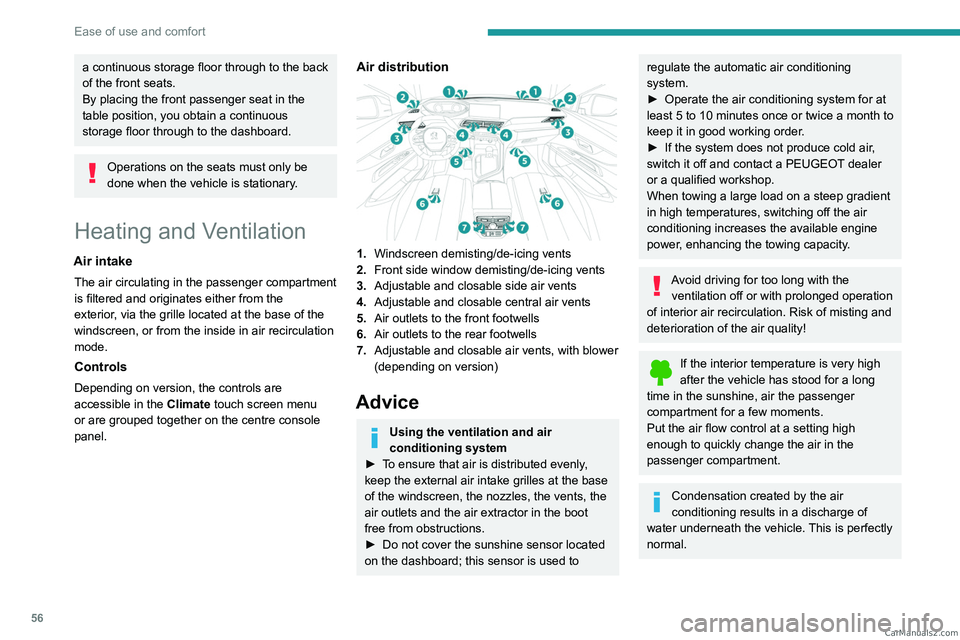
Air distribution
1. Windscreen demisting/de-icing vents
2. Front side window demisting/de-icing vents
3. Adjustable and closable side air vents
4. Adjustable and closable central air vents
5. Air outlets to the front footwells
6. Air outlets to the rear footwells
7. Adjustable and closable air vents, with blower
(depending on version)
Advice
Using the ventilation and air
conditioning system
►
T
o ensure that air is distributed evenly,
keep the external air intake grilles at the base
of the windscreen, the nozzles, the vents, the
air outlets and the air extractor in the boot
free from obstructions.
►
Do not cover the sunshine sensor located
on the dashboard; this sensor is used to
regulate the automatic air conditioning
system.
►
Operate the air conditioning system for at
least 5 to 10 minutes once or twice a month to
keep it in good working order
.
►
If the system does not produce cold air
,
switch it off and contact a PEUGEOT dealer
or a qualified workshop.
When towing a large load on a steep gradient
in high temperatures, switching off the air
conditioning increases the available engine
power, enhancing the towing capacity.
Avoid driving for too long with the ventilation off or with prolonged operation
of interior air recirculation. Risk of misting and
deterioration of the air quality!
If the interior temperature is very high
after the vehicle has stood for a long
time in the sunshine, air the passenger
compartment for a few moments.
Put the air flow control at a setting high
enough to quickly change the air in the
passenger compartment.
Condensation created by the air
conditioning results in a discharge of
water underneath the vehicle. This is perfectly
normal. CarM an uals 2 .c o m
Page 61 of 292
59
Ease of use and comfort
3– air distribution.
The indicator lamp in the " AUT
O” button goes
out if a setting is changed.
►
Press button
9 again to reactivate the
automatic Comfort programme.
Adjusting the air flow
► Press one of the buttons 2 (- or +) to increase
or decrease air flow.
The air flow symbol (a fan) is filled in according
to the request.
When the air flow is reduced to a minimum,
ventilation stops.
"OFF " is displayed alongside the fan.
Adjusting the air distribution
► Press the buttons 3 to adjust the air flow
distribution inside the passenger compartment.
Windscreen and side windows.
Central and side air vents.
Footwells.
The lighting of the button indicates that air is
being blown in the specified direction.
For a uniform distribution of air in the passenger
compartment, the three buttons can be activated
simultaneously.
In AUTO mode, the indicator lamps in all three
buttons 3 are off.
Air conditioning on/off
The air conditioning system is designed to
operate effectively in all seasons, with the
windows closed.
It is used to:
–
lower the temperature in summer
,
–
increase the effectiveness of demisting in
winter
, above 3°C.
►
Press button
5 to activate/deactivate the air
conditioning system.
When the system is activated, the indicator lamp
in the button comes on.
Air conditioning does not operate when the air flow is disabled.
To obtain cool air more quickly, enable interior
air recirculation for a brief period. Then return
to the intake of exterior air.
Switching off the air conditioning may result in
some discomfort (humidity or misting).
Maximum air conditioning
This function automatically adjusts the
temperature setting to the lowest possible, the
air distribution towards the central and side air
vents, the air flow to maximum and activates
interior air recirculation.
►
Press button
6 to activate/deactivate the
function (the indicator lamp will come on/switch
off).
Once the function is deactivated, the system
returns to the previous settings.
Mono-zone/Dual-zone
The passenger temperature setting can be linked
to the driver's setting (mono-zone function).
It is available in the secondary page which can
be accessed via the " OPTIONS" button.
►
Press button
13 to activate the "MONO"
function; its status is displayed as " ON".
The function is automatically deactivated if the
passenger uses their temperature adjustment
buttons (dual-zone function).
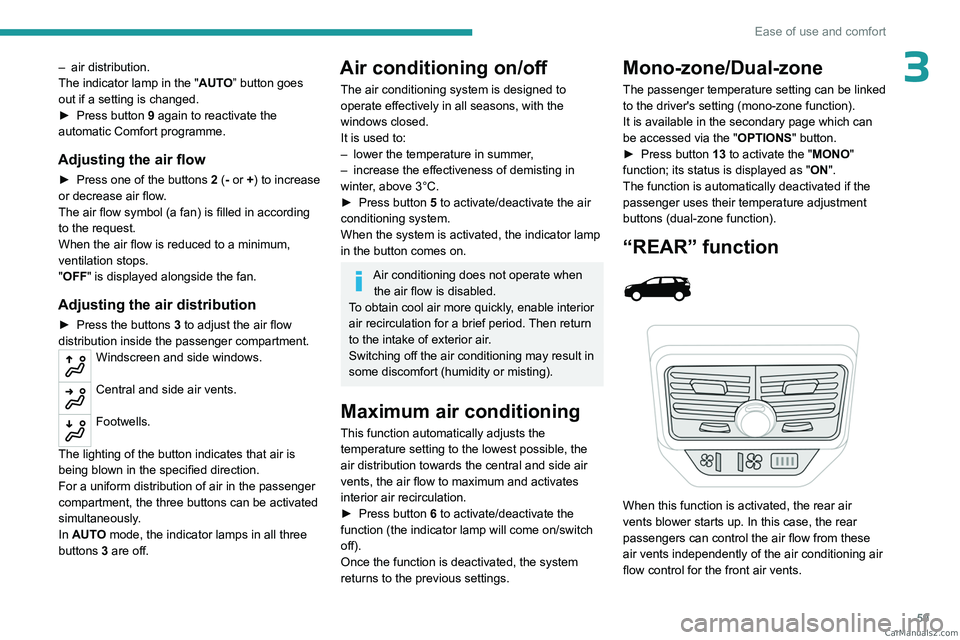
“REAR” function
When this function is activated, the rear air
vents blower starts up. In this case, the rear
passengers can control the air flow from these
air vents independently of the air conditioning air
flow control for the front air vents. CarM an uals 2 .c o m
Page 62 of 292
60
Ease of use and comfort
When the function is deactivated, the maximum
air flow distributed by the rear air vents is limited
by the air conditioning air flow setting for the
front air vents.
The function is available on the secondary
page, which can be accessed by pressing the
“OPTIONS” button.
►
Press button
14 to activate the "REAR"
function; its status is displayed as " ON".
►
Press the “
large fan” or “small fan” button to
increase or decrease the air flow.
The corresponding indicator lamps come on.
If all of the indicator lamps are off, a slight air
flow can still be felt as a result of the vehicle's
movement.
Ventilation with the ignition
on
When the ignition is switched on, the ventilation
system and the air flow 2 and air distribution
3 settings in the passenger compartment are
activated, for a period which depends on the
battery charge.
This function does not include the air
conditioning system.
Switching the system off
► Press button 7; all the indicator lamps of the
system go out.
This action deactivates all of the functions of the
air conditioning system.
The temperature is no longer regulated. A slight
flow of air can still be felt, due to the forward
movement of the vehicle.
Interior air recirculation
The intake of exterior air prevents the formation
of mist on the windscreen and side windows.
Recirculating the interior air isolates the
passenger compartment from outside odours
and fumes and allows the desired passenger
compartment temperature to be achieved more
rapidly.
► Press this button to activate/deactivate
the function (confirmed by the
illumination/extinction of the indicator lamp).
This function is activated automatically when reverse gear is engaged.
Front demisting
- defrosting
Automatic Visibility programme
This mode allows the windscreen and side
windows to be demisted or defrosted as quickly
as possible.
► Press this button to activate/deactivate
the mode (confirmed by the illumination/
extinction of the
indicator lamp).
The programme automatically manages the air
conditioning (depending on version), air flow
and air intake, and provides optimum distribution
towards the windscreen and side windows.
It is possible to manually change the air flow
without deactivating the automatic Visibility
programme.
With Stop & Start, when demisting has
been activated, STOP mode is not
available.
In wintry conditions, before moving off,
remove all snow or ice on the windscreen
near the camera.
Otherwise, the operation of the equipment
using the camera may be affected.
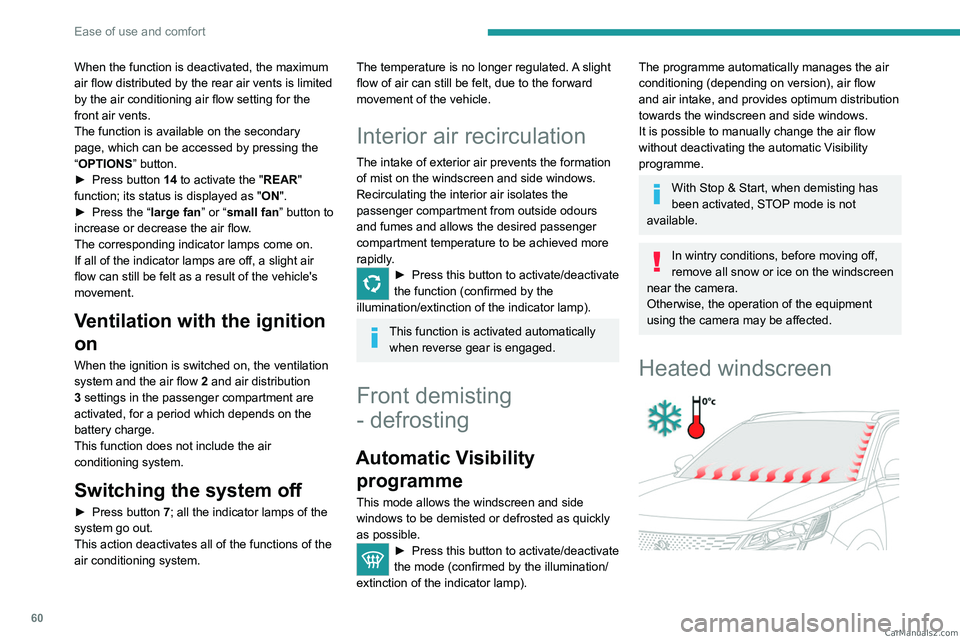
Heated windscreen
CarM an uals 2 .c o m
Page 70 of 292
68
Ease of use and comfort
Fitted to the second row windows, they protect
the passenger compartment from the sun's rays.
►
Pull the central tab to unroll the blind.
►
Position the blind's clip on the hook.
Always guide the blind slowly, using the tab, while raising or lowering it.
Storage boxes
Depending on version, the storage boxes are
fitted in the floor, at the foot of the side seats on
the second row. On the left-hand side, it may also contain the
temporary puncture repair kit.
►
T
o open them, lift the cover by the notch.
Boot fittings
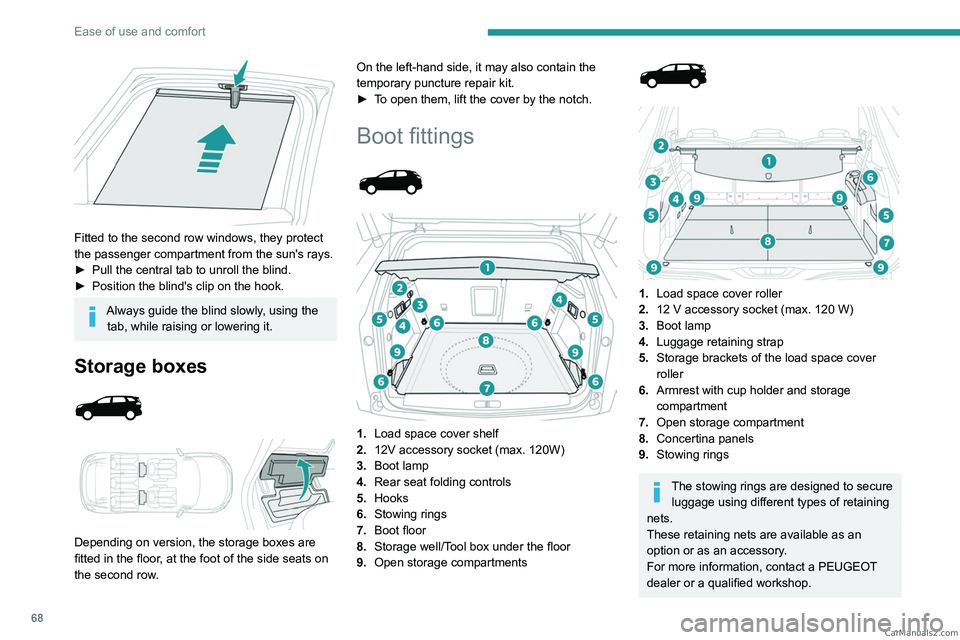
1. Load space cover shelf
2. 12V accessory socket (max. 120W)
3. Boot lamp
4. Rear seat folding controls
5. Hooks
6. Stowing rings
7. Boot floor
8. Storage well/Tool box under the floor
9. Open storage compartments
1. Load space cover roller
2. 12 V accessory socket (max. 120 W)
3. Boot lamp
4. Luggage retaining strap
5. Storage brackets of the load space cover
roller
6. Armrest with cup holder and storage
compartment
7. Open storage compartment
8. Concertina panels
9. Stowing rings
The stowing rings are designed to secure
luggage using different types of retaining
nets.
These retaining nets are available as an
option or as an accessory.
For more information, contact a PEUGEOT
dealer or a qualified workshop. CarM an uals 2 .c o m
Page 71 of 292
69
Ease of use and comfort
3For information on installing the High load
retaining net , refer to the corresponding
section.
Load space cover shelf
It consists of two sections:
– a fixed section with an open storage space.
–
a movable section
which rises when the boot
is opened, with an open storage space.
To remove the load space cover shelf:
► Unhook the two cords.
►
Raise the movable section slightly
, then
unclip it on each side.
►
Unclip the fixed section on each side, then
take out the load space cover shelf.
The load space cover shelf can be stowed under
the boot floor
.
In the event of sudden deceleration,
objects placed on the load space cover
shelf can turn into projectiles.
Load space cover roller
In the 5-seat configuration, it is installed behind
the second row seats, with the third row seats
stored folded away.
In the 7-seat configuration, it is stored behind the
third row seats.
In the event of sudden deceleration,
objects placed on the load space cover
roller can turn into projectiles.
Installation
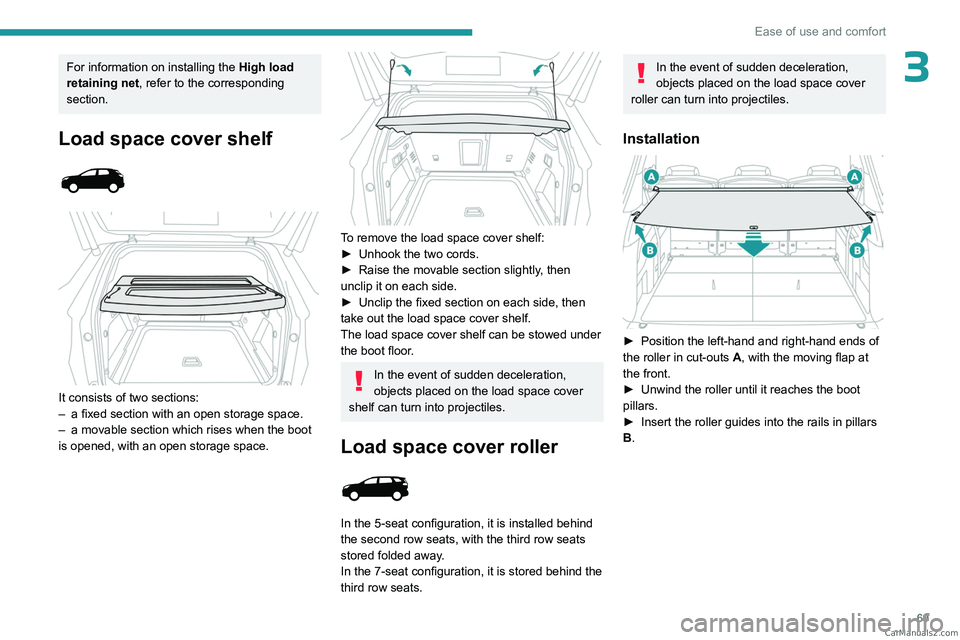
► Position the left-hand and right-hand ends of
the roller in cut-outs A , with the moving flap at
the front.
►
Unwind the roller until it reaches the boot
pillars.
►
Insert the roller guides into the rails in pillars
B
. CarM an uals 2 .c o m
Page 74 of 292
72
Ease of use and comfort
Behind the rear seats
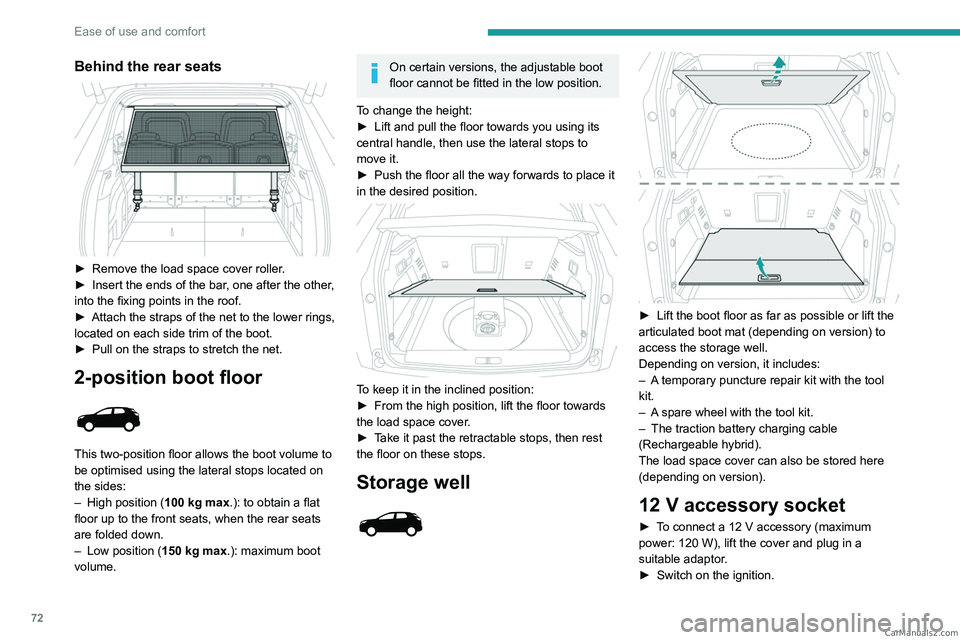
► Remove the load space cover roller.
► Insert the ends of the bar , one after the other,
into the fixing points in the roof.
►
Attach the straps of the net to the lower rings,
located on each side trim of the boot.
►
Pull on the straps to stretch the net.
2-position boot floor
This two-position floor allows the boot volume to
be optimised using the lateral stops located on
the sides:
–
High position ( 100
kg max.): to obtain a flat
floor up to the front seats, when the rear seats
are folded down.
–
Low position ( 150
kg max.): maximum boot
volume.
On certain versions, the adjustable boot
floor cannot be fitted in the low position.
To change the height:
►
Lift and pull the floor towards you using its
central handle, then use the lateral stops to
move it.
►
Push the floor all the way forwards to place it
in the desired position.
To keep it in the inclined position:
► From the high position, lift the floor towards
the load space cover
.
►
T
ake it past the retractable stops, then rest
the floor on these stops.
Storage well
► Lift the boot floor as far as possible or lift the
articulated boot mat (depending on version) to
access the storage well.
Depending on version, it includes:
–
A
temporary puncture repair kit with the tool
kit.
–
A
spare wheel with the tool kit.
–
The traction battery charging cable
(Rechargeable hybrid).
The load space cover can also be stored here
(depending on version).
12 V accessory socket
► To connect a 12 V accessory (maximum
power: 120 W), lift the cover and plug in a
suitable adaptor.
►
Switch on the ignition. CarM an uals 2 .c o m