2023 PEUGEOT 3008 sunroof
[x] Cancel search: sunroofPage 183 of 292

181
Practical information
7transverse roof bars approved for your
vehicle.
Observe the instructions on fitting and use
contained in the guide supplied with the roof
bars.
Maximum load distributed over the
transverse roof bars, for a loading height
not exceeding 40 cm (except bicycle carrier):
80
kg.
As this value may change, please verify the
maximum load quoted in the guide supplied
with the roof bars.
If the height exceeds 40 cm, adapt the speed
of the vehicle to the profile of the road to
avoid damaging the roof bars and the fixings
on the vehicle.
Be sure to refer to national legislation in order
to comply with the regulations for transporting
objects that are longer than the vehicle.
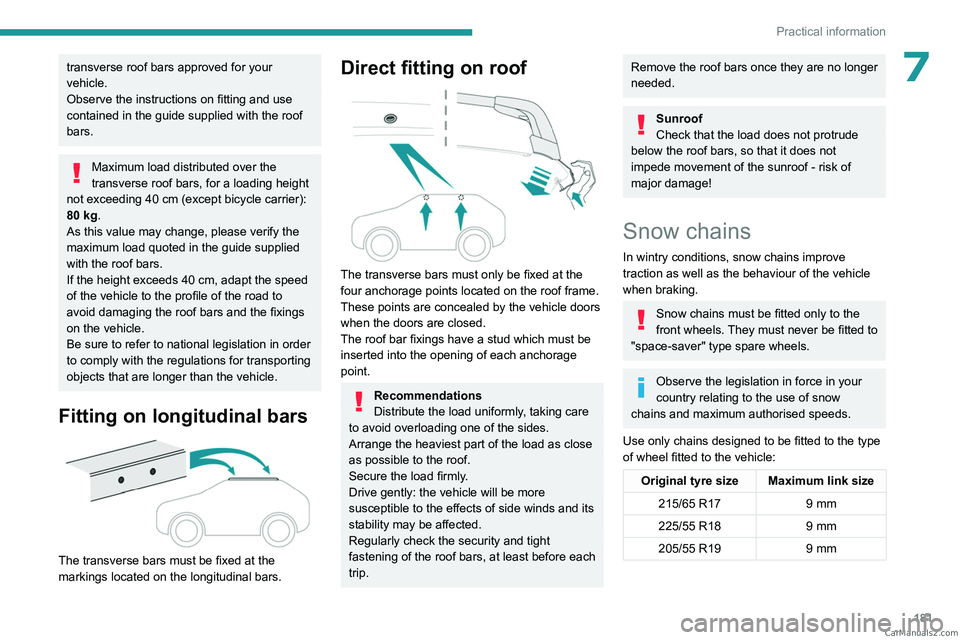
Fitting on longitudinal bars
The transverse bars must be fixed at the
markings located on the longitudinal bars.
Direct fitting on roof
The transverse bars must only be fixed at the
four anchorage points located on the roof frame.
These points are concealed by the vehicle doors
when the doors are closed.
The roof bar fixings have a stud which must be
inserted into the opening of each anchorage
point.
Recommendations
Distribute the load uniformly, taking care
to avoid overloading one of the sides.
Arrange the heaviest part of the load as close
as possible to the roof.
Secure the load firmly.
Drive gently: the vehicle will be more
susceptible to the effects of side winds and its
stability may be affected.
Regularly check the security and tight
fastening of the roof bars, at least before each
trip.
Remove the roof bars once they are no longer
needed.
Sunroof
Check that the load does not protrude
below the roof bars, so that it does not
impede movement of the sunroof - risk of
major damage!
Snow chains
In wintry conditions, snow chains improve
traction as well as the behaviour of the vehicle
when braking.
Snow chains must be fitted only to the
front wheels. They must never be fitted to
"space-saver" type spare wheels.
Observe the legislation in force in your
country relating to the use of snow
chains and maximum authorised speeds.
Use only chains designed to be fitted to the type
of wheel fitted to the vehicle:
Original tyre size Maximum link size 215/65 R17 9 mm
225/55 R18 9 mm
205/55 R19 9 mm CarM an uals 2 .c o m
Page 215 of 292

213
In the event of a breakdown
8
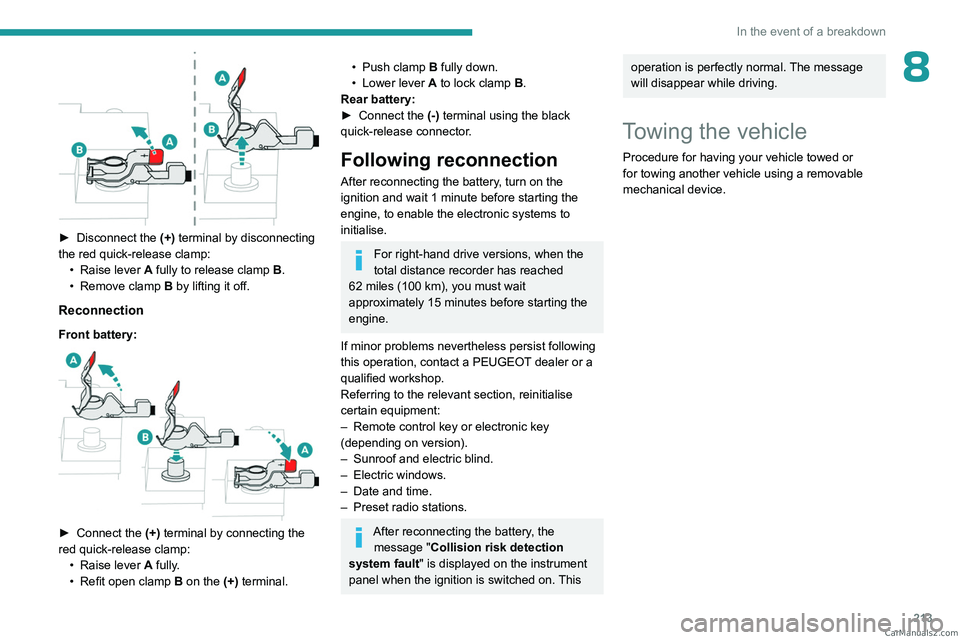
► Disconnect the (+) terminal by disconnecting
the red quick-release clamp: •
Raise lever
A
fully to release clamp
B
.
•
Remove clamp
B
by lifting it off.
Reconnection
Front battery:
► Connect the (+) terminal by connecting the
red quick-release clamp: •
Raise lever
A
fully.
•
Refit open clamp
B
on the (+) terminal.
• Push clamp B fully down.
• Lower lever A to lock clamp B.
Rear battery:
►
Connect the
(-) terminal using the black
quick-release connector.
Following reconnection
After reconnecting the battery, turn on the
ignition and wait 1 minute before starting the
engine, to enable the electronic systems to
initialise.
For right-hand drive versions, when the
total distance recorder has reached
62
miles (100 km), you must wait
approximately 15
minutes before starting the
engine.
If minor problems nevertheless persist following
this operation, contact a PEUGEOT dealer or a
qualified workshop.
Referring to the relevant section, reinitialise
certain equipment:
–
Remote control key or electronic key
(depending on version).
–
Sunroof and electric blind.
–
Electric windows.
–
Date and time.
–
Preset radio stations.
After reconnecting the battery, the message "Collision risk detection
system fault" is displayed on the instrument
panel when the ignition is switched on. This
operation is perfectly normal. The message
will disappear while driving.
Towing the vehicle
Procedure for having your vehicle towed or
for towing another vehicle using a removable
mechanical device. CarM an uals 2 .c o m
Page 242 of 292

240
PEUGEOT Connect Nav
Voice commands
Steering wheel-mounted
controls
Voice commands:
Voice commands can be issued from any
screen page after a short press on the "Voice
commands" button located on the steering
wheel or at the end of the lighting control stalk
(depending on equipment), as long as there is no
telephone call in progress.
To ensure that voice commands are always recognised by the system, please
follow these recommendations:
–
use natural language in a normal tone
without breaking up words or raising your
voice.
–
always wait for the "beep" (audible signal)
before speaking.
–
for best results, closing the windows and
sunroof is recommended, to avoid extraneous
interference (depending on version).
–
before issuing a voice command, ask any
other passengers to refrain from speaking.
First steps
Example of a "voice command" for
navigation:
"Navigate to address 11 regent street,
London"
Example of a "voice command" for the radio and
media:
"Play artist Madonna"
Example of a "voice command" for the
telephone:
"Call David Miller"
The voice commands, with a choice of 17 languages (Arabic, Brazilian, Czech,
Danish, Dutch, English, Farsi, French,
German, Italian, Norwegian, Polish,
Portuguese, Russian, Spanish, Swedish,
Turkish), are made using the language
previously chosen and set in the system.
For some voice commands, there are
alternative synonyms.
Example: Guide to / Navigate to / Go to / ...
The voice commands in Arabic for: "Navigate
to address" and "Display POI in the city", are
not available.
Information - Using the
system
When voice commands are activated, by
briefly pressing the button, help is
displayed on the touch screen, offering various
menus and enabling voice-based interaction with
the system.
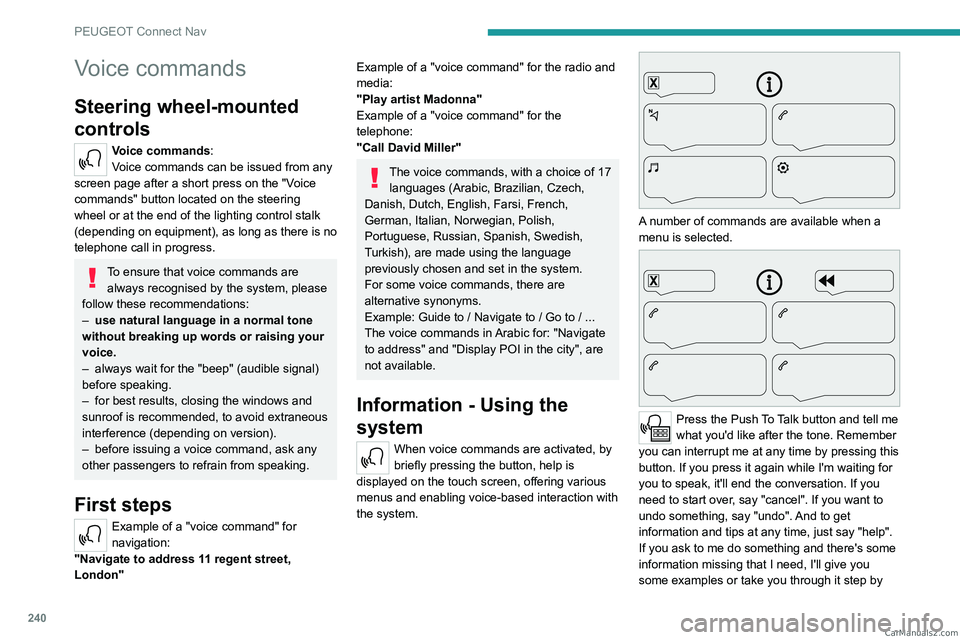
A number of commands are available when a
menu is selected.
Press the Push To Talk button and tell me
what you'd like after the tone. Remember
you can interrupt me at any time by pressing this
button. If you press it again while I'm waiting for
you to speak, it'll end the conversation. If you
need to start over, say "cancel". If you want to
undo something, say "undo". And to get
information and tips at any time, just say "help".
If you ask to me do something and there's some
information missing that I need, I'll give you
some examples or take you through it step by CarM an uals 2 .c o m
Page 272 of 292

270
Alphabetical index
Resetting the trip 21–22
Resetting the trip recorder
21
Rev counter
9
Reversing camera
130, 157–159
Reversing lamps
207
Roof bars
180–181
Running out of fuel (Diesel)
195
S
Safety, children 96–102, 105–106, 108
Saturation of the particle filter (Diesel)
187
Screen menu map
231
Screens, very cold conditions
182
Screenwash
81
Screenwash, front
81
Screenwash, rear
81
SCR (Selective Catalytic Reduction)
19, 189
Seat belts
91–92, 94, 100
Seat belts, rear
92–93
Seats, additional
53–55
Seats, electric
45–46
Seats, front
43, 45–46
Seats, heated
46
Seats, rear
48–55, 98
Selector, gear
118, 121–124
Sensors (warnings)
130
Serial number, vehicle
223
Servicing
16, 187, 189
Settings, equipment
23–24
Settings, system
234, 257
Sidelamps
75, 207
Silent vehicle warning sound (Rechargeable
hybrid)
85
Smartphone
25, 64
Snow chains
129, 181–182
Snow screen
182
Socket, 12 V accessory
63, 66, 72
Socket, auxiliary
230, 252
Socket, Jack
252
Speakers
63
Speed limiter
131, 134–136
Speed limit recognition
131, 133
Speedometer
9, 131
Sport mode
125–126
Spotlamps, side
77
Stability control (ESC)
87–88, 90
Starting a Diesel engine
165
Starting the engine
11 3
Starting the vehicle
113, 122–123
Starting using another battery
114, 209
State of charge, battery
23
Station, radio
227–228, 251
Stay, engine bonnet
184
Steering mounted controls, audio
225, 238
Steering wheel (adjustment)
47
Stickers, customising
193
Stopping the vehicle
113, 122–123
Stop & Start
22, 57, 60, 127–128, 165, 183, 187, 211
Storage
62, 65, 67–68
Storage box
72
Storage boxes
68
Storage compartments
62
Storage wells
72Storing driving positions 45–46
Sunroof, panoramic
39–41
Sunshine sensor
56
Sun visor
62
Suspension
189
Synchronising the remote control
32
T
Table position 44
Tables, aircraft
67
Tables of engines
221
Tailgate
32
Tank, fuel
165–166
Technical data
218, 220–221
Telephone
232–233, 254–256
Temperature, coolant
18
Ticket holder
62
Time (setting)
234, 258
TMC (Traffic info)
245
Tool box
72
Tools
195–198, 201–203
Topping-up AdBlue®
190
Top Tether (fixing)
102
Total distance recorder
20–21
Touch screen
21–24, 61
Towball, quickly detachable
178–180
Towbar
88, 177
Towbar with quickly detachable
towball
178–180
Towed loads
217–218, 220–221
Towing
213–216 CarM an uals 2 .c o m