2023 NISSAN SENTRA clutch
[x] Cancel search: clutchPage 16 of 556

2.0L 4 cylinder (MR20DD engine model)
1. Engine oil filler cap (P. 8-6)
2. Brake and clutch (if so equipped) fluidreservoir (P. 8-10)
3. Fuse and relay box (P. 8-20)
4. Battery (P. 8-13)
5. Air cleaner (P. 8-17)
6. Engine oil dipstick (P. 8-6)
7. Drive belt location (P. 8-15)
8. Windshield-washer fluid reservoir
(P. 8-11)
9. Engine coolant reservoir (P. 8-5)
Refer to the page number indicated in
parentheses for operating details.
NOTE:
Your vehicle may not be equipped with
an engine cover.
LDI3477
ENGINE COMPARTMENT CHECK
LOCATIONS
0-8Illustrated table of contents
Page 114 of 556
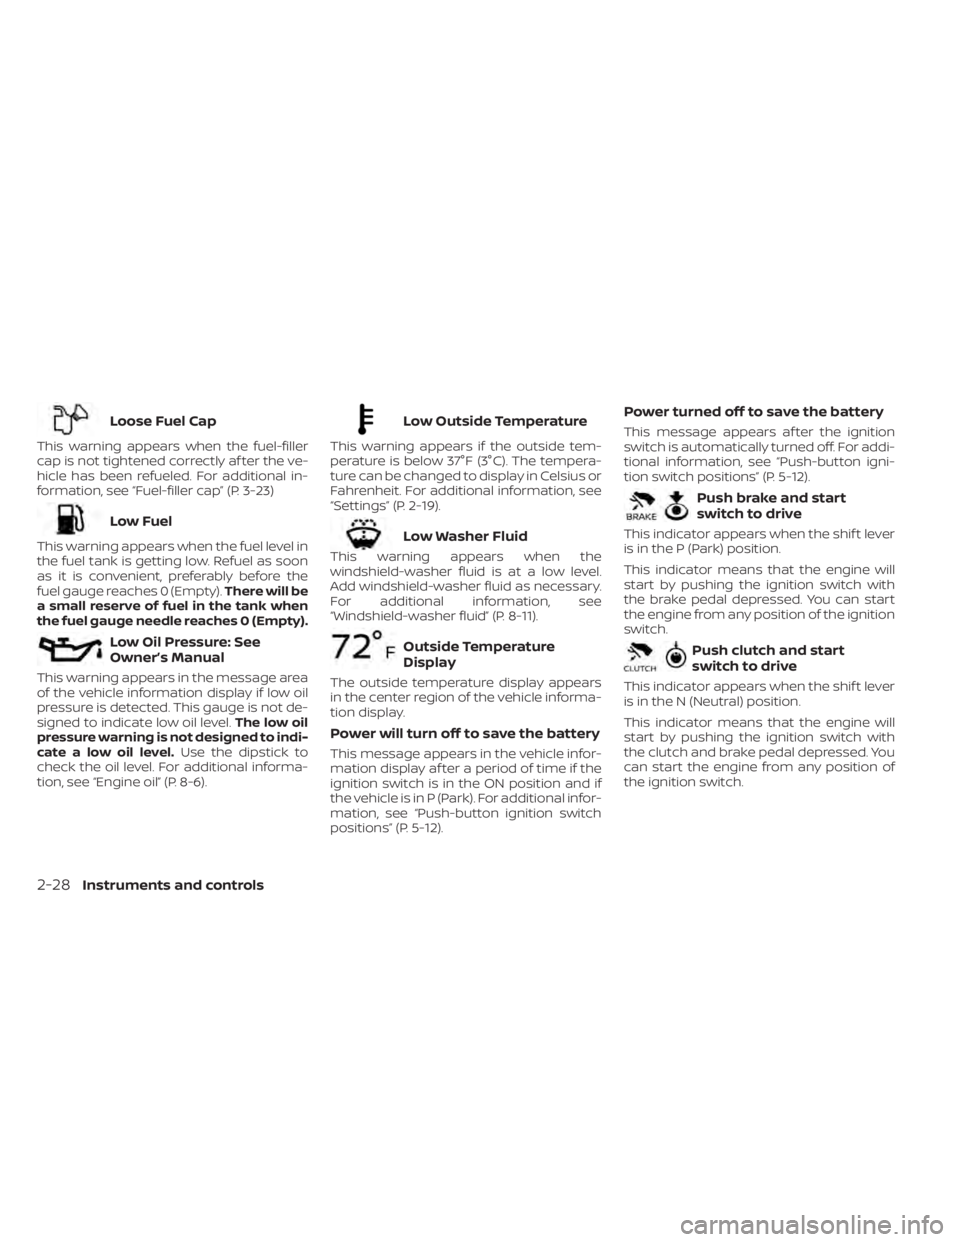
Loose Fuel Cap
This warning appears when the fuel-filler
cap is not tightened correctly af ter the ve-
hicle has been refueled. For additional in-
formation, see “Fuel-filler cap” (P. 3-23)
Low Fuel
This warning appears when the fuel level in
the fuel tank is getting low. Refuel as soon
as it is convenient, preferably before the
fuel gauge reaches 0 (Empty).There will be
a small reserve of fuel in the tank when
the fuel gauge needle reaches 0 (Empty).
Low Oil Pressure: See
Owner’s Manual
This warning appears in the message area
of the vehicle information display if low oil
pressure is detected. This gauge is not de-
signed to indicate low oil level. The low oil
pressure warning is not designed to indi-
cate a low oil level. Use the dipstick to
check the oil level. For additional informa-
tion, see “Engine oil” (P. 8-6).
Low Outside Temperature
This warning appears if the outside tem-
perature is below 37°F (3°C). The tempera-
ture can be changed to display in Celsius or
Fahrenheit. For additional information, see
“Settings” (P. 2-19).
Low Washer Fluid
This warning appears when the
windshield-washer fluid is at a low level.
Add windshield-washer fluid as necessary.
For additional information, see
“Windshield-washer fluid” (P. 8-11).
Outside Temperature
Display
The outside temperature display appears
in the center region of the vehicle informa-
tion display.
Power will turn off to save the battery
This message appears in the vehicle infor-
mation display af ter a period of time if the
ignition switch is in the ON position and if
the vehicle is in P (Park). For additional infor-
mation, see “Push-button ignition switch
positions” (P. 5-12).
Power turned off to save the battery
This message appears af ter the ignition
switch is automatically turned off. For addi-
tional information, see “Push-button igni-
tion switch positions” (P. 5-12).
Push brake and start
switch to drive
This indicator appears when the shif t lever
is in the P (Park) position.
This indicator means that the engine will
start by pushing the ignition switch with
the brake pedal depressed. You can start
the engine from any position of the ignition
switch.
Push clutch and start
switch to drive
This indicator appears when the shif t lever
is in the N (Neutral) position.
This indicator means that the engine will
start by pushing the ignition switch with
the clutch and brake pedal depressed. You
can start the engine from any position of
the ignition switch.
2-28Instruments and controls
Page 290 of 556
NISSAN VEHICLE IMMOBILIZER
SYSTEM
The NISSAN Vehicle Immobilizer System
will not allow the engine to start without
the use of the registered key.
If the engine fails to start using a registered
key (for example, when interference is
caused by another registered key, an auto-
mated toll road device or automatic pay-
ment device on the key ring), restart the
engine using the following procedure:
1. Leave the ignition switch in the ON posi-tion for approximately 5 seconds.
2. Place the ignition switch in the OFF or LOCK position, and wait approximately
10 seconds.
3. Repeat steps 1 and 2.
4. Restart the engine while holding the de- vice (which may have caused the inter-
ference) separate from the registered
key.
If the no start condition re-occurs, NISSAN
recommends placing the registered key on
a separate key ring to avoid interference
from other devices. • Make sure the area around the vehicle is
clear.
• Check fluid levels such as engine oil, cool- ant, brake and clutch fluid (if so equipped),
and windshield-washer fluid as fre-
quently as possible, or at least whenever
you refuel.
• Check that all windows and lights are clean.
• Visually inspect tires for their appearance and condition. Also check tires for proper
inflation.
• Lock all doors.
• Position seat and adjust head restraints/headrests.
• Adjust inside and outside mirrors.
• Fasten seat belts and ask all passengers to do likewise.
• Check the operation of warning lights when the ignition switch is placed in the
ON position. For additional information,
see “Warning lights, indicator lights and
audible reminders” (P. 2-9). 1. Apply the parking brake.
2.
Continuously Variable Transmission
model:
Move the shif t lever to P (Park) or N (Neu-
tral). P (Park) is recommended.
The starter is designed not to operate
if the shif t lever is in any of the driving
positions.
Manual Transmission (M/T) model:
Move the shif t lever to N (Neutral). De-
press the clutch pedal to the floor.
The starter is designed not to operate
unless the clutch pedal is fully
depressed.
3. Push the ignition switch to the ON posi- tion. Depress the brake pedal and the
clutch pedal (if so equipped) and push
the ignition switch to start the engine.
To start the engine immediately, push
and release the ignition switch while de-
pressing the brake pedal with the igni-
tion switch in any position.
BEFORE STARTING THE ENGINE STARTING THE ENGINE
5-14Starting and driving
Page 297 of 556
WARNING
When the high fluid temperature pro-
tection mode or fail-safe operation oc-
curs, vehicle speed may be gradually
reduced. The reduced speed may be
lower than other traffic, which could in-
crease the chance of a collision. Be es-
pecially careful when driving. If neces-
sary, pull to the side of the road at a safe
place and allow the transmission to re-
turn to normal operation, or have it re-
paired if necessary.
MANUAL TRANSMISSION (if so
equipped)
WARNING
• Do not downshif t abruptly on slip-
pery roads. This may cause a loss of
control.
• Do not over-rev the engine when
shif ting to a lower gear. This may
cause a loss of control or engine
damage.
• Do not shif t to the N (Neutral) posi-
tion while driving. Doing so may re-
sult in an accident due to loss of en-
gine braking.
CAUTION
• Do not rest your foot on the clutch
pedal while driving. This may cause
clutch damage.
• Fully depress the clutch pedal before
shif ting to help prevent transmission
damage.
• Stop your vehicle completely before
shif ting into R (Reverse).
• When the vehicle is stopped with the
engine running (for example, at a
stop light), shif t to N (Neutral) and re-
lease the clutch pedal with the foot
brake applied.
• Do not shif t to the N (Neutral) posi-
tion while driving. Doing so may re-
sult in an accident due to loss of en-
gine braking.
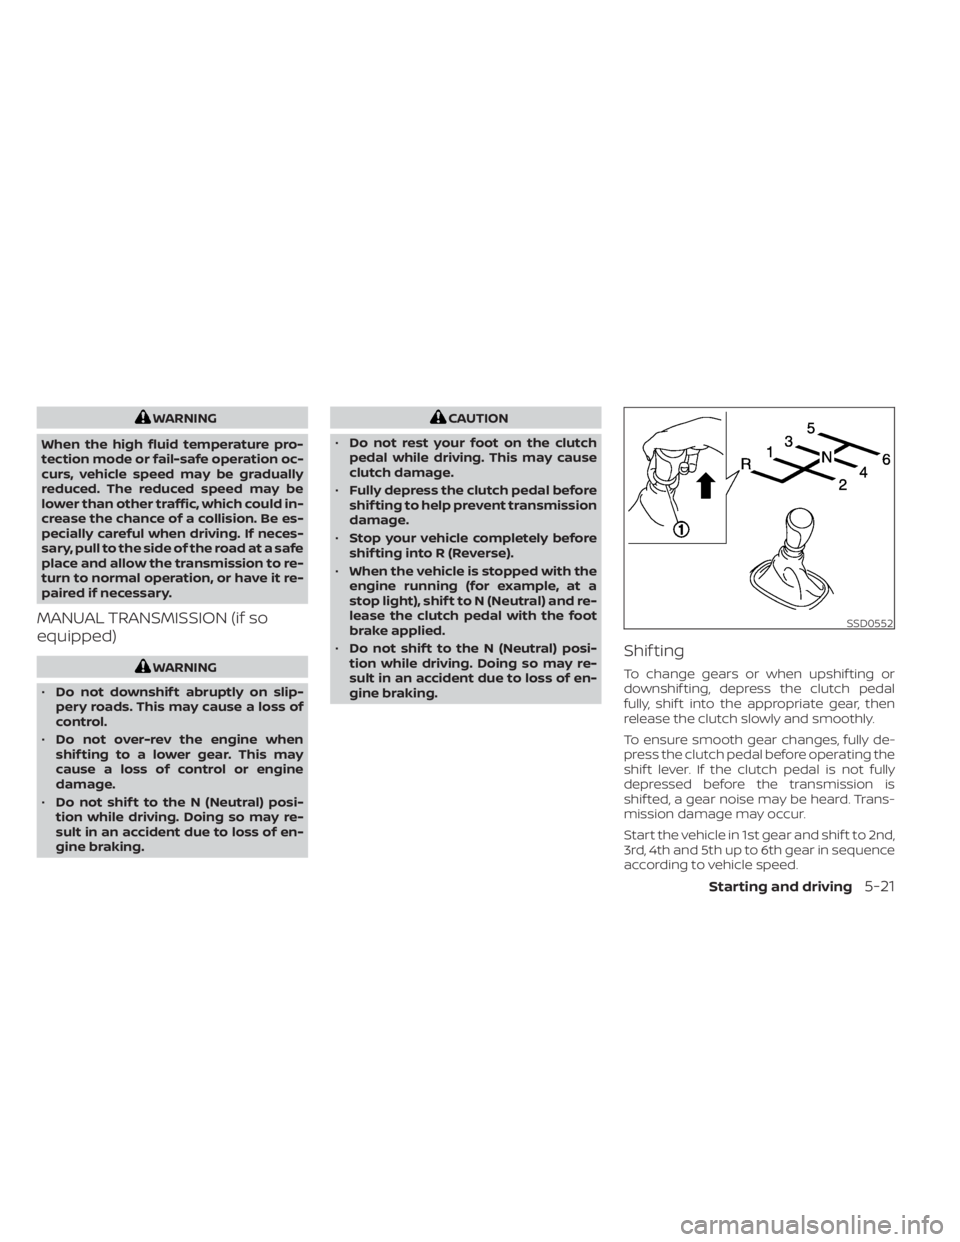
Shif ting
To change gears or when upshif ting or
downshif ting, depress the clutch pedal
fully, shif t into the appropriate gear, then
release the clutch slowly and smoothly.
To ensure smooth gear changes, fully de-
press the clutch pedal before operating the
shif t lever. If the clutch pedal is not fully
depressed before the transmission is
shif ted, a gear noise may be heard. Trans-
mission damage may occur.
Start the vehicle in 1st gear and shif t to 2nd,
3rd, 4th and 5th up to 6th gear in sequence
according to vehicle speed.
SSD0552
Starting and driving5-21
Page 298 of 556
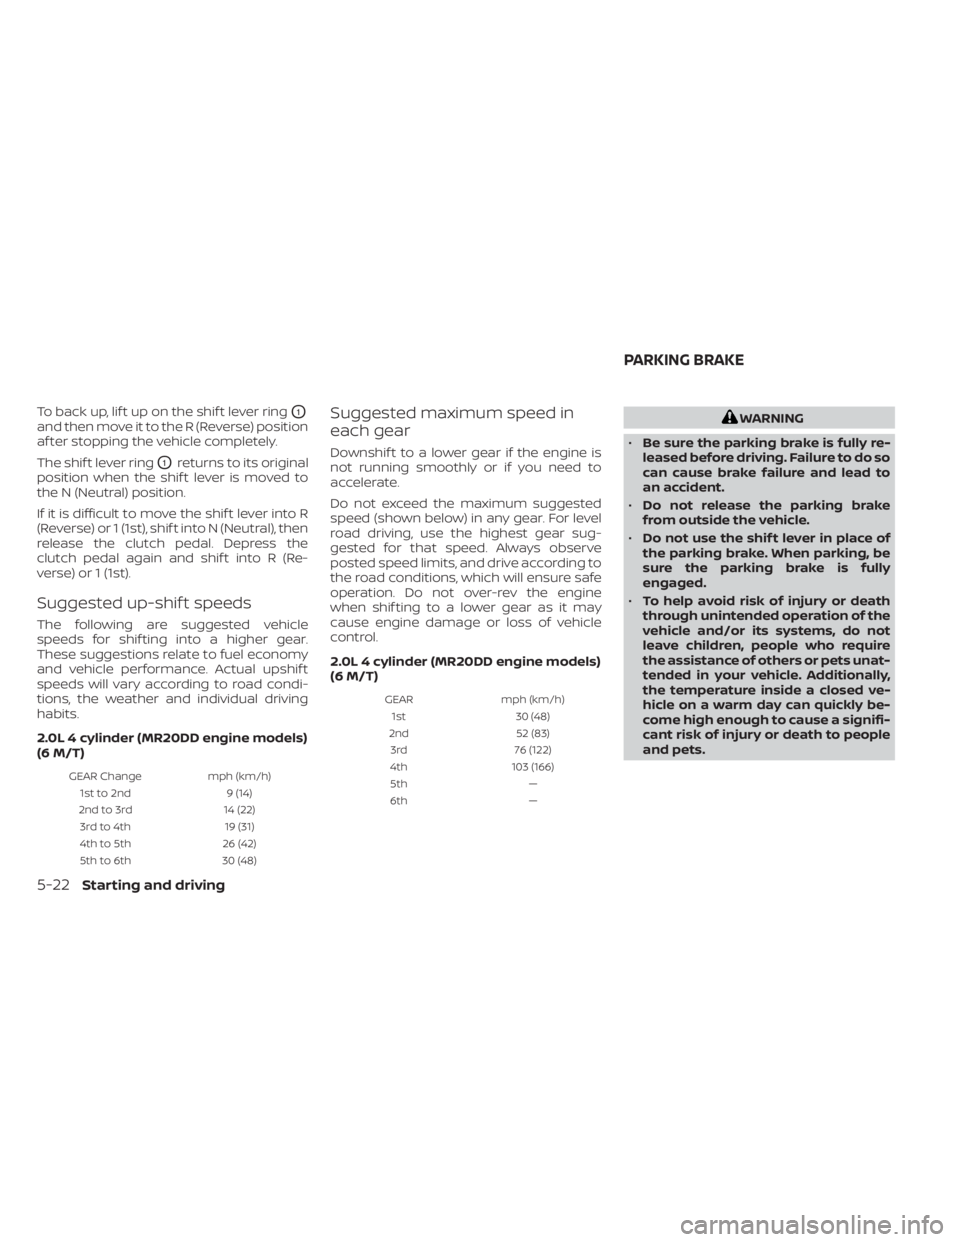
To back up, lif t up on the shif t lever ringO1
and then move it to the R (Reverse) position
af ter stopping the vehicle completely.
The shif t lever ring
O1returns to its original
position when the shif t lever is moved to
the N (Neutral) position.
If it is difficult to move the shif t lever into R
(Reverse) or 1 (1st), shif t into N (Neutral), then
release the clutch pedal. Depress the
clutch pedal again and shif t into R (Re-
verse) or 1 (1st).
Suggested up-shif t speeds
The following are suggested vehicle
speeds for shif ting into a higher gear.
These suggestions relate to fuel economy
and vehicle performance. Actual upshif t
speeds will vary according to road condi-
tions, the weather and individual driving
habits.
2.0L 4 cylinder (MR20DD engine models)
(6 M/T)
GEAR Change mph (km/h)
1st to 2nd 9 (14)
2nd to 3rd 14 (22)
3rd to 4th 19 (31)
4th to 5th 26 (42)
5th to 6th 30 (48)
Suggested maximum speed in
each gear
Downshif t to a lower gear if the engine is
not running smoothly or if you need to
accelerate.
Do not exceed the maximum suggested
speed (shown below) in any gear. For level
road driving, use the highest gear sug-
gested for that speed. Always observe
posted speed limits, and drive according to
the road conditions, which will ensure safe
operation. Do not over-rev the engine
when shif ting to a lower gear as it may
cause engine damage or loss of vehicle
control.
2.0L 4 cylinder (MR20DD engine models)
(6 M/T)
GEARmph (km/h)
1st 30 (48)
2nd 52 (83)
3rd 76 (122)
4th 103 (166)
5th —
6th —
WARNING
• Be sure the parking brake is fully re-
leased before driving. Failure to do so
can cause brake failure and lead to
an accident.
• Do not release the parking brake
from outside the vehicle.
• Do not use the shif t lever in place of
the parking brake. When parking, be
sure the parking brake is fully
engaged.
• To help avoid risk of injury or death
through unintended operation of the
vehicle and/or its systems, do not
leave children, people who require
the assistance of others or pets unat-
tended in your vehicle. Additionally,
the temperature inside a closed ve-
hicle on a warm day can quickly be-
come high enough to cause a signifi-
cant risk of injury or death to people
and pets.
PARKING BRAKE
5-22Starting and driving
Page 336 of 556
• If the cruise control system malfunctions,it cancels automatically. Theindica-
tor in the instrument panel then blinks to
warn the driver. For additional informa-
tion, see “Vehicle information display 4.2
inch (11 cm) TYPE A” (P. 2-18) or “Vehicle
information display 7 inch (18 cm) Type B”
(P. 2-32).
• If the
indicator blinks, push the
Cruise control switch off and have the
system checked. It is recommended that
you visit a NISSAN dealer for this service.
• The
indicator may blink when the
Cruise control switch is pushed on while
pushing the RES +, SET-, or CANCEL
switch. To properly set the cruise control
system, use the following procedures.
WARNING
Do not use the cruise control when driv-
ing under the following conditions:
• When it is not possible to keep the
vehicle at a set speed.
• In heavy traffic or in traffic that varies
in speed.
• On winding or hilly roads.
• On slippery roads (rain, snow, ice,
etc.).
• In very windy areas. Doing so could cause a loss of vehicle
control and result in an accident.
CRUISE CONTROL OPERATIONS
The cruise control allows driving at a speed
between 25 - 89 mph (40 - 144 km/h) with-
out keeping your foot on the accelerator
pedal.
To turn on the cruise control,
push the
Cruise control switch. The
indicator in
the instrument panel comes on.
To set cruising speed, accelerate the ve-
hicle to the desired speed, push the SET—
switch and release it. Take your foot off the
accelerator pedal. Your vehicle maintains
the set speed.
• To pass another vehicle, depress the ac-
celerator pedal. When you release the
pedal, the vehicle returns to the previ-
ously set speed.
• The vehicle may not maintain the set speed when going up or down steep hills.
If this happens, drive without the cruise
control.
To cancel the preset speed, use one of the
following three methods:
• Push the CANCEL switch.
• Tap the brake pedal. • Push the Cruise control switch off. The
indicator in the instrument panel
goes out.
The cruise control is automatically can-
celed if:
• You depress the brake or clutch pedal (for Manual Transmission models) while
pushing the RES+ or SET- switch. The pre-
set speed is deleted from memory.
• The vehicle slows down more than 8 mph (13 km/h) below the set speed.
• You depress the clutch pedal (for Manual Transmission models), or move the shif t
lever to N (Neutral) (for Continuously Vari-
able Transmission models).
To reset at a faster cruising speed, use
one of the following three methods:
• Depress the accelerator pedal. When the vehicle attains the desired speed, push
and release the SET— switch.
• Push and hold the RES+ switch. When the vehicle attains the speed you desire, re-
lease the switch.
• Push and release the RES+ switch. Each time you do this, the set speed increases
by about 1 mph (1.6 km/h).
5-60Starting and driving
Page 447 of 556

8 Do-it-yourself
Maintenance precautions.......................8-2
Engine compartment check locations ...........8-3
Engine cooling system ..........................8-4
Checking engine coolant level ................8-5
Changing engine coolant ....................8-5
Engine oil .......................................8-6
Checking engine oil level .....................8-6
Changing engine oil and oil filter ..............8-6
Continuously Variable Transmission (CVT)
fluid (if so equipped) ............................ 8-10
Brake and clutch (if so equipped) fluid ..........8-10
Brake fluid ................................... 8-10
Clutch (if so equipped) fluid ...................8-11
Windshield-washer fluid .........................8-11
Windshield-washer fluid reservoir ............8-11
Battery......................................... 8-13
Jump starting ............................... 8-14
Variable voltage control system ................8-15
Drive belt ....................................... 8-15
Spark plugs .................................... 8-16
Replacing spark plugs .......................8-16
Air cleaner ..................................... 8-17In-cabin microfilter
.......................... 8-17
Windshield wiper blades ........................8-18
Cleaning .................................... 8-18
Replacing ................................... 8-18
Brakes ......................................... 8-19
Fuses .......................................... 8-20
Engine compartment .......................8-20
Passenger compartment ...................8-22
Battery replacement ........................... 8-23
NISSAN Intelligent Key® ......................8-23
Lights .......................................... 8-25
Headlights .................................. 8-25
Turn signal bulb ............................. 8-26
Fog lights (if so equipped) ...................8-26
Exterior and interior lights ...................8-27
Wheels and tires ...............................
8-29
Tir
e pressure ................................ 8-29
Tire labeling ................................. 8-33
Types of tires ................................ 8-36
Tire chains .................................. 8-37
Changing wheels and tires ..................8-38
Page 449 of 556

2.0L 4 cylinder (MR20DD engine model)
1. Engine oil filler cap
2. Brake and clutch (if so equipped) fluidreservoir
3. Fuse and relay box
4. Battery
5. Air cleaner
6. Engine oil dipstick
7. Drive belt location
8. Windshield-washer fluid reservoir
9. Engine coolant reservoir
NOTE:
Your vehicle may not be equipped with
an engine cover.
LDI3477
ENGINE COMPARTMENT CHECK
LOCATIONS
Do-it-yourself8-3