2023 NISSAN SENTRA service indicator
[x] Cancel search: service indicatorPage 186 of 556
FUEL-FILLER CAP
WARNING
• Gasoline is extremely flammable and
highly explosive under certain condi-
tions. You could be burned or seri-
ously injured if it is misused or mis-
handled. Always stop the engine and
do not smoke or allow open flames or
sparks near the vehicle when
refueling.
• Do not attempt to top off the fuel
tank af ter the fuel pump nozzle
shuts off automatically. Continued
refueling may cause fuel overflow,
resulting in fuel spray and possibly a
fire.
• Use only an original equipment type
fuel-filler cap as a replacement. It has
a built-in safety valve needed for
proper operation of the fuel system
and emission control system. An in-
correct cap can result in a serious
malfunction and possible injury. It
could also cause the
Malfunc-
tion Indicator Light (MIL) to come on.
• Never pour fuel into the throttle body
to attempt to start your vehicle. •
Do not fill a portable fuel container in
the vehicle or trailer. Static electricity
can cause an explosion of flammable
liquid, vapor or gas in any vehicle or
trailer. To reduce the risk of serious
injury or death when filling portable
fuel containers:
– Always place the container on the
ground when filling.
– Do not use electronic devices
when filling.
– Keep the pump nozzle in contact
with the container while you are
filling it.
– Use only approved portable fuel
containers for flammable liquid.
CAUTION
• Do not use E–15 or E–85 fuel in your
vehicle. For additional information,
see “Fuel recommendation” (P. 10-4). •
The LOOSE FUEL CAP warning mes-
sage will appear if the fuel-filler cap
is not properly tightened. It may take
a few driving trips for the message to
be displayed. Failure to tighten the
fuel-filler cap properly af ter the
LOOSE FUEL CAP warning message
appears may cause the
Mal-
function Indicator Light (MIL) to
illuminate.
• Failure to tighten the fuel-filler cap
properly may cause the
Mal-
function Indicator Light (MIL) to illu-
minate. If the
light illuminates
because the fuel-filler cap is loose or
missing, tighten or install the cap and
continue to drive the vehicle. The
light should turn off af ter a few
driving trips. If thelight does not
turn off af ter a few driving trips, have
the vehicle inspected. It is recom-
mended that you visit a NISSAN
dealer for this service.
• For additional information, see “Mal-
function Indicator Light (MIL)”
(P. 2-11).
• If fuel is spilled on the vehicle body,
flush it away with water to avoid
paint damage.
3-24Pre-driving checks and adjustments
Page 281 of 556
CAUTION
• Do not use leaded gasoline. Deposits
from leaded gasoline will seriously
reduce the three-way catalyst's abil-
ity to help reduce exhaust pollutants.
• Keep your engine tuned up. Malfunc-
tions in the ignition, fuel injection, or
electrical systems can cause overrich
fuel flow into the three-way catalyst,
causing it to overheat. Do not keep
driving if the engine misfires, or if no-
ticeable loss of performance or other
unusual operating conditions are de-
tected. Have the vehicle inspected
promptly. It is recommended that
you visit a NISSAN dealer for this
service.
• Avoid driving with an extremely low
fuel level. Running out of fuel could
cause the engine to misfire, damag-
ing the three-way catalyst.
• Do not race the engine while warm-
ing it up.
• Do not push or tow your vehicle to
start the engine.TIRE PRESSURE MONITORING
SYSTEM (TPMS)
Each tire, including the spare (if provided),
should be checked monthly when cold and
inflated to the inflation pressure recom-
mended by the vehicle manufacturer on
the vehicle placard or tire inflation pressure
label. (If your vehicle has tires of a different
size than the size indicated on the vehicle
placard or tire inflation pressure label, you
should determine the proper tire inflation
pressure for those tires.)
As an added safety feature, your vehicle
has been equipped with a Tire Pressure
Monitoring System (TPMS) that illuminates
a low tire pressure telltale when one or
more of your tires is significantly under-
inflated. Accordingly, when the low tire
pressure telltale illuminates, you should
stop and check all your tires as soon as
possible, and inflate them to the proper
pressure. Driving on a significantly under-
inflated tire causes the tire to overheat and
can lead to tire failure. Under-inflation also
reduces fuel efficiency and tire tread life,
and may affect the vehicle’s handling and
stopping ability. Please note that the TPMS is not a substi-
tute for proper tire maintenance, and it is
the driver’s responsibility to maintain cor-
rect tire pressure, even if under-inflation
has not reached the level to trigger illumi-
nation of the TPMS low tire pressure telltale.
Your vehicle has also been equipped with a
TPMS malfunction indicator to indicate
when the system is not operating properly.
The TPMS malfunction indicator is com-
bined with the low tire pressure telltale.
When the system detects a malfunction,
the telltale will flash for approximately one
minute and then remain continuously illu-
minated. This sequence will continue upon
subsequent vehicle start-ups as long as
the malfunction exists. When the malfunc-
tion indicator is illuminated, the system
may not be able to detect or signal low tire
pressure as intended. TPMS malfunctions
may occur for a variety of reasons, includ-
ing the installation of replacement or alter-
nate tires or wheels on the vehicle that
prevent the TPMS from functioning prop-
erly. Always check the TPMS malfunction
telltale af ter replacing one or more tires or
wheels on your vehicle to ensure that the
replacement or alternate tires and wheels
allow the TPMS to continue to function
properly.
Starting and driving5-5
Page 296 of 556
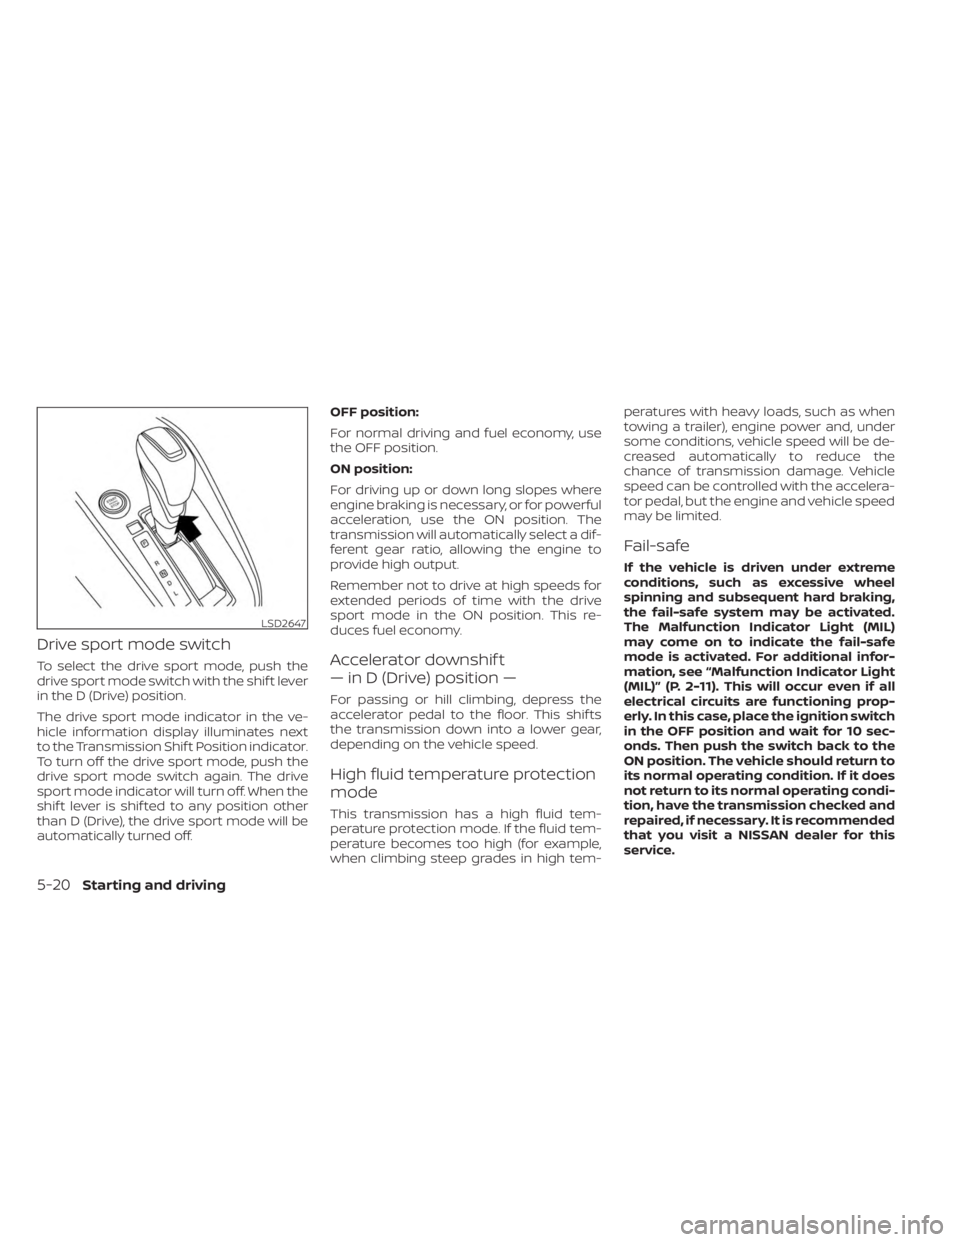
Drive sport mode switch
To select the drive sport mode, push the
drive sport mode switch with the shif t lever
in the D (Drive) position.
The drive sport mode indicator in the ve-
hicle information display illuminates next
to the Transmission Shif t Position indicator.
To turn off the drive sport mode, push the
drive sport mode switch again. The drive
sport mode indicator will turn off. When the
shif t lever is shif ted to any position other
than D (Drive), the drive sport mode will be
automatically turned off.OFF position:
For normal driving and fuel economy, use
the OFF position.
ON position:
For driving up or down long slopes where
engine braking is necessary, or for powerful
acceleration, use the ON position. The
transmission will automatically select a dif-
ferent gear ratio, allowing the engine to
provide high output.
Remember not to drive at high speeds for
extended periods of time with the drive
sport mode in the ON position. This re-
duces fuel economy.Accelerator downshif t
— in D (Drive) position —
For passing or hill climbing, depress the
accelerator pedal to the floor. This shif ts
the transmission down into a lower gear,
depending on the vehicle speed.
High fluid temperature protection
mode
This transmission has a high fluid tem-
perature protection mode. If the fluid tem-
perature becomes too high (for example,
when climbing steep grades in high tem-peratures with heavy loads, such as when
towing a trailer), engine power and, under
some conditions, vehicle speed will be de-
creased automatically to reduce the
chance of transmission damage. Vehicle
speed can be controlled with the accelera-
tor pedal, but the engine and vehicle speed
may be limited.
Fail-safe
If the vehicle is driven under extreme
conditions, such as excessive wheel
spinning and subsequent hard braking,
the fail-safe system may be activated.
The Malfunction Indicator Light (MIL)
may come on to indicate the fail-safe
mode is activated. For additional infor-
mation, see “Malfunction Indicator Light
(MIL)” (P. 2-11). This will occur even if all
electrical circuits are functioning prop-
erly. In this case, place the ignition switch
in the OFF position and wait for 10 sec-
onds. Then push the switch back to the
ON position. The vehicle should return to
its normal operating condition. If it does
not return to its normal operating condi-
tion, have the transmission checked and
repaired, if necessary. It is recommended
that you visit a NISSAN dealer for this
service.
LSD2647
5-20Starting and driving
Page 333 of 556
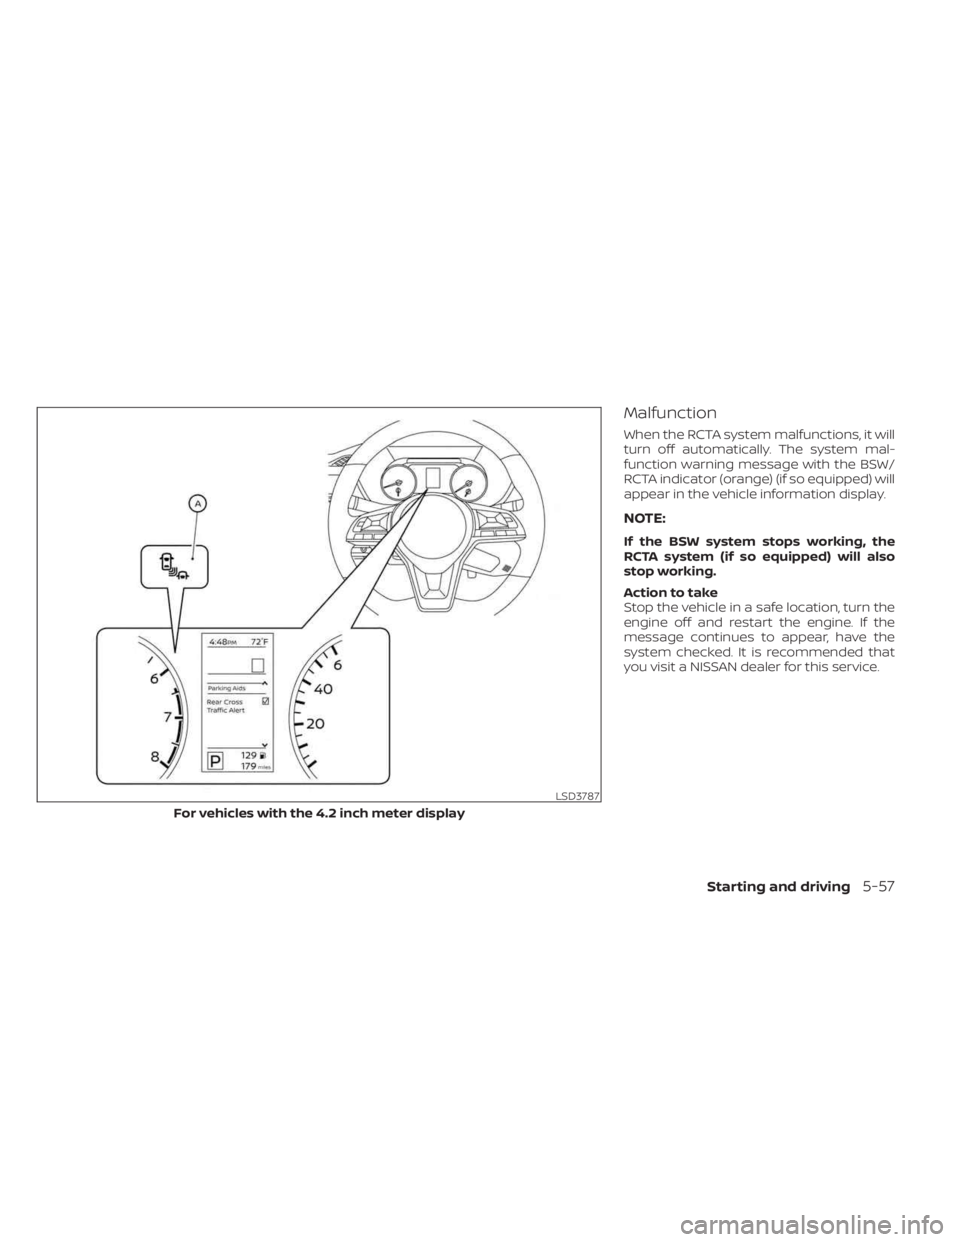
Malfunction
When the RCTA system malfunctions, it will
turn off automatically. The system mal-
function warning message with the BSW/
RCTA indicator (orange) (if so equipped) will
appear in the vehicle information display.
NOTE:
If the BSW system stops working, the
RCTA system (if so equipped) will also
stop working.
Action to take
Stop the vehicle in a safe location, turn the
engine off and restart the engine. If the
message continues to appear, have the
system checked. It is recommended that
you visit a NISSAN dealer for this service.
LSD3787
For vehicles with the 4.2 inch meter display
Starting and driving5-57
Page 336 of 556
• If the cruise control system malfunctions,it cancels automatically. Theindica-
tor in the instrument panel then blinks to
warn the driver. For additional informa-
tion, see “Vehicle information display 4.2
inch (11 cm) TYPE A” (P. 2-18) or “Vehicle
information display 7 inch (18 cm) Type B”
(P. 2-32).
• If the
indicator blinks, push the
Cruise control switch off and have the
system checked. It is recommended that
you visit a NISSAN dealer for this service.
• The
indicator may blink when the
Cruise control switch is pushed on while
pushing the RES +, SET-, or CANCEL
switch. To properly set the cruise control
system, use the following procedures.
WARNING
Do not use the cruise control when driv-
ing under the following conditions:
• When it is not possible to keep the
vehicle at a set speed.
• In heavy traffic or in traffic that varies
in speed.
• On winding or hilly roads.
• On slippery roads (rain, snow, ice,
etc.).
• In very windy areas. Doing so could cause a loss of vehicle
control and result in an accident.
CRUISE CONTROL OPERATIONS
The cruise control allows driving at a speed
between 25 - 89 mph (40 - 144 km/h) with-
out keeping your foot on the accelerator
pedal.
To turn on the cruise control,
push the
Cruise control switch. The
indicator in
the instrument panel comes on.
To set cruising speed, accelerate the ve-
hicle to the desired speed, push the SET—
switch and release it. Take your foot off the
accelerator pedal. Your vehicle maintains
the set speed.
• To pass another vehicle, depress the ac-
celerator pedal. When you release the
pedal, the vehicle returns to the previ-
ously set speed.
• The vehicle may not maintain the set speed when going up or down steep hills.
If this happens, drive without the cruise
control.
To cancel the preset speed, use one of the
following three methods:
• Push the CANCEL switch.
• Tap the brake pedal. • Push the Cruise control switch off. The
indicator in the instrument panel
goes out.
The cruise control is automatically can-
celed if:
• You depress the brake or clutch pedal (for Manual Transmission models) while
pushing the RES+ or SET- switch. The pre-
set speed is deleted from memory.
• The vehicle slows down more than 8 mph (13 km/h) below the set speed.
• You depress the clutch pedal (for Manual Transmission models), or move the shif t
lever to N (Neutral) (for Continuously Vari-
able Transmission models).
To reset at a faster cruising speed, use
one of the following three methods:
• Depress the accelerator pedal. When the vehicle attains the desired speed, push
and release the SET— switch.
• Push and hold the RES+ switch. When the vehicle attains the speed you desire, re-
lease the switch.
• Push and release the RES+ switch. Each time you do this, the set speed increases
by about 1 mph (1.6 km/h).
5-60Starting and driving
Page 355 of 556
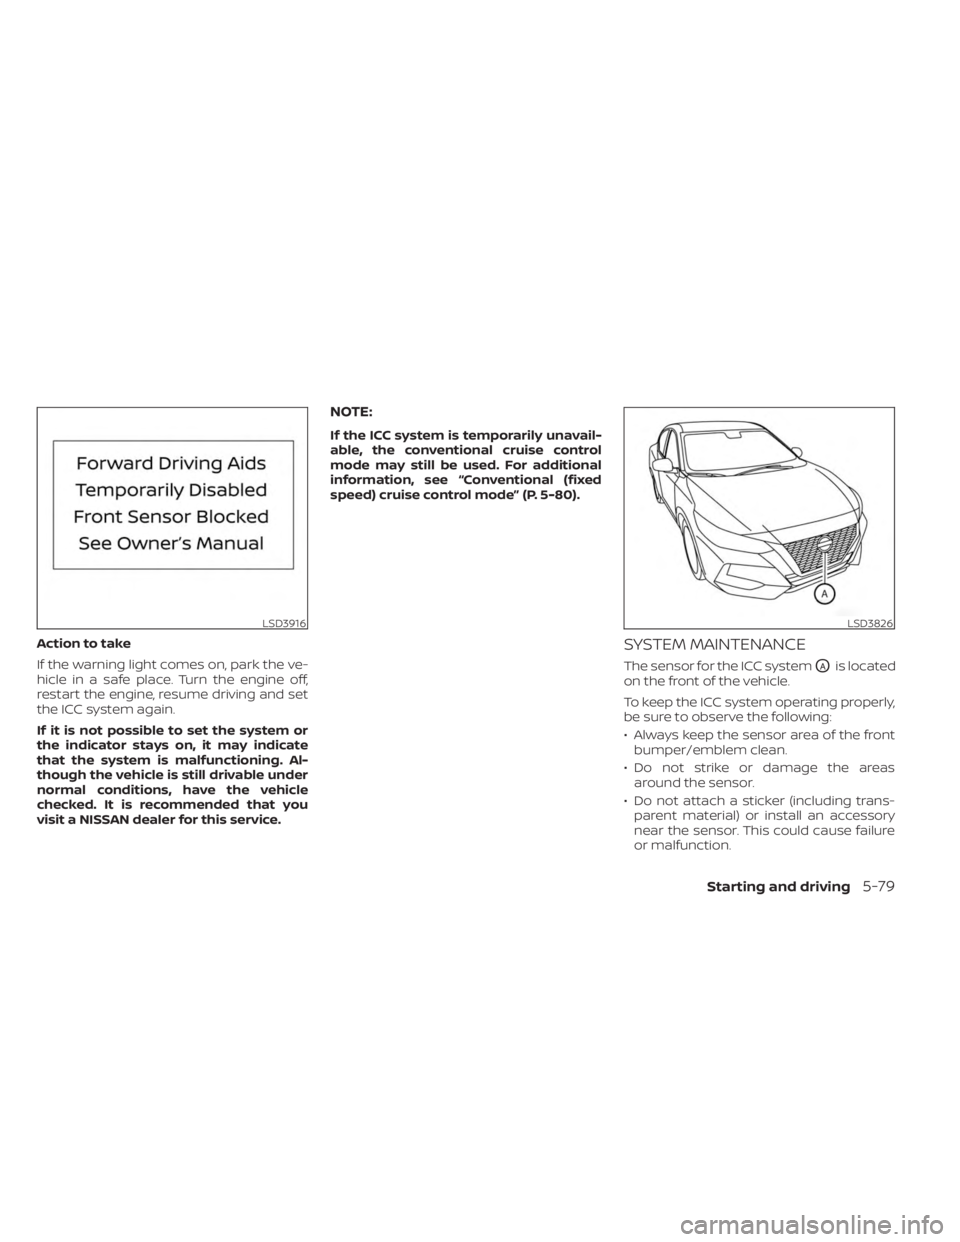
Action to take
If the warning light comes on, park the ve-
hicle in a safe place. Turn the engine off,
restart the engine, resume driving and set
the ICC system again.
If it is not possible to set the system or
the indicator stays on, it may indicate
that the system is malfunctioning. Al-
though the vehicle is still drivable under
normal conditions, have the vehicle
checked. It is recommended that you
visit a NISSAN dealer for this service.
NOTE:
If the ICC system is temporarily unavail-
able, the conventional cruise control
mode may still be used. For additional
information, see “Conventional (fixed
speed) cruise control mode” (P. 5-80).
SYSTEM MAINTENANCE
The sensor for the ICC systemOAis located
on the front of the vehicle.
To keep the ICC system operating properly,
be sure to observe the following:
• Always keep the sensor area of the front bumper/emblem clean.
• Do not strike or damage the areas around the sensor.
• Do not attach a sticker (including trans- parent material) or install an accessory
near the sensor. This could cause failure
or malfunction.
LSD3916LSD3826
Starting and driving5-79
Page 465 of 556
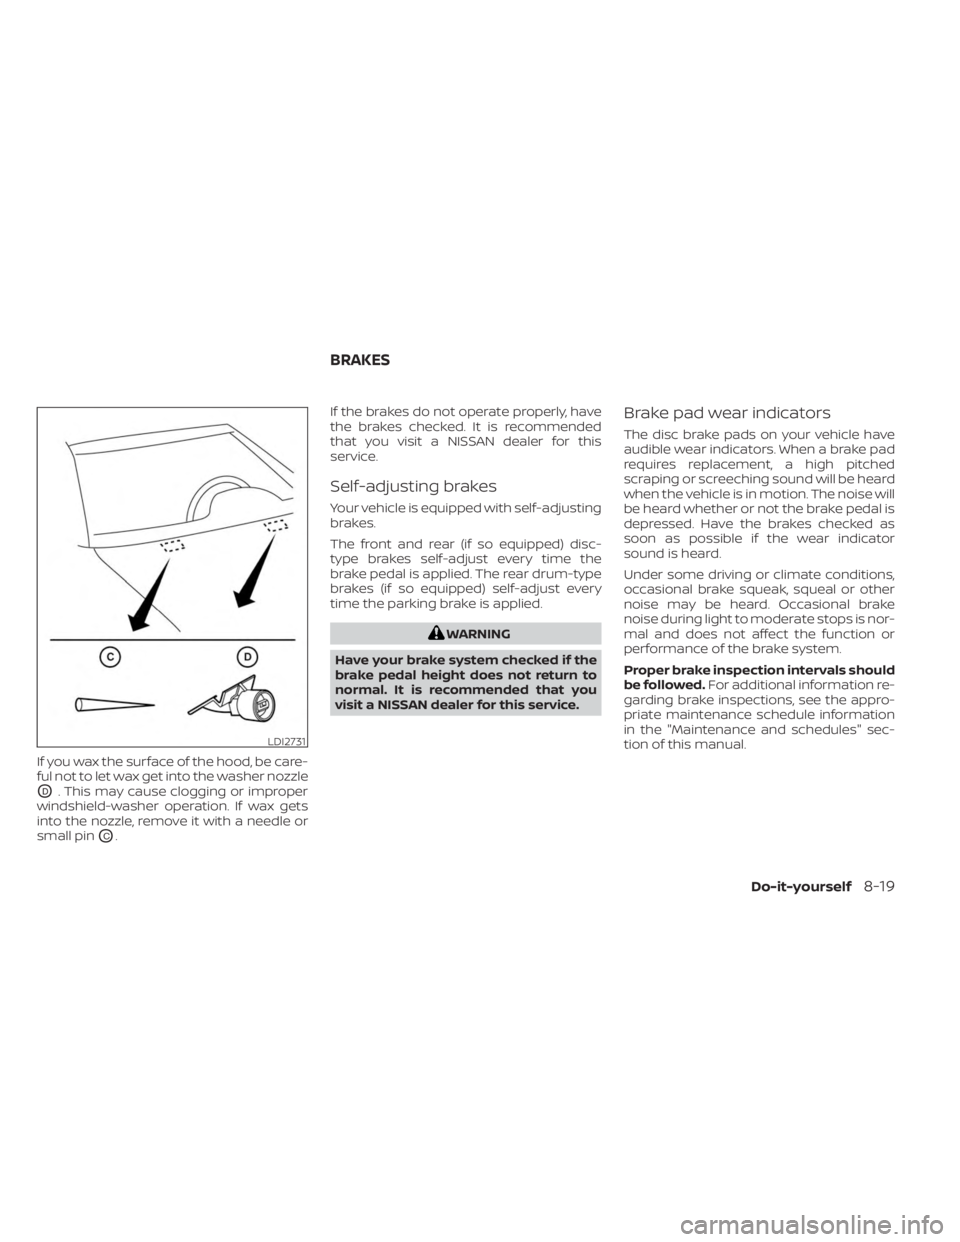
If you wax the surface of the hood, be care-
ful not to let wax get into the washer nozzle
OD. This may cause clogging or improper
windshield-washer operation. If wax gets
into the nozzle, remove it with a needle or
small pin
OC. If the brakes do not operate properly, have
the brakes checked. It is recommended
that you visit a NISSAN dealer for this
service.
Self-adjusting brakes
Your vehicle is equipped with self-adjusting
brakes.
The front and rear (if so equipped) disc-
type brakes self-adjust every time the
brake pedal is applied. The rear drum-type
brakes (if so equipped) self-adjust every
time the parking brake is applied.
WARNING
Have your brake system checked if the
brake pedal height does not return to
normal. It is recommended that you
visit a NISSAN dealer for this service.
Brake pad wear indicators
The disc brake pads on your vehicle have
audible wear indicators. When a brake pad
requires replacement, a high pitched
scraping or screeching sound will be heard
when the vehicle is in motion. The noise will
be heard whether or not the brake pedal is
depressed. Have the brakes checked as
soon as possible if the wear indicator
sound is heard.
Under some driving or climate conditions,
occasional brake squeak, squeal or other
noise may be heard. Occasional brake
noise during light to moderate stops is nor-
mal and does not affect the function or
performance of the brake system.
Proper brake inspection intervals should
be followed. For additional information re-
garding brake inspections, see the appro-
priate maintenance schedule information
in the "Maintenance and schedules" sec-
tion of this manual.
LDI2731
BRAKES
Do-it-yourself8-19
Page 485 of 556
WARNING
• Tires should be periodically in-
spected for wear, cracking,
bulging or objects caught in
the tread. If excessive wear,
cracks, bulging or deep cuts
are found, the tire(s) should be
replaced.
• The original tires have built-in
tread wear indicators. When
the wear indicators are visible,
the tire(s) should be replaced.
• Tires degrade with age and
use. Have tires, including the
spare, over 6 years old checked
by a qualified technician be-
cause some tire damage may
not be obvious. Replace the
tires as necessary to prevent
tire failure and possible per-
sonal injury. •
Improper service of the spare
tire may result in serious per-
sonal injury. If it is necessary to
repair the spare tire, it is rec-
ommended that you visit a
NISSAN dealer for this service.
• For additional information re-
garding tires, refer to “Impor-
tant Tire Safety Information”
(US) or “Tire Safety Informa-
tion” (Canada) in the Warranty
Information Booklet.
Replacing wheels and tires
When replacing a tire, use the same size,
tread design, speed rating and load carry-
ing capacity as originally equipped. Rec-
ommended types and sizes are shown in
“Wheels and tires” (P. 10-10).
WARNING
• The use of tires other than those rec-
ommended or the mixed use of tires
of different brands, construction
(bias, bias-belted or radial), or tread
patterns can adversely affect the
ride, braking, handling, Vehicle Dy-
namic Control (VDC) system, ground
clearance, body-to-tire clearance,
tire chain clearance, speedometer
calibration, headlight aim and bum-
per height. Some of these effects
may lead to accidents and could re-
sult in serious personal injury.
• If your vehicle was originally
equipped with four tires that were
the same size and you are only re-
placing two of the four tires, install
the new tires on the rear axle. Placing
new tires on the front axle may cause
loss of vehicle control in some driving
conditions and cause an accident
and personal injury.
Do-it-yourself8-39