2023 NISSAN QASHQAI belt
[x] Cancel search: beltPage 251 of 508
keep you and your passengers in
position when driving over rough
terrain.
. Do not drive across steep slopes.
Instead drive either straight up or
straight down the slopes. Off-
road vehicles can tip over side-
ways much more easily than they
can forward or backward.
. Many hills are too steep for any
vehicle. If you drive up them, you
may stall. If you drive down them,
you may not be able to control
your speed. If you drive across
them, you may roll over.
. Do not shift ranges while driving
on downhill grades as this could
cause loss of control of the vehi-
cle.
. Stay alert when driving to the top
of a hill. At the top there could be
a drop-off or other hazard that
could cause an accident.
. If your engine stalls or you cannot
make it to the top of a steep hill,
never attempt to turn around.
Your vehicle could tip or roll over.
Always back straight down in R
(Reverse) range. Never back down
in N (Neutral), using only the
brake, as this could cause loss of control.
. Heavy braking going down a hill
could cause your brakes to over-
heat and fade, resulting in loss of
control and an accident. Apply
brakes lightly and use a low
range to control your speed.
. Unsecured cargo can be thrown
around when driving over rough
terrain. Properly secure all cargo
so it will not be thrown forward
and cause injury to you or your
passengers.
. To avoid raising the center of
gravity excessively, do not exceed
the rated capacity of the roof rack
(if so equipped) and evenly dis-
tribute the load. Secure heavy
loads in the cargo area as far
forward and as low as possible.
Do not equip the vehicle with tires
larger than specified in this man-
ual. This could cause your vehicle
to roll over.
. Do not grip the inside or spokes
of the steering wheel when driv-
ing off-road. The steering wheel
could move suddenly and injure
your hands. Instead drive with
your fingers and thumbs on the
outside of the rim. .
Before operating the vehicle, en-
sure that the driver and all pas-
sengers have their seat belts
fastened.
. Always drive with the floor mats
in place as the floor may became
hot.
. Lower your speed when encoun-
tering strong crosswinds. With a
higher center of gravity, your
vehicle is more affected by strong
side winds. Slower speeds ensure
better vehicle control.
. Do not drive beyond the perfor-
mance capability of the tires,
even with AWD engaged.
. For AWD equipped vehicles, do
not attempt to raise two wheels
off the ground and shift the
transmission to any drive or re-
verse position with the engine
running. Doing so may result in
drivetrain damage or unexpected
vehicle movement which could
result in serious vehicle damage
or personal injury.
. Do not attempt to test an AWD
equipped vehicle on a 2-wheel
dynamometer (such as the dy-
namometers used by some
states for emissions testing), or
Starting and driving5-11
Page 252 of 508
5-12Starting and driving
similar equipment even if the
other two wheels are raised off
the ground. Make sure you inform
test facility personnel that your
vehicle is equipped with AWD
before it is placed on a dynam-
ometer. Using the wrong test
equipment may result in drive-
train damage or unexpected ve-
hicle movement which could
result in serious vehicle damage
or personal injury.
. When a wheel is off the ground
due to an unlevel surface, do not
spin the wheel excessively (AWD
model).
. Accelerating quickly, sharp steer-
ing maneuvers or sudden braking
may cause loss of control.
. If at all possible, avoid sharp
turning maneuvers, particularly
at high speeds. Your vehicle has
a higher center of gravity than a
conventional passenger car. The
vehicle is not designed for cor-
nering at the same speeds as
conventional passenger cars.
Failure to operate this vehicle
correctly could result in loss of
control and/or a rollover acci-
dent. .
Always use tires of the same type,
size, brand, construction (bias,
bias-belted or radial), and tread
pattern on all four wheels. Install
traction devices on the front
wheels when driving on slippery
roads and drive carefully.
. Be sure to check the brakes im-
mediately after driving in mud or
water. See “Brake system” (P.5-
129) for wet brakes.
. Avoid parking your vehicle on
steep hills. If you get out of the
vehicle and it rolls forward, back-
ward or sideways, you could be
injured.
. Whenever you drive off-road
through sand, mud or water as
deep as the wheel hub, more
frequent maintenance may be
required. See the maintenance
schedule shown in the “9. Main-
tenance and schedules” section.
. Spinning the front wheels on
slippery surfaces may cause the
AWD warning message to display
and the AWD system to automa-
tically switch from the AWD mode
to the 2WD mode. This could
reduce traction. (AWD models)WARNING
Never remove the key or place the
ignition switch in the LOCK position
while driving. The steering wheel will
lock and could cause the driver to
lose control of the vehicle. This could
result in serious vehicle damage or
personal injury.
IGNITION SWITCH (models without
Intelligent Key system)
Page 257 of 508
JVS0404X
INTELLIGENT KEY BATTERY DIS-
CHARGE
If the battery of the Intelligent Key is
discharged, or environmental conditions
interfere with the Intelligent Key opera-
tion, start the engine according to the
following procedure:
1. Move the shift lever to the P (Park)position (for CVT models) or the shift
lever to the N (Neutral) position (for MT
models).
2. Firmly apply the foot brake.
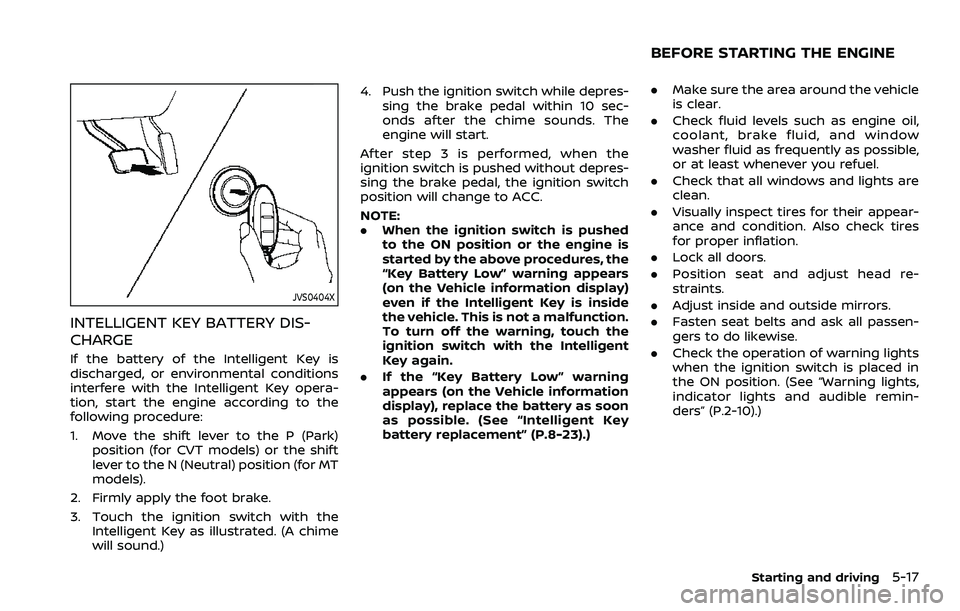
3. Touch the ignition switch with the Intelligent Key as illustrated. (A chime
will sound.) 4. Push the ignition switch while depres-
sing the brake pedal within 10 sec-
onds after the chime sounds. The
engine will start.
After step 3 is performed, when the
ignition switch is pushed without depres-
sing the brake pedal, the ignition switch
position will change to ACC.
NOTE:
. When the ignition switch is pushed
to the ON position or the engine is
started by the above procedures, the
“Key Battery Low” warning appears
(on the Vehicle information display)
even if the Intelligent Key is inside
the vehicle. This is not a malfunction.
To turn off the warning, touch the
ignition switch with the Intelligent
Key again.
. If the “Key Battery Low” warning
appears (on the Vehicle information
display), replace the battery as soon
as possible. (See “Intelligent Key
battery replacement” (P.8-23).)
.Make sure the area around the vehicle
is clear.
. Check fluid levels such as engine oil,
coolant, brake fluid, and window
washer fluid as frequently as possible,
or at least whenever you refuel.
. Check that all windows and lights are
clean.
. Visually inspect tires for their appear-
ance and condition. Also check tires
for proper inflation.
. Lock all doors.
. Position seat and adjust head re-
straints.
. Adjust inside and outside mirrors.
. Fasten seat belts and ask all passen-
gers to do likewise.
. Check the operation of warning lights
when the ignition switch is placed in
the ON position. (See “Warning lights,
indicator lights and audible remin-
ders” (P.2-10).)
Starting and driving5-17
BEFORE STARTING THE ENGINE
Page 268 of 508
5-28Starting and driving
automatic brake hold function.
The electronic parking brake is automati-
cally released as soon as the vehicle
starts while the accelerator pedal is
depressed.
WARNING
.The electronic parking brake will
not be automatically applied
when the engine is stopped with-
out using the ignition switch (for
example, by engine stalling).
Without the vehicle stationary,
the electronic parking brake will
not be automatically applied
even if the engine is turned off
with the ignition switch.
. Before leaving the vehicle, move
the shift lever to the 1 (1st) or R
(Reverse) position and check that
the electronic parking brake in-
dicator light is illuminated to
confirm that the electronic park-
ing brake is applied. The electro-
nic parking brake indicator light
will remain on for a period of time
after the driver’s door is locked.
CAUTION
When parking in an area where the
outside temperature is below 32°F
(0°C), do not apply the parking brake
to prevent it from freezing.
For safe parking, place the shift lever
in the 1 (1st) or R (Reverse) position
and securely block the wheels.
NOTE:
. To keep the electronic parking brake
released after the engine is turned
off, place the ignition switch in the
OFF position, depress the brake
pedal and push down the parking
brake switch before opening the
driver’s door.
. If a malfunction occurs in the elec-
tronic parking brake system (for
example, due to battery discharge),
it is recommended to contact a
NISSAN dealer.
. If the shift lever is moved to the P
(Park) position when the brake force
is maintained by the automatic
brake hold function, the electronic
parking brake will apply automati-
cally. .
If the driver’s seat belt is unfastened
when the brake force is maintained
by the automatic brake hold func-
tion, the electronic parking brake
will apply automatically.
. If the ignition switch is placed in the
OFF position when the brake force is
maintained by the automatic brake
hold function, the electronic parking
brake will apply automatically.
Manual operation
The electronic parking brake will not be
automatically applied if the engine is
stopped without using the ignition switch
(for example, by engine stalling). In such a
case, you have to apply the parking brake
manually.
To apply: Pull the switch up
. The
indicator lightwill illuminate.
To release: With the ignition switch in the
ON position, depress the brake pedal and
push the switch down
. The indicator
lightwill turn off.
Before driving, check that the electronic
parking brake indicator light
goes
out. For additional information, see
“Warning lights, indicator lights and audi-
ble reminders” (P.2-10).
Page 271 of 508
the following conditions need to be met.
.The driver’s seat belt is fastened.
. The electronic parking brake is re-
leased.
. The shift lever is not in the P (Park)
position.
. The vehicle is not parked on a steep
hill.
NOTE:
The automatic brake hold function re-
sets to OFF every time the ignition
switch is switched from the OFF posi-
tion to the ON position.
How to deactivate the automatic
brake hold function
While the automatic brake hold function
is activated, push the automatic brake
hold switch to turn off the automatic
brake hold indicator light and deactivate
the automatic brake hold function. To
deactivate the automatic brake hold
function while the brake force has been
maintained by the automatic brake hold
function, depress the brake pedal and
push the automatic brake hold switch.
WARNING
Make sure to firmly depress and hold
the brake pedal when turning off the
automatic brake hold function while
the brake force is applied. When the
automatic brake hold function is
deactivated, the brake force will be
released. This could cause the vehi-
cle to move or roll away unexpect-
edly.
Failure to prevent the vehicle from
rolling may result in serious personal
injury or property damage.
HOW TO USE THE AUTOMATIC
BRAKE HOLD FUNCTION
For additional information on using the
automatic brake hold function, refer to
the instructions outlined in this section.
To maintain braking force auto-
matically
With the automatic brake hold function
activated and the automatic brake hold
indicator light (white) illuminated on the
meter, depress the braking pedal to stop
the vehicle. The brake force is automati-
cally applied without your foot depressed
on the brake pedal. While the brake hold is maintained, the automatic brake hold
indicator light (green) illuminates on the
meter.
To start the vehicle from a stand-
still
With the shift lever not in the P (Park) or N
(Neutral) position, depress the accelerator
pedal while the brake force is maintained.
The brake force will automatically be
released to restart the vehicle. The auto-
matic brake hold indicator light (white) on
the meter illuminates and the automatic
brake hold returns to standby.
Parking
When the shift lever is in the P (Park)
position with the brake force maintained
by the automatic brake hold function, the
parking brake will automatically be ap-
plied and the brake force of the auto-
matic brake hold will be released. The
automatic brake hold indicator light turns
off. When the parking brake is applied
with the brake force maintained by the
automatic brake hold function, the brake
force of the automatic brake hold will be
released. The automatic brake hold in-
dicator light turns off.
NOTE:
.
Under the following conditions, the
parking brake will automatically be
Starting and driving5-31
Page 272 of 508
5-32Starting and driving
applied and the brake force of the
automatic brake hold will be re-
leased:
—The braking force is applied by
the automatic brake hold function
for 3 minutes or longer.
— The driver’s seat belt is unfas-
tened.
— The ignition switch is placed in
the OFF position.
— If a malfunction occurs in the
automatic brake hold function.
. When the vehicle stops, but the
brake force is not automatically
applied, depress the brake pedal
firmly until the automatic brake hold
indicator light (green) illuminates.
Automatic brake hold function dis-
play
The automatic brake hold function status
can be checked in the “Chassis Control”
mode in the vehicle information display.
For additional information, see “Trip com-
puter” (P.2-40).
WAF0037X
The SPORT mode switch adjusts the
engine and transmission points to en-
hance performance. Push the SPORT
mode switch on the instrument panel to
activate the SPORT mode. The SPORT
mode indicator (drive mode indicator)
appears in the vehicle information dis-
play.
NOTE:
In the SPORT mode, fuel economy may
be reduced.
JVS0185X
The ECO mode system helps to enhance
the fuel economy by controlling the
engine and CVT operation (for CVT mod-
els) automatically to avoid rapid accelera-
tion.
To turn on the ECO mode system, push
the ECO switch. The ECO mode indicator
appears on the meter.
To turn off the ECO mode, push the ECO
switch again. The ECO mode indicator will
turn off.
.The ECO mode system cannot be
turned off while the accelerator pedal
is depressed even if the ECO switch is
pushed to OFF. Release the accelera-
tor pedal to turn off the ECO mode
SPORT MODE SWITCH (if so equipped)ECO MODE SYSTEM
Page 304 of 508
5-64Starting and driving
WARNING
Failure to follow the warnings and
instructions for proper use of the
ProPILOT assist system could result
in serious injury or death.
.ProPILOT assist is not a self-driv-
ing system. Within the limits of its
capabilities, as described in this
manual, it helps the driver with
certain driving activities.
. The ProPILOT assist system is not
a replacement for proper driving
procedures and is not designed
to correct careless, inattentive or
absentminded driving. ProPILOT
assist will not always steer the
vehicle to keep it in the lane. The
ProPILOT assist system is not
designed to prevent loss of con-
trol. It is the driver’s responsibility
to stay alert, drive safely, keep
the vehicle in the traveling lane,
and be in control of the vehicle at
all times.
. There are limitations to the Pro-
PILOT assist system capability.
The ProPILOT assist system does
not function in all driving, traffic,
weather, and road conditions. It is the driver’s responsibility to stay
alert, drive safely, keep the vehi-
cle in the traveling lane, and be in
control of the vehicle at all times.
. The ProPILOT assist system is
only an aid to assist the driver
and is not a collision warning or
avoidance device.
. The ProPILOT assist system is for
highway use only and is not
intended for city driving. Failure
to apply the brakes or steer the
vehicle when necessary may re-
sult in a serious accident.
. Always observe posted speed
limits and do not set the speed
over them.
. Never take your hands off the
steering wheel when driving. Al-
ways keep your hands on the
steering wheel and drive your
vehicle safely.
. Never unfasten your safety belt
when using ProPILOT assist.
Doing so automatically cancels
the ProPILOT assist system.
. The ProPILOT assist system does
not react to stationary and slow
moving vehicles. .
Always drive carefully and atten-
tively when using the ProPILOT
assist system. Read and under-
stand the Owner’s Manual thor-
oughly before using the ProPILOT
assist system. To avoid serious
injury or death, do not rely on the
system to prevent accidents or to
control the vehicle’s speed in
emergency situations. Do not
use the ProPILOT assist system
except in appropriate road and
traffic conditions.
PROPILOT ASSIST (if so equipped)
Page 311 of 508
WAF0052X
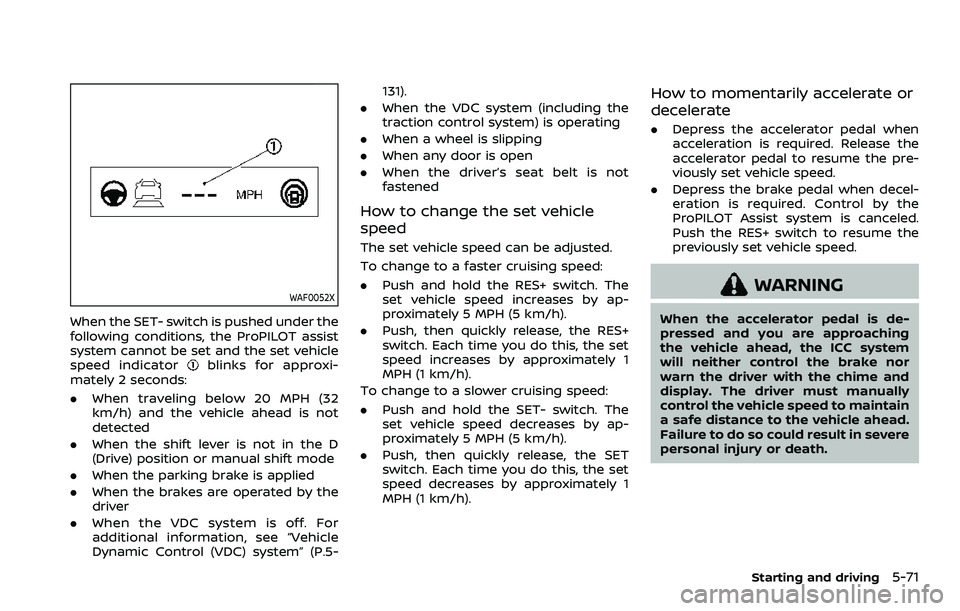
When the SET- switch is pushed under the
following conditions, the ProPILOT assist
system cannot be set and the set vehicle
speed indicator
blinks for approxi-
mately 2 seconds:
. When traveling below 20 MPH (32
km/h) and the vehicle ahead is not
detected
. When the shift lever is not in the D
(Drive) position or manual shift mode
. When the parking brake is applied
. When the brakes are operated by the
driver
. When the VDC system is off. For
additional information, see “Vehicle
Dynamic Control (VDC) system” (P.5- 131).
. When the VDC system (including the
traction control system) is operating
. When a wheel is slipping
. When any door is open
. When the driver’s seat belt is not
fastened
How to change the set vehicle
speed
The set vehicle speed can be adjusted.
To change to a faster cruising speed:
.Push and hold the RES+ switch. The
set vehicle speed increases by ap-
proximately 5 MPH (5 km/h).
. Push, then quickly release, the RES+
switch. Each time you do this, the set
speed increases by approximately 1
MPH (1 km/h).
To change to a slower cruising speed:
. Push and hold the SET- switch. The
set vehicle speed decreases by ap-
proximately 5 MPH (5 km/h).
. Push, then quickly release, the SET
switch. Each time you do this, the set
speed decreases by approximately 1
MPH (1 km/h).
How to momentarily accelerate or
decelerate
. Depress the accelerator pedal when
acceleration is required. Release the
accelerator pedal to resume the pre-
viously set vehicle speed.
. Depress the brake pedal when decel-
eration is required. Control by the
ProPILOT Assist system is canceled.
Push the RES+ switch to resume the
previously set vehicle speed.
WARNING
When the accelerator pedal is de-
pressed and you are approaching
the vehicle ahead, the ICC system
will neither control the brake nor
warn the driver with the chime and
display. The driver must manually
control the vehicle speed to maintain
a safe distance to the vehicle ahead.
Failure to do so could result in severe
personal injury or death.
Starting and driving5-71