2023 NISSAN PATHFINDER key
[x] Cancel search: keyPage 167 of 665

Vehicle Settings
The vehicle settings menu allows the user to change the settings for lights, wipers, locking, keys, and other vehicle settings.
Some menu items shown below may not be equipped on your vehicle.
Menu itemExplanation
Power Back Door Allows user to turn the power back door on or off.
Lighting Displays the available lighting options.
Welcome Headlight Allows user to turn the welcome headlight on or off.
Auto Room Lamp Allows user to turn the auto room lamp on or off.
Accent Lighting Allows user to adjust the accent lighting.
Auto Headlight Allows user to change when the lights illuminate based on the brightness outside the vehicle.
Light Off Delay Allows user to change the duration of time that the automatic headlights stay on af ter the vehicle is shut off.
Locking Displays the available locking options.
Ext. Door Switch Allows user to turn the exit door switch on or off.
Selective Unlock Allows user to turn the selective unlock feature o n or off. When this item is turned on (default), only the driver’s
door is unlocked af ter the driver’s door unlock operation. All the doors can be unlocked if the capacitive touch
pad is pressed within 60 seconds of the door handle capacitive unlock feature. When this feature is turned off, all
the doors unlock when the drivers door unlock operation is performed once.
Auto Door Unlock Allows the user to set the auto door unlock to Shif t to P and OFF.
Horn beeps on lock Allows the user to turn the horn beeps on lock feature on or off.
Walk Away Lock Allows the user to turn the walk away lock function ON or OFF. For additional information, see “Walk away lock
function” (P. 3-17).
Approach Unlock Allows the user to turn the approach unlock function ON or OFF. For additional information, see “Approach unlock
function” (P. 3-17).
Wipers Displays the available wiper options.
Speed Dependent Allows user to turn the speed dependent wipers on or off.
Rain Sensor Allows user to turn the rain sensor on or off.
Reverse Link Allows user to turn the reverse link feature on or off.
2-60Instruments and controls
Page 172 of 665

VEHICLE INFORMATION DISPLAY
WARNINGS AND INDICATORS
The following messages may appear in
your vehicle information display.
Engine start operation for
Intelligent Key system (if
I-Key battery level is low)
This indicator appears when the battery of
the Intelligent Key is low and when the In-
telligent Key system and the vehicle are not
communicating normally.
If this appears, touch the ignition switch
with the Intelligent Key while depressing
the brake pedal. For additional information,
see “NISSAN Intelligent Key® battery dis-
charge” (P. 5-15).
Key ID Incorrect
This warning appears when the ignition
switch is placed from the OFF position and
the Intelligent Key is not recognized by the
system. You cannot start the engine with
an unregistered key.
For additional information, see “NISSAN In-
telligent Key® system” (P. 3-7).
Key System Error: See
Owner’s Manual
Af ter the ignition switch is placed in the ON
position, this warning appears for a period
of time and then turns off.
The Key System Error message warns of a
malfunction with the Intelligent Key sys-
tem. If the warning appears while the en-
gine is stopped, it may be impossible to
start the engine.
If the warning appears while the engine is
running, you can drive the vehicle. However,
in these cases, have the system checked. It
is recommended that you visit a NISSAN
dealer for this service.
Key Battery Low
This indicator appears when the Intelligent
Key battery is running out of power.
If this indicator appears, replace the bat-
tery with a new one. For additional infor-
mation, see “Battery replacement” (P. 8-24).
No Key Detected
This warning appears when the Intelligent
Key is lef t outside the vehicle with the igni-
tion switch in the ON position. Make sure
the Intelligent Key is inside the vehicle.For additional information, see “NISSAN In-
telligent Key® system” (P. 3-7).
Automatic brake hold
indicator light
(white/green)
The automatic brake hold indicator light
(white) illuminates when the automatic
brake hold system is on standby.
The automatic brake hold indicator light
(green) illuminates when the automatic
brake hold system is operating.
For additional information, see “Automatic
brake hold” (P. 5-28).
Brightness indicator
This indicator shows the brightness ad-
justment of the instrument panel. For addi-
tional information, see “Instrument bright-
ness control” (P. 2-88).
Caution Steep slope
This indicator appears, and a chime
sounds when the automatic brake hold
function is activated while the vehicle is on
a steep hill. Apply the foot brake to stop the
vehicle from moving. For additional infor-
mation, see “Automatic brake hold” (P. 5-28).
Instruments and controls2-65
Page 183 of 665

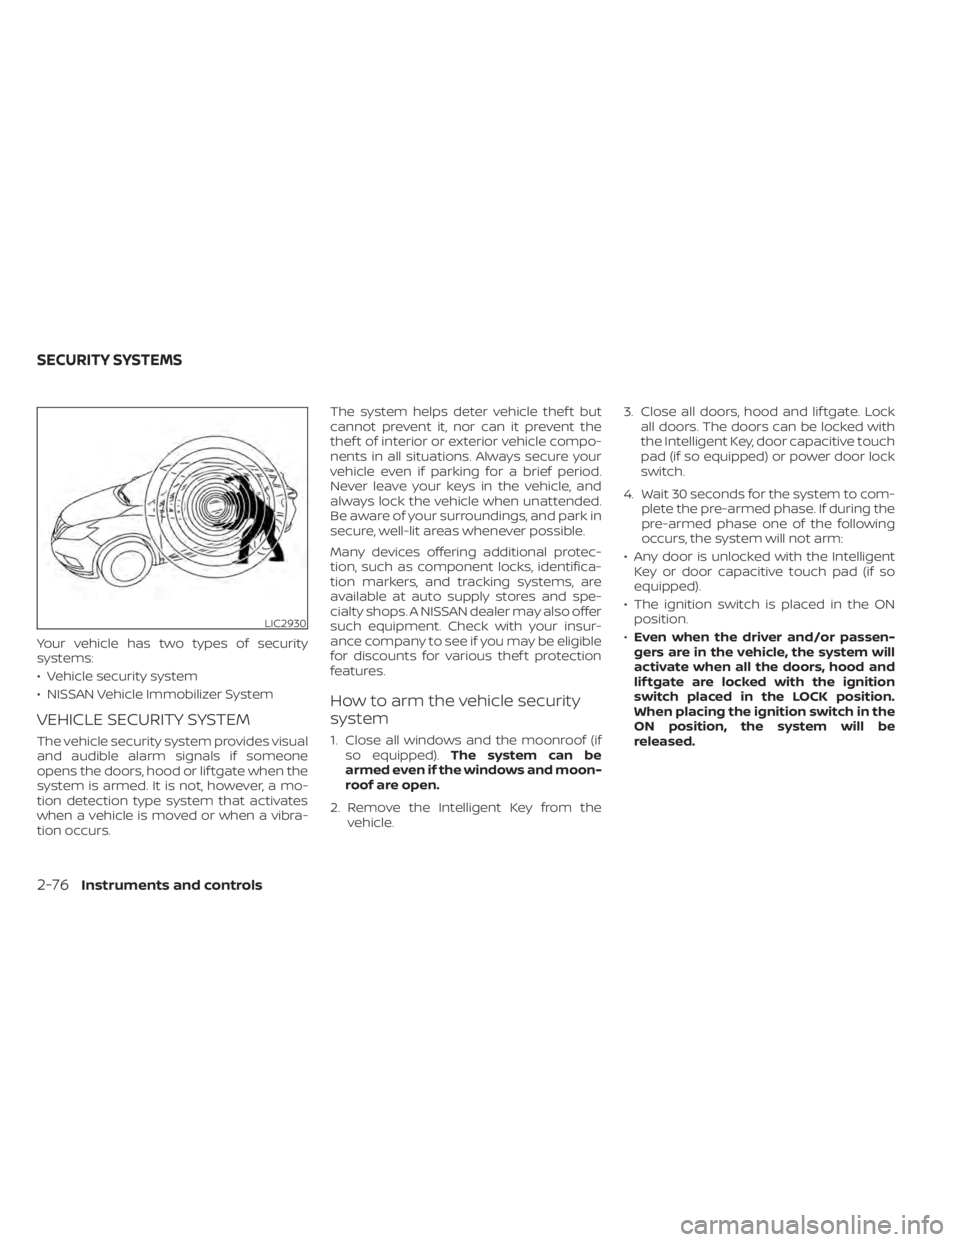
Your vehicle has two types of security
systems:
• Vehicle security system
• NISSAN Vehicle Immobilizer System
VEHICLE SECURITY SYSTEM
The vehicle security system provides visual
and audible alarm signals if someone
opens the doors, hood or lif tgate when the
system is armed. It is not, however, a mo-
tion detection type system that activates
when a vehicle is moved or when a vibra-
tion occurs.The system helps deter vehicle thef t but
cannot prevent it, nor can it prevent the
thef t of interior or exterior vehicle compo-
nents in all situations. Always secure your
vehicle even if parking for a brief period.
Never leave your keys in the vehicle, and
always lock the vehicle when unattended.
Be aware of your surroundings, and park in
secure, well-lit areas whenever possible.
Many devices offering additional protec-
tion, such as component locks, identifica-
tion markers, and tracking systems, are
available at auto supply stores and spe-
cialty shops. A NISSAN dealer may also offer
such equipment. Check with your insur-
ance company to see if you may be eligible
for discounts for various thef t protection
features.
How to arm the vehicle security
system
1. Close all windows and the moonroof (if
so equipped). The system can be
armed even if the windows and moon-
roof are open.
2. Remove the Intelligent Key from the vehicle. 3. Close all doors, hood and lif tgate. Lock
all doors. The doors can be locked with
the Intelligent Key, door capacitive touch
pad (if so equipped) or power door lock
switch.
4. Wait 30 seconds for the system to com- plete the pre-armed phase. If during the
pre-armed phase one of the following
occurs, the system will not arm:
• Any door is unlocked with the Intelligent Key or door capacitive touch pad (if so
equipped).
• The ignition switch is placed in the ON position.
• Even when the driver and/or passen-
gers are in the vehicle, the system will
activate when all the doors, hood and
lif tgate are locked with the ignition
switch placed in the LOCK position.
When placing the ignition switch in the
ON position, the system will be
released.
LIC2930
SECURITY SYSTEMS
2-76Instruments and controls
Page 184 of 665

Vehicle security system activation
The vehicle security system will give the
following alarm:
• The headlights blink and the horn soundsintermittently.
• The alarm automatically turns off af ter a period of time. However, the alarm reacti-
vates if the vehicle is tampered with
again. The alarm can be shut off by un-
locking the driver's door by pressing the
button on the Intelligent Key or plac-
ing the ignition switch in the ON position.
The alarm is activated by:
• opening a door without using the Intelli- gent Key (even if the door is unlocked by
using the inside lock knob or the power
door lock switch).
How to stop an activated alarm
The alarm stops only by unlocking the driv-
er’s door or the lif tgate by pressing the
button on the Intelligent Key or push-
ing the capacitive touch pad (if so
equipped) on the driver's or passenger's
door with the Intelligent Key in range of the
door handle.
NISSAN VEHICLE IMMOBILIZER
SYSTEM
The NISSAN Vehicle Immobilizer System
will not allow the engine to start without
the use of a registered key.
If the engine fails to start using a registered
key (for example, when interference is
caused by another registered key, an auto-
mated toll road device or automatic pay-
ment device on the key ring), restart the
engine using the following procedures:
1. Leave the ignition switch in the ON posi- tion for approximately 5 seconds.
2. Place the ignition switch in the OFF or LOCK position and wait approximately
10 seconds.
3. Repeat steps 1 and 2.
4. Restart the engine while holding the de- vice (which may have caused the inter-
ference) separate from the registered
key.
If the no start condition reoccurs, NISSAN
recommends placing the registered key on
a separate key ring to avoid interference
from other devices. Never leave these keys in the vehicle.
FCC Notice:
For USA:
This device complies with Part 15 of the
FCC Rules. Operation is subject to the fol-
lowing two conditions: (1) This device
may not cause harmful interference, and
(2) this device must accept any interfer-
ence received, including interference
that may cause undesired operation.
NOTE:
Changes or modifications not expressly
approved by the party responsible for
compliance could void the user's author-
ity to operate the equipment.
For Canada:
This device contains licence-exempt
transmitter(s)/receiver(s) that comply
with Innovation, Science and Economic
Development Canada’s licence-exempt
RSS(s). Operation is subject to the fol-
lowing two conditions: (1) This device
may not cause interference. (2) This de-
vice must accept any interference, in-
cluding interference that may cause un-
desired operation of the device.
Instruments and controls2-77
Page 212 of 665

WARNING
• Never put metallic materials be-
tween the wireless charger and a
smartphone.
• Those who use a pacemaker or other
medical equipment should contact
the electric medical equipment
manufacturer for the possible influ-
ences before use.
• Never put cloth over the smartphone
during charging process.
• Never charge a smartphone when it
is wet.
• Never put metallic materials or small
goods such as a cigarette lighter, In-
telligent Key or memory drive.
CAUTION
• Do not put an RFID/NFC/credit card
between the wireless charger and a
smartphone. This could cause data
corruption in the card.
• Do not use the wireless charger with
dust accumulated or dirt on the pad.
• Do not hit the surface of the wireless
charger. •
Do not spill liquid (water, drinks, etc.)
on the charging pad.
• Do not use grease, oil or alcohol for
cleaning charging pad.
WIRELESS CHARGER INDICATOR
The indicator(1)willil luminate in orange
when the charging process is started.
When the charging has completed, the in-
dicator illuminates in green.
If a malfunction occurs or the charging
process has stopped, the indicator will
blink in orange for 8 seconds then turn off.
WIRELESS CHARGER OPERATION
To use the wireless charger, it is necessary
to seat the smartphone well within the
charging pad. To maximize charging per-
formance, ensure the smartphone is fully
seated on the center of the charging pad
over the "Qi" logo
OA. Because the location
of the power receiver may vary depending
on the smartphone, you will need to try and
find the area that suits your smartphone.
Because some smartphone cases or ac-
cessories may adversely affect charging,
remove them before wireless charging.
Turn off the vibration function of the smart-
phone before wireless charging.
NOTE:
• Only a Qi compatible smartphone can
be used.
• The smartphone may be warmed dur-
ing charging process and the charging
may stop by the protection function of
the wireless charger. This is not a mal-
function. If this occurs, restart charging
af ter the smartphone cooled down.
The indicator will blink in orange then
turn off.
• The wireless charging process may be
stopped by the status of the smart-
phone (battery temperature, etc.).
• If a radio noise interference occurs dur-
ing charging process, put the smart-
phone onto the center (“Qi” logo) posi-
tion of the wireless charger.
• The wireless charging process will stop
during process of searching the Intelli-
gent Key.
• The wireless charging process will not
be started when a USB (Universal Serial
Bus) cable is connected to the smart-
phone. The indicator may illuminate in
orange or blink if the smartphone is
put on the wireless charger with a USB
cable connected. However, charging is
not performed.
Instruments and controls2-105
Page 217 of 665

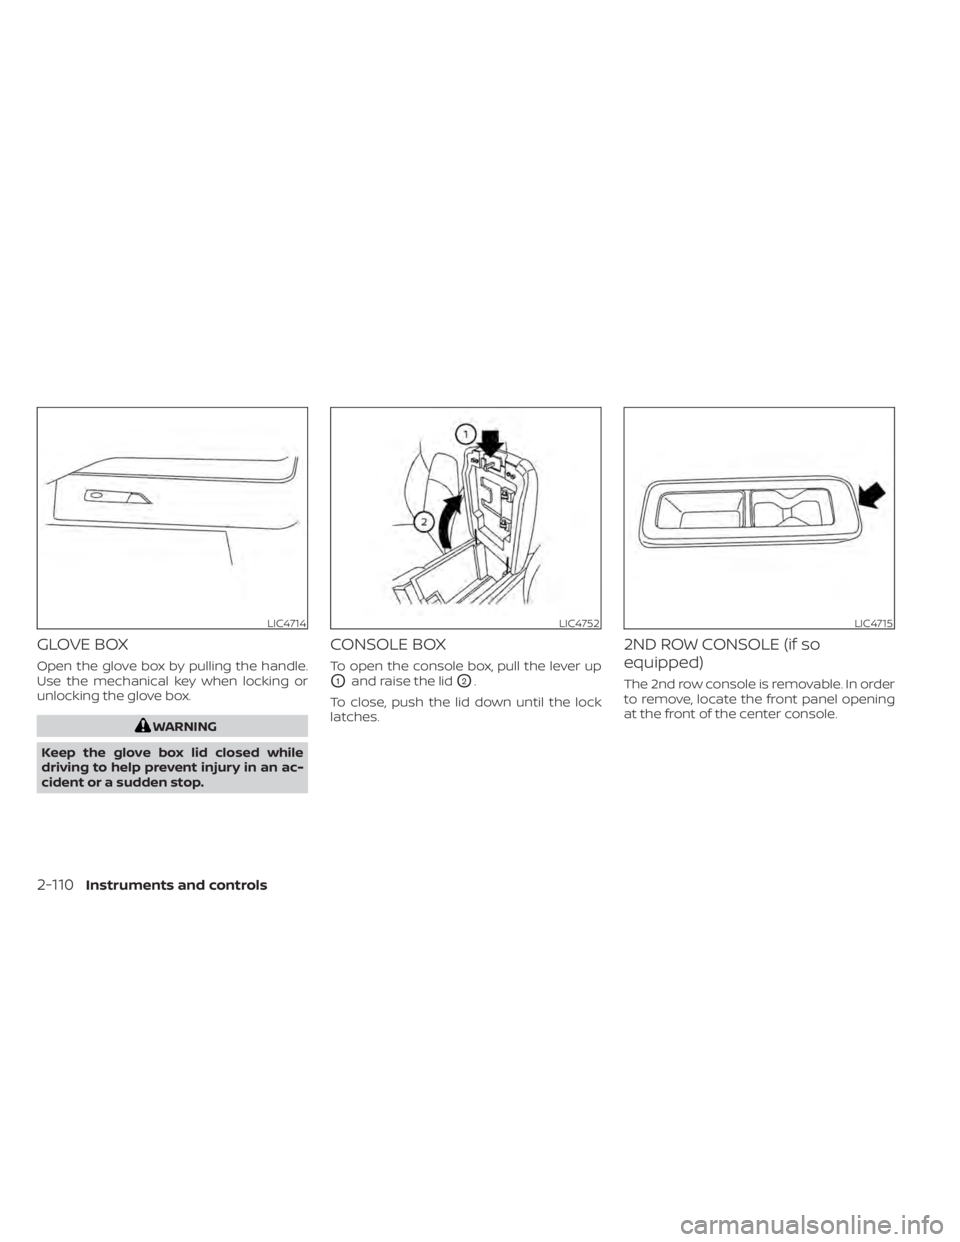
GLOVE BOX
Open the glove box by pulling the handle.
Use the mechanical key when locking or
unlocking the glove box.
WARNING
Keep the glove box lid closed while
driving to help prevent injury in an ac-
cident or a sudden stop.
CONSOLE BOX
To open the console box, pull the lever up
O1and raise the lidO2.
To close, push the lid down until the lock
latches.
2ND ROW CONSOLE (if so
equipped)
The 2nd row console is removable. In order
to remove, locate the front panel opening
at the front of the center console.
LIC4714LIC4752LIC4715
2-110Instruments and controls
Page 229 of 665

If the moonroof switch does not
operate
If the moonroof and sunshade do not op-
erate properly, perform the following pro-
cedure to initialize the operation system.
1. If the moonroof and sunshade are open,close them fully by repeatedly pushing
the moonroof switch to the CLOSE
O2
andO4position.
2. Push and hold the moonroof switch to the CLOSE
O4position for 10 seconds.
3. Af ter the moonroof and sunshade move slightly to the closed position and
then move back a little, release the
moonroof switch.
4. Push and hold the moonroof switch to the CLOSE
O4position, and the glass
and shade will move.
5. Release the moonroof switch. Then the moonroof and sunshade will fully open
and then fully close.
6. Check if the moonroof switch operates normally.
WARNING
The driver is always responsible for op-
erating the moonroof properly, includ-
ing the operation by all passengers.
Failure to follow the warnings and in-
structions for proper use of the moon-
roof could result in serious injury or
death.
• Do not allow children to operate the
moonroof. Improper operation by
children may cause an accident. If
children or others get caught in the
moonroof, it could cause serious
injury.
• To help avoid risk of injury or death
through unintended operation of the
moonroof, place the ignition switch
in the OFF position when leaving the
vehicle, and do not leave children and
the Intelligent Key inside the vehicle.
• Do not activate the auto-reverse
function intentionally. If hands or
face, etc. get caught in the moonroof,
it could cause serious injury.CAUTION
• Do not place objects (such as news-
papers, handkerchiefs, etc.) on the
sunshade when it is extending or re-
tracting causing improper operation
or damage to the sunshade.
• Do not push the sunshade arm with
your hands, etc., as this may deform
it. Improper operation or damage to
the sunshade may result.
• Do not put any object into the sun-
shade inlet port as this may result in
improper operation or damage the
sunshade.
• Do not hang any object on the arm
rail as this may result in improper op-
eration or damage the sunshade.
• Do not forcefully pull the sunshade.
Doing so may elongate the sun-
shade. Improper operation or dam-
age to the sunshade may result.
If the moonroof does not operate properly
af ter performing the procedure above,
have your vehicle checked by a NISSAN
dealer.
2-122Instruments and controls
Page 237 of 665

3 Pre-driving checks and adjustments
Keys.............................................3-2NISSAN Intelligent Key® .......................3-2
NISSAN Vehicle Immobilizer System
keys..........................................3-4
Doors ...........................................3-5
Locking with key .............................3-5
Locking with inside lock knob ................3-6
Locking with power door lock switch .........3-6
Automatic door locks ........................3-6
Child safety rear door lock .................... 3-7
NISSAN Intelligent Key® system .................. 3-7
Operating range .............................3-8
Door locks/unlocks precaution ...............3-9
NISSAN Intelligent Key® Operation ............3-9
How to use the remote keyless entry
function ..................................... 3-13
Approach unlock function ...................3-17
Walk away lock function .....................3-17
Warning signals ............................. 3-17
Troubleshooting guide ......................3-18
Remote Engine Start (if so equipped) ...........3-20
Remote Engine Start operating range .......3-20
Remote starting the vehicle .................3-21
Extending engine run time ..................3-21
Canceling a Remote Engine Start ...........3-21
Conditions the Remote Engine Start will
notwork .................................... 3-22Hood
........................................... 3-23
Lif tgate ........................................ 3-23
Operating the manual lif tgate
(if so equipped) .............................. 3-24
Operating the power lif tgate
(if so equipped) .............................. 3-24
Motion-Activated Lif tgate
(if so equipped) .............................. 3-27
Lif tgate release ............................. 3-29
Lif tgate position setting
(if so equipped) .............................. 3-30
Fuel-filler door .................................. 3-31
Opening the fuel-filler door ..................3-31
How to refuel ................................ 3-32
When refueling from a portable fuel
container ................................... 3-33
Steering wheel ................................. 3-34
Manual operation (if so equipped) ...........3-34
Automatic operation (if so equipped) ........3-35
Sun visors ...................................... 3-36
Vanity mirrors ............................... 3-36
C
ard holder ................................. 3-37
Mirrors ......................................... 3-37
Manual anti-glare rearview mirror
(if so equipped) .............................. 3-37