Page 42 of 665
ADJUST
For adjustable head restraint/headrest
Adjust the head restraint/headrest so the
center is level with the center of your ears. If
your ear position is still higher than the
recommended alignment, place the head
restraint/headrest at the highest position.For non-adjustable head restraint/headrest
Make sure the head restraint/headrest is
positioned so the lock knob is engaged in
the notch before riding in that designated
seating position.
WRS0134LRS2351
Type A (if so equipped)
LRS3394
Type B (if so equipped)
Safety-Seats, seat belts and supplemental restraint system1-17
Page 43 of 665
Raise
To raise the head restraint/headrest, pull it
up.
Make sure the head restraint/headrest is
positioned so the lock knob is engaged in
the notch before riding in that designated
seating position.
Lower
To lower, push and hold the lock knob and
push the head restraint/headrest down.
Make sure the head restraint/headrest is
positioned so the lock knob is engaged in
the notch before riding in that designated
seating position.
LRS2305
Type A (if so equipped)
LRS3395
Type B (if so equipped)
LRS2306
Type A (if so equipped)
1-18Safety-Seats, seat belts and supplemental restraint system
Page 44 of 665
FOLDING HEAD
RESTRAINT/HEADREST
To fold the head restraint/headrest, pull the
strap located on the rear of the head
restraint/headrest.
If the head restraint/headrest has been
folded, make sure that it is returned to the
upright position.
Make sure the head restraint/headrest is
positioned so the lock knobs are engaged
in the notches before riding in that desig-
nated seating position.
WARNING
When the seat is returned to the normal
seating position, the head restraint/
headrest must be returned to the up-
right position to properly protect ve-
hicle occupants.
LRS3396
Type B (if so equipped)
LRS2307
Safety-Seats, seat belts and supplemental restraint system1-19
Page 57 of 665
• Do the child’s knees bend easily over thefront edge of the seat with feet flat on the
floor?
• Can the child safely wear the seat belt (lap belt low and snug across the hips and
shoulder belt across mid-chest and
shoulder)?
• Is the child able to use the properly ad- justed head restraint/headrest?
• Will the child be able to stay in position for the entire ride?
If you answered no to any of these ques-
tions, the child should remain in a booster
seat using a three-point type seat belt.
NOTE:
Laws in some communities may follow
different guidelines. Check local and
state regulations to confirm your child is
using the correct restraint system before
traveling.
WARNING
Never let a child stand or kneel on any
seat and do not allow a child in the
cargo area. The child could be seriously
injured or killed in a sudden stop or
collision.
LRS2690
1-32Safety-Seats, seat belts and supplemental restraint system
Page 72 of 665

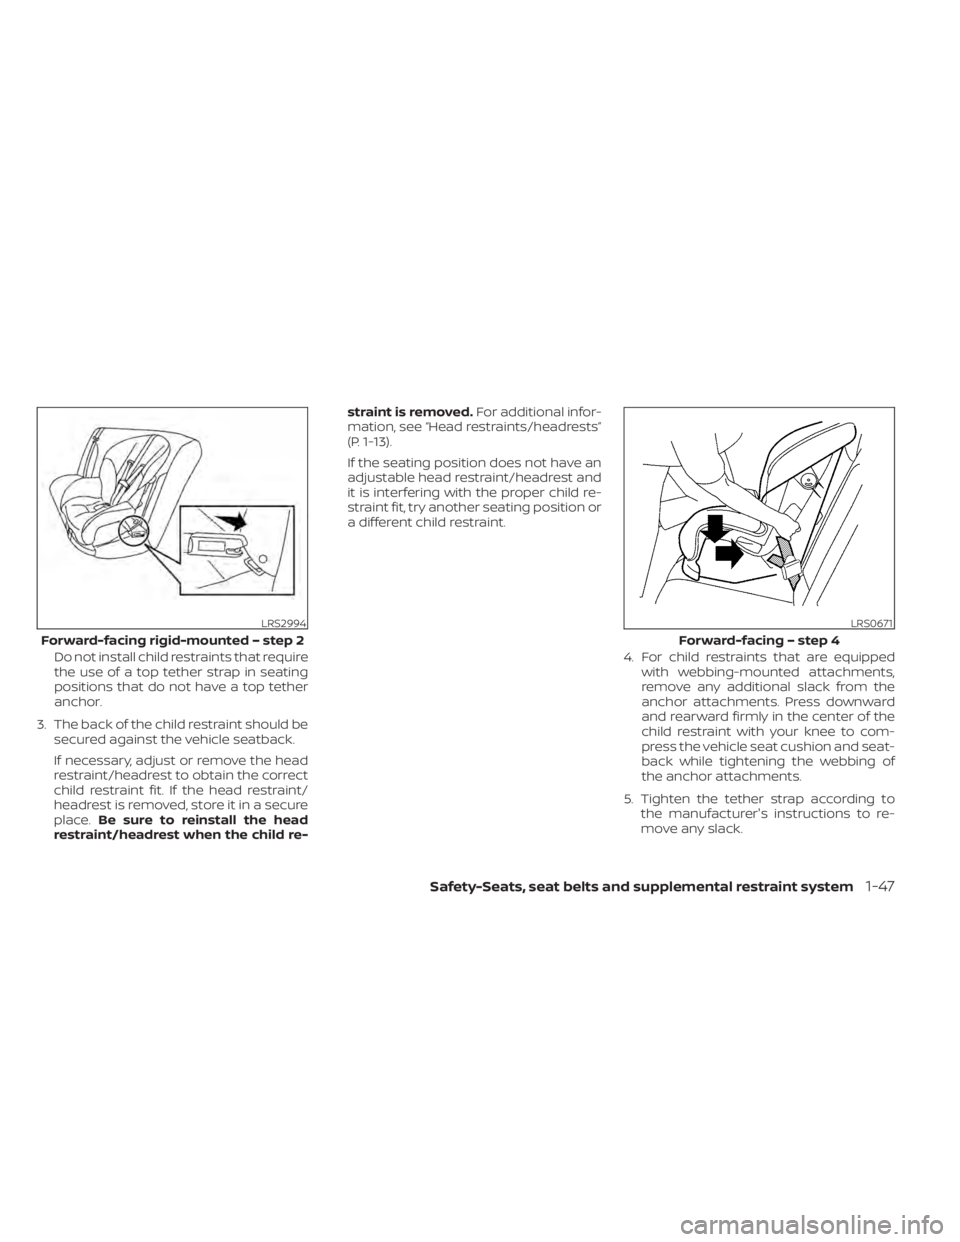
Do not install child restraints that require
the use of a top tether strap in seating
positions that do not have a top tether
anchor.
3. The back of the child restraint should be secured against the vehicle seatback.
If necessary, adjust or remove the head
restraint/headrest to obtain the correct
child restraint fit. If the head restraint/
headrest is removed, store it in a secure
place. Be sure to reinstall the head
restraint/headrest when the child re- straint is removed.
For additional infor-
mation, see “Head restraints/headrests”
(P. 1-13).
If the seating position does not have an
adjustable head restraint/headrest and
it is interfering with the proper child re-
straint fit, try another seating position or
a different child restraint.
4. For child restraints that are equippedwith webbing-mounted attachments,
remove any additional slack from the
anchor attachments. Press downward
and rearward firmly in the center of the
child restraint with your knee to com-
press the vehicle seat cushion and seat-
back while tightening the webbing of
the anchor attachments.
5. Tighten the tether strap according to the manufacturer's instructions to re-
move any slack.
LRS2994
Forward-facing rigid-mounted – step 2
LRS0671
Forward-facing – step 4
Safety-Seats, seat belts and supplemental restraint system1-47
Page 74 of 665

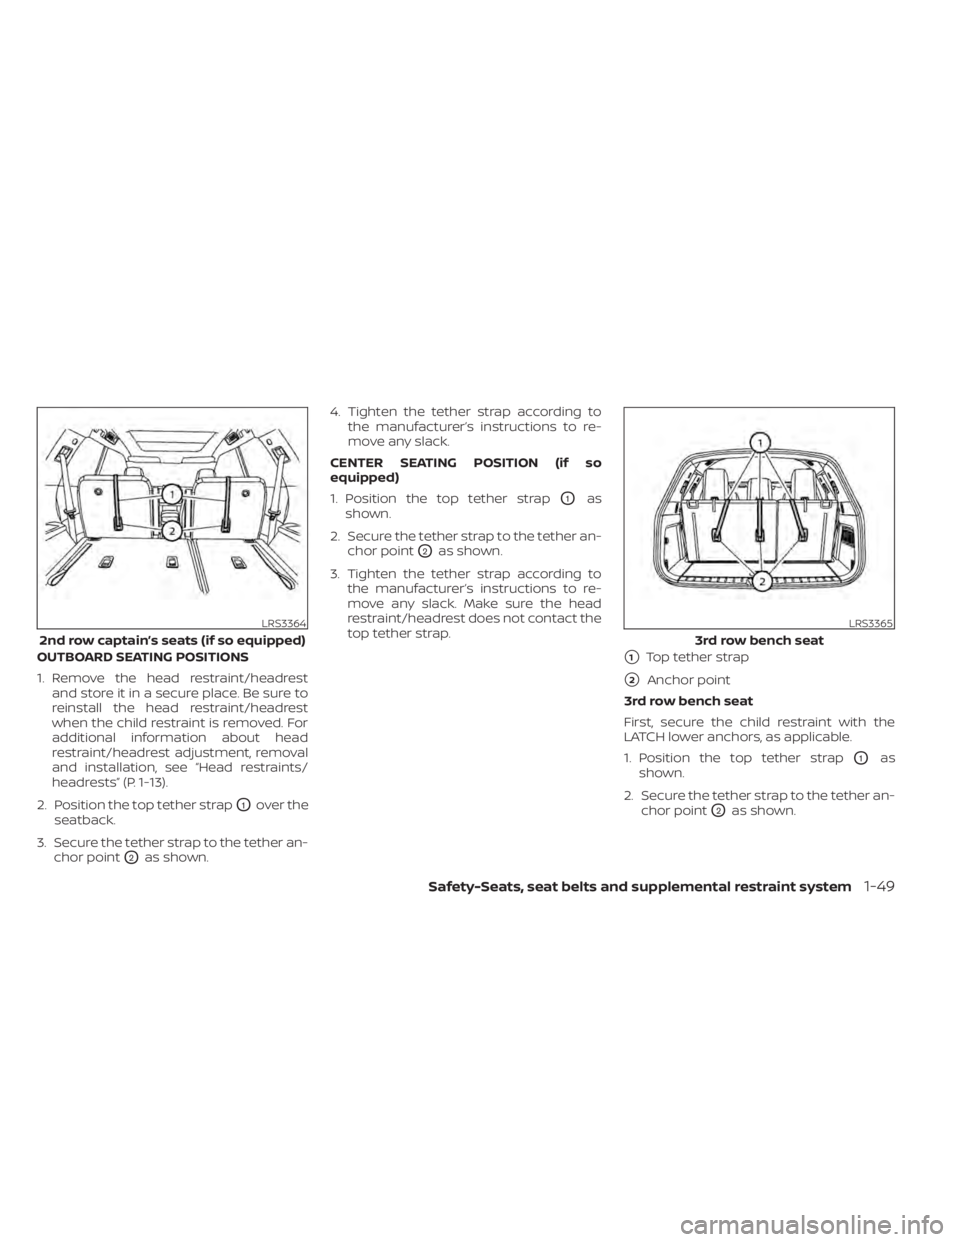
OUTBOARD SEATING POSITIONS
1. Remove the head restraint/headrestand store it in a secure place. Be sure to
reinstall the head restraint/headrest
when the child restraint is removed. For
additional information about head
restraint/headrest adjustment, removal
and installation, see “Head restraints/
headrests” (P. 1-13).
2. Position the top tether strap
O1over the
seatback.
3. Secure the tether strap to the tether an- chor point
O2as shown. 4. Tighten the tether strap according to
the manufacturer’s instructions to re-
move any slack.
CENTER SEATING POSITION (if so
equipped)
1. Position the top tether strap
O1as
shown.
2. Secure the tether strap to the tether an- chor point
O2as shown.
3. Tighten the tether strap according to the manufacturer’s instructions to re-
move any slack. Make sure the head
restraint/headrest does not contact the
top tether strap.
�1Top tether strap
�2Anchor point
3rd row bench seat
First, secure the child restraint with the
LATCH lower anchors, as applicable.
1. Position the top tether strap
O1as
shown.
2. Secure the tether strap to the tether an- chor point
O2as shown.
LRS3364
2nd row captain’s seats (if so equipped)
LRS3365
3rd row bench seat
Safety-Seats, seat belts and supplemental restraint system1-49
Page 75 of 665

3. Tighten the tether strap according tothe manufacturer's instructions to re-
move any slack. Make sure the head
restraint/headrest does not contact the
top tether strap.
If you have any questions when install-
ing a top tether strap, it is recommended
that you visit a NISSAN dealer for this
service.
WARNING
Child restraint anchorages are de-
signed to withstand only those loads
imposed by correctly fitted child re-
straints. Under no circumstances are
they to be used to attach adult seat
belts, or other items or equipment to
the vehicle. Doing so could damage the
child restraint anchorages. The child
restraint will not be properly installed
using the damaged anchorage, and a
child could be seriously injured or killed
in a collision.
FORWARD-FACING CHILD
RESTRAINT INSTALLATION USING
THE SEAT BELTS
WARNING
The three-point seat belt with Auto-
matic Locking Retractor (ALR) must be
used when installing a child restraint.
Failure to use the ALR mode will result
in the child restraint not being properly
secured. The restraint could tip over or
be loose and cause injury to a child in a
sudden stop or collision.
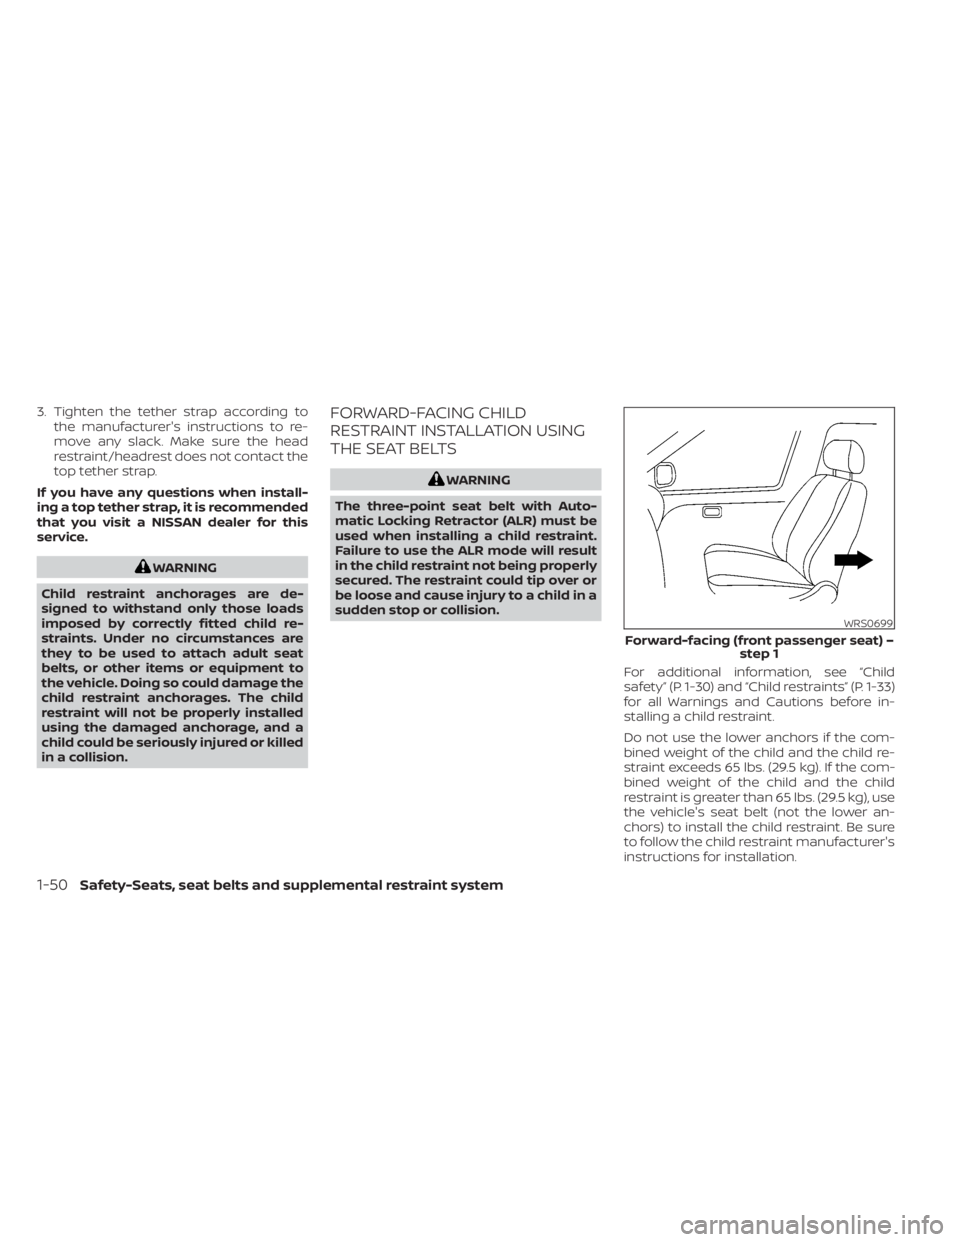
For additional information, see “Child
safety” (P. 1-30) and “Child restraints” (P. 1-33)
for all Warnings and Cautions before in-
stalling a child restraint.
Do not use the lower anchors if the com-
bined weight of the child and the child re-
straint exceeds 65 lbs. (29.5 kg). If the com-
bined weight of the child and the child
restraint is greater than 65 lbs. (29.5 kg), use
the vehicle's seat belt (not the lower an-
chors) to install the child restraint. Be sure
to follow the child restraint manufacturer's
instructions for installation.
WRS0699
Forward-facing (front passenger seat) –step 1
1-50Safety-Seats, seat belts and supplemental restraint system
Page 76 of 665

Follow these steps to install a forward-
facing child restraint using the vehicle seat
belt in the rear seats or in the front passen-
ger seat:
1.If you must install a child restraint in
the front seat, it should be placed in a
forward-facing direction only. Move
the seat to the rearmost position.
Child restraints for infants must be
used in the rear-facing direction and,
therefore, must not be used in the
front seat.
2. Position the child restraint on the seat. Always follow the child restraint manu-
facturer’s instructions.
The back of the child restraint should be
secured against the vehicle seatback.
If necessary, adjust or remove the head
restraint/headrest to obtain the correct
child restraint fit. If the head restraint/
headrest is removed, store it in a secure
place. Be sure to reinstall the head
restraint/headrest when the child re-
straint is removed. For additional infor-
mation about head restraint/headrest
adjustment, removal and installation,
see “Head restraints/headrests” (P. 1-13). If the seating position does not have an
adjustable head restraint/headrest and
it is interfering with the proper child re-
straint fit, try another seating position or
a different child restraint.
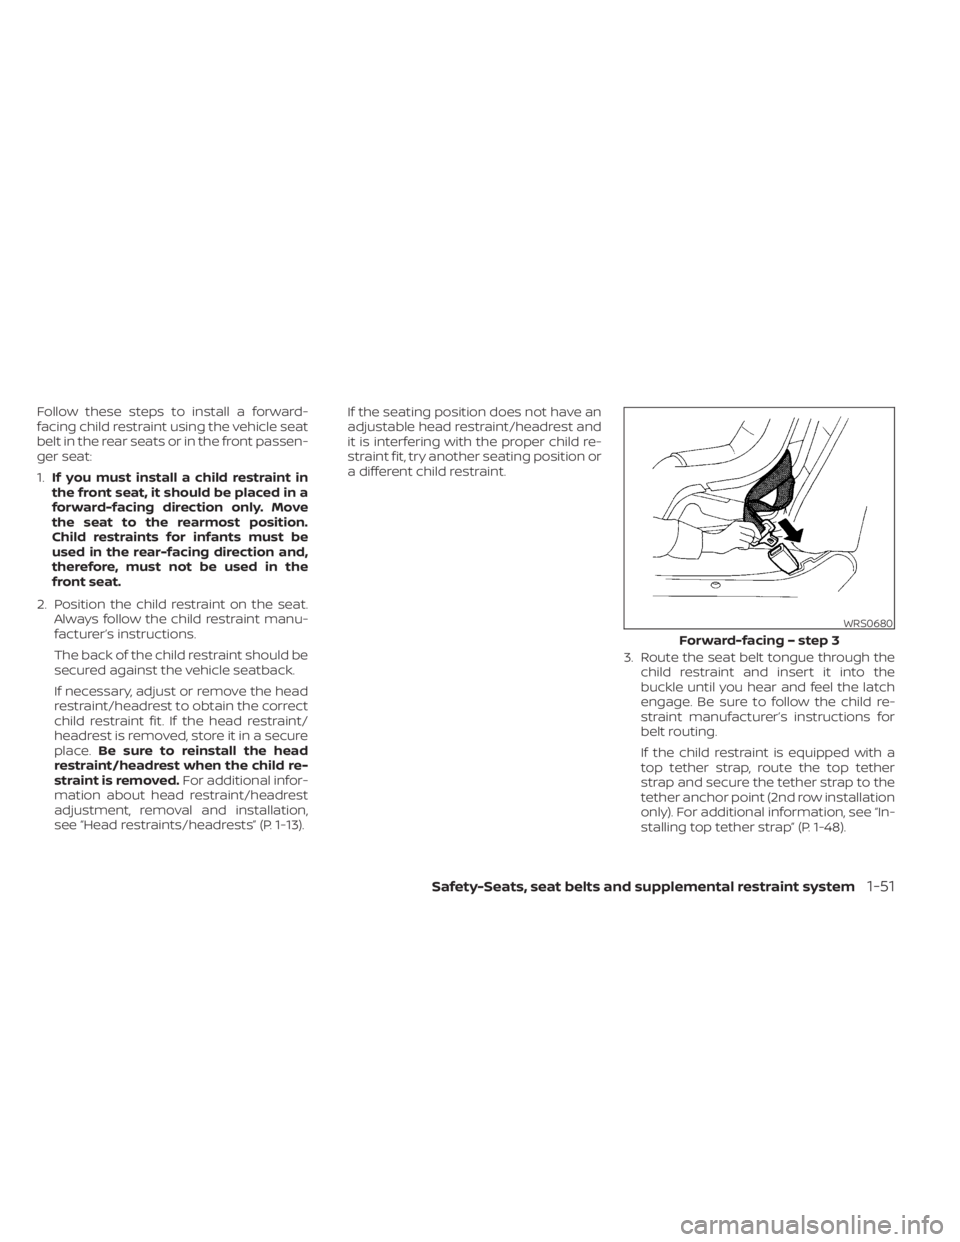
3. Route the seat belt tongue through thechild restraint and insert it into the
buckle until you hear and feel the latch
engage. Be sure to follow the child re-
straint manufacturer’s instructions for
belt routing.
If the child restraint is equipped with a
top tether strap, route the top tether
strap and secure the tether strap to the
tether anchor point (2nd row installation
only). For additional information, see “In-
stalling top tether strap” (P. 1-48).
WRS0680
Forward-facing – step 3
Safety-Seats, seat belts and supplemental restraint system1-51