2023 NISSAN MURANO oil temperature
[x] Cancel search: oil temperaturePage 121 of 518
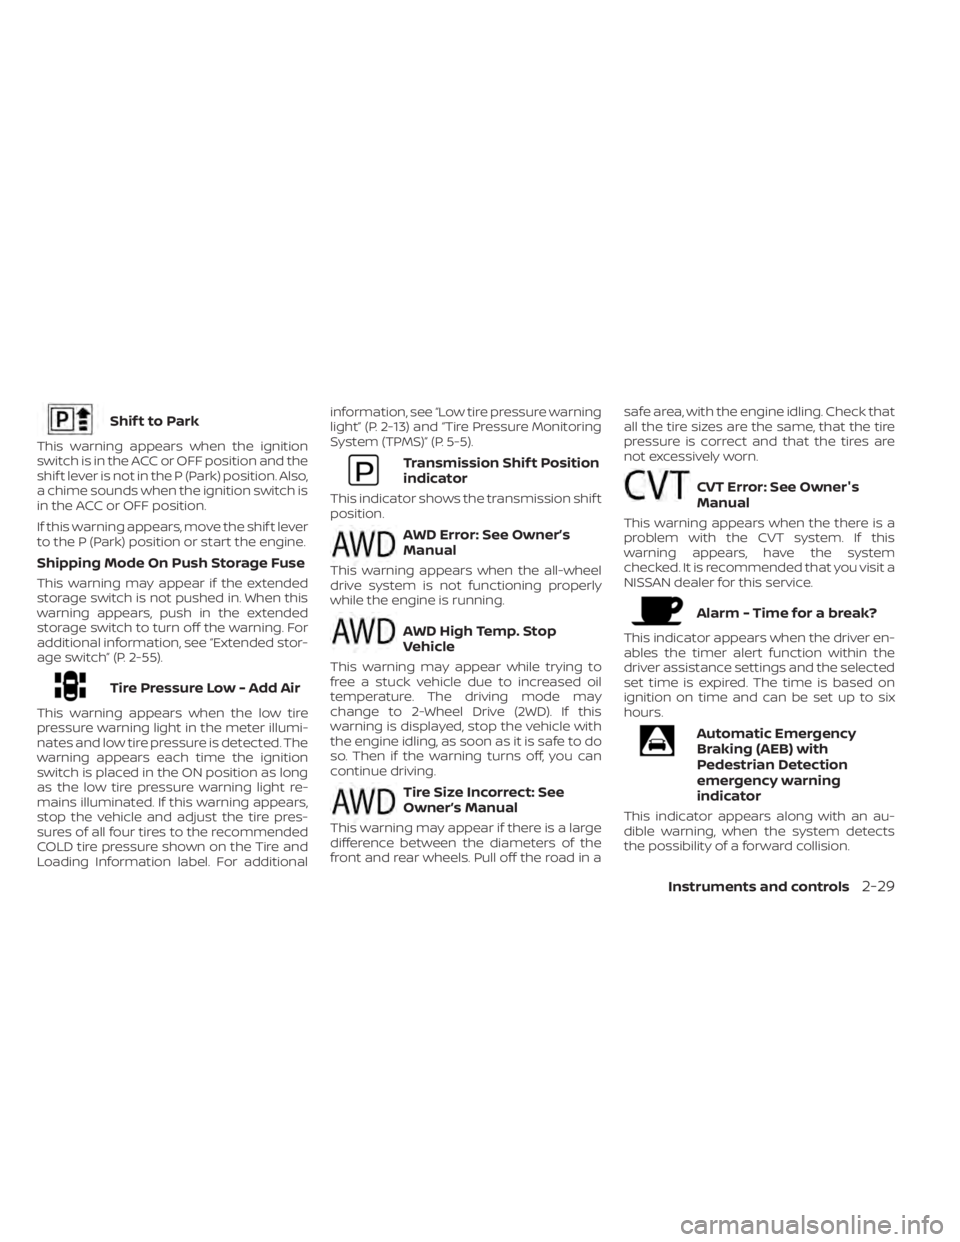
Shif t to Park
This warning appears when the ignition
switch is in the ACC or OFF position and the
shif t lever is not in the P (Park) position. Also,
a chime sounds when the ignition switch is
in the ACC or OFF position.
If this warning appears, move the shif t lever
to the P (Park) position or start the engine.
Shipping Mode On Push Storage Fuse
This warning may appear if the extended
storage switch is not pushed in. When this
warning appears, push in the extended
storage switch to turn off the warning. For
additional information, see “Extended stor-
age switch” (P. 2-55).
Tire Pressure Low - Add Air
This warning appears when the low tire
pressure warning light in the meter illumi-
nates and low tire pressure is detected. The
warning appears each time the ignition
switch is placed in the ON position as long
as the low tire pressure warning light re-
mains illuminated. If this warning appears,
stop the vehicle and adjust the tire pres-
sures of all four tires to the recommended
COLD tire pressure shown on the Tire and
Loading Information label. For additionalinformation, see “Low tire pressure warning
light” (P. 2-13) and “Tire Pressure Monitoring
System (TPMS)” (P. 5-5).
Transmission Shif t Position
indicator
This indicator shows the transmission shif t
position.
AWD Error: See Owner’s
Manual
This warning appears when the all-wheel
drive system is not functioning properly
while the engine is running.
AWD High Temp. Stop
Vehicle
This warning may appear while trying to
free a stuck vehicle due to increased oil
temperature. The driving mode may
change to 2-Wheel Drive (2WD). If this
warning is displayed, stop the vehicle with
the engine idling, as soon as it is safe to do
so. Then if the warning turns off, you can
continue driving.
Tire Size Incorrect: See
Owner’s Manual
This warning may appear if there is a large
difference between the diameters of the
front and rear wheels. Pull off the road in a
safe area, with the engine idling. Check that
all the tire sizes are the same, that the tire
pressure is correct and that the tires are
not excessively worn.
CVT Error: See Owner's
Manual
This warning appears when the there is a
problem with the CVT system. If this
warning appears, have the system
checked. It is recommended that you visit a
NISSAN dealer for this service.
Alarm - Time for a break?
This indicator appears when the driver en-
ables the timer alert function within the
driver assistance settings and the selected
set time is expired. The time is based on
ignition on time and can be set up to six
hours.
Automatic Emergency
Braking (AEB) with
Pedestrian Detection
emergency warning
indicator
This indicator appears along with an au-
dible warning, when the system detects
the possibility of a forward collision.
Instruments and controls2-29
Page 238 of 518
OPERATING TIPS
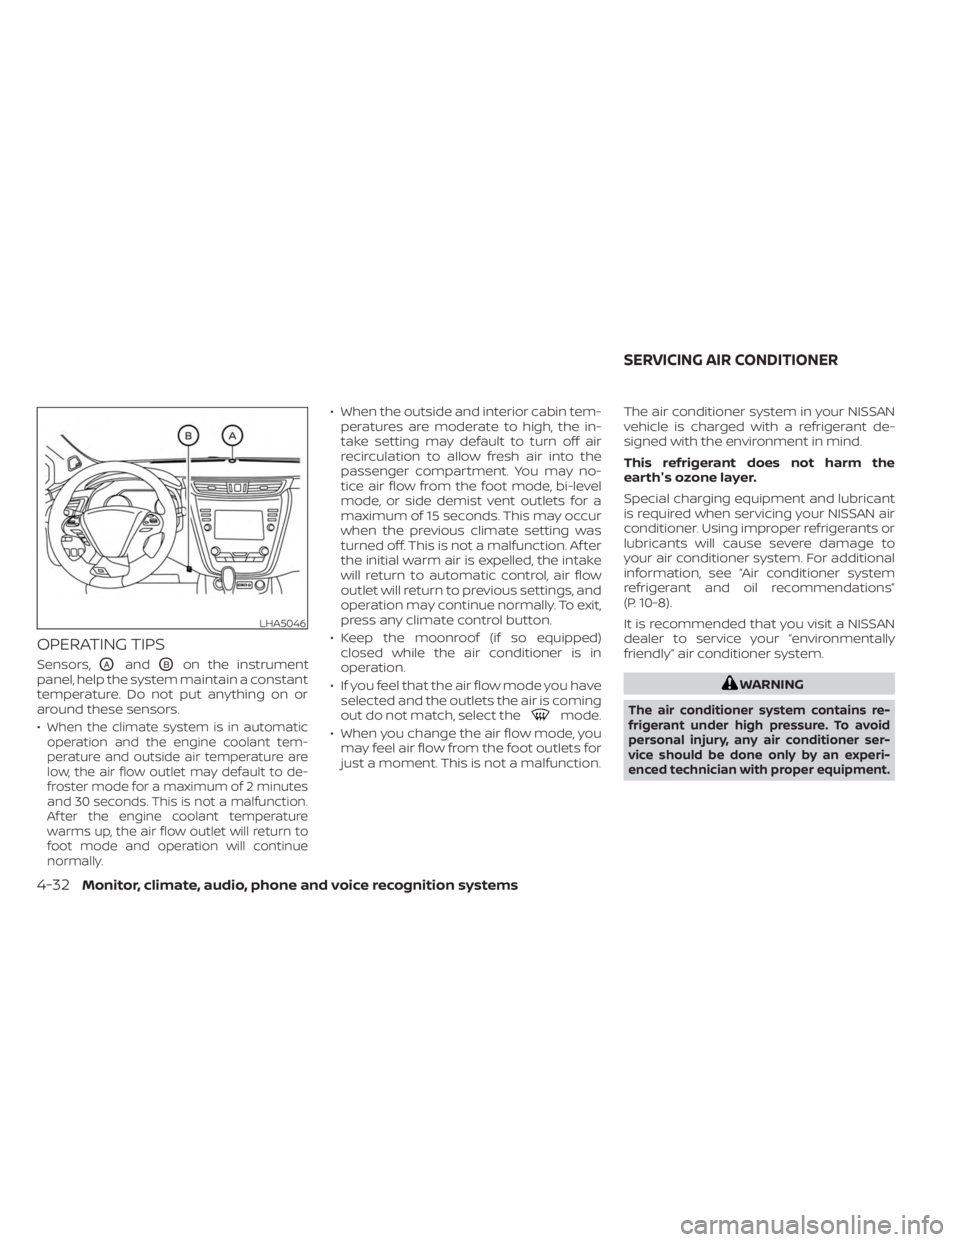
Sensors,OAandOBon the instrument
panel, help the system maintain a constant
temperature. Do not put anything on or
around these sensors.
•
When the climate system is in automatic
operation and the engine coolant tem-
perature and outside air temperature are
low, the air flow outlet may default to de-
froster mode for a maximum of 2 minutes
and 30 seconds. This is not a malfunction.
Af ter the engine coolant temperature
warms up, the air flow outlet will return to
foot mode and operation will continue
normally.
• When the outside and interior cabin tem- peratures are moderate to high, the in-
take setting may default to turn off air
recirculation to allow fresh air into the
passenger compartment. You may no-
tice air flow from the foot mode, bi-level
mode, or side demist vent outlets for a
maximum of 15 seconds. This may occur
when the previous climate setting was
turned off. This is not a malfunction. Af ter
the initial warm air is expelled, the intake
will return to automatic control, air flow
outlet will return to previous settings, and
operation may continue normally. To exit,
press any climate control button.
• Keep the moonroof (if so equipped) closed while the air conditioner is in
operation.
• If you feel that the air flow mode you have selected and the outlets the air is coming
out do not match, select the
mode.
• When you change the air flow mode, you may feel air flow from the foot outlets for
just a moment. This is not a malfunction. The air conditioner system in your NISSAN
vehicle is charged with a refrigerant de-
signed with the environment in mind.
This refrigerant does not harm the
earth's ozone layer.
Special charging equipment and lubricant
is required when servicing your NISSAN air
conditioner. Using improper refrigerants or
lubricants will cause severe damage to
your air conditioner system. For additional
information, see “Air conditioner system
refrigerant and oil recommendations”
(P. 10-8).
It is recommended that you visit a NISSAN
dealer to service your “environmentally
friendly” air conditioner system.
WARNING
The air conditioner system contains re-
frigerant under high pressure. To avoid
personal injury, any air conditioner ser-
vice should be done only by an experi-
enced technician with proper equipment.
LHA5046
SERVICING AIR CONDITIONER
4-32Monitor, climate, audio, phone and voice recognition systems
Page 356 of 518
• Recirculating the cool air in the cabinwhen the A/C is on reduces cooling
load.
4. Drive at Economical Speeds and
Distances
• Observing the speed limit and not ex- ceeding 60 mph (97 km/h) (where le-
gally allowed) can improve fuel effi-
ciency due to reduced aerodynamic
drag.
• Maintaining a safe following distance behind other vehicles reduces unnec-
essary braking.
• Safely monitoring traffic to anticipate changes in speed permits reduced
braking and smooth acceleration
changes.
• Select a gear range suitable to road conditions.
5. Use Cruise Control
• Using cruise control during highway driving helps maintain a steady speed.
• Cruise control is particularly effective in providing fuel savings when driving
on flat terrains.
6. Plan for the Shortest Route
• Utilize a map or navigation system to determine the best route to save time. 7.
Avoid Idling
• Shutting off your engine when safe for stops exceeding 30–60 seconds saves
fuel and reduces emissions.
8. Buy an Automated Pass for Toll Roads
• Automated passes permit drivers to use special lanes to maintain cruising
speed through the toll and avoid stop-
ping and starting.
9. Winter Warm Up
• Limit idling time to minimize impact to fuel economy.
• Vehicles typically need no more than 30 seconds of idling at start-up to ef-
fectively circulate the engine oil before
driving.
• Your vehicle will reach its ideal operat- ing temperature more quickly while
driving versus idling.
10. Keeping your Vehicle Cool
• Park your vehicle in a covered parking area or in the shade whenever
possible.
• When entering a hot vehicle, opening the windows will help to reduce the
inside temperature faster, resulting in
reduced demand on your A/C system. • Keep your engine tuned up.
• Follow the recommended scheduled
maintenance.
• Keep the tires inflated to the correct pres- sure. Low tire pressure increases tire
wear and lowers fuel economy.
• Keep all the wheels in correct alignment. Improper alignment increases tire wear
and lowers fuel economy.
• Use the recommended viscosity engine oil. For additional information, see “Engine
oil and oil filter recommendations”
(P. 10-7).
INCREASING FUEL ECONOMY
5-116Starting and driving
Page 357 of 518
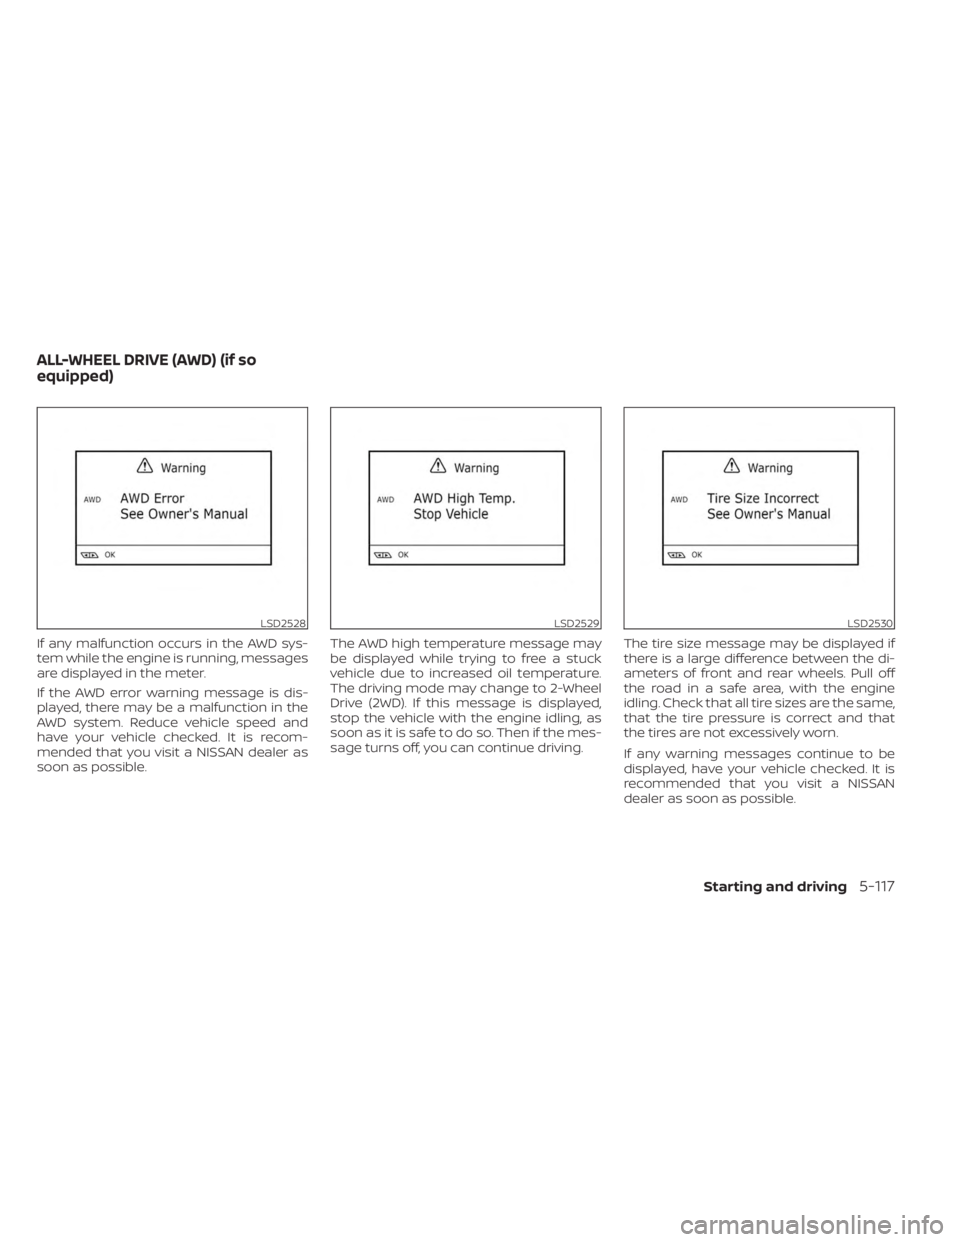
If any malfunction occurs in the AWD sys-
tem while the engine is running, messages
are displayed in the meter.
If the AWD error warning message is dis-
played, there may be a malfunction in the
AWD system. Reduce vehicle speed and
have your vehicle checked. It is recom-
mended that you visit a NISSAN dealer as
soon as possible.The AWD high temperature message may
be displayed while trying to free a stuck
vehicle due to increased oil temperature.
The driving mode may change to 2-Wheel
Drive (2WD). If this message is displayed,
stop the vehicle with the engine idling, as
soon as it is safe to do so. Then if the mes-
sage turns off, you can continue driving.
The tire size message may be displayed if
there is a large difference between the di-
ameters of front and rear wheels. Pull off
the road in a safe area, with the engine
idling. Check that all tire sizes are the same,
that the tire pressure is correct and that
the tires are not excessively worn.
If any warning messages continue to be
displayed, have your vehicle checked. It is
recommended that you visit a NISSAN
dealer as soon as possible.
LSD2528LSD2529LSD2530
ALL-WHEEL DRIVE (AWD) (if so
equipped)
Starting and driving5-117
Page 381 of 518
4. Lower the vehicle slowly until the tiretouches the ground. Then, with the
wheel nut wrench, tighten the wheel
nuts securely in the sequence illustrated
(
OA,OB,OC,OD,OE). Lower the vehicle
completely.
WARNING
• Incorrect wheel nuts or improperly
tightened wheel nuts can cause the
wheel to become loose or come off.
This could cause an accident.
• Do not use oil or grease on the wheel
studs or nuts. This could cause the
nuts to become loose.
• Retighten the wheel nuts when the
vehicle has been driven for 621 miles
(1,000 km) (also in cases of a flat tire,
etc.).
As soon as possible, tighten the wheel
nuts to the specified torque with a
torque wrench.
Wheel nut tightening torque: 83 f t-lb (113 N·m) The wheel nuts must be kept tightened
to specification at all times. It is recom-
mended that wheel nuts be tightened
to specifications at each lubrication
interval.
Adjust tire pressure to the COLD
pressure.
COLD pressure: Af ter vehicle has been
parked for 3 hours or more or driven less
than 1 mile (1.6 km).
COLD tire pressures are shown on the tire
and loading information label affixed to
the driver side center pillar.
Af ter adjusting tire pressure to the COLD
tire pressure, the display (if so equipped)
of the tire pressure information may
show higher pressure than the COLD tire
pressure af ter the vehicle has been
driven more than 1 mi. (1.6 km). This is
because the tire pressure increases as
the tire temperature rises. This does not
indicate a system malfunction.
5. Securely store the flat tire in the tire well
and jacking equipment in the vehicle.
NOTE:Remove the center wheel cap before
storing the flat tire.
6. Place the spare tire cover and the floor carpeting over the damaged tire.
7. Close the rear lif tgate.
WARNING
• Always make sure that the spare tire
and jacking equipment are properly
secured af ter use. Such items can be-
come dangerous projectiles in an ac-
cident or sudden stop.
In case of emergency6-9
Page 391 of 518
WAXING
Regular waxing protects the paint surface
and helps retain new vehicle appearance.
Polishing is recommended to remove
built-up wax residue and to avoid a weath-
ered appearance before re-applying wax.
A NISSAN dealer can assist you in choosing
the proper product.
• Wax your vehicle only af ter a thoroughwashing. Follow the instructions supplied
with the wax.
• Do not use a wax containing any abra- sives, cutting compounds or cleaners
that may damage the vehicle finish.
Machine compounding or aggressive pol-
ishing on a base coat/clear coat paint fin-
ish may dull the finish or leave swirl marks.
REMOVING SPOTS
Remove tar and oil spots, industrial dust,
insects, and tree sap as quickly as possible
from the surface of the paint to avoid last-
ing damage or staining. Special cleaning
products are available at a NISSAN dealer
or any automotive accessory store. It is
recommended that you visit a NISSAN
dealer for these products.
UNDERBODY
In areas where road salt is used in winter, it
is necessary to clean the underbody regu-
larly in order to prevent dirt and salt from
building up and causing the acceleration of
corrosion on the underbody and suspen-
sion. Before the winter period and again in
the spring, the underseal must be checked
and, if necessary, re-treated.
GLASS
Use glass cleaner to remove smoke and
dust film from the glass surfaces. It is nor-
mal for glass to become coated with a film
af ter the vehicle is parked in the hot sun.
Glass cleaner and a sof t cloth will easily
remove this film.
CAUTION
When cleaning the inside of the win-
dows, do not use sharp-edged tools,
abrasive cleaners or chlorine-based
disinfectant cleaners. They could dam-
age the electrical conductors, radio an-
tenna elements or rear window de-
froster elements.
ALUMINUM ALLOY WHEELS
Wash the wheels regularly with a sponge
dampened in a mild soap solution, espe-
cially during winter months in areas where
road salt is used. If not removed, road salt
can discolor the wheels.
CAUTION
Follow the directions below to avoid
staining or discoloring the wheels:
• Do not use a cleaner that uses strong
acid or alkali contents to clean the
wheels.
• Do not apply wheel cleaners to the
wheels when they are hot. The wheel
temperature should be the same as
ambient temperature.
• Rinse the wheel to completely re-
move the cleaner within 15 minutes
af ter the cleaner is applied.
CHROME PARTS
Clean all chrome parts regularly with a
non-abrasive chrome polish to maintain
the finish.
Appearance and care7-3
Page 402 of 518
CHECKING ENGINE OIL LEVEL
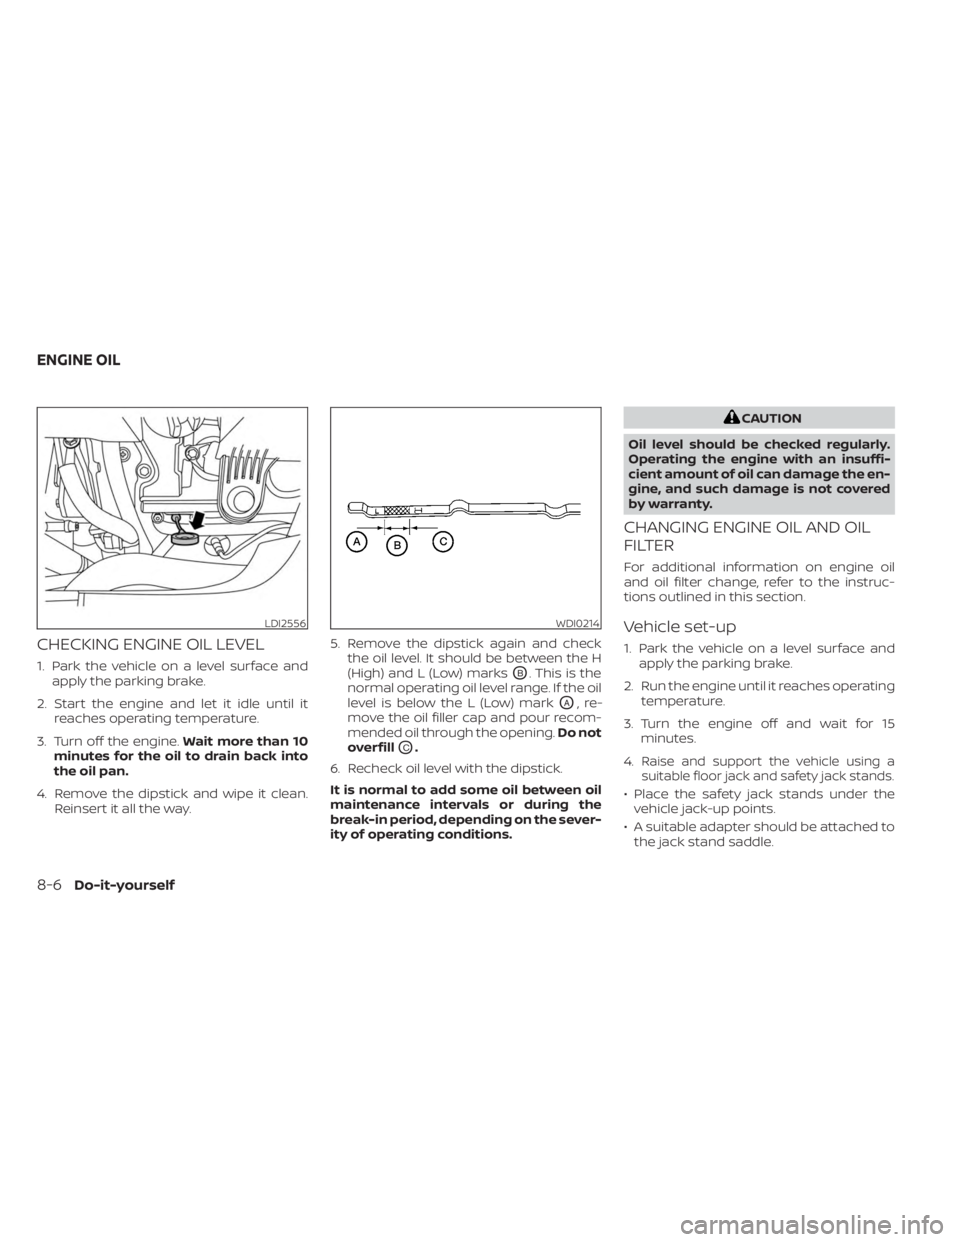
1. Park the vehicle on a level surface andapply the parking brake.
2. Start the engine and let it idle until it reaches operating temperature.
3. Turn off the engine. Wait more than 10
minutes for the oil to drain back into
the oil pan.
4. Remove the dipstick and wipe it clean. Reinsert it all the way. 5. Remove the dipstick again and check
the oil level. It should be between the H
(High) and L (Low) marksOB. This is the
normal operating oil level range. If the oil
level is below the L (Low) mark
OA,re-
move the oil filler cap and pour recom-
mended oil through the opening. Do not
overfill
OC.
6. Recheck oil level with the dipstick.
It is normal to add some oil between oil
maintenance intervals or during the
break-in period, depending on the sever-
ity of operating conditions.
CAUTION
Oil level should be checked regularly.
Operating the engine with an insuffi-
cient amount of oil can damage the en-
gine, and such damage is not covered
by warranty.
CHANGING ENGINE OIL AND OIL
FILTER
For additional information on engine oil
and oil filter change, refer to the instruc-
tions outlined in this section.
Vehicle set-up
1. Park the vehicle on a level surface and apply the parking brake.
2. Run the engine until it reaches operating temperature.
3. Turn the engine off and wait for 15 minutes.
4.
Raise and support the vehicle using a
suitable floor jack and safety jack stands.
• Place the safety jack stands under the vehicle jack-up points.
• A suitable adapter should be attached to the jack stand saddle.
LDI2556WDI0214
ENGINE OIL
8-6Do-it-yourself
Page 406 of 518
•The dipstick must be inserted in
place to prevent oil spillage from the
dipstick hole when filling the engine
with oil.
6. Coat the gasket on the new filter with clean engine oil.
7. Screw in the oil filter clockwise until a slight resistance is felt, then tighten addi-
tionally more than 2/3 turn.
Oil filter tightening torque: 11 to 15 f t-lb (14.7 to 20.6 N·m)
8. Clean and re-install the drain plug with a new washer. Securely tighten the drain
plug with a wrench. Do not use exces-
sive force.
Drain plug tightening torque: 22 to 29 f t-lb (29.4 to 39.2 N·m)
9. Refill the engine with the recommended oil through the oil filler opening, and in-
stall the oil filler cap securely. For additional information about drain and
refill capacity, see “Recommended fluids/
lubricants and capacities” (P. 10-2). The
drain and refill capacity depends on the oil
temperature and drain time. Use these
specifications for reference only. Always
use the dipstick to determine the proper
amount of oil in the engine.
10. Start the engine and check for leakage
around the drain plug and the oil filter.
Correct as required. Turn the engine off
and wait more than 15 minutes. Check
the oil level with the dipstick. Add en-
gine oil if necessary.
Af ter the operation
1. Reinstall engine protectors in reverse or-der of removal.
2. Lower the vehicle carefully to the ground.
3. Reset oil and oil filter maintenance re- minder. For additional information, see
“Vehicle information display” (P. 2-18).
• Dispose of waste oil and filter properly.
• Check your local regulations.
CAUTION
• NISSAN recommends using Genuine
NISSAN CVT Fluid NS-3 (or equiva-
lent) ONLY in NISSAN CVTs. Do not mix
with other fluids.
• Do not use Automatic Transmission
Fluid (ATF) or manual transmission
fluid in a NISSAN CVT, as it may dam-
age the CVT. Damage caused by the
use of fluids other than as recom-
mended is not covered under
NISSAN's New Vehicle Limited War-
ranty outlined in your Warranty Infor-
mation Booklet.
• Using fluids that are not equivalent
to Genuine NISSAN CVT Fluid NS-3
may also damage the CVT. Damage
caused by the use of fluids other than
as recommended is not covered un-
der NISSAN's New Vehicle Limited
Warranty outlined in your Warranty
Information Booklet.
When checking or replacement of CVT fluid
is required, we recommend a NISSAN
dealer for servicing.
CONTINUOUSLY VARIABLE
TRANSMISSION (CVT) FLUID
8-10Do-it-yourself