2023 NISSAN MURANO Parking Brake
[x] Cancel search: Parking BrakePage 102 of 518
CHECKING LIGHTS
With all doors closed, apply the parking
brake, fasten the seat belts and place the
ignition switch in the ON position without
starting the engine. The following lights (if
so equipped) will come on:
,or,,,,,
The following lights (if so equipped) come
on briefly and then go off:
or,,,,
If any light fails to come on or operate in a
way other than described, it may indicate a
burned-out bulb and/or a system mal-
function. Have the system checked. It is
recommended that you visit a NISSAN
dealer for this service.
Some indicators and warnings are also dis-
played in the vehicle information display
between the speedometer and tachom-
eter. For additional information, see “Ve-
hicle information display” (P. 2-18).
WARNING/INDICATOR LIGHTS (red)
For additional information, see “Vehicle in-
formation display” (P. 2-18).
orBrake warning
light
This light functions for both the parking
brake and the foot brake systems.
Low brake fluid warning light
When the ignition switch is placed in the ON
position, the light warns of a low brake fluid
level. If the light comes on while the engine
is running with the parking brake not ap-
plied, stop the vehicle and perform the
following:
1. Check the brake fluid level. Add brakefluid as necessary. For additional infor-
mation, see “Brake fluid” (P. 8-11).
2. If the brake fluid level is correct, have the warning system checked. It is recom-
mended that you visit a NISSAN dealer
for this service.
WARNING
• Your brake system may not be work-
ing properly if the warning light is on.
Driving could be dangerous. If you
judge it to be safe, drive carefully to
the nearest service station for re-
pairs. Otherwise, have your vehicle
towed because driving it could be
dangerous. •
Pressing the brake pedal with the en-
gine stopped and/or a low brake
fluid level may increase your stop-
ping distance and braking will re-
quire greater pedal effort as well as
pedal travel.
• If the brake fluid level is below the
MINIMUM or MIN mark on the brake
fluid reservoir, do not drive until the
brake system has been checked. It is
recommended that you visit a
NISSAN dealer for this service.
Charge warning light
If this light comes on while the engine is
running, it may indicate the charging sys-
tem is not functioning properly. Turn the
engine off and check the drive belt. If the
belt is loose, broken, missing, or if the light
remains on, have your vehicle serviced im-
mediately. It is recommended that you visit
a NISSAN dealer for this service.
2-10Instruments and controls
Page 103 of 518
CAUTION
Do not continue driving if the drive belt
is loose, broken or missing.
Engine oil pressure
warning light
This light warns of low engine oil pressure.
If the light flickers or comes on during nor-
mal driving, pull off the road in a safe area,
stop the engine immediatelyand call a
NISSAN dealer or other authorized repair
shop.
The engine oil pressure warning light is
not designed to indicate a low oil level.
Use the dipstick to check the oil level.
For additional information, see “Engine oil”
(P. 8-6).
CAUTION
Running the engine with the engine oil
pressure warning light on could cause
serious damage to the engine almost
immediately. Such damage is not cov-
ered by the NISSAN New Vehicle Limited
Warranty. Turn off the engine as soon
as it is safe to do so.
Master warning light
When the ignition switch is in the ON posi-
tion, the master warning light illuminates
if any of the following are displayed on the
vehicle information display:
• Parking brake release warning
• Door open warning (when vehicle is moving)
• Shif t into Park warning
• LED Headlight Failure warning (when red warning exists)
For additional information, see “Vehicle in-
formation display” (P. 2-18).
Seat belt warning light and
chime
• The light and chime remind you to fasten the seat belts.
• The seat belt warning light will illuminate when the ignition switch is pushed to the
ON position if the driver’s seat belt is not
fastened, or if the front passenger seat
belt is not fastened when occupied.
• The seat belt warning light will also illumi- nate if a rear passenger seat belt is
changed from fastened to unfastened. • If the driver’s seat belt is not fastened
when the ignition switch is pushed to the
ON position, the chime will sound shortly.
• If the vehicle is driven above 9 mph (15 km/h) in the conditions that illuminate
the seat belt warning light, the lamp will
begin to blink and the chime will sound
for over one minute, or until the seat belt
is fastened again.
NOTE:
•The warning light and/or chime may
activate if an object is placed in the un-
occupied front passenger seat. In this
case, please remove the object from
the front passenger seat.
• The warning light and/or chime may
activate if any seat belt is unfastened
before the vehicle comes to a complete
stop. Please remain fastened until the
vehicle has come to a complete stop.
Security indicator light
This light blinks when the ignition switch is
placed in the OFF, LOCK or ACC position.
The blinking security indicator light indi-
cates that the security systems equipped
on the vehicle are operational.
Instruments and controls2-11
Page 109 of 518
While the VDC system is operating, you
might feel a slight vibration or hear the sys-
tem working when starting the vehicle or
accelerating, but this is normal.
WARNING/INDICATOR LIGHTS
(other)
For additional information, see “Vehicle in-
formation display” (P. 2-18).
Front fog light indicator
light (green) (if so
equipped)
The front fog light indicator light illumi-
nates when the front fog lights are on. For
additional information, see “Fog light
switch” (P. 2-44).
High Beam Assist indicator
light (green)
This indicator light illuminates when the
headlights come on while the headlight
switch is in the AUTO position with the high
beams selected. This indicates that the
high beam assist is operational.
For additional information, see “Headlight
and turn signal switch” (P. 2-38).
High beam indicator light
(blue)
This blue light comes on when the head-
light high beams are on and goes out when
the low beams are selected.
Side light and headlight
indicator light (green)
The side light and headlight indicator light
illuminates when the side light or headlight
position is selected. For additional informa-
tion, see “Headlight and turn signal switch”
(P. 2-38).
Turn signal/hazard
indicator lights (green)
The appropriate light flashes when the turn
signal switch is activated.
Both lights flash when the hazard switch is
turned on.
AUDIBLE REMINDERS
Brake pad wear warning
The disc brake pads have audible wear
warnings. When a disc brake pad requires
replacement, it makes a high pitched
scraping sound when the vehicle is in mo-tion, whether or not the brake pedal is de-
pressed. Have the brakes checked as soon
as possible if the warning sound is heard.
Light reminder chime
With the ignition switch placed in the OFF
position, a chime sounds when the driver's
door is opened if the headlights or parking
lights are on.
Turn the headlight control switch off before
leaving the vehicle.
NISSAN Intelligent Key® door
buzzer (if so equipped)
The Intelligent Key door buzzer sounds if
any one of the following improper opera-
tions is found.
• The Intelligent Key is lef t inside the vehicle
when locking the doors.
• The Intelligent Key is taken outside the vehicle when operating the vehicle.
When the buzzer sounds, be sure to check
both the vehicle and the Intelligent Key. For
additional information, see “NISSAN Intelli-
gent Key®” (P. 3-7).
Instruments and controls2-17
Page 112 of 518
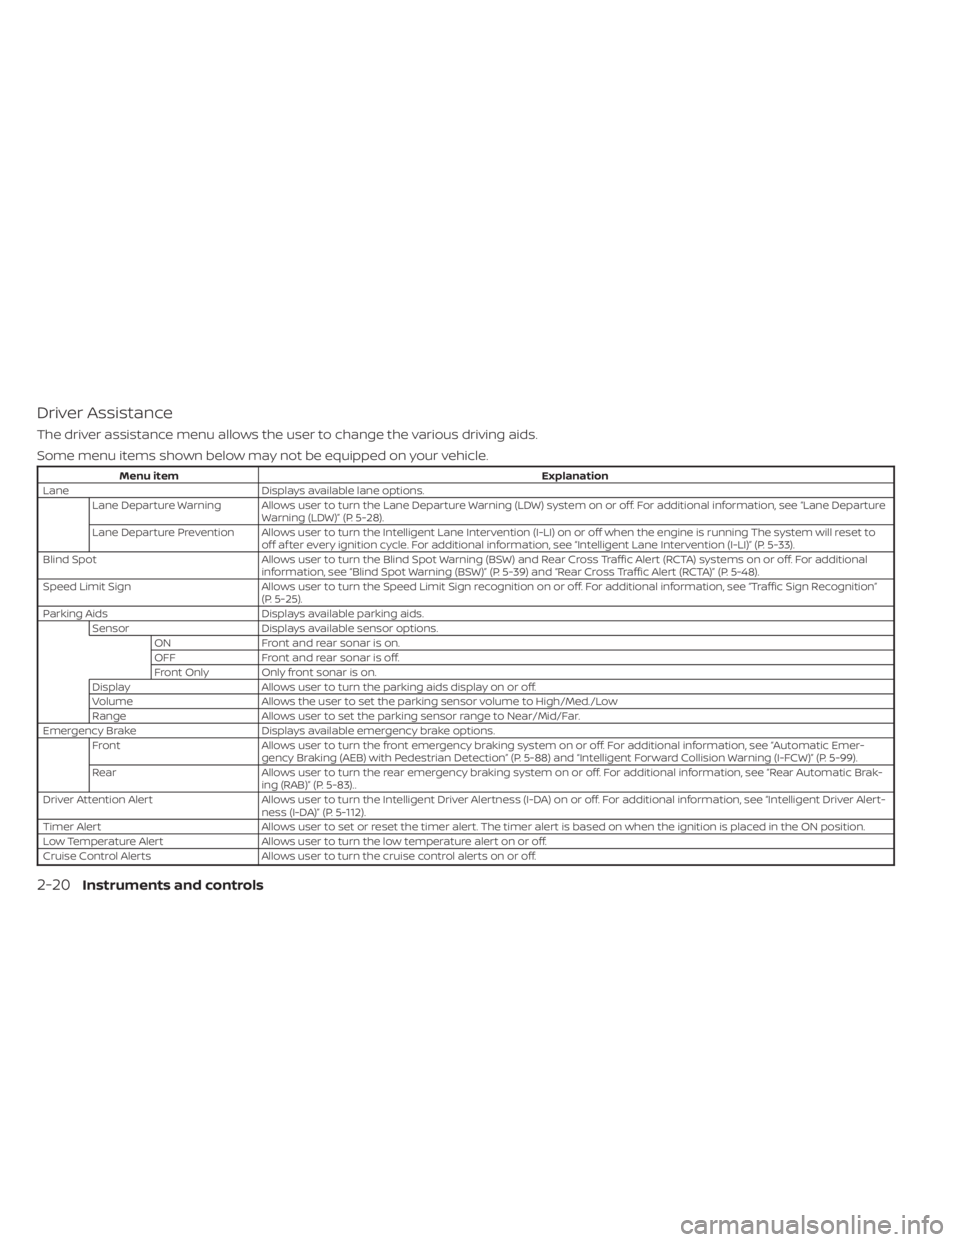
Driver Assistance
The driver assistance menu allows the user to change the various driving aids.
Some menu items shown below may not be equipped on your vehicle.
Menu itemExplanation
Lane Displays available lane options.
Lane Departure Warning Allows user to turn the Lane Departure Warning (LDW) system on or off. For additional information, see “Lane Departure Warning (LDW)” (P. 5-28).
Lane Departure Prevention Allows user to turn the Intelligent Lane Intervention (I-LI) on or off when the engine is running The system will reset to off af ter every ignition cycle. For additional information, see “Intelligent Lane Intervention (I-LI)” (P. 5-33).
Blind Spot Allows user to turn the Blind Spot Warning (BSW) and Rear Cross Traffic Alert (RCTA) systems on or off. For additional
information, see “Blind Spot Warning (BSW)” (P. 5-39) and “Rear Cross Traffic Alert (RCTA)” (P. 5-48).
Speed Limit Sign Allows user to turn the Speed Limit Sign recognition on or off. For additional information, see “Traffic Sign Recognition”
(P. 5-25).
Parking Aids Displays available parking aids.
Sensor Displays available sensor options.
ON Front and rear sonar is on.
OFF Front and rear sonar is off.
Front Only Only front sonar is on.
Display Allows user to turn the parking aids display on or off.
Volume Allows the user to set the parking sensor volume to High/Med./Low
Range Allows user to set the parking sensor range to Near/Mid/Far.
Emergency Brake Displays available emergency brake options.
Front Allows user to turn the front emergency braking system on or off. For additional information, see “Automatic Emer-
gency Braking (AEB) with Pedestrian Detection” (P. 5-88) and “Intelligent Forward Collision Warning (I-FCW)” (P. 5-99).
Rear Allows user to turn the rear emergency braking system on or off. For additional information, see “Rear Automatic Brak-
ing (RAB)” (P. 5-83)..
Driver Attention Alert Allows user to turn the Intelligent Driver Alertness (I-DA) on or off. For additional information, see “Intelligent Driver Al ert-
ness (I-DA)” (P. 5-112).
Timer Alert Allows user to set or reset the timer alert. The timer alert is based on when the ignition is placed in the ON position.
Low Temperature Alert Allows user to turn the low temperature alert on or off.
Cruise Control Alerts Allows user to turn the cruise control alerts on or off.
2-20Instruments and controls
Page 120 of 518
Low Washer Fluid
This warning appears when the windshield-
washer fluid is at a low level. Add windshield-
washer fluid as necessary. For additional
information, see “Windshield-washer fluid”
(P. 8-12).
Power will turn off to save the battery
This message appears in the vehicle infor-
mation display af ter a period of time if the
ignition switch is in the ACC or the ON po-
sition and if the vehicle is in P (Park). For
additional information, see “Push-button
ignition switch positions” (P. 5-13).
Power turned off to save the battery
This message appears af ter the ignition
switch is automatically turned to off. For
additional information, see “Push-button
ignition switch positions” (P. 5-13)
Push brake and start
switch to drive
This indicator appears when the shif t lever
is in the P (Park) position.
This indicator also appears when the ve-
hicle has been started using the Remote
Engine Start (if so equipped) function.This indicator means that the engine will
start by pushing the ignition switch with
the brake pedal depressed. You can start
the engine from any position of the ignition
switch.
Push Ignition to OFF
Af ter the Push ignition to OFF warning ap-
pears, the warning will appear if the ignition
switch is placed in the ACC position when
the shif t lever is moved to the P (Park)
position.
To turn off the Push warning, place the ig-
nition switch in the ON position and then in
the LOCK position.
Rear seat belt warning
• This warning includes display of the seat
belts for rear positions only. Rear seat
belts that are unfastened will appear red.
• If any rear seat belts are unfastened when the ignition switch is pushed to the
ON position, this warning will display for
about one minute, or until dismissed.
• When a rear seat belt is changed from fastened to unfastened, this warning will
display for about one minute, or until
dismissed. • If the vehicle is driven above 9 mph (15
km/h) during or af ter the status change,
this warning will display and the chime
will sound for over one minute. During
this time, the warning and chime cannot
be dismissed unless the rear seat belt is
fastened again.
NOTE:
Opening and closing a rear door while
stopped will reset this warning, similar to
pushing the ignition switch to the ON po-
sition again.
Release Parking Brake
This warning appears in the message area
of the vehicle information display when the
parking brake is set and the vehicle is
driven.
Reminder: Turn OFF
Headlights
This warning appears when the headlights
are lef t in the ON position when exiting the
vehicle. Place the headlight switch in the
OFF or AUTO position. For additional infor-
mation, see “Headlight and turn signal
switch” (P. 2-38).
2-28Instruments and controls
Page 135 of 518
If the ambient image sensor is damaged
due to an accident, it is recommended that
you visit a NISSAN dealer.
Battery saver system
The battery saver system automatically
turns off the following lights af ter a period
of time when the ignition switch is placed in
the OFF position and the doors are closed:
• Headlights, when the headlight switch isin the
orposition
• Interior lights, when lef t in the ON position
Af ter the headlights automatically turn off
with the headlight switch in the
orposition, the headlights will illuminate
again if the headlight switch is moved to
the OFF position and then turned to the
orposition.
CAUTION
Even though the battery saver feature
automatically turns off the headlights
af ter a period of time, you should turn
the headlight switch to the OFF posi-
tion when the engine is not running to
avoid discharging the vehicle battery.
LED DAYTIME RUNNING LIGHTS
(DRL) SYSTEM
The LED DRL automatically illuminate at
100% intensity when the engine is started
and the parking brake released. The LED
Daytime Running Lights (DRL) operate with
the headlight switch in any position. When
you turn the headlight switch to the
position for full illumination, the LED DRL
illuminate at a lower intensity.
If the parking brake is applied before the
engine is started, the LED DRL do not illumi-
nate. The LED DRL illuminate when the
parking brake is released. The LED DRL will
remain on until the ignition switch is placed
in the OFF position.
At dusk, the headlights, interior controls and
switches will automatically illuminate if the
headlight switch is in the AUTO position.
WARNING
When the LED DRL system is active, tail
lights on your vehicle are not on. It is
necessary at dusk to turn on your head-
lights. Failure to do so could cause an
accident injuring yourself and others.
INSTRUMENT BRIGHTNESS
CONTROL
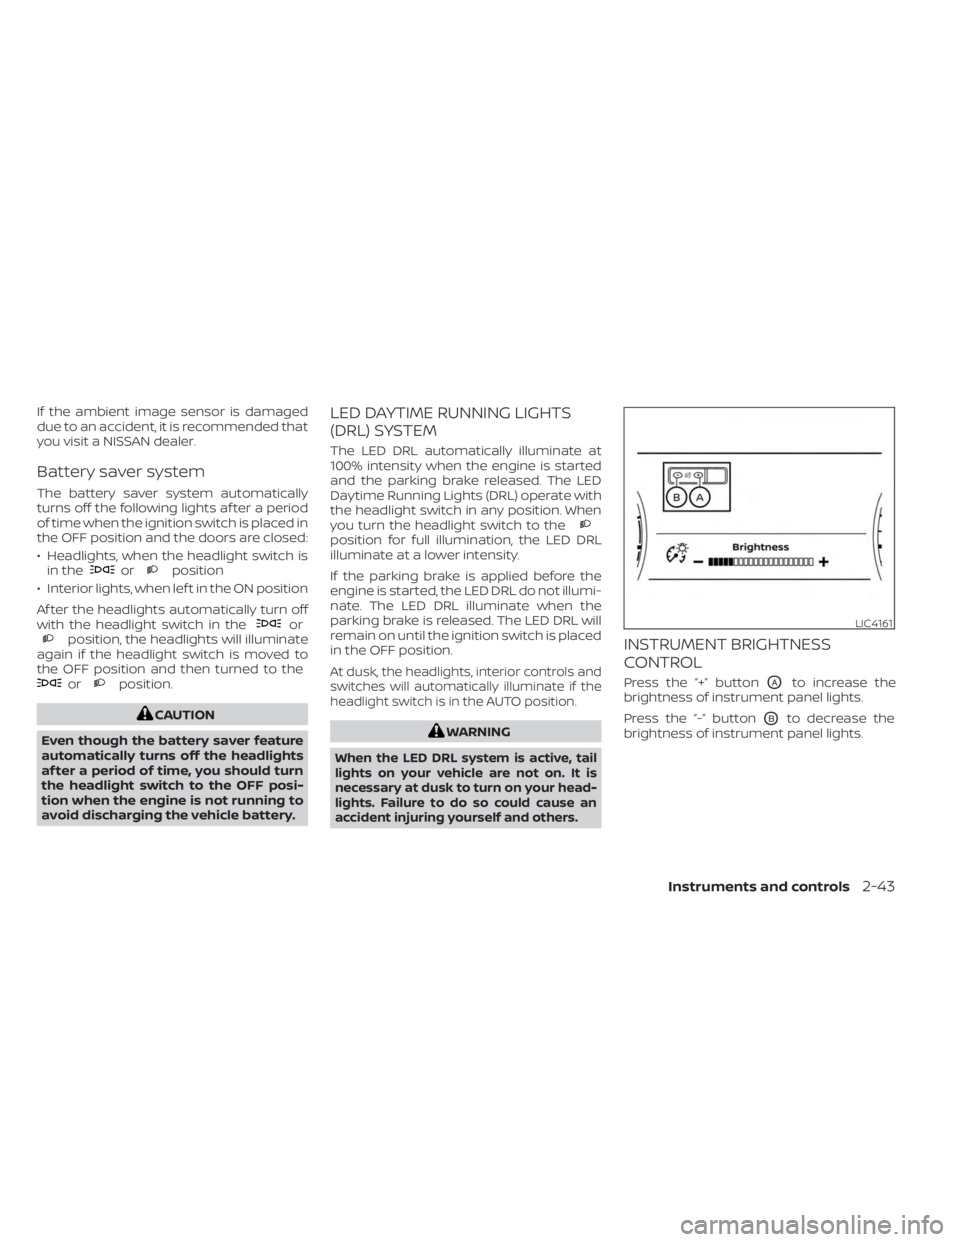
Press the “+” buttonOAto increase the
brightness of instrument panel lights.
Press the “-” button
OBto decrease the
brightness of instrument panel lights.
LIC4161
Instruments and controls2-43
Page 144 of 518
– It may not be possible to make anemergency call depending on the
severity of a collision and/or
emergency.
• Park the vehicle in a safe location and
set the parking brake before operat-
ing the Emergency Call (SOS) button.
• Only use this service in case of an
emergency. There may be a penalty
for inappropriate use of the service.
• Radio waves could adversely affect
electric medical equipment. Indi-
viduals who use a pacemaker should
contact the device manufacturer re-
garding any possible effects before
using the system.
• The TCU (Telematics Control Unit) an-
tenna is installed inside the upper
central part of the instrument panel.
An occupant should not get any
closer to the antenna than specified
by the pacemaker manufacturer. The
radio waves from the TCU antenna
may adversely affect the operation
of the pacemaker while using the
NissanConnect® Services.
Making an emergency call
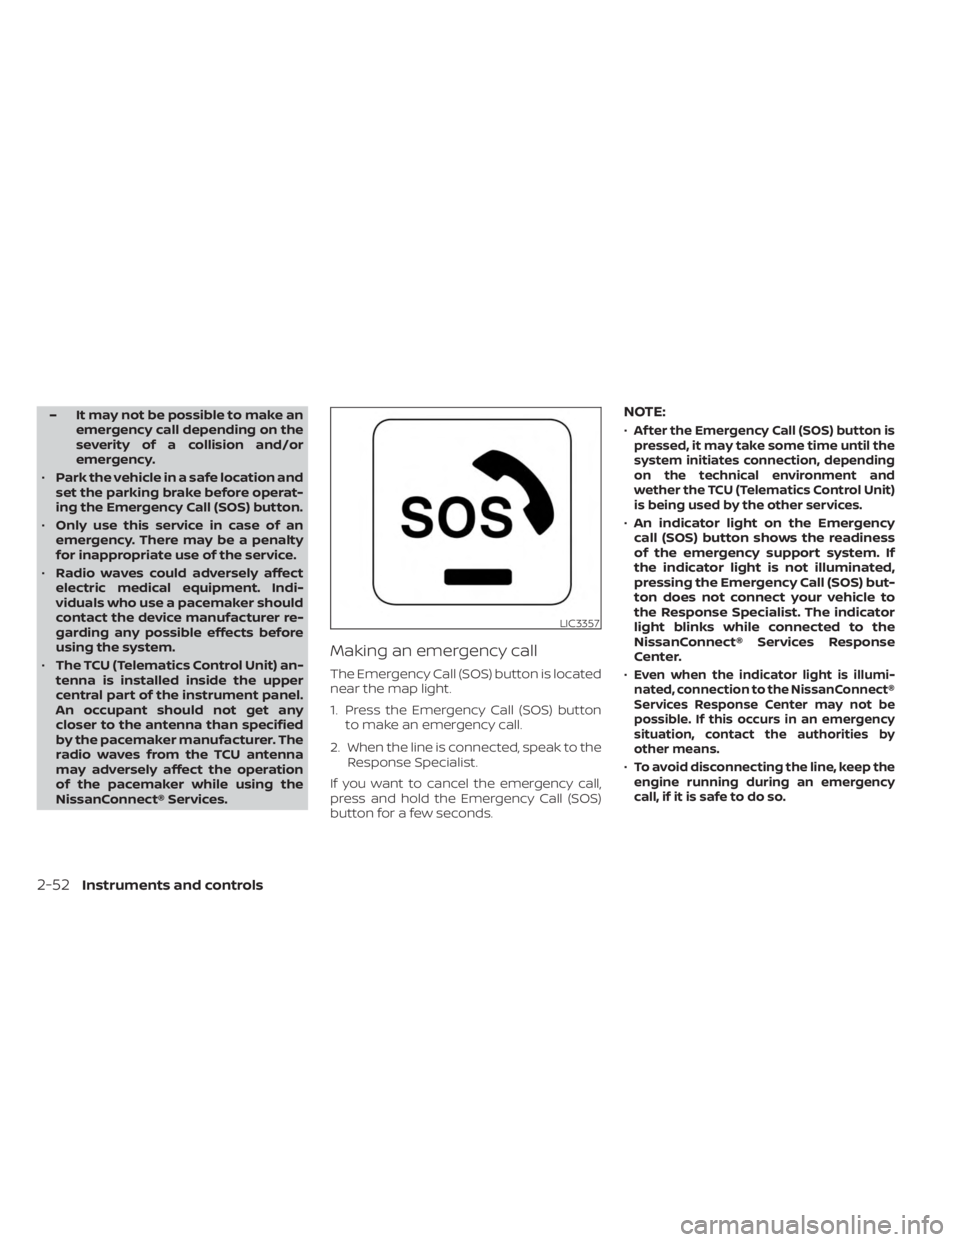
The Emergency Call (SOS) button is located
near the map light.
1. Press the Emergency Call (SOS) button to make an emergency call.
2. When the line is connected, speak to the Response Specialist.
If you want to cancel the emergency call,
press and hold the Emergency Call (SOS)
button for a few seconds.
NOTE:
•Af ter the Emergency Call (SOS) button is
pressed, it may take some time until the
system initiates connection, depending
on the technical environment and
wether the TCU (Telematics Control Unit)
is being used by the other services.
• An indicator light on the Emergency
call (SOS) button shows the readiness
of the emergency support system. If
the indicator light is not illuminated,
pressing the Emergency Call (SOS) but-
ton does not connect your vehicle to
the Response Specialist. The indicator
light blinks while connected to the
NissanConnect® Services Response
Center.
•
Even when the indicator light is illumi-
nated, connection to the NissanConnect®
Services Response Center may not be
possible. If this occurs in an emergency
situation, contact the authorities by
other means.
•To avoid disconnecting the line, keep the
engine running during an emergency
call,ifitissafetodoso.
LIC3357
2-52Instruments and controls
Page 187 of 518
REMOTE STARTING THE VEHICLE
To use the Remote Engine Start feature to
start the engine perform the following:
1. Aim the Intelligent Key at the vehicle.
2. Press the
button to lock all doors.
3. Within 5 seconds press and hold the
button until the turn signal lights
flash and the tail lamps turn on. If the
vehicle is not within view press and hold
the
button for at least 2 seconds.
The following events will occur when the
engine starts:
• The parking lights will turn on and remain on as long as the engine is running.
• The doors will be locked and the climate control system may come on.
• The engine will continue to run for 10 min- utes. Repeat the steps to extend the time
for an additional 10 minutes. For addi-
tional information, see “Extending engine
run time” (P. 3-19).
Press and hold the brake then push the
push-button ignition switch to the ON po-
sition before driving. For additional infor-
mation, see “Driving the vehicle” (P. 5-18).
EXTENDING ENGINE RUN TIME
The Remote Engine Start feature can be
extended one time by performing the
steps listed in “Remote starting the vehicle”
(P. 3-19). Run time will be calculated as
follows:
• The first 10–minute run time will start when the Remote Engine Start function is
performed.
• The second 10 minutes will start immedi- ately when the Remote Engine Start
function is performed again. For example,
if the engine has been running for 5 min-
utes, and 10 minutes are added, the en-
gine will run for a total of 15 minutes.
• Extending engine run time will bring you to the two Remote Engine Start limit.
A maximum of two Remote Engine Starts,
or a single start with an extension, are al-
lowed between ignition cycles.
The ignition switch must be cycled to the
ON position and then back to the OFF po-
sition before the Remote Engine Start pro-
cedure can be used again.
CANCELING A REMOTE ENGINE
START
To cancel a Remote Engine Start, perform
one of the following:
• Aim the Intelligent Key at the vehicle and press
until the parking lights turn off.
• Turn on the hazard indicator flashers.
• Cycle the ignition switch on and then off.
• The extended engine run time has expired.
• The first 10–minute timer has expired.
• The engine hood has been opened.
• The vehicle is shif ted out of P (Park) position.
• The alarm sounds due to illegal entry into the vehicle.
• The ignition switch is pushed without an Intelligent Key in the vehicle.
• The ignition switch is pushed with an In- telligent Key in the vehicle but the brake
pedal is not depressed.
Pre-driving checks and adjustments3-19