2023 NISSAN MICRA flat tire
[x] Cancel search: flat tirePage 10 of 346
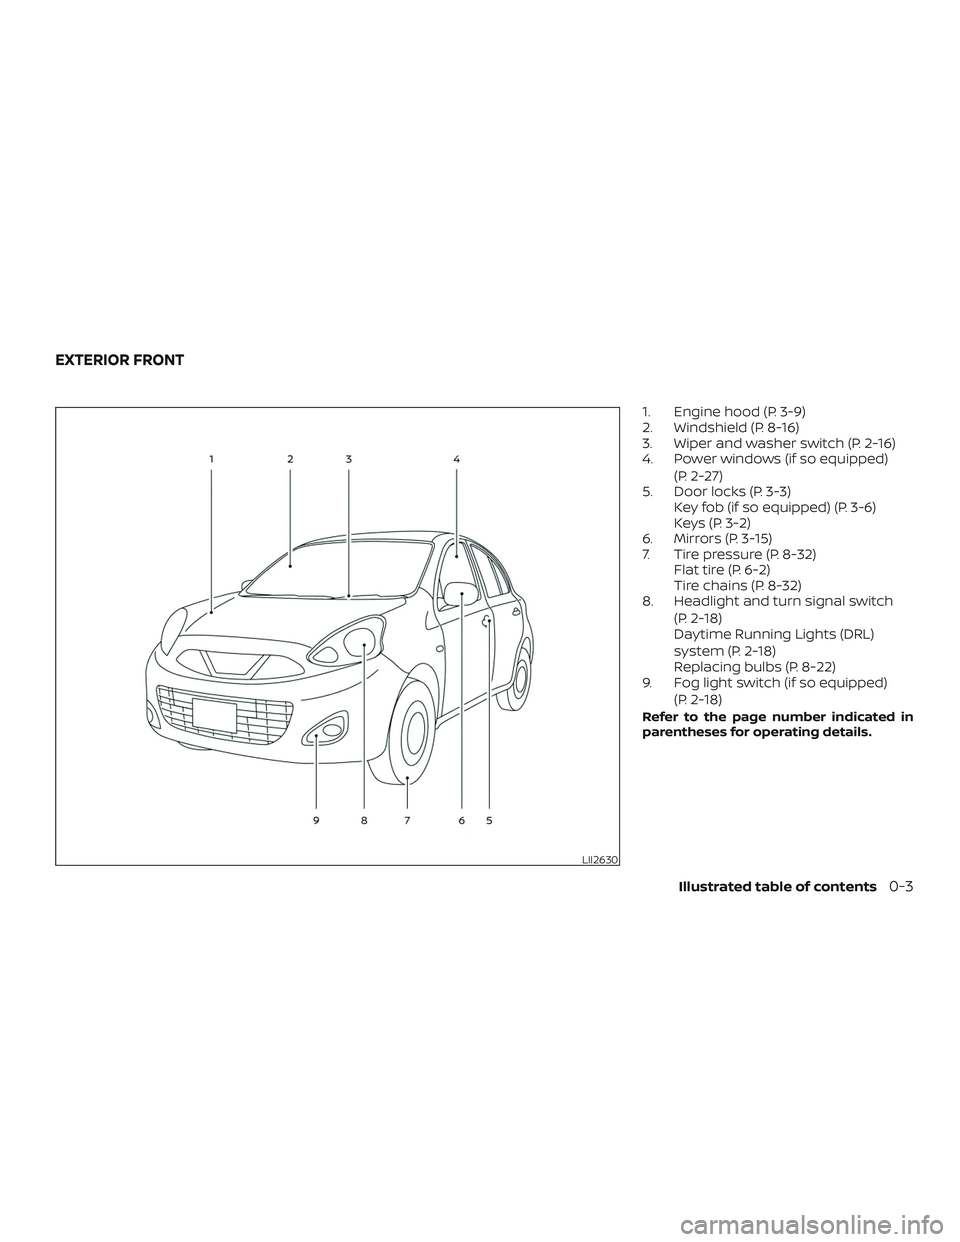
1. Engine hood (P. 3-9)
2. Windshield (P. 8-16)
3. Wiper and washer switch (P. 2-16)
4. Power windows (if so equipped)(P. 2-27)
5. Door locks (P. 3-3) Key fob (if so equipped) (P. 3-6)
Keys (P. 3-2)
6. Mirrors (P. 3-15)
7. Tire pressure (P. 8-32) Flat tire (P. 6-2)
Tire chains (P. 8-32)
8. Headlight and turn signal switch
(P. 2-18)
Daytime Running Lights (DRL)
system (P. 2-18)
Replacing bulbs (P. 8-22)
9. Fog light switch (if so equipped)
(P. 2-18)
Refer to the page number indicated in
parentheses for operating details.
LII2630
EXTERIOR FRONT
Illustrated table of contents0-3
Page 39 of 346
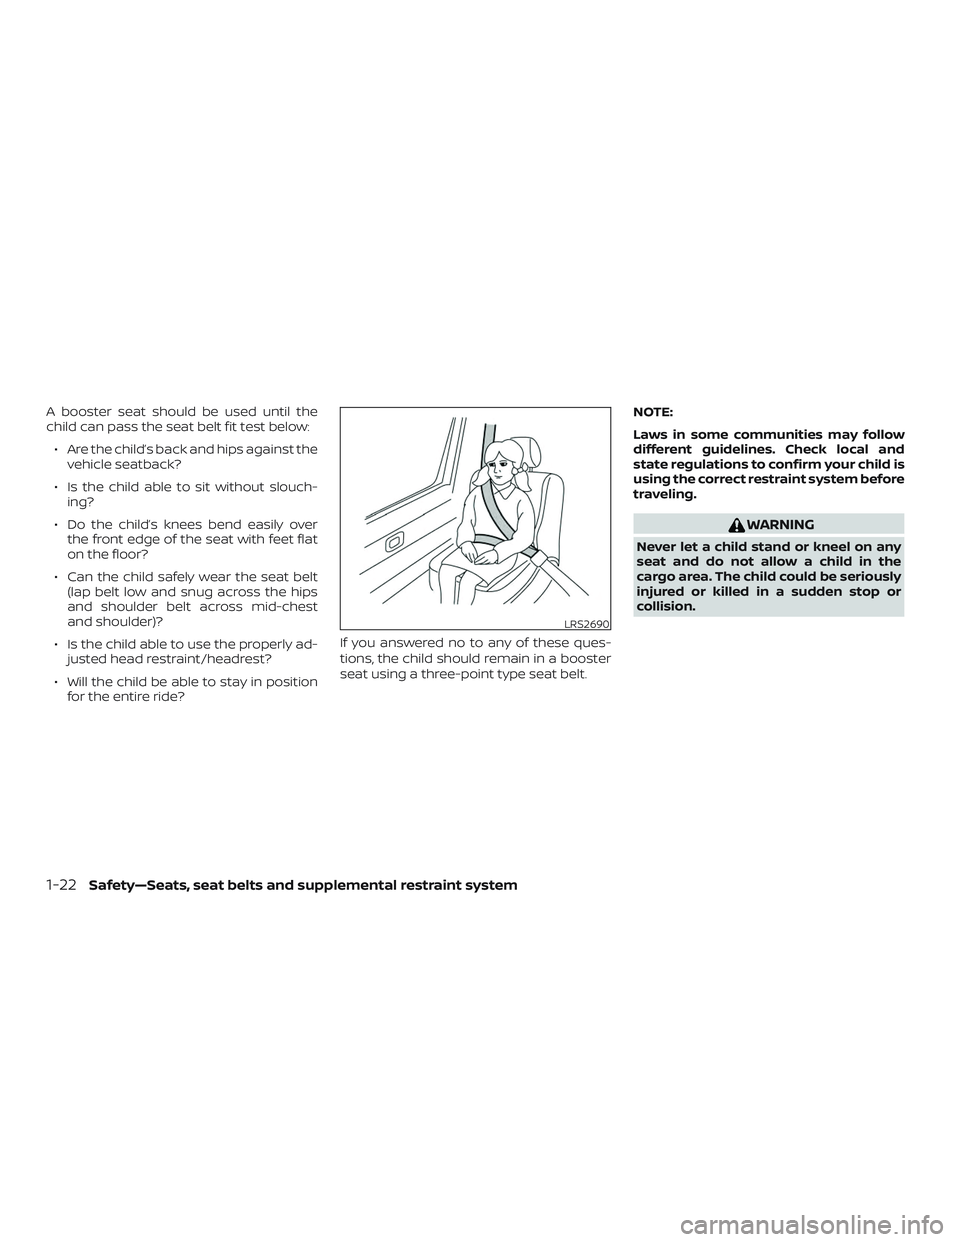
A booster seat should be used until the
child can pass the seat belt fit test below:∙ Are the child’s back and hips against the vehicle seatback?
∙ Is the child able to sit without slouch- ing?
∙ Do the child’s knees bend easily over the front edge of the seat with feet flat
on the floor?
∙ Can the child safely wear the seat belt (lap belt low and snug across the hips
and shoulder belt across mid-chest
and shoulder)?
∙ Is the child able to use the properly ad- justed head restraint/headrest?
∙ Will the child be able to stay in position for the entire ride? If you answered no to any of these ques-
tions, the child should remain in a booster
seat using a three-point type seat belt. NOTE:
Laws in some communities may follow
different guidelines. Check local and
state regulations to confirm your child is
using the correct restraint system before
traveling.
WARNING
Never let a child stand or kneel on any
seat and do not allow a child in the
cargo area. The child could be seriously
injured or killed in a sudden stop or
collision.
LRS2690
1-22Safety—Seats, seat belts and supplemental restraint system
Page 203 of 346
5. If there is nothing in the way, steer thevehicle to follow the road while vehicle
speed is reduced. Do not attempt to
drive the vehicle back onto the road
surface until vehicle speed is reduced.
6. When it is safe to do so, gradually turn the steering wheel until both tires re-
turn to the road surface. When all tires
are on the road surface, steer the ve-
hicle to stay in the appropriate driving
lane.
∙ If you decide that it is not safe to re- turn the vehicle to the road surface
based on vehicle, road or traffic con-
ditions, gradually slow the vehicle to a
stop in a safe place off the road.
RAPID AIR PRESSURE LOSS
Rapid air pressure loss or a “blow-out” can
occur if the tire is punctured or is damaged
due to hitting a curb or pothole. Rapid air
pressure loss can also be caused by driving
on under-inflated tires.
Rapid air pressure loss can affect the han-
dling and stability of the vehicle, especially
at highway speeds. Help prevent rapid air pressure loss by
maintaining the correct air pressure and
visually inspecting the tires for wear and
damage. For additional information, refer
to “Wheels and tires” in the “Do-it-yourself ”
section of this manual. If a tire rapidly loses
air pressure or “blows-out” while driving,
maintain control of the vehicle by following
the procedure below. Please note that this
procedure is only a general guide. The ve-
hicle must be driven as appropriate based
on the conditions of the vehicle, road and
traffic.
WARNING
The following actions can increase the
chance of losing control of the vehicle if
there is a sudden loss of tire air pres-
sure. Losing control of the vehicle may
cause a collision and result in personal
injury.
∙ The vehicle generally moves or pulls
in the direction of the flat tire.
∙ Do not rapidly apply the brakes.
∙ Do not rapidly release the accelerator pedal.
∙ Do not rapidly turn the steering wheel. 1. Remain calm and do not overreact.
2. Maintain a firm grip on the steering
wheel with both hands and try to hold a
straight course.
3. When appropriate, slowly release the accelerator pedal to gradually slow the
vehicle.
4. Gradually steer the vehicle to a safe location off the road and away from
traffic if possible.
5. Lightly apply the brake pedal to gradu- ally stop the vehicle.
6. Turn on the hazard warning flashers and contact a roadside emergency
service to change the tire. For addi-
tional information, refer to “Changing a
flat tire” in the “In case of emergency”
section of this manual.
5-4Starting and driving
Page 207 of 346
∙ Make sure the area around the vehicle isclear.
∙ Check fluid levels such as engine oil, coolant, brake and clutch fluid (if so
equipped), and windshield-washer fluid
as frequently as possible, or at least
whenever you refuel.
∙ Check that all windows and lights are clean.
∙ Visually inspect tires for their appear- ance and condition. Also check tires for
proper inflation.
∙ Lock all doors.
∙ Position seat and adjust head re- straints.
∙ Adjust inside and outside mirrors.
∙ Fasten seat belts and ask all passen- gers to do likewise.
∙ Check the operation of warning lights when the key is turned to the ON posi-
tion. For additional information, refer to
“Warning lights, indicator lights and au-
dible reminders” in the “Instruments
and controls” section of this manual. 1. Apply the parking brake.
2.
Automatic transmission:
Move the shif t lever to P (Park) or N
(Neutral). P (Park) is recommended.
The shif t lever cannot be moved out
of the P (Park) position and into any
of the other gear positions if the ig-
nition switch is placed in the OFF po-
sition or if the key is removed from
the ignition switch.
The starter is designed not to oper-
ate if the shif t lever is in any of the
driving positions.
Manual transmission:
Move the shif t lever to N (Neutral). De-
press the clutch pedal to the floor
while cranking the engine.
3. Crank the engine with your foot off
the accelerator pedal by placing the
ignition switch in the START position.
Release the key when the engine
starts. If the engine starts, but fails to
run, repeat the above procedure.
∙ If the engine is very hard to start in extremely cold weather or when re-
starting, depress the accelerator
pedal a little (approximately 1/3 to the floor) and hold it and then crank the
engine. Release the key and the ac-
celerator pedal when the engine
starts.
∙ If the engine is very hard to start be- cause it is flooded, depress the accel-
erator pedal all the way to the floor
and hold it. Crank the engine for
5-6 seconds. Af ter cranking the en-
gine, release the accelerator pedal.
Crank the engine with your foot off
the accelerator pedal by placing the
ignition in the START position. Re-
lease the key when the engine starts.
If the engine starts, but fails to run,
repeat the above procedure.
CAUTION
Do not operate the starter for more
than 15 seconds at a time. If the engine
does not start, turn the key off and wait
10 seconds before cranking again, oth-
erwise the starter could be damaged.
4. Allow the engine to idle for at least 30 seconds af ter starting. Do not race
the engine while warming it up. Drive at
moderate speed for a short distance
first, especially in cold weather.
BEFORE STARTING THE ENGINE STARTING THE ENGINE
5-8Starting and driving
Page 219 of 346
10.Keeping your Vehicle Cool
∙ Park your vehicle in a covered parking area or in the shade whenever pos-
sible.
∙ When entering a hot vehicle, opening the windows will help to reduce the
inside temperature faster, resulting in
reduced demand on your A/C sys-
tem. The following methods are recommended
by NISSAN to increase fuel economy on
NISSAN vehicles. All these recommenda-
tions can help you to achieve a higher level
of fuel economy in your vehicle.
∙ Accelerate slowly and smoothly. Main- tain cruising speeds with a constant ac-
celerator position.
∙ Drive at moderate speeds on the high- way. Driving at high speed lowers fuel
economy.
∙ Avoid unnecessary stopping and brak- ing. Maintain a safe distance behind
other vehicles.
∙ Use a proper gear range which suits road conditions. On level roads, shif t
into high gear as soon as possible.
∙ Avoid unnecessary engine idling.
∙ Keep your engine tuned up.
∙ Follow the recommended scheduled maintenance. ∙ Keep the tires inflated to the correct
pressure. Low tire pressure increases
tire wear and lowers fuel economy.
∙ Keep the wheels in correct alignment. Improper alignment increases tire wear
and lowers fuel economy.
∙ Air conditioner operation lowers fuel economy. Use the air conditioner only
when necessary.
∙ When cruising at highway speeds, it is more economical to use the air condi-
tioner and leave the windows closed to
reduce drag.
∙ Use the recommended viscosity engine oil. For additional information, refer to
“Engine oil and oil filter recommenda-
tions” in the “Technical and consumer
information” section of this manual.
INCREASING FUEL ECONOMY
5-20Starting and driving
Page 227 of 346
TIRE EQUIPMENT
1. SUMMER tires have a tread designed toprovide superior performance on dry
pavement. However, the performance
of these tires will be substantially re-
duced in snowy and icy conditions. If
you operate your vehicle on snowy or
icy roads, NISSAN recommends the use
of MUD & SNOW or ALL SEASON TIRES
on all four wheels. It is recommended
that you visit a NISSAN dealer for the tire
type, size, speed rating and availability
information.
2. For additional traction on icy roads, studded tires may be used. However,
some U.S. states and Canadian prov-
inces prohibit their use. Check local,
state and provincial laws before install-
ing studded tires.
Skid and traction capabilities of studded
snow tires on wet or dry surfaces may be
poorer than that of non-studded snow
tires. 3. Tire chains may be used. For additional information, refer to “Tire chains” in the
“Do-it-yourself ” section of this manual.
SPECIAL WINTER EQUIPMENT
It is recommended that the following items
be carried in the vehicle during winter:
∙ A scraper and stiff-bristled brush to re- move ice and snow from the windows
and wiper blades.
∙ A sturdy, flat board to be placed under the jack to give it firm support.
∙ A shovel to dig the vehicle out of snow- drif ts.
∙ Extra washer fluid to refill the windshield-washer fluid reservoir.
DRIVING ON SNOW OR ICE
WARNING
∙ Wet ice (0°C, 32°F and freezing rain),very cold snow or ice can be slick and
very hard to drive on. The vehicle will
have much less traction or “grip” un-
der these conditions. Try to avoid driv-
ing on wet ice until the road is salted
or sanded. ∙ Whatever the condition, drive with
caution. Accelerate and slow down
with care. If accelerating or down-
shif ting too fast, the drive wheels will
lose even more traction.
∙ Allow more stopping distance under these conditions. Braking should be
started sooner than on dry pavement.
∙ Allow greater following distances on slippery roads.
∙ Watch for slippery spots (glare ice). These may appear on an otherwise
clear road in shaded areas. If a patch
of ice is seen ahead, brake before
reaching it. Try not to brake while on
the ice, and avoid any sudden steering
maneuvers.
∙ Snow can trap dangerous exhaust gases under your vehicle. Keep snow
clear of the exhaust pipe and from
around your vehicle.
5-28Starting and driving
Page 230 of 346
6 In case of emergency
Hazard warning flasher switch..................6-2
Flat tire ..........................................6-2
Changing a flat tire ...........................6-2
Jump starting ................................... 6-11
Push starting ................................... 6-13If your vehicle overheats
........................6-13
Towing your vehicle ............................ 6-14
Towing recommended by NISSAN ...........6-14
Vehicle recovery (freeing a stuck
vehicle) ...................................... 6-17
Page 231 of 346
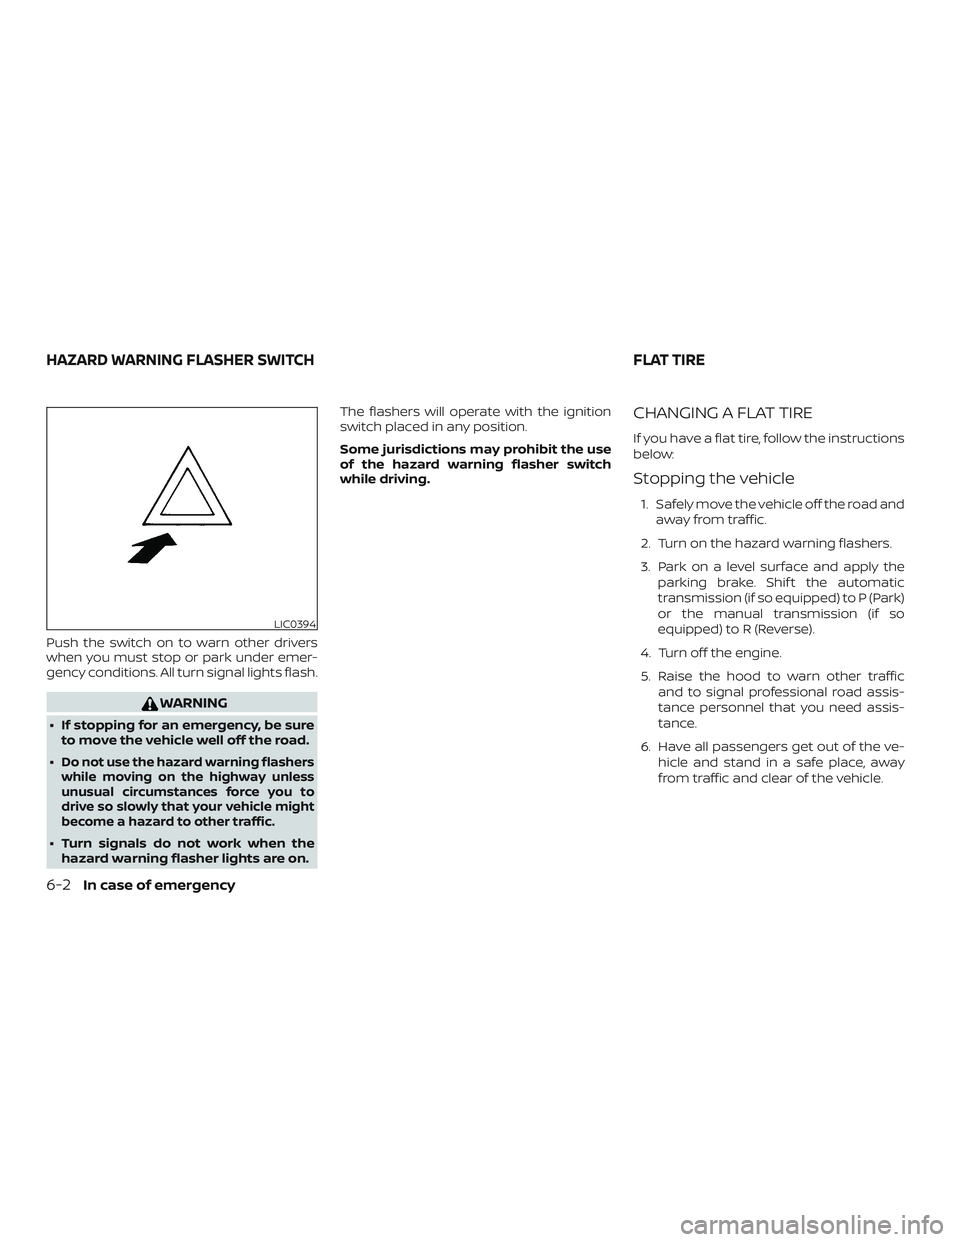
Push the switch on to warn other drivers
when you must stop or park under emer-
gency conditions. All turn signal lights flash.
WARNING
∙ If stopping for an emergency, be sureto move the vehicle well off the road.
∙
Do not use the hazard warning flashers
while moving on the highway unless
unusual circumstances force you to
drive so slowly that your vehicle might
become a hazard to other traffic.
∙ Turn signals do not work when the hazard warning flasher lights are on. The flashers will operate with the ignition
switch placed in any position.
Some jurisdictions may prohibit the use
of the hazard warning flasher switch
while driving.
CHANGING A FLAT TIRE
If you have a flat tire, follow the instructions
below:
Stopping the vehicle
1. Safely move the vehicle off the road and
away from traffic.
2. Turn on the hazard warning flashers.
3. Park on a level surface and apply the parking brake. Shif t the automatic
transmission (if so equipped) to P (Park)
or the manual transmission (if so
equipped) to R (Reverse).
4. Turn off the engine.
5. Raise the hood to warn other traffic and to signal professional road assis-
tance personnel that you need assis-
tance.
6. Have all passengers get out of the ve- hicle and stand in a safe place, away
from traffic and clear of the vehicle.
LIC0394
HAZARD WARNING FLASHER SWITCH FLAT TIRE
6-2In case of emergency