2023 NISSAN LEAF Vehicle information display warning
[x] Cancel search: Vehicle information display warningPage 268 of 612
SymptomPossible causeAction to take
When opening the driver’s door
to get out of the vehicle The inside warning chime sounds continu-
ously. The power switch is pushed to the OFF
position while the driver's door is open.
Close the driver's door.
The power switch is in the ACC posi-
tion. Push the power switch to the OFF posi-
tion then close the driver's door.
When closing the door af ter
getting out of the vehicle The No Key Detected warning appears on
the display, the outside chime sounds
three times and the inside warning chime
sounds for a few seconds.
The power switch is in the ACC or ON
position.
Push the power switch to the OFF posi-
tion.
The Rear Door Alert warning message ap-
pears on the display, the horn sounds three
times twice, or a Check Rear Seat for All Ar-
ticles warning appears on the display. The Rear Door Alert is activated.
Check the back seat for all articles, press
the OK button to clear the Rear Door Alert
warning message.
The outside chime sounds continuously. The power switch is in the ACC or OFF
position, the electric shif t control sys-
tem has malfunctioned and the ve-
hicle cannot be placed in the P (Park)
position when the parking brake is not
applied.Make sure the parking brake is applied.
When closing the door with the
inside lock knob turned to
LOCK The outside chime sounds for a few sec-
onds and all the doors unlock.
The Intelligent Key is inside the vehicle
or cargo area.
Carry the Intelligent Key with you.
When pushing the request
switch or the
button on
the Intelligent Key to lock the
door The outside chime sounds for a few sec-
onds.
The Intelligent Key is inside the vehicle
or a cargo area.
Carry the Intelligent Key with you.
When pushing the power
switch in the READY to drive
position The EV system operation for discharged
Intelligent Key system indicator appears on
the display.
The Intelligent Key battery charge is
low.
For additional information, see “NISSAN
Intelligent Key® battery discharge” (P. 8-19).
The No Key Detected warning appears on
the display and the inside warning chime
sounds for a few seconds. The Intelligent Key is not in the vehicle. Carry the Intelligent Key with you.
When pushing the power
switch The Key System Error indicator appears on
the display. It warns of a malfunction with the In-
telligent Key system.It is recommended that you visit a NISSAN
certified LEAF dealer.
Pre-driving checks and adjustments3-17
Page 290 of 612
When the camera is first activated with the
bird’s-eye view in the display, a red icon will
flash on the screen. This indicates that the
sonar system is activated. For additional
information on the rear sonar system, see
“Rear sonar system” (P. 5-169). The screen
displayed on the Intelligent Around View®
Monitor will automatically return to the
previous screen 3 minutes af ter the CAM-
ERA button has been pressed with the shif t
lever in a position other than the R (Re-
verse) position.
Available views
WARNING
• The distance guide lines and the ve-
hicle width lines should be used as a
reference only when the vehicle is on
a paved, level surface. The apparent
distance viewed on the monitor may
be different than the actual distance
between the vehicle and displayed
objects.
• Use the displayed lines and the bird’s
eye view as a reference. The lines and
the bird’s-eye view are greatly af-
fected by the number of occupants,
cargo, fuel level, vehicle position,
road condition and road grade. •
If the tires are replaced with different
sized tires, the predicted course lines
and the bird’s-eye view may be dis-
played incorrectly.
• When driving the vehicle up a hill, ob-
jects viewed in the monitor are fur-
ther than they appear. When driving
the vehicle down a hill, objects
viewed in the monitor are closer than
they appear.
• Objects in the rear view will appear
visually opposite compared to when
viewed in the rear view and outside
mirrors.
• Use the mirrors or actually look to
properly judge distances to other
objects.
• On a snow-covered or slippery road,
there may be a difference between
the predicted course lines and the
actual course line.
• The vehicle width and predicted
course lines are wider than the actual
width and course.
• The displayed lines will appear
slightly off to the right, because the
rearview camera is not installed in
the rear center of the vehicle.
Front and rear view
Guiding lines that indicate the approximate
vehicle width and distance to objects with
reference to the vehicle body lines
OAare
displayed on the monitor.
Distance guide lines
Indicate distances from the vehicle body:
• Red line
O1: approximately 1.5 f t (0.5 m)
• Yellow lines
O2: approximately 3 f t (1 m)
• Green lines
O3: approximately 7 f t (2 m)
• Green lines
O4: approximately 10 f t (3 m) (if
so equipped)
SAA1840
Front View
Monitor, climate, audio, phone and voice recognition systems4-13
Page 303 of 612
A blue MOD iconO3is displayed in the view
where the MOD system is operative. A gray
MOD icon is displayed in the view where the
MOD system is not operative.
If the MOD system is turned off, the MOD
icon
O3is not displayed.
TURNING MOD ON AND OFF
Some vehicles include the option to allow
the MOD system to be turned on or off in
the vehicle information display.
To turn the MOD system on or off:
1. Use either the
ormenu control
switch on the steering wheel to select
“Settings”.
2. Select “Driver Assistance” and press the OK button.
3. Select “Parking Aids” and press the OK button.
4. Toggle ON or OFF “Moving Object” using the OK button.
MOD SYSTEM LIMITATIONS
WARNING
Listed below are the system limitations
for MOD. Failure to operate the vehicle
in accordance with these system limi-
tations could result in serious injury or
death.
• Excessive noise (for example, audio
system volume or open vehicle win-
dow) will interfere with the chime
sound, and it may not be heard.
• The MOD system performance will be
limited according to environmental
conditions and surrounding objects
such as:
– When there is low contrast be-
tween background and the mov-
ing objects.
– When there is a blinking source of
light.
– When strong light such as another
vehicle’s headlight or sunlight is
present.
– When camera orientation is not in
its usual position, such as when a
mirror is folded. –
When there is dirt, water drops or
snow on the camera lens.
– When the position of the moving
objects in the display is not
changed.
• The MOD system might detect flow-
ing water droplets on the camera
lens, white smoke from the muffler,
moving shadows, etc.
• The MOD system may not function
properly depending on the speed, di-
rection, distance or shape of the
moving objects.
• If your vehicle sustains damage to
the parts where the camera is in-
stalled, leaving it misaligned or bent,
the sensing zone may be altered and
the MOD system may not detect ob-
jects properly.
• When the temperature is extremely
high or low, the screen may not dis-
play objects clearly. This is not a
malfunction.
4-26Monitor, climate, audio, phone and voice recognition systems
Page 328 of 612
• The low tire pressure warning light doesnot automatically turn off when the tire
pressure is adjusted. Af ter the tire is in-
flated to the recommended pressure, the
vehicle must be driven at speeds above
16 mph (25 km/h) to activate the TPMS
and turn off the low tire pressure warning
light. Use a tire pressure gauge to check
the tire pressure.
• The “Tire Pressure Low - Add Air” warning also appears on the vehicle information
display when the low tire pressure
warning light is illuminated and low tire
pressure is detected. The “Tire Pressure
Low - Add Air” warning turns off when the
low tire pressure warning light turns off.
• The “Tire Pressure Low - Add Air” warning appears each time the power switch is
placed in the ON position as long as the
low tire pressure warning light remains
illuminated.
• The “Tire Pressure Low - Add Air” warning does not appear if the low tire pressure
warning light illuminates to indicate a
TPMS malfunction. • Tire pressure rises and falls depending on
the heat caused by operation of the ve-
hicle and the outside temperature. Do
not reduce the tire pressure af ter driving
because the tire pressure rises af ter driv-
ing. Low outside temperature can lower
the temperature of the air inside the tire,
which can cause a lower tire inflation
pressure. This may cause the low tire
pressure warning light to illuminate. If the
warning light illuminates in low ambient
temperature, check the tire pressure for
all four tires.
• The pressure of all tires can also be checked on the display screen. The order
of the tire pressure figures displayed on
the screen does not correspond with the
actual order of the tire position.
For additional information, see “Low tire
pressure warning light” (P. 2-21) and “Tire
Pressure Monitoring System (TPMS)” (P. 6-3).WARNING
• Radio waves could adversely affect
electric medical equipment. Those
who use a pacemaker should contact
the electric medical equipment
manufacturer for the possible influ-
ences before use.
• If the low tire pressure warning light
illuminates while driving, avoid sud-
den steering maneuvers or abrupt
braking, reduce vehicle speed, pull
off the road to a safe location and
stop the vehicle as soon as possible.
Driving with under-inflated tires may
permanently damage the tires and
increase the likelihood of tire failure.
Serious vehicle damage could occur
and may lead to an accident and
could result in serious personal in-
jury. Check the tire pressure for all
four tires. Adjust the tire pressure to
the recommended COLD tire pres-
sure shown on the Tire and Loading
Information label to turn the low tire
pressure warning light off. If the tire is
flat, repair it as soon as possible. For
additional information, see “Flat tire”
(P. 6-3).
Starting and driving5-5
Page 333 of 612
NISSAN INTELLIGENT KEY®
SYSTEM
The Intelligent Key system allows the driver
to start the EV system without taking the
key out of a pocket or purse. The operating
environment and/or conditions may affect
Intelligent Key system operation.
Some indicators and warnings for opera-
tion are displayed on the vehicle informa-
tion display. For additional information, see
“Vehicle information display” (P. 2-26).
CAUTION
• Be sure to carry the Intelligent Key
with you when operating the vehicle.
• Never leave the Intelligent Key inside
the vehicle when you leave the
vehicle.
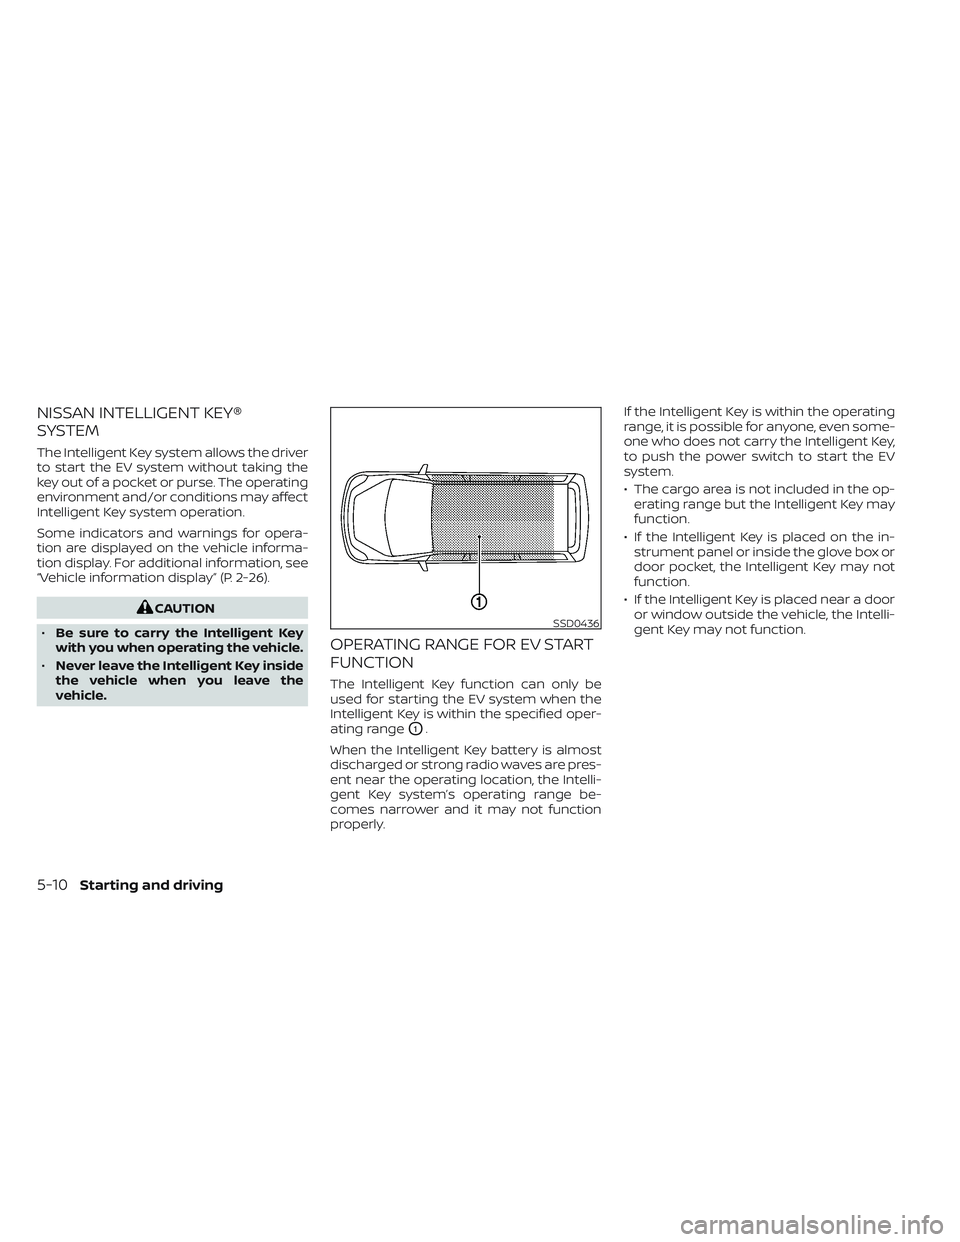
OPERATING RANGE FOR EV START
FUNCTION
The Intelligent Key function can only be
used for starting the EV system when the
Intelligent Key is within the specified oper-
ating range
O1.
When the Intelligent Key battery is almost
discharged or strong radio waves are pres-
ent near the operating location, the Intelli-
gent Key system’s operating range be-
comes narrower and it may not function
properly. If the Intelligent Key is within the operating
range, it is possible for anyone, even some-
one who does not carry the Intelligent Key,
to push the power switch to start the EV
system.
• The cargo area is not included in the op-
erating range but the Intelligent Key may
function.
• If the Intelligent Key is placed on the in- strument panel or inside the glove box or
door pocket, the Intelligent Key may not
function.
• If the Intelligent Key is placed near a door or window outside the vehicle, the Intelli-
gent Key may not function.
SSD0436
5-10Starting and driving
Page 336 of 612
4. Push the power switch while depressingthe brake pedal within 10 seconds af ter
the chime sounds. The power switch
position changes to the READY to drive
mode.
Af ter step 3 is performed, if the power
switch is pushed without depressing the
brake pedal, the power switch position will
change to ACC.
NOTE:
• When the power switch is placed in the ACC or ON position or READY to drive
mode by the above procedure, the EV
system operation for discharged Intel-
ligent Key system indicator appears on
the vehicle information display even if
the Intelligent Key is inside the vehicle.
This is not a malfunction. To stop the
warning indicator from blinking, touch
the power switch with the Intelligent
Key again.
• If the Intelligent Key battery discharge indicator appears on the vehicle infor-
mation display, replace the battery as
soon as possible. For additional infor-
mation, see “NISSAN Intelligent Key®
battery replacement” (P. 8-19).
NISSAN VEHICLE IMMOBILIZER
SYSTEM
The NISSAN Vehicle Immobilizer System
will not allow the power switch to be placed
in the READY to drive position without the
use of the registered key.
If the power switch fails to place the vehicle
into the READY to drive position using the
registered key, it may be due to interfer-
ence caused by another registered key, an
automated toll road device or automated
payment device on the key ring. Restart the
EV system using the following procedure:
1. Leave the power switch in the ON posi- tion for approximately 5 seconds.
2. Place the power switch in the OFF posi- tion and wait approximately 10 seconds.
3. Repeat steps 1 and 2 again.
4. Place the power switch in the READY to drive position while holding the device
(which may have caused the interfer-
ence) separate from the registered key.
If this procedure allows the power
switch to be placed in the READY to drive
mode, NISSAN recommends placing the
registered key on a separate key ring to
avoid interference from other devices. • Make sure that the area around the ve-
hicle is clear.
• Check fluid levels such as coolant, brake fluid, and windshield-washer fluid as fre-
quently as possible.
• Check that all windows and lights are clean.
• Visually inspect tires for their appearance and condition. Also check tires for proper
inflation.
• Check that all doors are closed.
• Position the seat and adjust the head restraints/headrests.
• Adjust the inside and outside mirrors.
• Fasten seat belts and ask all passengers to do likewise.
• Check the operation of the warning lights when the power switch is pushed to the
ON position. For additional information,
see “Warning lights, indicator lights and
audible reminders” (P. 2-14).
BEFORE STARTING THE EV SYSTEM
Starting and driving5-13
Page 339 of 612
NOTE:
• Confirm that the vehicle is in the de-sired shif t position by checking the
shif t indicator
O1located near the shif t
lever or the vehicle information display
in the meter.
• To place the vehicle into the D (Drive) position from the B mode, move the
shif t lever into the D (Drive) position.
Af ter placing the vehicle in the READY to
drive position, fully depress the brake pedal,
and move the shif t lever to any of the pre-
ferred shif t positions.
If the power switch is placed in the OFF or
ACC position for any reason while the shif t
position is in any position other than the P
(Park) position, the power switch cannot be
placed in the LOCK position.
If the power switch cannot be placed in the
LOCK position, perform the following steps:
1. Apply the parking brake when the ve- hicle is stopped.
2. Place the power switch in the ON posi- tion while depressing the foot brake
pedal.
3. Push the P (Park) position switch and confirm the vehicle is in the P (Park)
position. 4. Place the power switch in the OFF
position.NOTE:
The vehicle automatically applies the P
(Park) position when the power switch is
in the OFF position.
When the following conditions overlap,
the shif t position may be automatically
switched to P (Park):
– When maintaining a stop and holdwith the e-pedal.
– When taking off the seatbelt.
– When opening the door.
WARNING
• The shif t lever is always in the home
position when released. When the
power switch is placed in the READY
to drive position, the driver needs to
confirm that the vehicle is in the P
(Park) position. The indicator next to
the “P” by the shif t lever is illumi-
nated and the “P” is displayed on the
meter. If the vehicle is in the D (Drive)
position or R (Reverse) position when
the power switch is placed in the
READY to drive position, this may
cause a sudden start which could re-
sult in an accident.
• On a hilly road, do not allow the ve-
hicle to roll backwards while in the D
(Drive) position or B mode or allow
the vehicle to roll forward while in the
R (Reverse) position. This may cause
an accident.
5-16Starting and driving
Page 347 of 612
E-PEDAL SYSTEM LIMITATIONS
WARNING
Listed below are the system limitations
for the e-Pedal system. Failure to oper-
ate the vehicle in accordance with
these system limitations could result in
serious injury or death.
• If the “Press brake pedal to prevent
rolling” warning message appears in
the vehicle information display, de-
press the brake pedal. The vehicle
may start moving.
• If the deceleration force provided by
the e-Pedal system is not sufficient,
depress the brake pedal.
• If the vehicle starts to move while it is
stopped by the e-Pedal system, de-
press the brake pedal immediately.
• Under the following conditions, place
the vehicle in the P (Park) position
and make sure the parking brake is
securely applied. The vehicle may
start moving suddenly.
– When getting in and out of the
vehicle
– When loading and unloading the
vehicle –
When stopping the vehicle for a
long period of time
• Under the following conditions, the
e-Pedal system may not decelerate
or stop the vehicle sufficiently. De-
press the brake pedal whenever
necessary.
– When excessively heavy baggage
is loaded in the vehicle
– When driving on steep downhill
roads
– When driving on icy roads
• On a slope, the e-Pedal system may
not stop the vehicle completely or
may not keep the vehicle stopped.
Depress the brake pedal whenever
necessary.
CAUTION
• Turn the e-Pedal system off and
place the vehicle in the N (Neutral)
position under the following
conditions:
– When the vehicle enters an auto-
matic car wash
– When the vehicle is towed
• Be careful not to operate the e-Pedal
switch mistakenly or unintentionally.
SYSTEM MALFUNCTION
If the e-Pedal system malfunctions, the “e-
Pedal system failure! Press brake pedal to
slow or stop” warning message appears in
the vehicle information display. When the
warning message appears, the e-Pedal
system will be turned off automatically.
Have the system checked as soon as pos-
sible. It is recommended that you visit a
NISSAN certified LEAF dealer for this
service.
5-24Starting and driving