2023 NISSAN KICKS warning lights
[x] Cancel search: warning lightsPage 298 of 558
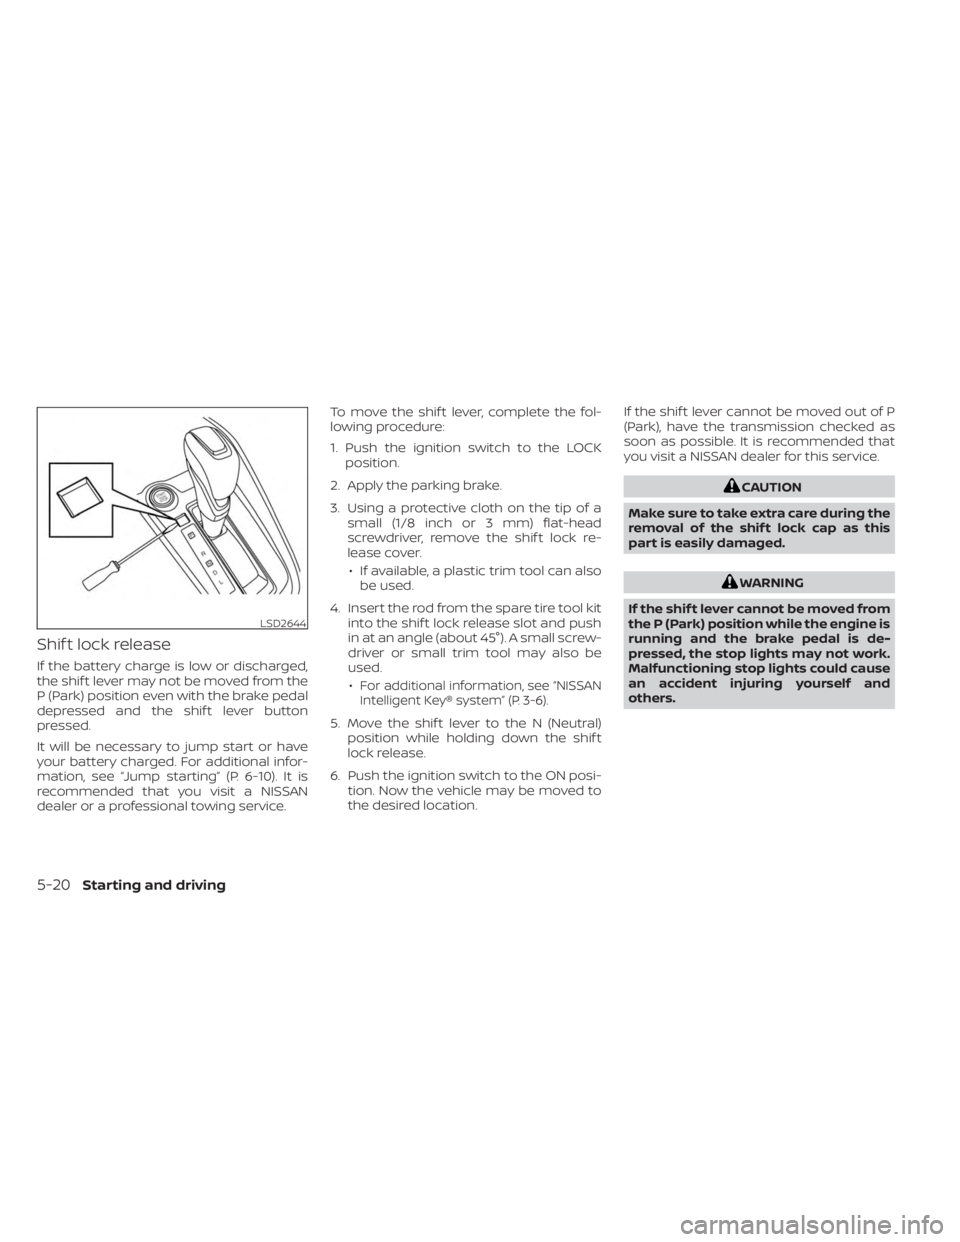
Shif t lock release
If the battery charge is low or discharged,
the shif t lever may not be moved from the
P (Park) position even with the brake pedal
depressed and the shif t lever button
pressed.
It will be necessary to jump start or have
your battery charged. For additional infor-
mation, see “Jump starting” (P. 6-10). It is
recommended that you visit a NISSAN
dealer or a professional towing service.To move the shif t lever, complete the fol-
lowing procedure:
1. Push the ignition switch to the LOCK
position.
2. Apply the parking brake.
3. Using a protective cloth on the tip of a small (1/8 inch or 3 mm) flat-head
screwdriver, remove the shif t lock re-
lease cover.
• If available, a plastic trim tool can also be used.
4. Insert the rod from the spare tire tool kit into the shif t lock release slot and push
in at an angle (about 45°). A small screw-
driver or small trim tool may also be
used.
•
For additional information, see “NISSAN
Intelligent Key® system” (P. 3-6).
5. Move the shif t lever to the N (Neutral) position while holding down the shif t
lock release.
6. Push the ignition switch to the ON posi- tion. Now the vehicle may be moved to
the desired location. If the shif t lever cannot be moved out of P
(Park), have the transmission checked as
soon as possible. It is recommended that
you visit a NISSAN dealer for this service.
CAUTION
Make sure to take extra care during the
removal of the shif t lock cap as this
part is easily damaged.
WARNING
If the shif t lever cannot be moved from
the P (Park) position while the engine is
running and the brake pedal is de-
pressed, the stop lights may not work.
Malfunctioning stop lights could cause
an accident injuring yourself and
others.
LSD2644
5-20Starting and driving
Page 302 of 558
– The braking force is applied by theautomatic brake hold function for
3 minutes or longer.
– The shif t lever is in the P (Park) position.
– The driver’s seat belt is unfastened.
– The ignition switch is placed in the OFF position.
–
The parking brake is applied manually.– If a malfunction occurs in the auto- matic brake hold function.
Manual operation
The electronic parking brake will not be au-
tomatically applied if the engine is stopped
without using the ignition switch (for ex-
ample, by engine stalling). In such a case,
you have to apply the parking brake
manually.
To apply: Pull the switch up
O1. The indica-
tor light
OAwill illuminate.
To release: With the ignition switch in the
ON position, depress the brake pedal and
push the switch down
O2. The indicator
light
OAwill turn off.
Before driving, check that the electronic
parking brake indicator light (
or PARK)
goes out. For additional information, see “Warning lights, indicator lights and audible
reminders” (P. 2-11).
NOTE:
• A buzzer will sound if the vehicle is
driven without releasing the parking
brake. For additional information, see
“Warning lights, indicator lights and
audible reminders” (P. 2-11).
• While the electronic parking brake is applied or released, an operating
sound is heard from the lower side of
the rear seat. This is normal and does
not indicate a malfunction.
• When the electronic parking brake is frequently applied and released in a
short period of time, the parking brake
may not operate in order to prevent the
parking brake system from overheat-
ing. If this occurs, operate the elec-
tronic parking brake switch again af ter
waiting approximately 1 minute.
• If the electronic parking brake must be applied while driving in an emergency,
pull up and hold the parking brake
switch. When you release the parking
brake switch, the parking brake will be
released. • While pulling up the electronic parking
brake switch during driving, the park-
ing brake is applied and a chime
sounds. The electronic parking brake
indicator light in the meter and in the
parking brake switch illuminates. This
does not indicate a malfunction. The
electronic parking brake indicator light
in the meter and in the parking brake
switch turns off when the parking
brake is released.
• When pulling the electronic parking brake switch up with the ignition
switch in the OFF or AUTO ACC position,
the parking brake switch indicator
light will continue to illuminate for a
short period of time.
5-24Starting and driving
Page 361 of 558
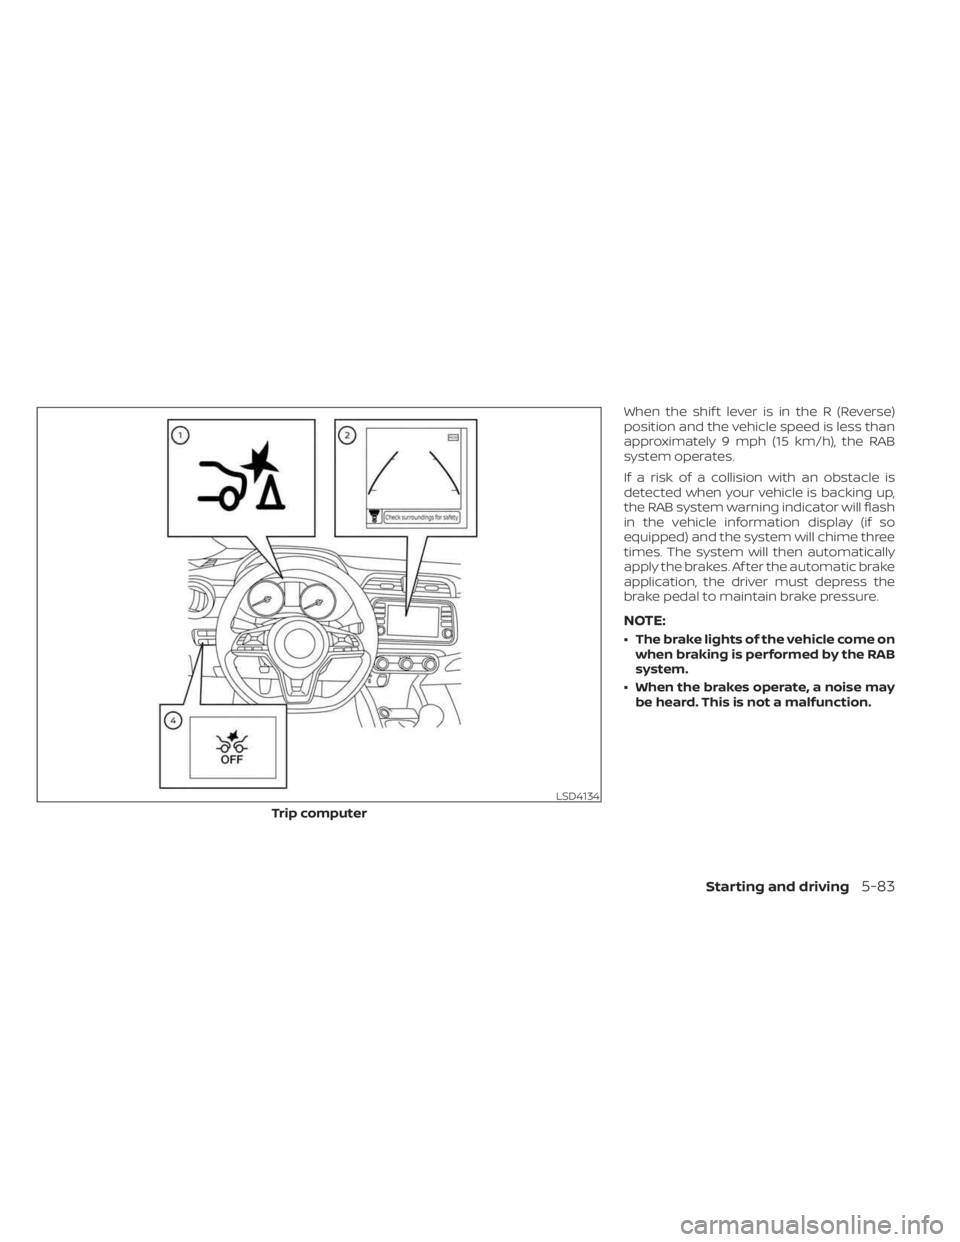
When the shif t lever is in the R (Reverse)
position and the vehicle speed is less than
approximately 9 mph (15 km/h), the RAB
system operates.
If a risk of a collision with an obstacle is
detected when your vehicle is backing up,
the RAB system warning indicator will flash
in the vehicle information display (if so
equipped) and the system will chime three
times. The system will then automatically
apply the brakes. Af ter the automatic brake
application, the driver must depress the
brake pedal to maintain brake pressure.
NOTE:
• The brake lights of the vehicle come onwhen braking is performed by the RAB
system.
• When the brakes operate, a noise may be heard. This is not a malfunction.
LSD4134
Trip computer
Starting and driving5-83
Page 367 of 558
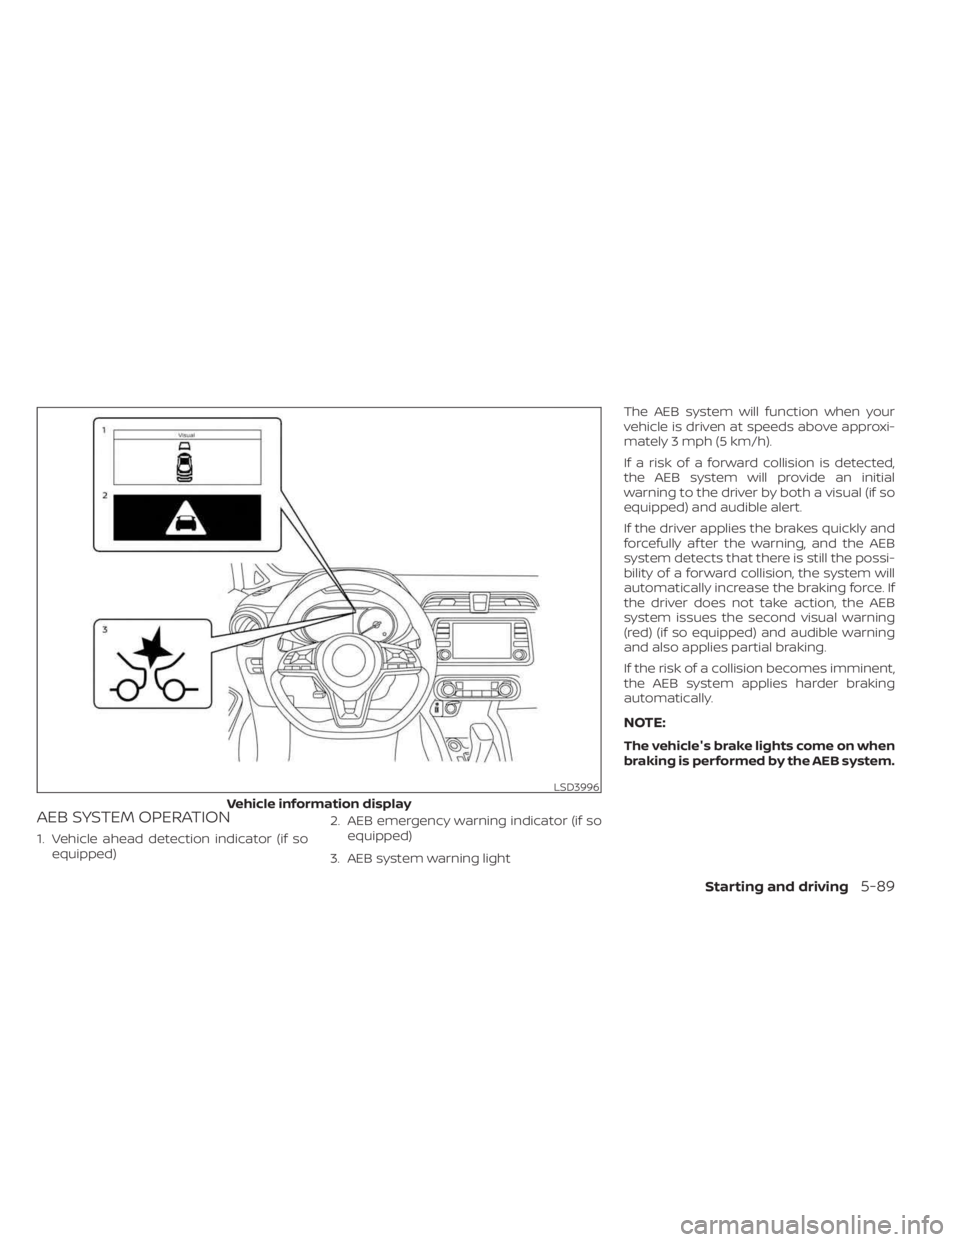
AEB SYSTEM OPERATION
1. Vehicle ahead detection indicator (if soequipped) 2. AEB emergency warning indicator (if so
equipped)
3. AEB system warning light The AEB system will function when your
vehicle is driven at speeds above approxi-
mately 3 mph (5 km/h).
If a risk of a forward collision is detected,
the AEB system will provide an initial
warning to the driver by both a visual (if so
equipped) and audible alert.
If the driver applies the brakes quickly and
forcefully af ter the warning, and the AEB
system detects that there is still the possi-
bility of a forward collision, the system will
automatically increase the braking force. If
the driver does not take action, the AEB
system issues the second visual warning
(red) (if so equipped) and audible warning
and also applies partial braking.
If the risk of a collision becomes imminent,
the AEB system applies harder braking
automatically.
NOTE:
The vehicle's brake lights come on when
braking is performed by the AEB system.
LSD3996
Vehicle information display
Starting and driving5-89
Page 381 of 558
AEB WITH PEDESTRIAN
DETECTION SYSTEM LIMITATIONS
WARNING
Listed below are the system limitations for
the AEB with Pedestrian Detection sys-
tem. Failure to operate the vehicle in ac-
cordance with these system limitations
could result in serious injury or death.
•The AEB with Pedestrian Detection
system cannot detect all vehicles or
pedestrians under all conditions.
•
The AEB with Pedestrian Detection
system does not detect the following:
– Pedestrians that are small (for ex- ample, children), in a sitting posi-
tion, operating toys/skateboards,
on scooters or in wheelchairs, or
not in an upright standing or
walking position.
– Animals of any size.
–
Obstacles (for example, cargo or
debris) on the roadway or roadside.
– Oncoming or crossing vehicles.
–Vehicles where the tires are difficult
to see or the shape of the rear of the
vehicle is unclear or obstructed.
– Parked vehicles. •
The AEB with Pedestrian Detection
system has some performance limi-
tations.
– If a stationary vehicle is in the
vehicle’s path, the system will not
function when the vehicle ap-
proaches the stationary vehicle
at speeds over approximately
50 mph (80 km/h).
– Pedestrian detection will not
function when the vehicle is
driven at speeds over approxi-
mately 37 mph (60 km/h) or below
approximately 6 mph (10km/h).
• For pedestrians, the AEB with Pedes-
trian Detection system will not issue
the first warning.
• The AEB with Pedestrian Detection
system may not function properly
or detect a vehicle or pedestrians
ahead in the following conditions:
– In poor visibility conditions (such
as rain, snow, fog, dust storms,
sand storms, smoke, and road
spray from other vehicles).
–
If dirt, ice, snow, fog or other mate-
rial is covering the radar sensor
area or camera area of windshield.
– If a strong light (for example, sun-
light or high beams) enters the
front camera or a sudden change
in brightness occurs (for example,
entering a tunnel or driving in
lightning).
– In dark or dimly lit conditions,
such as at night or in tunnels, in-
cluding cases where your vehi-
cle’s headlights are off or dim, or
the tail lights of the vehicle ahead
are off.
– When the direction of the camera
is misaligned.
– When driving on a steep downhill
slope, on roads with sharp curves,
and/or bumpy or dirt roads.
– If there is interference by other ra-
dar sources.
– When your vehicle’s position or
movement is changed quickly or
significantly (for example, lane
change, turning vehicle, abrupt
steering, sudden acceleration or
deceleration).
Starting and driving5-103
Page 412 of 558
BRAKE ASSIST
When the force applied to the brake pedal
exceeds a certain level, the Brake Assist is
activated generating greater braking force
than a conventional brake booster even
with light pedal force.
WARNING
The Brake Assist is only an aid to assist
braking operation and is not a collision
warning or avoidance device. It is the
driver’s responsibility to stay alert,
drive safely and be in control of the ve-
hicle at all times. The VDC system uses various sensors to
monitor driver inputs and vehicle motion.
Under certain driving conditions, the VDC
system helps to perform the following
functions:
• Controls brake pressure to reduce wheel
slip on one slipping drive wheel so power
is transferred to a non-slipping drive
wheel on the same axle.
• Controls brake pressure and engine out- put to reduce drive wheel slip based on
vehicle speed (traction control function).
• Controls brake pressure at individual wheels and engine output to help the
driver maintain control of the vehicle in
the following conditions:– Understeer (vehicle tends to not follow the steered path despite increased
steering input)
– Oversteer (vehicle tends to spin due to certain road or driving conditions)
The VDC system can help the driver to
maintain control of the vehicle, but it can-
not prevent loss of vehicle control in all driv-
ing situations. When the VDC system operates, the
indicator light in the instrument panel
flashes so note the following:
• The road may be slippery or the system
may determine some action is required
to help keep the vehicle on the steered
path.
• You may feel a pulsation in the brake pedal and hear a noise or vibration from
under the hood. This is normal and indi-
cates that the VDC system is working
properly.
• Adjust your speed and driving to the road conditions.
For additional information, see “Slip indica-
tor light” (P. 2-21) and ”Vehicle Dynamic Con-
trol (VDC) OFF indicator light” (P. 2-21).
If a malfunction occurs in the system, the
indicator light comes on in the instru-
ment panel. The VDC system automatically
turns off when these indicator lights are on.
The VDC OFF switch, or the vehicle infor-
mation display, is used to turn off the VDC
system. The
indicator light and the
Automatic Emergency Braking (AEB) sys-
tem warning light or the AEB with Pedes-
trian Detection system warning light illumi-
nate to indicate the VDC system is off.
VEHICLE DYNAMIC CONTROL (VDC)
SYSTEM
5-134Starting and driving
Page 428 of 558
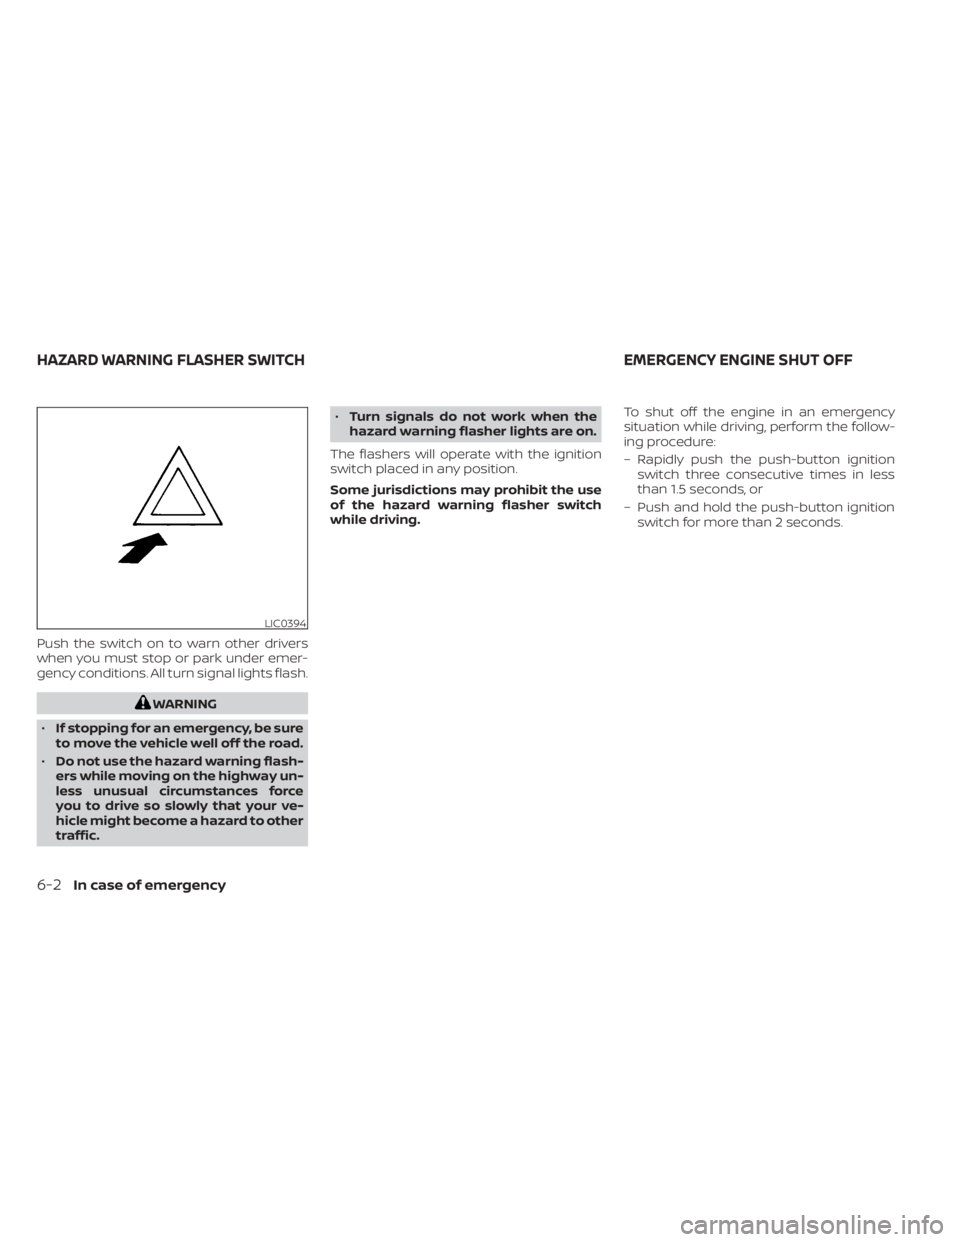
Push the switch on to warn other drivers
when you must stop or park under emer-
gency conditions. All turn signal lights flash.
WARNING
• If stopping for an emergency, be sure
to move the vehicle well off the road.
• Do not use the hazard warning flash-
ers while moving on the highway un-
less unusual circumstances force
you to drive so slowly that your ve-
hicle might become a hazard to other
traffic. •
Turn signals do not work when the
hazard warning flasher lights are on.
The flashers will operate with the ignition
switch placed in any position.
Some jurisdictions may prohibit the use
of the hazard warning flasher switch
while driving. To shut off the engine in an emergency
situation while driving, perform the follow-
ing procedure:
– Rapidly push the push-button ignition
switch three consecutive times in less
than 1.5 seconds, or
– Push and hold the push-button ignition switch for more than 2 seconds.
LIC0394
HAZARD WARNING FLASHER SWITCH EMERGENCY ENGINE SHUT OFF
6-2In case of emergency
Page 429 of 558
TIRE PRESSURE MONITORING
SYSTEM (TPMS)
This vehicle is equipped with the TPMS. It
monitors tire pressure of all tires except the
spare. When the low tire pressure warning
light is lit and the ”CHECK TIRE PRES” (ve-
hicles without a vehicle information dis-
play) or the “Tire Pressure Low — Add Air”
(vehicles with a vehicle information display)
warning appears in the vehicle information
display, one or more of your tires is signifi-
cantly under-inflated. If the vehicle is being
driven with low tire pressure, the TPMS will
activate and warn you of it by the low tire
pressure warning light. This system will ac-
tivate only when the vehicle is driven at
speeds above 16 mph (25 km/h). For addi-
tional information, see “Warning lights, indi-
cator lights and audible reminders” (P. 2-11),
and “Tire Pressure Monitoring System
(TPMS)” (P. 5-5).
WARNING
• Radio waves could adversely affect
electric medical equipment. Those
who use a pacemaker should contact
the electric medical equipment
manufacturer for the possible influ-
ences before use. •
If the low tire pressure warning light
illuminates while driving, avoid sud-
den steering maneuvers or abrupt
braking, reduce vehicle speed, pull
off the road to a safe location and
stop the vehicle as soon as possible.
Driving with underinflated tires may
permanently damage the tires and
increase the likelihood of tire failure.
Serious vehicle damage could occur
and may lead to an accident and
could result in serious personal in-
jury. Check the tire pressure for all
four tires. Adjust the tire pressure to
the recommended COLD tire pres-
sure shown on the Tire and Loading
Information label to turn the low tire
pressure warning light OFF. If the
light still illuminates while driving af-
ter adjusting the tire pressure, a tire
may be flat or the TPMS may be mal-
functioning. If you have a flat tire, re-
place it with a spare tire as soon as
possible. If no tire is flat and all tires
are properly inflated, have the ve-
hicle checked. It is recommended
that you visit a NISSAN dealer for this
service. •
When using a wheel without the
TPMS such as the spare tire, the TPMS
will not function and the low tire
pressure warning light will flash for
approximately 1 minute. The light will
remain on af ter 1 minute. Have your
tires replaced and/or TPMS system
reset as soon as possible. It is recom-
mended that you visit a NISSAN
dealer for these services.
• Replacing tires with those not origi-
nally specified by NISSAN could af-
fect the proper operation of the
TPMS.
• Do not inject any tire liquid or aerosol
tire sealant into the tires, as this may
cause a malfunction of the tire pres-
sure sensors.
• If the light still comes on while driving
af ter adjusting the tire pressure, a
tire may be flat or the TPMS may be
malfunctioning. If you have a flat tire,
replace it with a spare tire as soon as
possible. If no tire is flat and all tires
are properly inflated, it is recom-
mended that you visit a NISSAN
dealer for this service.
FLAT TIRE
In case of emergency6-3