2023 NISSAN KICKS stop start
[x] Cancel search: stop startPage 121 of 558
WARNING
Selecting “Dismiss Message” during a
stop within a trip temporarily dis-
misses the message for that stop with-
out turning the system off. Alerts can
be provided for other stops during the
trip. Selecting “Disable Alert” turns off
the Rear Door Alert system for the re-
mainder of a trip and no audible alert
will be provided.
NOTE:
This system is disabled until a driver en-
ables it using the vehicle information
display. For additional information, see
“How to use the vehicle information dis-
play ” (P. 2-24).
For additional information, see “Rear Door
Alert” (P. 2-58).
Check Back Seat For All Articles
When the system is enabled, this message
appears when the vehicle comes to a com-
plete stop, the vehicle is transitioned from
the D (Drive) position to P (Park) position,
and the driver exits the vehicle. This mes-
sage alerts the driver, af ter a period of time,
to check for items in the rear seat af ter the
audible alert has been provided.
NOTE:
This system is disabled until a driver en-
ables it using the vehicle information
display. For additional information, see
“How to use the vehicle information dis-
play ” (P. 2-24).
For additional information, see “Rear Door
Alert” (P. 2-58).
Door/lif tgate Open
This warning appears when a door or the
lif tgate has been opened.
Headlight System Error: See Owner’s
Manual
This warning appears when there is an er-
ror with the system. For additional informa-
tion, see “Headlight and turn signal switch”
(P. 2-44).
High Coolant Temp: See
Owner’s Manual
This warning appears when the tempera-
ture of the engine coolant is too high. Stop
the vehicle in a safe location as soon as
possible. Avoid quick starting or abrupt ac-
celeration. When the warning turns off, the
vehicle can be driven. If the warning appears again soon af ter it
turns off, have the vehicle checked. It is rec-
ommended that you visit a NISSAN dealer
for this service.
Illumination indicator
This indicator shows the illumination ad-
justment of the instrument panel. For addi-
tional information, see “Instrument bright-
ness control” (P. 2-50).
Low Fuel
This warning appears when the fuel level in
the fuel tank is getting low. Refuel as soon
as it is convenient, preferably before the
fuel gauge reaches 0 (Empty).
There will be
a small reserve of fuel in the tank when
the fuel gauge needle reaches 0 (Empty).
Low Outside Temperature
This warning appears if the outside tem-
perature is below 37°F (3°C). The tempera-
ture can be changed to display in Celsius or
Fahrenheit. For additional information, see
“Settings” (P. 2-25).
Instruments and controls2-33
Page 122 of 558
Oil and Filter
This indicator appears when the customer
set distance comes for changing the en-
gine oil and filter. You can set or reset the
distance for checking or replacing these
items. For scheduled maintenance items
and intervals, see “Maintenance and
schedules” (P. 9-7).
Other
This indicator appears when the customer
set distance is reached for checking or re-
placing maintenance items other than the
engine oil, oil filter and tires. Other mainte-
nance items can include such things as air
filter or tire rotation. The distance for
checking or replacing the items can be set
or reset.
Outside Temperature
Display
The outside temperature display appears
in the center region of the vehicle informa-
tion display.
Parking Sensor Error: See Owner’s
Manual
This warning appears when there is an er-
ror with the system. For additional informa-
tion, see “Rear Sonar System (RSS)” (P. 5-140).
Parking Sensor
This indicator appears when the sensor is
activated. For additional information, see
“Rear Sonar System (RSS)” (P. 5-140).
Power will turn off to save the battery
This message appears in the vehicle infor-
mation display af ter a period of time if the
ignition switch is in the ON position and if
the vehicle is in P (Park). For additional infor-
mation, see “Push-button ignition switch
positions” (P. 5-12).
Power turned off to save the battery
This message appears af ter the ignition
switch is automatically turned off. For addi-
tional information, see “Push-button igni-
tion switch positions” (P. 5-12).
Press Brake Pedal
This warning appears in the following situ-
ations:
• The driver tires to release the electronicparking brake manually without depress-
ing the brake pedal. • The vehicle is stopped on a steep hill and
there is a possibility of moving backward,
even if the electronic parking brake is
applied.
• This warning appears if the vehicle moves while the automatic brake hold is
activated.
Press brake to operate
switch
This warning appears if the automatic
brake hold switch is pushed without de-
pressing the brake pedal while the auto-
matic brake hold function is activated. De-
press the brake pedal and push the switch
to deactivate the automatic brake hold
function.
For additional information, see “Automatic
brake hold” (P. 5-25).
Push brake and start
switch to drive
This indicator appears when the shif t lever
is in the P (Park) position.
This indicator also appears when the ve-
hicle has been started using the Remote
Engine Start (if so equipped) function.
2-34Instruments and controls
Page 123 of 558
This indicator means that the engine will
start by pushing the ignition switch with
the brake pedal depressed. You can start
the engine from any position of the ignition
switch.
Rear seat belt reminder
This warning appears for 65 seconds af ter
the ignition is placed in the ON position and
the engine is started.
This warning message shows the status
of the three rear seat belts. When one of
the rear seat belts are buckled, the corre-
sponding rear seat belt indicator will ap-
pear white. When one of the rear seat belts
are unbuckled, the corresponding rear seat
belt indicator will appear red.
Af ter a change in buckle status, a chime will
sound and the warning will appear for an-
other 65 seconds.
Release Parking Brake
This warning appears in the message area
of the vehicle information display when
the parking brake is set and the vehicle is
driven.
Reminder: Turn OFF
Headlights
This warning appears when the headlights
are lef t in the ON position when exiting the
vehicle. Place the headlight switch in the
OFF (if so equipped) or AUTO position. For
additional information, see “Headlight and
turn signal switch” (P. 2-44).
Shif t to Park
This warning appears when the ignition
switch is in the OFF position and the shif t
lever is not in the P (Park) position. Also, a
chime sounds when the ignition switch is
in the OFF position.
If this warning appears, move the shif t lever
to the P (Park) position and start the engine.
Shipping Mode On Push Storage Fuse
This warning may appear if the extended
storage switch is not pushed in. When this
warning appears, push in the extended
storage switch to turn off the warning. For
additional information, see “Extended stor-
age switch” (P. 2-60).
Steep slope Apply foot
brake
This warning appears if the “Caution Steep
slope” warning has appeared over about 3
minutes. Then the parking brake will auto-
matically be applied and the brake force of
the automatic brake hold will be released,
and the vehicle may move or roll away un-
expectedly. Apply the foot brake to stop the
vehicle from moving.
For additional information, see “Automatic
brake hold” (P. 5-25).
Steering lock release
malfunction indicator
This indicator appears when the steering
lock cannot be released.
If this indicator appears, push the ignition
switch while lightly turning the steering
wheel right and lef t.
Tire
This indicator appears when the customer
set distance is reached for replacing tires.
You can set or reset the distance for replac-
ing tires.
Instruments and controls2-35
Page 127 of 558
3. Close all doors, hood and lif tgate. Lockall doors. The doors can be locked with
the Intelligent Key, mechanical key, or
door handle request switch (if so
equipped).
4. Confirm that the
security indicator
light stays on for about 30 seconds. The
vehicle security system is now pre-
armed. The vehicle security system will
automatically shif t into the armed
phase. The
security light begins to
flash once every three seconds. If during
the pre-armed phase one of the follow-
ing occurs, the system will not arm:
• Any door is unlocked with the Intelligent Key, mechanical key, or door request
switch (if so equipped).
• Ignition switch is placed in the ON position.
• Even when the driver and/or passen-
gers are in the vehicle, the system will
activate with all the doors, hood and
lif tgate locked with the ignition switch
placed in the LOCK position. When plac-
ing the ignition switch in the ON posi-
tion, the system will be released.
Vehicle security system activation
The vehicle security system will give the
following alarm:
• The headlights or turn lamps blink and the horn sounds intermittently but
synchronously.
•
The alarm automatically turns off af ter a
period of time. However, the alarm reacti-
vates if the vehicle is tampered with again.
The alarm is activated by:
• opening any door, hood or the lif tgate without using the key or Intelligent Key
(even if the door is unlocked by releasing
the door inside lock knob).
How to stop an activated alarm
The alarm stops only by unlocking a door
or the lif tgate with the key fob, pressing the
button on the Intelligent Key, or push-
ing the request switch (if so equipped) on
the driver's or passenger's door with the
Intelligent Key in range of the door handle.
NISSAN ANTI-THEFT SYSTEM
(NATS) (if so equipped)
The NISSAN Anti-Thef t System will not al-
low the engine to start without the use of a
registered NATS key. If the engine does not start using the reg-
istered NATS key, it may be due to interfer-
ence caused by:
• Another NATS key
• Automated toll road device
• Automated payment device
• Other devices that transmit similar
signals
Start the engine using the following
procedure:
1. Remove any items that may be causing the interference away from the NATS key.
2. Leave the ignition switch in the ON posi- tion for approximately 5 seconds.
3. Place the ignition switch in the OFF or LOCK position and wait approximately
10 seconds.
4. Repeat steps 2 and 3 again.
5. Start the engine.
6. Repeat the steps above until all possible interferences are eliminated.
If this procedure allows the engine to start,
NISSAN recommends placing the regis-
tered NATS key separate from other de-
vices to avoid interference.
Instruments and controls2-39
Page 129 of 558
If the light still remains on and/or the
engine will not start, seek service for the
NATS as soon as possible. Please bring all
registered keys that you have. It is rec-
ommended that you visit a NISSAN
dealer for this service.
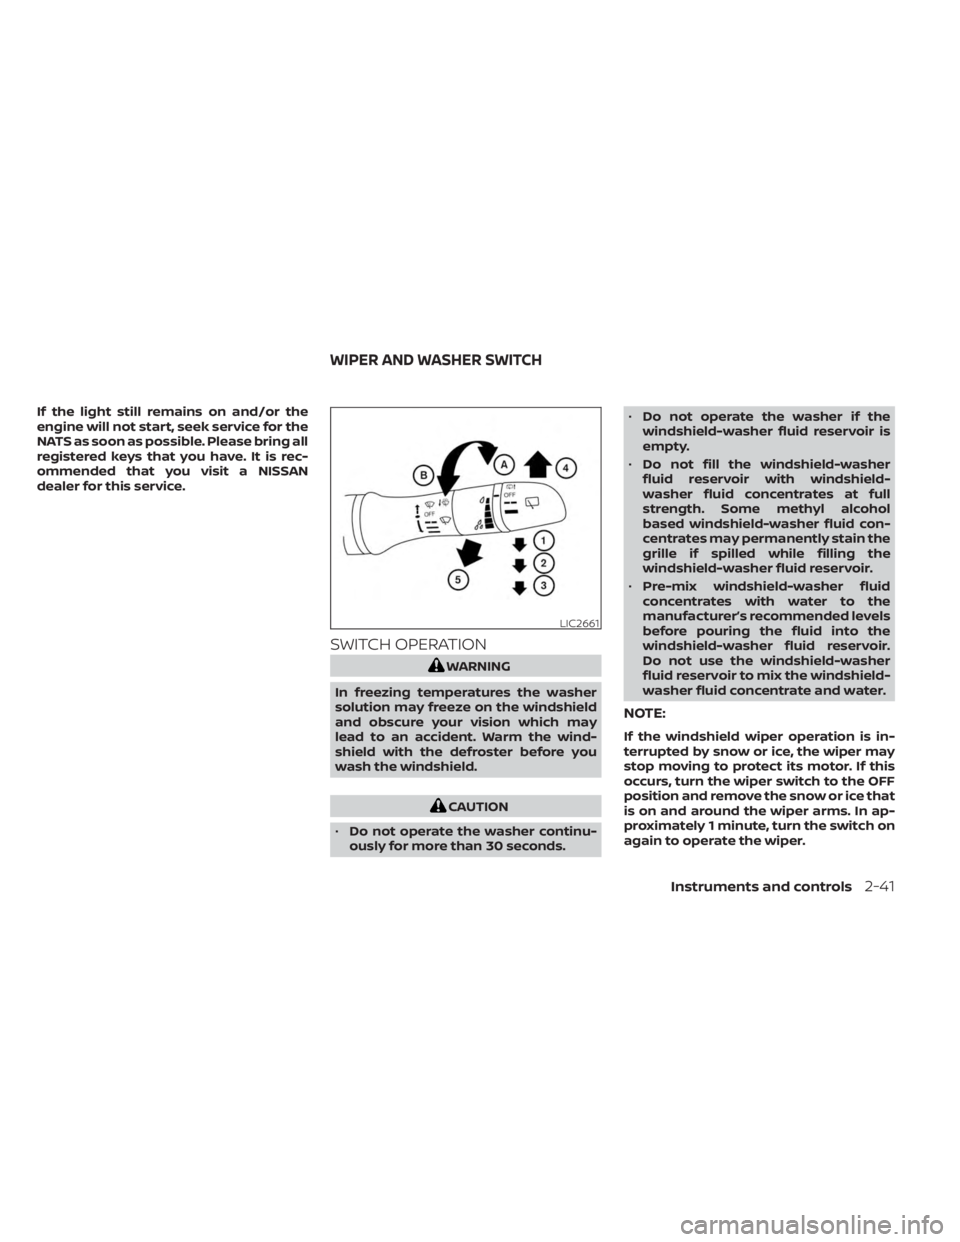
SWITCH OPERATION
WARNING
In freezing temperatures the washer
solution may freeze on the windshield
and obscure your vision which may
lead to an accident. Warm the wind-
shield with the defroster before you
wash the windshield.
CAUTION
• Do not operate the washer continu-
ously for more than 30 seconds. •
Do not operate the washer if the
windshield-washer fluid reservoir is
empty.
• Do not fill the windshield-washer
fluid reservoir with windshield-
washer fluid concentrates at full
strength. Some methyl alcohol
based windshield-washer fluid con-
centrates may permanently stain the
grille if spilled while filling the
windshield-washer fluid reservoir.
• Pre-mix windshield-washer fluid
concentrates with water to the
manufacturer’s recommended levels
before pouring the fluid into the
windshield-washer fluid reservoir.
Do not use the windshield-washer
fluid reservoir to mix the windshield-
washer fluid concentrate and water.
NOTE:
If the windshield wiper operation is in-
terrupted by snow or ice, the wiper may
stop moving to protect its motor. If this
occurs, turn the wiper switch to the OFF
position and remove the snow or ice that
is on and around the wiper arms. In ap-
proximately 1 minute, turn the switch on
again to operate the wiper.
LIC2661
WIPER AND WASHER SWITCH
Instruments and controls2-41
Page 161 of 558
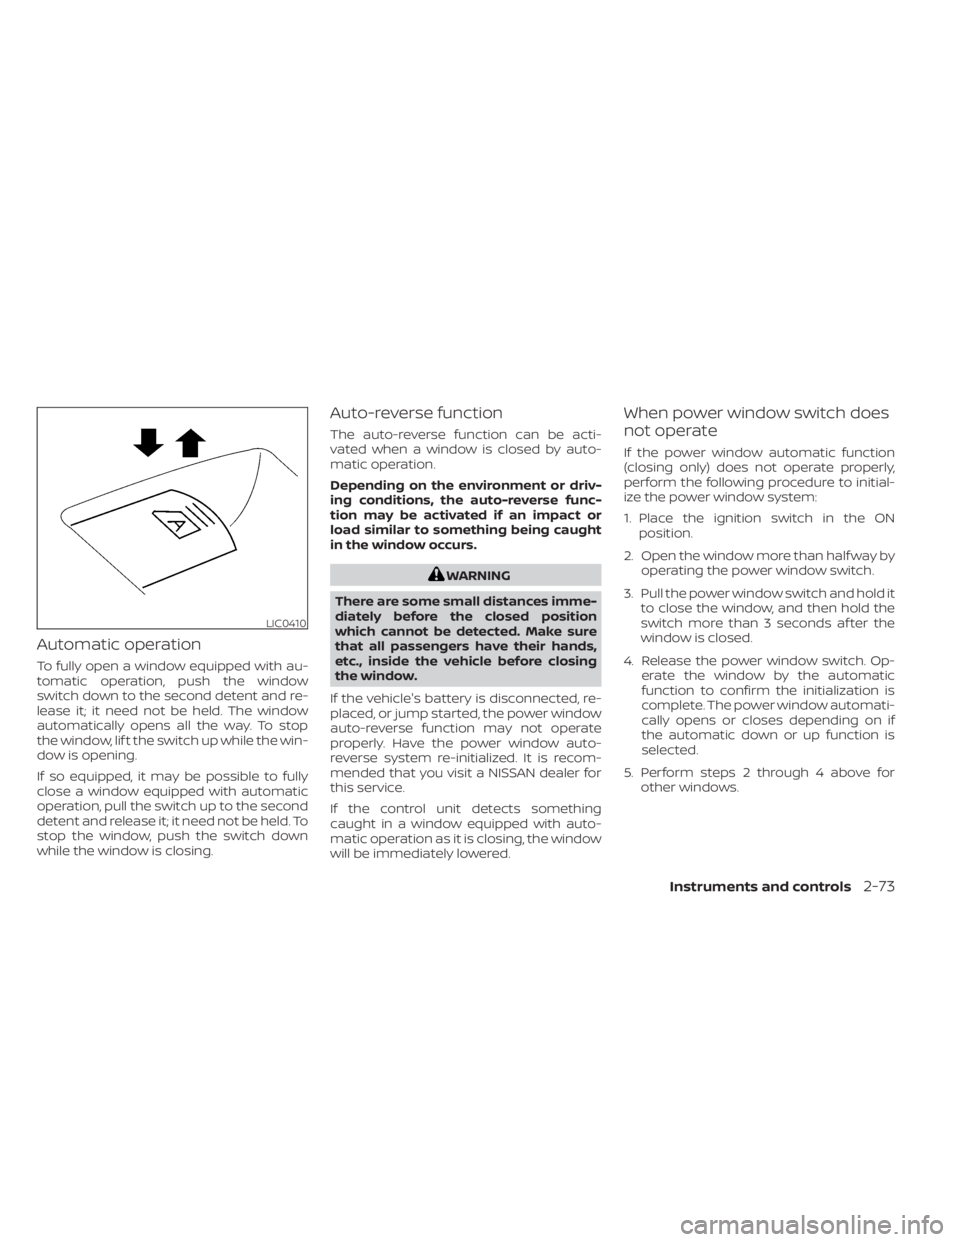
Automatic operation
To fully open a window equipped with au-
tomatic operation, push the window
switch down to the second detent and re-
lease it; it need not be held. The window
automatically opens all the way. To stop
the window, lif t the switch up while the win-
dow is opening.
If so equipped, it may be possible to fully
close a window equipped with automatic
operation, pull the switch up to the second
detent and release it; it need not be held. To
stop the window, push the switch down
while the window is closing.
Auto-reverse function
The auto-reverse function can be acti-
vated when a window is closed by auto-
matic operation.
Depending on the environment or driv-
ing conditions, the auto-reverse func-
tion may be activated if an impact or
load similar to something being caught
in the window occurs.
WARNING
There are some small distances imme-
diately before the closed position
which cannot be detected. Make sure
that all passengers have their hands,
etc., inside the vehicle before closing
the window.
If the vehicle's battery is disconnected, re-
placed, or jump started, the power window
auto-reverse function may not operate
properly. Have the power window auto-
reverse system re-initialized. It is recom-
mended that you visit a NISSAN dealer for
this service.
If the control unit detects something
caught in a window equipped with auto-
matic operation as it is closing, the window
will be immediately lowered.
When power window switch does
not operate
If the power window automatic function
(closing only) does not operate properly,
perform the following procedure to initial-
ize the power window system:
1. Place the ignition switch in the ON position.
2. Open the window more than half way by operating the power window switch.
3. Pull the power window switch and hold it to close the window, and then hold the
switch more than 3 seconds af ter the
window is closed.
4. Release the power window switch. Op- erate the window by the automatic
function to confirm the initialization is
complete. The power window automati-
cally opens or closes depending on if
the automatic down or up function is
selected.
5. Perform steps 2 through 4 above for other windows.
LIC0410
Instruments and controls2-73
Page 184 of 558
• The engine hood has been opened.
•
The vehicle is shif ted out of P (Park) position.
• The alarm sounds due to illegal entry intothe vehicle.
• The ignition switch is pushed without an Intelligent Key in the vehicle.
• The ignition switch is pushed with an In- telligent Key in the vehicle but the brake
pedal is not depressed.
CONDITIONS THE REMOTE ENGINE
START WILL NOT WORK
The Remote Engine Start will not operate if
any of the following conditions are present:
• The ignition switch is placed in the ONposition.
• The hood is not securely closed.
• The hazard indicator lights are on.
• The engine is still running. The engine must be completely stopped. Wait at
least 6 seconds if the engine goes from
running to off. This is not applicable when
extending engine run time.
• The
button is not pressed and held
for at least 2 seconds.
•
Thebutton is not pressed and held
within 5 seconds of pressing the lock button.
• The brake is pressed.
• The doors are not closed and locked.
• The lif tgate is open.
• The Key System Error warning message appears in the vehicle information dis-
play (if so equipped).
• The alarm sounds due to illegal entry into the vehicle.
• Two Remote Engine Starts, or a single Remote Engine Start with an extension,
have already been used.
• The vehicle is not in P (Park).
• There is a detected registered key already inside of the vehicle.
• The Remote Engine Start feature has been switched to the OFF position using
the “Vehicle Settings” menu on the vehicle
information display (if so equipped).
For additional information, see “Vehicle
information display” (P. 2-24).
The Remote Engine Start may display a
warning or indicator in the vehicle informa-
tion display (if so equipped). For additional
information, see “Vehicle information dis-
play” (P. 2-24).
3-20Pre-driving checks and adjustments
Page 189 of 558
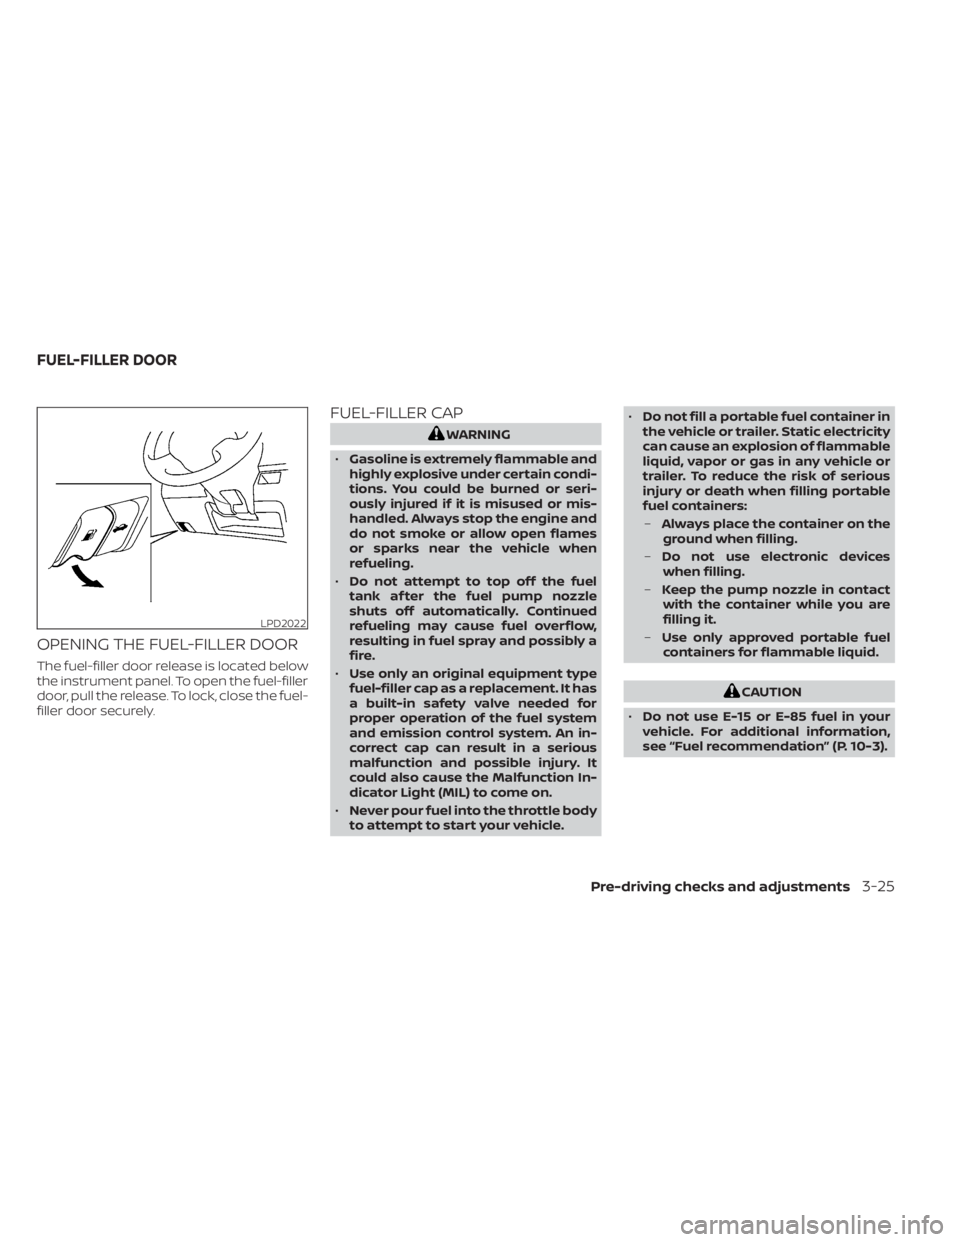
OPENING THE FUEL-FILLER DOOR
The fuel-filler door release is located below
the instrument panel. To open the fuel-filler
door, pull the release. To lock, close the fuel-
filler door securely.
FUEL-FILLER CAP
WARNING
• Gasoline is extremely flammable and
highly explosive under certain condi-
tions. You could be burned or seri-
ously injured if it is misused or mis-
handled. Always stop the engine and
do not smoke or allow open flames
or sparks near the vehicle when
refueling.
• Do not attempt to top off the fuel
tank af ter the fuel pump nozzle
shuts off automatically. Continued
refueling may cause fuel overflow,
resulting in fuel spray and possibly a
fire.
• Use only an original equipment type
fuel-filler cap as a replacement. It has
a built-in safety valve needed for
proper operation of the fuel system
and emission control system. An in-
correct cap can result in a serious
malfunction and possible injury. It
could also cause the Malfunction In-
dicator Light (MIL) to come on.
• Never pour fuel into the throttle body
to attempt to start your vehicle. •
Do not fill a portable fuel container in
the vehicle or trailer. Static electricity
can cause an explosion of flammable
liquid, vapor or gas in any vehicle or
trailer. To reduce the risk of serious
injury or death when filling portable
fuel containers:
– Always place the container on the
ground when filling.
– Do not use electronic devices
when filling.
– Keep the pump nozzle in contact
with the container while you are
filling it.
– Use only approved portable fuel
containers for flammable liquid.
CAUTION
• Do not use E-15 or E-85 fuel in your
vehicle. For additional information,
see “Fuel recommendation” (P. 10-3).
LPD2022
FUEL-FILLER DOOR
Pre-driving checks and adjustments3-25