2023 NISSAN FRONTIER door lock
[x] Cancel search: door lockPage 156 of 572
The system helps deter vehicle thef t but
cannot prevent it, nor can it prevent the
thef t of interior or exterior vehicle compo-
nents in all situations. Always secure your
vehicle even if parking for a brief period.
Never leave your keys in the vehicle, and
always lock the vehicle when unattended.
Be aware of your surroundings, and park in
secure, well-lit areas whenever possible.
Many devices offering additional protec-
tion, such as component locks, identifica-
tion markers, and tracking systems, are
available at auto supply stores and spe-
cialty shops. A NISSAN dealer may also offer
such equipment. Check with your insur-
ance company to see if you may be eligible
for discounts for various thef t protection
features.
How to arm the vehicle security
system
1. Close all windows.(The system can be
armed even if the windows are open.)
2. Remove the Intelligent Key from the vehicle.
3. Close all doors. Lock all doors. The doors can be locked with the power door lock
switch (if the door is opened, locked and
then closed) or with the key fob. Key fob operation:
• Press the
button on the key fob. All
doors lock. The hazard lights flash twice
and the horn beeps once to indicate all
doors are locked.
• When the
button is pressed with all
doors locked, the hazard lights flash twice
and the horn beeps once as a reminder
that the doors are already locked.
The horn may or may not beep.
4. Confirm that the
indicator light
comes on. Theindicator light
stays on for about 30 seconds. The ve-
hicle security system is now pre-armed.
Af ter about 30 seconds the vehicle se-
curity system automatically shif ts into
the armed phase. The
indicator
light begins to flash once every 3 sec-
onds. If, during the 30-second pre-arm
time period, the driver's door is unlocked
by the key fob or the ignition switch is
placed in ACC or ON position, the system
will not arm.
• If the indicator light fails to glow for a
period of time, unlock the door once
and lock it again. •
Even when the driver and/or passen-
gers are in the vehicle, the system will
arm with all doors closed and locked
with the ignition switch placed in the
OFF position.
Vehicle security system activation
The vehicle security system will give the
following alarm:
• The headlights blink and the horn sounds intermittently.
• The alarm automatically turns off af ter a period of time. However, the alarm reacti-
vates if the vehicle is tampered with
again. The alarm can be shut off by un-
locking the driver's door by pressing the
button on the key fob.
The alarm is activated by:
• Opening a door without using the key fob (even if the door is unlocked by using the
inside lock knob or the power door lock
switch).
How to stop an activated alarm
The alarm stops only by pressing thebutton on the key fob.
2-40Instruments and controls
Page 176 of 572

When the Rear Door Alert system is acti-
vated and a driver exits the vehicle af ter
arriving at a destination:
• When the driver puts the vehicle in the P(Park) position, a message appears in the
vehicle information display for a driver
to “Dismiss Message” or “Disable Alert” if
desired.
• With the system enabled, when the driver exits the vehicle, an audible alert (horn
sound) will occur unless a rear door is
opened and closed within a short time to
deactivate the alert.
• If the doors are locked before the alert is deactivated by opening a rear door, the
horn will sound.
• If the audible horn alert occurs, a mes- sage will also appear in the vehicle infor-
mation display that states, “Check Rear
Seat for All Articles”.
WARNING
• If the driver selects “Disable Alert”, no
audible alert will be provided regard-
less of rear door open/close status. • There may be times when there is an
object or passenger in the rear seat(s)
but the audible alert does not sound.
For example, this may occur if rear seat
passengers enter or exit the vehicle
during a trip.
• The system does not directly detect
objects or passengers in the rear
seat(s). Instead, it can detect when a
rear door is opened and closed, indicat-
ing that there may be something in the
rear seat(s).
NOTE:
There may be times when the horn
sounds but there are no objects or pas-
sengers in the rear seat(s).
For additional information, see “Rear Door
Alert is activated” (P. 2-35).
12V OUTLETS
The power outlets are for powering electrical
accessories such as cellular telephones.
The power outlet located on the instru-
ment panel is powered only when the igni-
tion switch is placed in the ACC or ON
position.
Open the cap to use a power outlet.
CAUTION
• The outlet and plug may be hot dur-
ing or immediately af ter use.
LIC4831
Instrument panel
POWER OUTLETS
2-60Instruments and controls
Page 190 of 572

CAUTION
• Do not use the bottle holder for any
other objects that could be thrown
about in the vehicle and possibly in-
jure people during sudden braking or
an accident.
• Do not use the bottle holder for open
liquid containers.
POWER WINDOWS
WARNING
• Make sure that all passengers have
their hands, etc., inside the vehicle
while it is in motion and before clos-
ing the windows. Use the window
lock switch to prevent unexpected
use of the power windows.
• To help avoid risk of injury or death
through unintended operation of the
vehicle and/or its systems, including
entrapment in windows or inadver-
tent door lock activation, do not
leave children, people who require
the assistance of others or pets unat-
tended in your vehicle. Additionally,
the temperature inside a closed ve-
hicle on a warm day can quickly be-
come high enough to cause a signifi-
cant risk of injury or death to people
and pets.
The power windows operate when the ig-
nition switch is placed in the ON position or
for a period of time af ter the ignition switch
is placed in the ACC or OFF position. If the
driver's or passenger's door is opened dur-
ing this period of time, the power to the
windows is canceled.
Driver's side power window
switch
The driver's side control panel is equipped
with switches to open or close the front
and rear passenger windows.
LIC4833
Rear bottle holders
LIC1329
1. Window lock button
2. Power door lock switch
3. Front passenger side window switch
4. Right rear passenger window switch (Crew Cab models only)
5. Lef t rear passenger window switch (Crew Cab models only)
6. Driver's side automatic switch
WINDOWS
2-74Instruments and controls
Page 195 of 572
• The doors are unlocked by the key fob, akey or the power door lock switch while
all doors are closed and the ignition
switch is in the OFF position.
• The driver’s door is opened and then closed while the ignition switch is placed
in the OFF position.
• The ignition switch is placed in the OFF position while all doors are closed.
The lights will turn off while the timer is
activated when:
• The driver’s door is locked by the key fob, a key, or the power door lock switch.
• The ignition switch is placed in the ON position.
When the switch is in the OFF position
O3,
the interior lights do not illuminate, regard-
less of door position. The cargo light may
illuminate when any front or rear passen-
ger door is opened.
The lights will turn off automatically af ter
a period of time while doors are open
to prevent the battery from becoming
discharged.
CAUTION
Do not use for extended periods of time
with the engine stopped. This could re-
sult in a discharged battery.
MAP LIGHTS
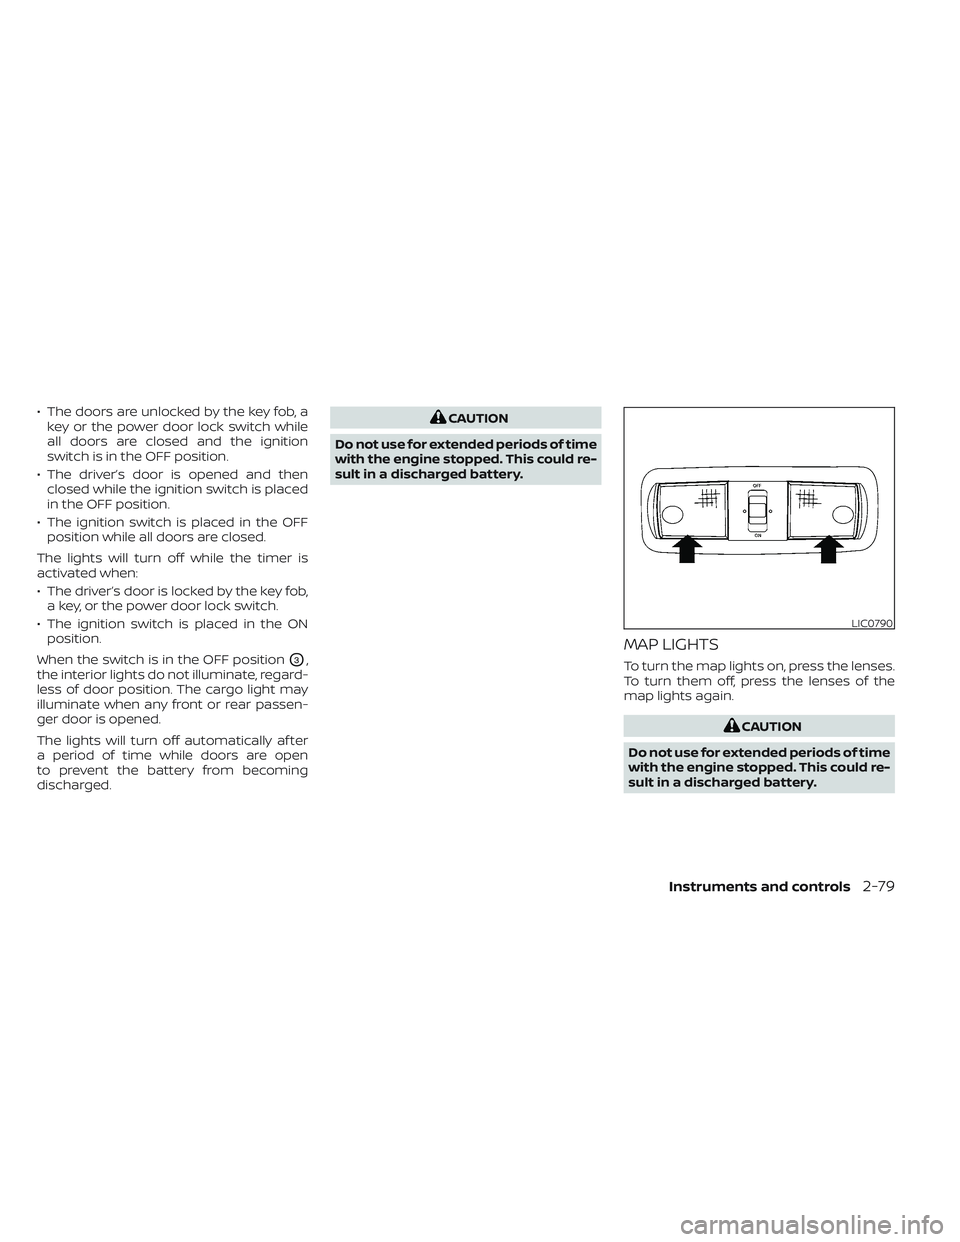
To turn the map lights on, press the lenses.
To turn them off, press the lenses of the
map lights again.
CAUTION
Do not use for extended periods of time
with the engine stopped. This could re-
sult in a discharged battery.
LIC0790
Instruments and controls2-79
Page 196 of 572

CARGO LIGHT
The cargo light on the overhead trim has a
three-position switch. To operate, push the
switch to the desired position.
ON: The light is illuminated.
DOOR: The light illuminates when the rear
doors are opened. The light turns off when
the rear doors are closed.
OFF: The light does not illuminate regard-
less of door position or lock status.
CAUTION
Do not use for extended periods of time
with the engine stopped. This could re-
sult in a discharged battery. The HomeLink® Universal Transceiver pro-
vides a convenient way to consolidate the
functions of up to three individual hand-
held transmitters into one built-in device.
HomeLink® Universal Transceiver:
• Will operate most Radio Frequency (RF)
devices such as garage doors, gates,
home and office lighting, entry door locks
and security systems.
• Is powered by your vehicle's battery. No separate batteries are required. If the
vehicle's battery is discharged or is dis-
connected, HomeLink® will retain all
programming.
When the HomeLink® Universal Trans-
ceiver is programmed, retain the original
transmitter for future programming
procedures (Example: new vehicle pur-
chases). Upon sale of the vehicle, the
programmed HomeLink® Universal
Transceiver buttons should be erased for
security purposes. For additional infor-
mation, see “Programming HomeLink®”
(P. 2-81).
LIC0590
HOMELINK® UNIVERSAL
TRANSCEIVER (if so equipped)
2-80Instruments and controls
Page 203 of 572
3 Pre-driving checks and adjustments
Keys.............................................3-2NISSAN Intelligent Key® .......................3-2
NISSAN Vehicle Immobilizer System
keys..........................................3-4
Doors ...........................................3-4
Locking with key .............................3-5
Locking with inside lock knob ................3-6
Locking with power door lock switch .........3-6
Rear doors (King Cab® models) ...............3-6
Automatic door locks ........................ 3-7
Child safety rear door lock
(if so equipped) ............................... 3-7
NISSAN Intelligent Key® system ..................3-8
Operating range .............................3-9
Door locks/unlocks precaution ...............3-9
NISSAN Intelligent Key® Operation ...........3-10
How to use the remote keyless entry
function ..................................... 3-13
Warning signals ............................. 3-16
Troubleshooting guide ......................3-16
Remote Engine Start (if so equipped) ...........3-18
Remote Engine Start operating range .......3-18 Remote starting the vehicle
.................3-19
Extending engine run time ..................3-19
Canceling a Remote Engine Start ...........3-19
Conditions the Remote Engine Start will
notwork .................................... 3-20
Hood ........................................... 3-20
Fuel-filler door .................................. 3-21
Fuel-filler cap ................................ 3-21
Steering wheel ................................. 3-23
Tilt operation ................................ 3-23
Sun visors ...................................... 3-24
Vanity mirrors (if so equipped) ...............3-24
Mirrors ......................................... 3-25
Manual anti-glare rearview mirror
(if so equipped) .............................. 3-25
Automatic anti-glare rearview mirror
(if so equipped) .............................. 3-25
Outside mirrors ............................. 3-25
Truck box ...................................... 3-27
Tailgate ..................................... 3-27
Tie down hooks ............................. 3-31
Page 205 of 572
•Wetting may damage the Intelligent
Key. If the Intelligent Key gets wet,
immediately wipe until it is com-
pletely dry.
• Do not place the Intelligent Key for an
extended period in an area where
temperatures exceed 140°F (60°C).
• Do not attach the Intelligent Key with
a key holder that contains a magnet.
• Do not place the Intelligent Key near
equipment that produces a magnetic
field, such as a TV, audio equipment
and personal computers.
If an Intelligent Key is lost or stolen,
NISSAN recommends erasing the ID
code of that Intelligent Key from the
vehicle. This may prevent the unau-
thorized use of the Intelligent Key to
operate the vehicle. For information re-
garding the erasing procedure, it is rec-
ommended that you visit a NISSAN
dealer.
Mechanical key
The Intelligent Key contains the mechani-
cal key.
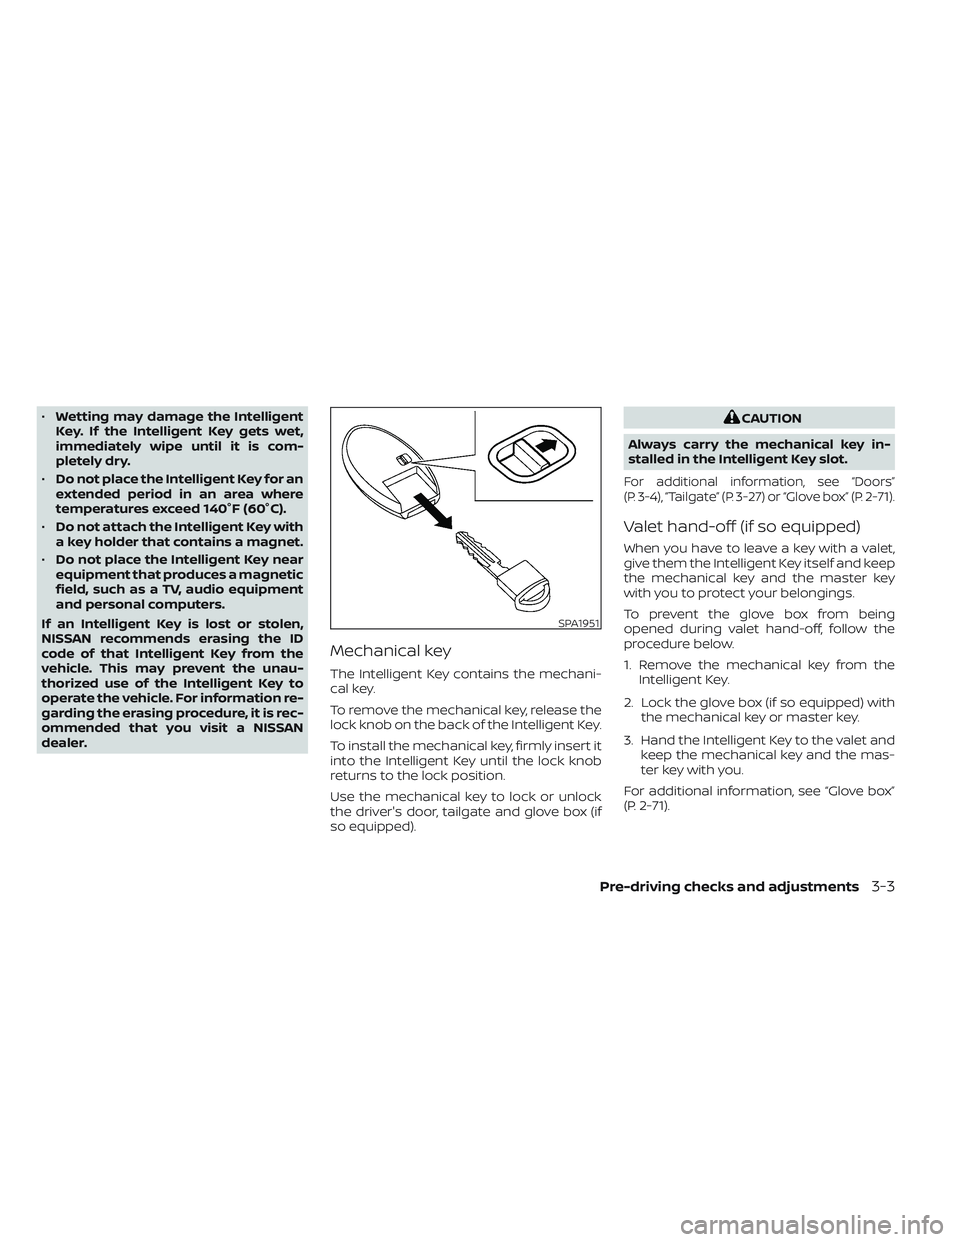
To remove the mechanical key, release the
lock knob on the back of the Intelligent Key.
To install the mechanical key, firmly insert it
into the Intelligent Key until the lock knob
returns to the lock position.
Use the mechanical key to lock or unlock
the driver's door, tailgate and glove box (if
so equipped).
CAUTION
Always carry the mechanical key in-
stalled in the Intelligent Key slot.
For additional information, see “Doors”
(P. 3-4), “Tailgate” (P. 3-27) or “Glove box” (P. 2-71).
Valet hand-off (if so equipped)
When you have to leave a key with a valet,
give them the Intelligent Key itself and keep
the mechanical key and the master key
with you to protect your belongings.
To prevent the glove box from being
opened during valet hand-off, follow the
procedure below.
1. Remove the mechanical key from the Intelligent Key.
2. Lock the glove box (if so equipped) with the mechanical key or master key.
3. Hand the Intelligent Key to the valet and keep the mechanical key and the mas-
ter key with you.
For additional information, see “Glove box”
(P. 2-71).
SPA1951
Pre-driving checks and adjustments3-3
Page 206 of 572

NISSAN VEHICLE IMMOBILIZER
SYSTEM KEYS
Additional or replacement keys:
If you still have a key, the key number is not
necessary when you need extra NISSAN
Vehicle Immobilizer System keys. Your ex-
isting key can be duplicated without know-
ing the key number. As many as four
NISSAN Vehicle Immobilizer System keys
can be used with one vehicle. You should
bring all NISSAN Vehicle Immobilizer Sys-
tem keys that you have to the NISSAN
dealer for registration. This is because the
registration process will erase the memory
of all key codes previously registered into
the NISSAN Vehicle Immobilizer System. Af-
ter the registration process, these compo-
nents will only recognize keys coded into
the NISSAN Vehicle Immobilizer System
during registration. Any virtual key acces-
sories (if so equipped) will also have to be
registered. Any key that is not given to the
dealer at the time of registration will no
longer be able to start your vehicle.
CAUTION
Do not allow the immobilizer system
key, which contains an electrical tran-
sponder, to come into contact with wa-
ter or salt water. This could affect sys-
tem function. When the doors are locked using one of the
following methods, the doors cannot be
opened using the inside or outside door
handles. The doors must be unlocked to
open the doors.
WARNING
• Always have the doors locked while
driving. Along with the use of seat
belts, this provides greater safety in
the event of an accident by helping to
prevent persons from being thrown
from the vehicle. This also helps keep
children and others from uninten-
tionally opening the doors, and will
help keep out intruders.
• Before opening any door, always look
for and avoid oncoming traffic.
DOORS
3-4Pre-driving checks and adjustments