2023 NISSAN FRONTIER interior lights
[x] Cancel search: interior lightsPage 117 of 572

Power inverter switch (if so equipped)..........2-56
Parking Aids system switch (if so equipped) ....2-56
Tow mode switch (if so equipped) ..............2-57
Emergency Call (SOS) button (if so equipped) . . . 2-58 Emergency support ......................... 2-58
Rear Door Alert ................................. 2-59
Power outlets .................................. 2-60
12v Outlets .................................. 2-60
120v outlets (if so equipped) .................2-61
USB charging ports (if so equipped) ............2-63
Wireless charger (if so equipped) ...............2-64
Wireless charger indicator ...................2-65
Wireless charger operation ..................2-65
Extended storage switch .......................2-66
Storage ........................................ 2-67
Front-door pockets ......................... 2-67
Rear-door pockets .......................... 2-68
Seatback pocket ............................ 2-68
Under-seat storage bins
(if so equipped) .............................. 2-69
Storagetrays................................ 2-71
Glovebox ................................... 2-71
Console box ................................. 2-72Overhead sunglasses storage
(if so equipped)
.............................. 2-72
Cup holders ................................. 2-73
Windows .......................................2-74
Power windows .............................2-74
Rear sliding window (if so equipped) .........2-76
Moonroof (if so equipped) ......................2-77
Power moonroof ............................ 2-77
Interior lights ................................... 2-78
Map lights ................................... 2-79
Cargo light .................................. 2-80
HomeLink® Universal Transceiver
(if so equipped) ................................. 2-80
Programming HomeLink® ...................2-81
Programming HomeLink® for Canadian
customers and gate openers ...............2-83
Operating the HomeLink® Universal
Transceiver .................................. 2-83
Pr
ogramming trouble-shooting .............2-84
Clearing the programmed information ......2-84
Reprogramming a single HomeLink®
button ...................................... 2-84
If your vehicle is stolen ......................2-84
Page 156 of 572

The system helps deter vehicle thef t but
cannot prevent it, nor can it prevent the
thef t of interior or exterior vehicle compo-
nents in all situations. Always secure your
vehicle even if parking for a brief period.
Never leave your keys in the vehicle, and
always lock the vehicle when unattended.
Be aware of your surroundings, and park in
secure, well-lit areas whenever possible.
Many devices offering additional protec-
tion, such as component locks, identifica-
tion markers, and tracking systems, are
available at auto supply stores and spe-
cialty shops. A NISSAN dealer may also offer
such equipment. Check with your insur-
ance company to see if you may be eligible
for discounts for various thef t protection
features.
How to arm the vehicle security
system
1. Close all windows.(The system can be
armed even if the windows are open.)
2. Remove the Intelligent Key from the vehicle.
3. Close all doors. Lock all doors. The doors can be locked with the power door lock
switch (if the door is opened, locked and
then closed) or with the key fob. Key fob operation:
• Press the
button on the key fob. All
doors lock. The hazard lights flash twice
and the horn beeps once to indicate all
doors are locked.
• When the
button is pressed with all
doors locked, the hazard lights flash twice
and the horn beeps once as a reminder
that the doors are already locked.
The horn may or may not beep.
4. Confirm that the
indicator light
comes on. Theindicator light
stays on for about 30 seconds. The ve-
hicle security system is now pre-armed.
Af ter about 30 seconds the vehicle se-
curity system automatically shif ts into
the armed phase. The
indicator
light begins to flash once every 3 sec-
onds. If, during the 30-second pre-arm
time period, the driver's door is unlocked
by the key fob or the ignition switch is
placed in ACC or ON position, the system
will not arm.
• If the indicator light fails to glow for a
period of time, unlock the door once
and lock it again. •
Even when the driver and/or passen-
gers are in the vehicle, the system will
arm with all doors closed and locked
with the ignition switch placed in the
OFF position.
Vehicle security system activation
The vehicle security system will give the
following alarm:
• The headlights blink and the horn sounds intermittently.
• The alarm automatically turns off af ter a period of time. However, the alarm reacti-
vates if the vehicle is tampered with
again. The alarm can be shut off by un-
locking the driver's door by pressing the
button on the key fob.
The alarm is activated by:
• Opening a door without using the key fob (even if the door is unlocked by using the
inside lock knob or the power door lock
switch).
How to stop an activated alarm
The alarm stops only by pressing thebutton on the key fob.
2-40Instruments and controls
Page 163 of 572

When the vehicle speed lowers to less than
approximately 16 mph (25 km/h), the head-
light uses the low beam.
To turn off the High Beam Assist system,
turn the headlight switch to the
posi-
tion or select the low beam position by
placing the lever in the neutral position.
Ambient image sensor maintenance
The ambient image sensorO1for the High
Beam Assist system is located in front of
the inside mirror. To maintain the proper
operation of the high beam assist system
and prevent a system malfunction, be sure
to observe the following:
• Always keep the windshield clean.
• Do not attach a sticker (including trans- parent material) or install an accessory
near the ambient image sensor.
• Do not strike or damage the areas around the ambient image sensor. Do
not touch the sensor lens that is located
on the ambient image sensor. If the ambient image sensor is damaged
due to an accident, it is recommended that
you visit a NISSAN dealer.
Battery saver system
The battery saver system automatically
turns off the following lights af ter a period
of time when the ignition switch is placed in
the OFF position and the doors are closed:
• Headlights, when the headlight switch is
in the
orposition
• Interior lights, when lef t in the ON position (if so equipped)
Af ter the headlights automatically turn off
with the headlight switch in the
orposition, the headlights will illuminate
again if the headlight switch is moved to
the OFF position and then turned to the
orposition.
CAUTION
Even though the battery saver feature
automatically turns off the headlights
af ter a period of time, you should turn
the headlight switch to the OFF posi-
tion when the engine is not running to
avoid discharging the vehicle battery.
LSD2712
Instruments and controls2-47
Page 164 of 572

DAYTIME RUNNING LIGHTS (DRL)
SYSTEM (Type A) (if so equipped)
The DRL system automatically illuminates
when the engine is started with the parking
brake released. The DRL system operates
with the headlight switch in the OFF posi-
tion or in the
position, or in AUTO
position when there is bright ambient light.
Turn the headlight switch to the
posi-
tion for full illumination when driving at
night.
If the parking brake is applied before the
engine is started, the DRL system does not
illuminate. The DRL system illuminates
when the parking brake is released. The
DRL system will remain on until the ignition
switch is placed in the OFF position.
WARNING
When the DRL system is active, tail lights
on your vehicle are not on. It is necessary
at dusk to turn on your headlights. Fail-
uretodosocouldcauseanaccidentin-
juring yourself and others.
LED DAYTIME RUNNING LIGHTS
(DRL) SYSTEM (Type B) (if so
equipped)
The LED DRL automatically illuminate at
100% intensity when the engine is started
and the parking brake released. The LED
DRL operate with the headlight switch in
the OFF position or in the
position, or
in AUTO position when there is bright am-
bient light. When you turn the headlight
switch to the
position for full illumina-
tion, the LED lights switch from LED DRL to
the park function.
If the parking brake is applied before the
engine is started, the LED DRL do not illumi-
nate. The LED DRL illuminate when the
parking brake is released. The LED DRL will
remain on until the ignition switch is placed
in the OFF position.
It is necessary at dusk to turn the headlight
switch on for interior controls and switches
to illuminate, as those remain off while the
switch is in the OFF position.
WARNING
When the LED DRL system is active, tail
lights on your vehicle are not on. It is
necessary at dusk to turn on your head-
lights. Failure to do so could cause an
accident injuring yourself and others.
2-48Instruments and controls
Page 194 of 572

When tilting down
If the control unit detects something
caught in the moonroof as it tilts down, the
moonroof will immediately tilt up.
If the auto-reverse function malfunctions
and repeats opening or tilting up the
moonroof, keep pushing the tilt down
switch within 5 seconds af ter it happens;
the moonroof will fully close gradually.
Make sure nothing is caught in the
moonroof.
WARNING
• In an accident you could be thrown
from the vehicle through an open
moonroof. Always use seat belts and
child restraints.
• Do not allow anyone to stand up or
extend any portion of their body out
of the moonroof opening while the
vehicle is in motion or while the
moonroof is closing.
CAUTION
• Remove water drops, snow, ice or
sand from the moonroof before
opening.
• Do not place heavy objects on the
moonroof or surrounding area.
Sunshade
Open and close the sunshade by sliding it
forward or backward.
If the moonroof does not close
Have your moonroof checked and re-
paired. It is recommended that you visit a
NISSAN dealer for this service. The interior light has a three-position
switch and operates regardless of ignition
switch position.
When the switch is in the ON position
O1,
the interior lights illuminate, regardless of
door position. The lights will go off af ter a
period of time unless the ignition switch is
placed in the ON position.
When the switch is in the DOOR or normal
operation position
O2, the interior lights will
stay on for a period of time and the cargo
light may illuminate when:
LIC0792
INTERIOR LIGHTS
2-78Instruments and controls
Page 195 of 572

• The doors are unlocked by the key fob, akey or the power door lock switch while
all doors are closed and the ignition
switch is in the OFF position.
• The driver’s door is opened and then closed while the ignition switch is placed
in the OFF position.
• The ignition switch is placed in the OFF position while all doors are closed.
The lights will turn off while the timer is
activated when:
• The driver’s door is locked by the key fob, a key, or the power door lock switch.
• The ignition switch is placed in the ON position.
When the switch is in the OFF position
O3,
the interior lights do not illuminate, regard-
less of door position. The cargo light may
illuminate when any front or rear passen-
ger door is opened.
The lights will turn off automatically af ter
a period of time while doors are open
to prevent the battery from becoming
discharged.
CAUTION
Do not use for extended periods of time
with the engine stopped. This could re-
sult in a discharged battery.
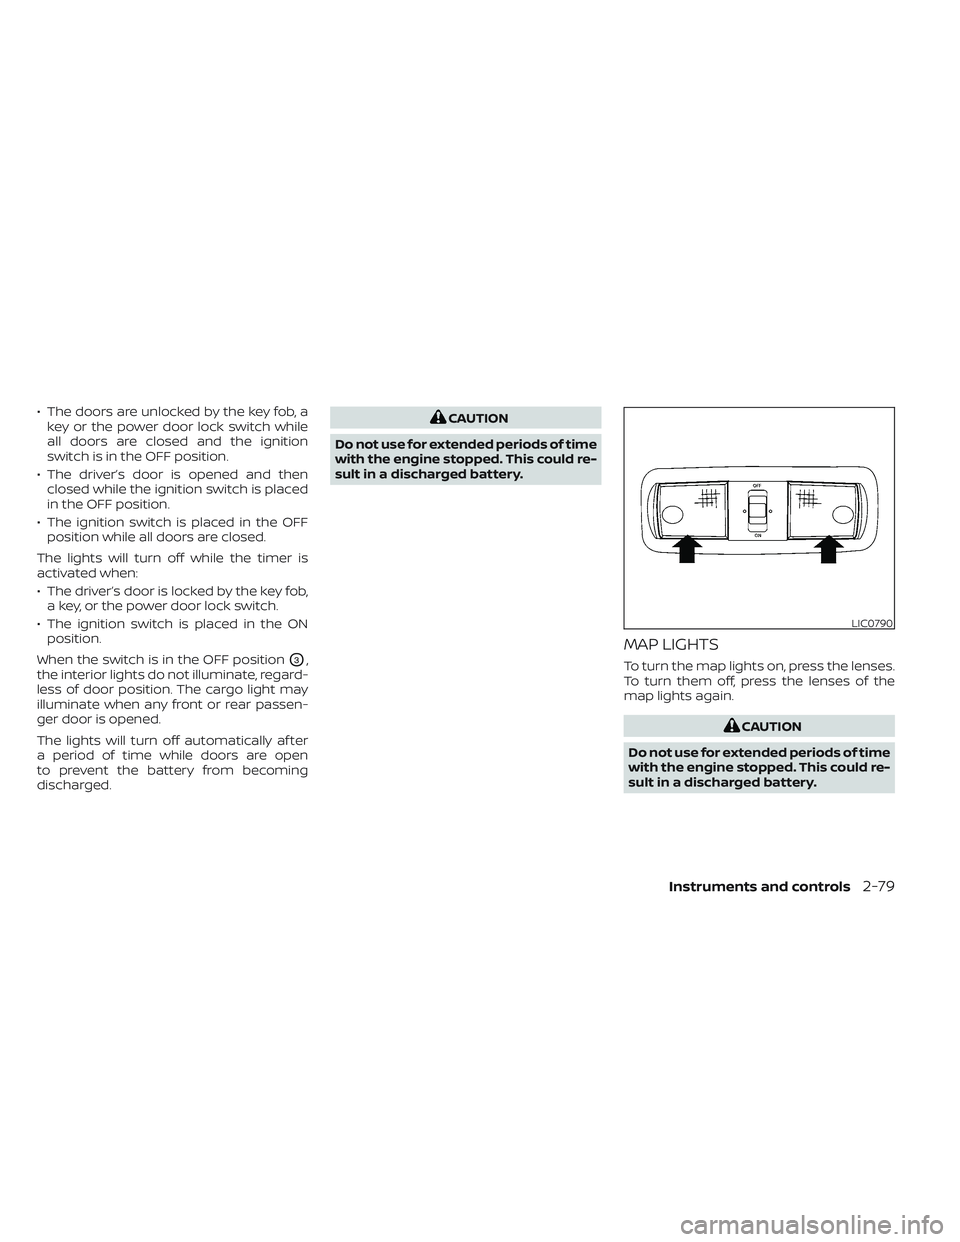
MAP LIGHTS
To turn the map lights on, press the lenses.
To turn them off, press the lenses of the
map lights again.
CAUTION
Do not use for extended periods of time
with the engine stopped. This could re-
sult in a discharged battery.
LIC0790
Instruments and controls2-79
Page 215 of 572

If a door handle is pulled while unlocking
the doors, that door may not be unlocked.
Returning the door handle to its original
position will unlock the door. If the door
does not unlock af ter returning the door
handle, push the door handle request
switch (if so equipped) to unlock the door.
All doors will be locked automatically un-
less one of the following operations is per-
formed within one minute af ter pushing
the request switch (if so equipped).
• Opening any door.
• Pushing the ignition switch.
Using the interior lights
The interior lights illuminate for a period of
time when a door is unlocked and the inte-
rior light switch is in the DOOR position.
The lights can be turned off without waiting
by performing one of the following
operations:
• Placing the ignition switch in the ONposition.
• Locking the doors with the Intelligent Key.
• Switching the interior lights switch to the OFF position.
For additional information, see “Interior
lights” (P. 2-78).
HOW TO USE THE REMOTE
KEYLESS ENTRY FUNCTION
The remote keyless entry function can op-
erate all door locks using the remote key-
less function of the Intelligent Key. The re-
mote keyless function can operate at a
distance of 16 f t (5 m) away from the ve-
hicle. The operating distance depends
upon the conditions around the vehicle.
The remote keyless entry function will not
function under the following conditions:
• When the Intelligent Key is not within the operational range.
• When the doors are open or not closed securely.
• When the Intelligent Key battery is discharged.
CAUTION
When locking the doors using the Intel-
ligent Key, be sure not to leave the key
in the vehicle.
Pre-driving checks and adjustments3-13
Page 217 of 572

Using the interior lights
The interior lights illuminate for a period of
time when a door is unlocked and the inte-
rior light switch is in the DOOR position.
The lights can be turned off without waiting
by performing one of the following
operations:
• Placing the ignition switch in the ONposition.
• Locking the doors with the Intelligent Key.
• Switching the interior lights switch to the OFF position.
For additional information, see “Interior
lights” (P. 2-78).
Opening windows (if so equipped)
The Intelligent Key allows you to simultane-
ously open windows equipped with auto-
matic operation.
• To open the windows, press the
but-
ton on the Intelligent Key longer than 3
seconds af ter all doors are unlocked.
The door windows cannot be closed by
using the Intelligent Key.
Using the panic alarm
If you are near your vehicle and feel threat-
ened, you may activate the panic alarm to
call attention by pressing and holding the
button on the Intelligent Key for lon-
ger than 0.5 seconds.
The panic alarm and headlights will stay on
for a period of time.
The panic alarm stops when:
• It has run for a period of time.
• Any button is pressed on the Intelligent Key.
Answer back horn feature
If desired, the answer back horn feature
can be deactivated using the Intelligent
Key. When it is deactivated and the
button is pressed, the hazard indicator
lights flash twice. When thebutton is
pressed, neither the hazard indicator lights
nor the horn operates.
NOTE:
If you change the Answer Back Horn
and light flash feature with the Intelli-
gent Key, the vehicle information dis-
play screen will show the current
mode af ter the ignition switch has
been cycled from the OFF to the ON
position. The vehicle information dis-
play screen can also be used to
change the answer back horn mode.
For additional information, see “Ve-
hicle Settings” (P. 2-22).
To deactivate:
Press and hold theandbuttons
for at least 4 seconds. The hazard indica-
tor lights will flash three times to confirm
that the answer back horn feature has
been deactivated.
Pre-driving checks and adjustments3-15