2023 NISSAN ARMADA ignition
[x] Cancel search: ignitionPage 116 of 604

2-22Instruments and controls
menus offer instruction prompts of the
steering switch buttons to indicate how
to control the vehicle information display.
The OK
button changes the audio
source and thebuttonsalso
control voice recognition manual mode.
The OK
button can be used to change
the audio source when the audio screen
is displayed. The
buttonscan be
used when controlling voice recognition
prompts manually. (See NissanConnect®
Owner’s Manual.)
STARTUP DISPLAY
When the ignition switch is placed in the
ON position, the vehicle information dis-
play may display the following screens if
the vehicle is equipped with them:
. Home
. Speed
. Drive Computer
. Fuel Economy
. Navigation
. Audio
. CRUISE
. Driving Aids
. TPMS
. Speed Limit Sign
Warnings will only display if there are any
present. (See “Operational indicators” (P.2-
30).) To control what items display in the
vehicle information display, see “Settings”
(P.2-22).
SETTINGS
The setting mode allows user to change
the information displayed in the vehicle
information display and some settings:
.
Driver Assistance
. TPMS Setting
. Clock
. Vehicle settings
. Maintenance
. Customize Display
. Unit/Language
. Factory Reset
Driver Assistance
To change the status, warnings or turn on
or off any of the systems/warnings dis-
played in the “Driver Assistance” menu,
use the
buttonsto select and
change a menu item:
. Emergency Brake
. Lane
. Blind Spot
. Speed Limit Sign
. Cross Traffic Alert
. Driver Attention Alert .
Timer Alert
. Low Temp. Alert
Emergency Brake:
. Front
Allows user to turn the Automatic
Emergency Braking (AEB) with pedes-
trian detection system and Intelligent
Forward Collision Warning (I-FCW) sys-
tem ON/OFF.
. Rear
Allows user to turn the Rear Auto-
matic Braking (RAB) system ON/OFF.
(See “Automatic Emergency Braking (AEB)
with pedestrian detection system” (P.5-
96), “Intelligent Forward Collision Warning
(I-FCW)” (P.5-106) and “Rear Automatic
Braking (RAB)” (P.5-116).)
Lane:
. Warning(LDW)
Allows user to turn the Lane Depar-
ture Warning (LDW) system ON/OFF.
. Prevention(LDP)
Allows user to turn the Intelligent Lane
Intervention (I-LI) system ON/OFF.
(See “Lane Departure Warning (LDW)” (P.5-
26) and “Intelligent Lane Intervention (I-
LI)” (P.5-31).)
Page 124 of 604
2-30Instruments and controls
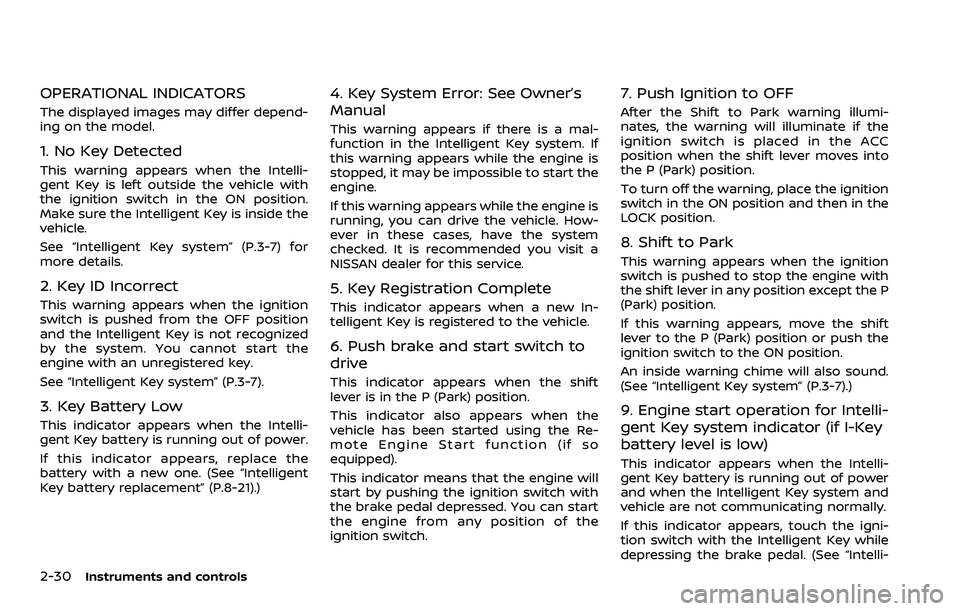
OPERATIONAL INDICATORS
The displayed images may differ depend-
ing on the model.
1. No Key Detected
This warning appears when the Intelli-
gent Key is left outside the vehicle with
the ignition switch in the ON position.
Make sure the Intelligent Key is inside the
vehicle.
See “Intelligent Key system” (P.3-7) for
more details.
2. Key ID Incorrect
This warning appears when the ignition
switch is pushed from the OFF position
and the Intelligent Key is not recognized
by the system. You cannot start the
engine with an unregistered key.
See “Intelligent Key system” (P.3-7).
3. Key Battery Low
This indicator appears when the Intelli-
gent Key battery is running out of power.
If this indicator appears, replace the
battery with a new one. (See “Intelligent
Key battery replacement” (P.8-21).)
4. Key System Error: See Owner’s
Manual
This warning appears if there is a mal-
function in the Intelligent Key system. If
this warning appears while the engine is
stopped, it may be impossible to start the
engine.
If this warning appears while the engine is
running, you can drive the vehicle. How-
ever in these cases, have the system
checked. It is recommended you visit a
NISSAN dealer for this service.
5. Key Registration Complete
This indicator appears when a new In-
telligent Key is registered to the vehicle.
6. Push brake and start switch to
drive
This indicator appears when the shift
lever is in the P (Park) position.
This indicator also appears when the
vehicle has been started using the Re-
mote Engine Start function (if so
equipped).
This indicator means that the engine will
start by pushing the ignition switch with
the brake pedal depressed. You can start
the engine from any position of the
ignition switch.
7. Push Ignition to OFF
After the Shift to Park warning illumi-
nates, the warning will illuminate if the
ignition switch is placed in the ACC
position when the shift lever moves into
the P (Park) position.
To turn off the warning, place the ignition
switch in the ON position and then in the
LOCK position.
8. Shift to Park
This warning appears when the ignition
switch is pushed to stop the engine with
the shift lever in any position except the P
(Park) position.
If this warning appears, move the shift
lever to the P (Park) position or push the
ignition switch to the ON position.
An inside warning chime will also sound.
(See “Intelligent Key system” (P.3-7).)
9. Engine start operation for Intelli-
gent Key system indicator (if I-Key
battery level is low)
This indicator appears when the Intelli-
gent Key battery is running out of power
and when the Intelligent Key system and
vehicle are not communicating normally.
If this indicator appears, touch the igni-
tion switch with the Intelligent Key while
depressing the brake pedal. (See “Intelli-
Page 125 of 604
gent Key battery discharge” (P.5-15).)
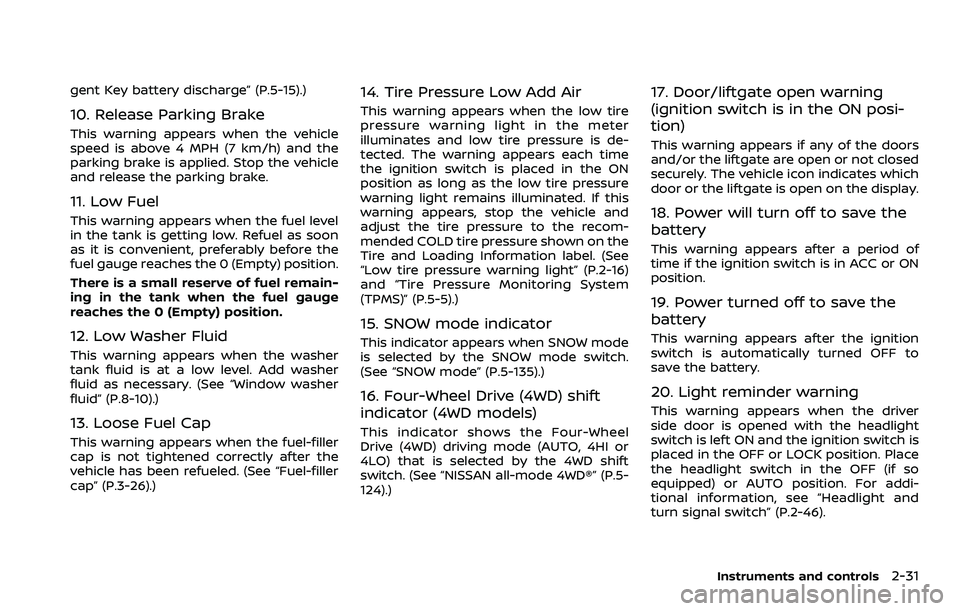
10. Release Parking Brake
This warning appears when the vehicle
speed is above 4 MPH (7 km/h) and the
parking brake is applied. Stop the vehicle
and release the parking brake.
11. Low Fuel
This warning appears when the fuel level
in the tank is getting low. Refuel as soon
as it is convenient, preferably before the
fuel gauge reaches the 0 (Empty) position.
There is a small reserve of fuel remain-
ing in the tank when the fuel gauge
reaches the 0 (Empty) position.
12. Low Washer Fluid
This warning appears when the washer
tank fluid is at a low level. Add washer
fluid as necessary. (See “Window washer
fluid” (P.8-10).)
13. Loose Fuel Cap
This warning appears when the fuel-filler
cap is not tightened correctly after the
vehicle has been refueled. (See “Fuel-filler
cap” (P.3-26).)
14. Tire Pressure Low Add Air
This warning appears when the low tire
pressure warning light in the meter
illuminates and low tire pressure is de-
tected. The warning appears each time
the ignition switch is placed in the ON
position as long as the low tire pressure
warning light remains illuminated. If this
warning appears, stop the vehicle and
adjust the tire pressure to the recom-
mended COLD tire pressure shown on the
Tire and Loading Information label. (See
“Low tire pressure warning light” (P.2-16)
and “Tire Pressure Monitoring System
(TPMS)” (P.5-5).)
15. SNOW mode indicator
This indicator appears when SNOW mode
is selected by the SNOW mode switch.
(See “SNOW mode” (P.5-135).)
16. Four-Wheel Drive (4WD) shift
indicator (4WD models)
This indicator shows the Four-Wheel
Drive (4WD) driving mode (AUTO, 4HI or
4LO) that is selected by the 4WD shift
switch. (See “NISSAN all-mode 4WD®” (P.5-
124).)
17. Door/liftgate open warning
(ignition switch is in the ON posi-
tion)
This warning appears if any of the doors
and/or the liftgate are open or not closed
securely. The vehicle icon indicates which
door or the liftgate is open on the display.
18. Power will turn off to save the
battery
This warning appears after a period of
time if the ignition switch is in ACC or ON
position.
19. Power turned off to save the
battery
This warning appears after the ignition
switch is automatically turned OFF to
save the battery.
20. Light reminder warning
This warning appears when the driver
side door is opened with the headlight
switch is left ON and the ignition switch is
placed in the OFF or LOCK position. Place
the headlight switch in the OFF (if so
equipped) or AUTO position. For addi-
tional information, see “Headlight and
turn signal switch” (P.2-46).
Instruments and controls2-31
Page 129 of 604
WARNING
Selecting “Dismiss Message” during a
stop within a trip temporarily dis-
misses the message for that stop
without turning the system off.
Alerts can be provided for other
stops during the trip. Selecting “Dis-
able Alert” turns off the Rear Door
Alert system for the remainder of a
trip and no audible alert will be
provided.
NOTE:
This system is disabled until the driver
enables it using the settings menu. See
“Vehicle settings” (P.2-24).
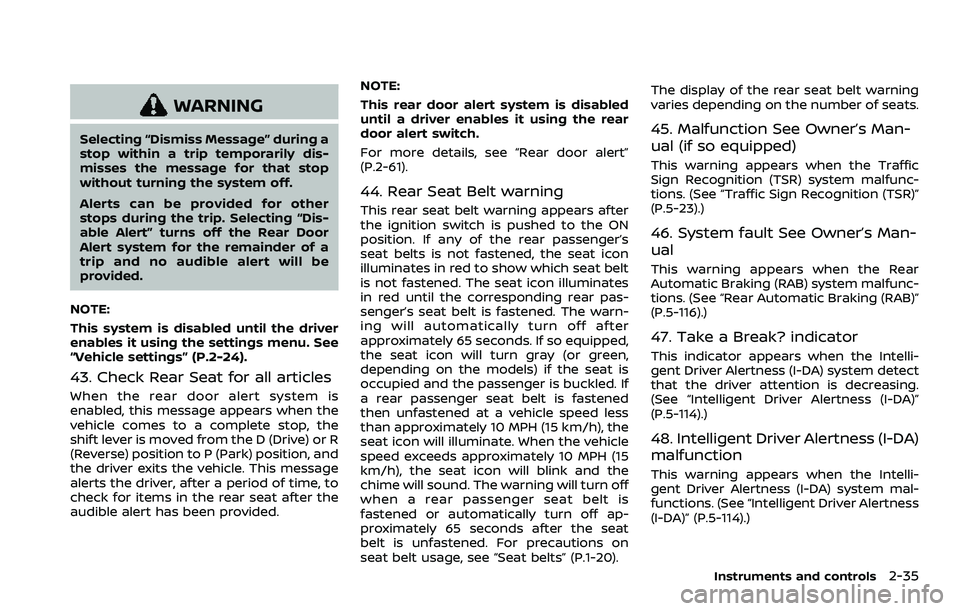
43. Check Rear Seat for all articles
When the rear door alert system is
enabled, this message appears when the
vehicle comes to a complete stop, the
shift lever is moved from the D (Drive) or R
(Reverse) position to P (Park) position, and
the driver exits the vehicle. This message
alerts the driver, after a period of time, to
check for items in the rear seat after the
audible alert has been provided. NOTE:
This rear door alert system is disabled
until a driver enables it using the rear
door alert switch.
For more details, see “Rear door alert”
(P.2-61).
44. Rear Seat Belt warning
This rear seat belt warning appears after
the ignition switch is pushed to the ON
position. If any of the rear passenger’s
seat belts is not fastened, the seat icon
illuminates in red to show which seat belt
is not fastened. The seat icon illuminates
in red until the corresponding rear pas-
senger’s seat belt is fastened. The warn-
ing will automatically turn off after
approximately 65 seconds. If so equipped,
the seat icon will turn gray (or green,
depending on the models) if the seat is
occupied and the passenger is buckled. If
a rear passenger seat belt is fastened
then unfastened at a vehicle speed less
than approximately 10 MPH (15 km/h), the
seat icon will illuminate. When the vehicle
speed exceeds approximately 10 MPH (15
km/h), the seat icon will blink and the
chime will sound. The warning will turn off
when a rear passenger seat belt is
fastened or automatically turn off ap-
proximately 65 seconds after the seat
belt is unfastened. For precautions on
seat belt usage, see “Seat belts” (P.1-20).The display of the rear seat belt warning
varies depending on the number of seats.
45. Malfunction See Owner’s Man-
ual (if so equipped)
This warning appears when the Traffic
Sign Recognition (TSR) system malfunc-
tions. (See “Traffic Sign Recognition (TSR)”
(P.5-23).)
46. System fault See Owner’s Man-
ual
This warning appears when the Rear
Automatic Braking (RAB) system malfunc-
tions. (See “Rear Automatic Braking (RAB)”
(P.5-116).)
47. Take a Break? indicator
This indicator appears when the Intelli-
gent Driver Alertness (I-DA) system detect
that the driver attention is decreasing.
(See “Intelligent Driver Alertness (I-DA)”
(P.5-114).)
48. Intelligent Driver Alertness (I-DA)
malfunction
This warning appears when the Intelli-
gent Driver Alertness (I-DA) system mal-
functions. (See “Intelligent Driver Alertness
(I-DA)” (P.5-114).)
Instruments and controls2-35
Page 132 of 604
2-38Instruments and controls
button for longer than 1 second.
The display is updated every 30 seconds.
At about the first 1/3 mile (500 m) after a
reset, the display shows “——”.
8. Intelligent Cruise Control (ICC)
system
This mode shows the operating condition
for the Intelligent Cruise Control (ICC)
system. (See “Intelligent Cruise Control
(ICC)” (P.5-74).)
NOTE:
If the ICC system is in a standby state,
this screen is automatically displayed.
9. Driving aids (if so equipped)
The driving aids mode shows the operat-
ing condition for the following systems, if
the vehicle is equipped with them.
. Automatic Emergency Braking (AEB)
with pedestrian detection system
. Intelligent Forward Collision Warning
(I-FCW)
. Lane Departure Warning (LDW)
. Intelligent Lane Intervention (I-LI)
. Blind Spot Warning (BSW)
. Intelligent Blind Spot Intervention (I-
BSI)
For more details, see “Automatic Emer-
gency Braking (AEB) with pedestrian de-
tection system” (P.5-96), “Intelligent Forward Collision Warning (I-FCW)” (P.5-
106), “Lane Departure Warning (LDW)” (P.5-
26), “Intelligent Lane Intervention (I-LI)”
(P.5-31), “Blind Spot Warning (BSW)” (P.5-
38) or “Intelligent Blind Spot Intervention
(I-BSI)” (P.5-46).
10. Tire pressures
The tire pressure mode shows the pres-
sure of all four tires while the vehicle is
driven.
When the “Tire Pressure Low Add Air”
warning appears, the display can be
switched to the tire pressure mode by
pushing the left or right side of the
button.
The tire pressure unit can be changed
using the “TPMS Setting” menu displayed
in the vehicle information display. (See
“TPMS Setting” (P.2-23).)
NOTE:
After the ignition switch is placed in the
ON position, it may take a period of time
for the tire pressure to be displayed
while the vehicle is driven. Depending
on the radio wave circumstance, tire
pressure may not correctly be dis-
played.WAC0225X
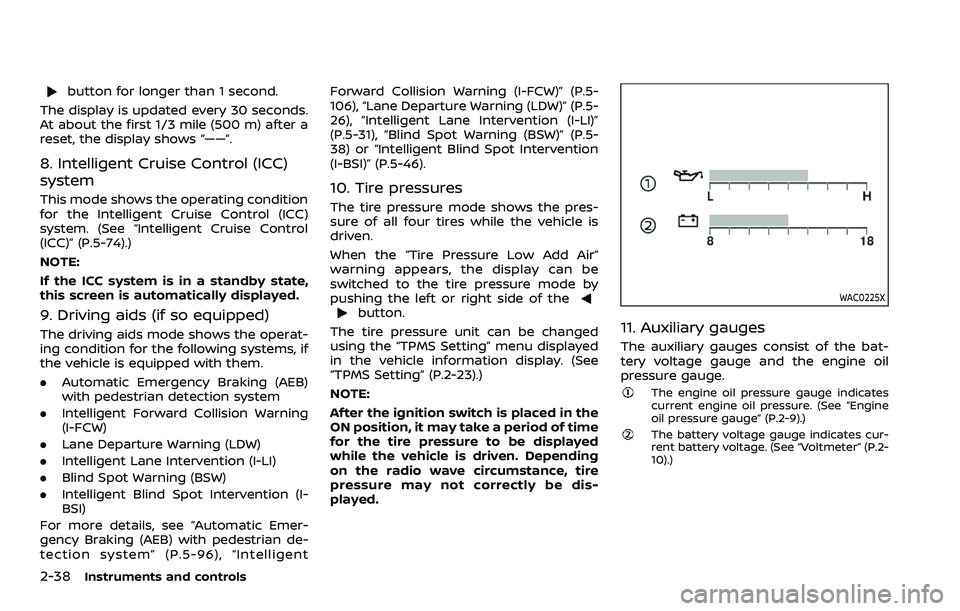
11. Auxiliary gauges
The auxiliary gauges consist of the bat-
tery voltage gauge and the engine oil
pressure gauge.
The engine oil pressure gauge indicates
current engine oil pressure. (See “Engine
oil pressure gauge” (P.2-9).)
The battery voltage gauge indicates cur-
rent battery voltage. (See “Voltmeter” (P.2-
10).)
Page 134 of 604
2-40Instruments and controls
cannot prevent it, nor can it prevent the
theft of interior or exterior vehicle com-
ponents in all situations. Always secure
your vehicle even if parking for a brief
period. Never leave your Intelligent Key(s)
in the vehicle, and always lock it when
unattended. Be aware of your surround-
ings, and park in secure, well-lit areas
whenever possible.
Many devices offering additional protec-
tion, such as component locks, identifica-
tion markers, and tracking systems, are
available at auto supply stores and speci-
alty shops. Your NISSAN dealer may also
offer such equipment. Check with your
insurance company to see if you may be
eligible for discounts for various theft
protection features.
SIC2045
How to arm the vehicle security
system
1. Close all windows.The system can be armed even if the
windows are open.
2. Push the ignition switch to the OFF position.
3. Remove the Intelligent Key from the vehicle.
4. Close all doors, hood and liftgate. Lock all doors. The doors can be locked
with the Intelligent Key, door handle
request switch, power door lock
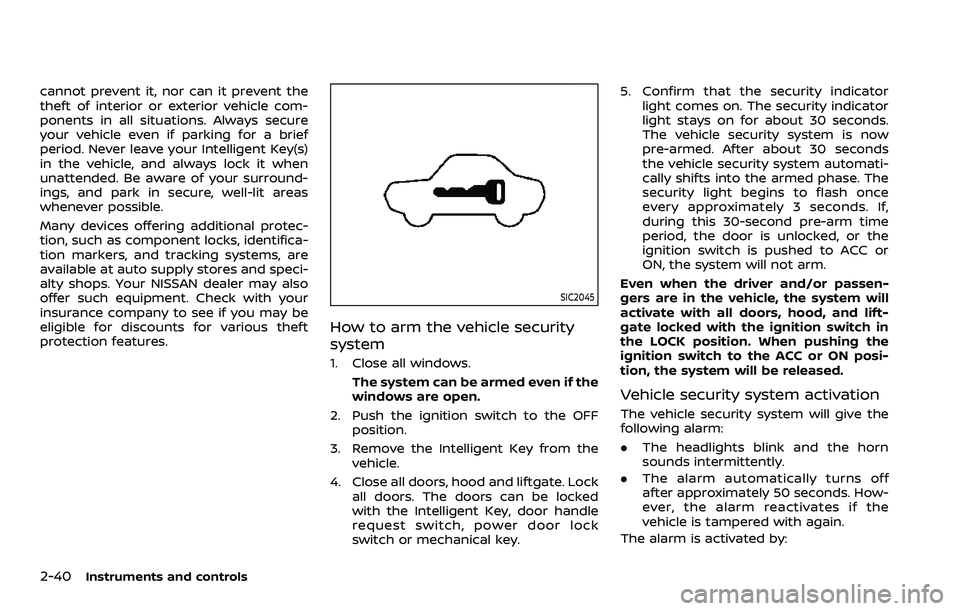
switch or mechanical key. 5. Confirm that the security indicator
light comes on. The security indicator
light stays on for about 30 seconds.
The vehicle security system is now
pre-armed. After about 30 seconds
the vehicle security system automati-
cally shifts into the armed phase. The
security light begins to flash once
every approximately 3 seconds. If,
during this 30-second pre-arm time
period, the door is unlocked, or the
ignition switch is pushed to ACC or
ON, the system will not arm.
Even when the driver and/or passen-
gers are in the vehicle, the system will
activate with all doors, hood, and lift-
gate locked with the ignition switch in
the LOCK position. When pushing the
ignition switch to the ACC or ON posi-
tion, the system will be released.
Vehicle security system activation
The vehicle security system will give the
following alarm:
. The headlights blink and the horn
sounds intermittently.
. The alarm automatically turns off
after approximately 50 seconds. How-
ever, the alarm reactivates if the
vehicle is tampered with again.
The alarm is activated by:
Page 135 of 604
.Unlocking the door or opening the
liftgate without using the button on
the Intelligent Key, the door handle
request switch or the mechanical key.
(Even if the door is opened by releas-
ing the door inside lock knob, the
alarm will activate.)
. Opening the hood.
How to stop an activated alarm
The alarm will stop when a door is
unlocked by pushing the unlock button
on the Intelligent Key, the door handle
request switch or using the mechanical
key, or when the ignition switch is pushed
to the ACC or ON position.
If the system does not operate as
described above, it is recommended
you have it checked by a NISSAN dealer.
NISSAN VEHICLE IMMOBILIZER SYS-
TEM
The NISSAN Vehicle Immobilizer System
will not allow the engine to start without
the use of the registered Intelligent Key.
Never leave these keys in the vehicle.
FCC Notice:
For USA:
This device complies with Part 15 of the
FCC Rules. Operation is subject to the
following two conditions: (1) This device
may not cause harmful interference, and (2) this device must accept any
interference received, including inter-
ference that may cause undesired op-
eration.
NOTE:
Changes or modifications not expressly
approved by the party responsible for
compliance could void the user’s
authority to operate the equipment.
For Canada:
This device complies with Industry Ca-
nada licence-exempt RSS standard(s).
Operation is subject to the following
two conditions: (1) this device may not
cause interference, and (2) this device
must accept any interference, including
interference that may cause undesired
operation of the device.
SIC2045
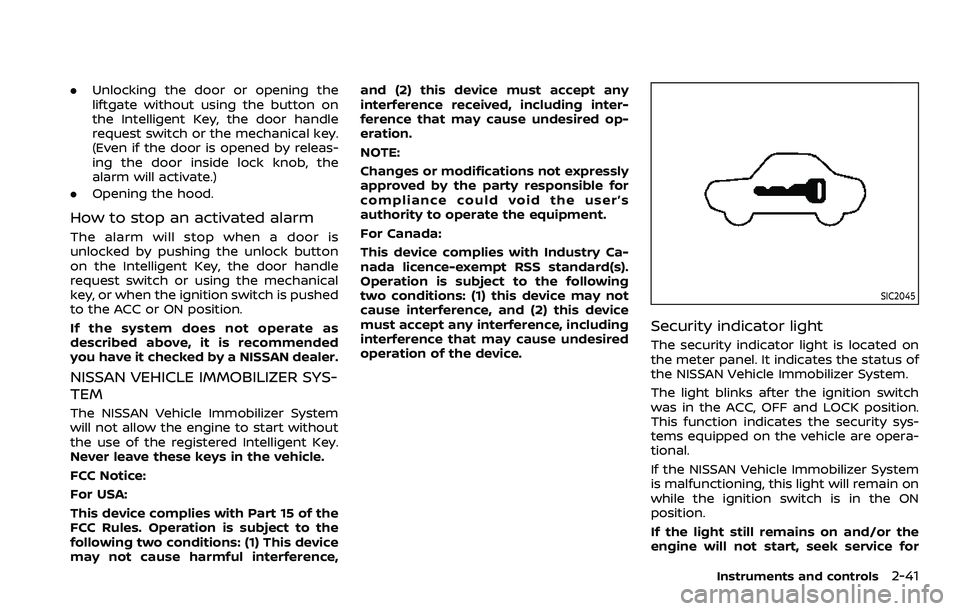
Security indicator light
The security indicator light is located on
the meter panel. It indicates the status of
the NISSAN Vehicle Immobilizer System.
The light blinks after the ignition switch
was in the ACC, OFF and LOCK position.
This function indicates the security sys-
tems equipped on the vehicle are opera-
tional.
If the NISSAN Vehicle Immobilizer System
is malfunctioning, this light will remain on
while the ignition switch is in the ON
position.
If the light still remains on and/or the
engine will not start, seek service for
Instruments and controls2-41
Page 137 of 604
JVI1010X
Type A (if so equipped)
JVI1011XType B (if so equipped)
WINDSHIELD WIPER AND WASHER
OPERATION
The windshield wiper and washer oper-
ates when the ignition switch is in the ON
position.
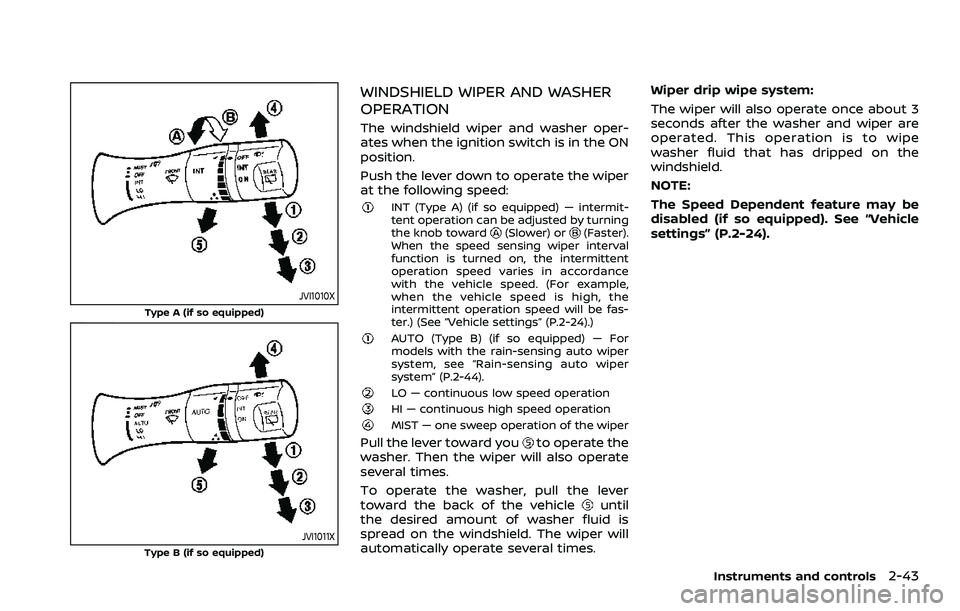
Push the lever down to operate the wiper
at the following speed:
INT (Type A) (if so equipped) — intermit-
tent operation can be adjusted by turning
the knob toward
(Slower) or(Faster).
When the speed sensing wiper interval
function is turned on, the intermittent
operation speed varies in accordance
with the vehicle speed. (For example,
when the vehicle speed is high, the
intermittent operation speed will be fas-
ter.) (See “Vehicle settings” (P.2-24).)
AUTO (Type B) (if so equipped) — For
models with the rain-sensing auto wiper
system, see “Rain-sensing auto wiper
system” (P.2-44).
LO — continuous low speed operationHI — continuous high speed operationMIST — one sweep operation of the wiper
Pull the lever toward youto operate the
washer. Then the wiper will also operate
several times.
To operate the washer, pull the lever
toward the back of the vehicle
until
the desired amount of washer fluid is
spread on the windshield. The wiper will
automatically operate several times. Wiper drip wipe system:
The wiper will also operate once about 3
seconds after the washer and wiper are
operated. This operation is to wipe
washer fluid that has dripped on the
windshield.
NOTE:
The Speed Dependent feature may be
disabled (if so equipped). See “Vehicle
settings” (P.2-24).
Instruments and controls2-43